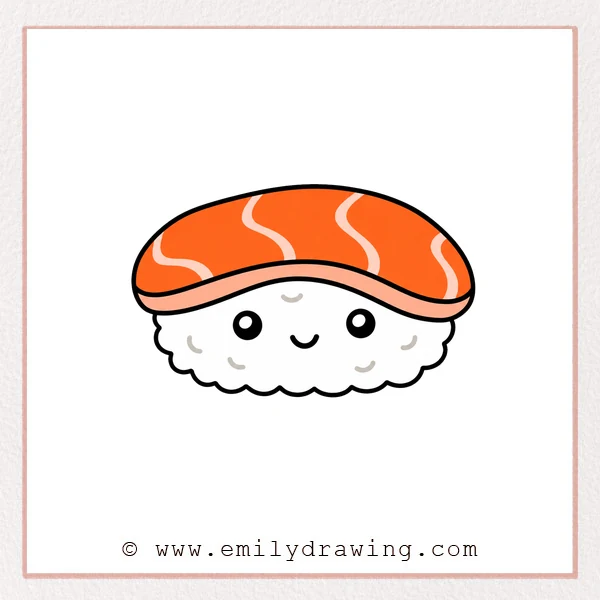
Learning how to draw sushi is a fun way to practice soft curves, simple shapes, and cute expressions. This easy drawing tutorial is designed for beginners, so take your time and build the sushi one step at a time.
What You Will Need
- Pencil
- Eraser
- Black marker or pen
- Coloring tools
- Drawing paper
Here are my RECOMMENDED Art Supplies!
- Crayola Coloring Set (140 Pieces – Mega Value!)
- 24 Colored Crayon Set
- A4 Printer Paper
- Crayola Coloring Pencils
- HP Home Printer with Instant Ink!
Time needed:
12 minutes.
Step-by-Step Drawing Guide
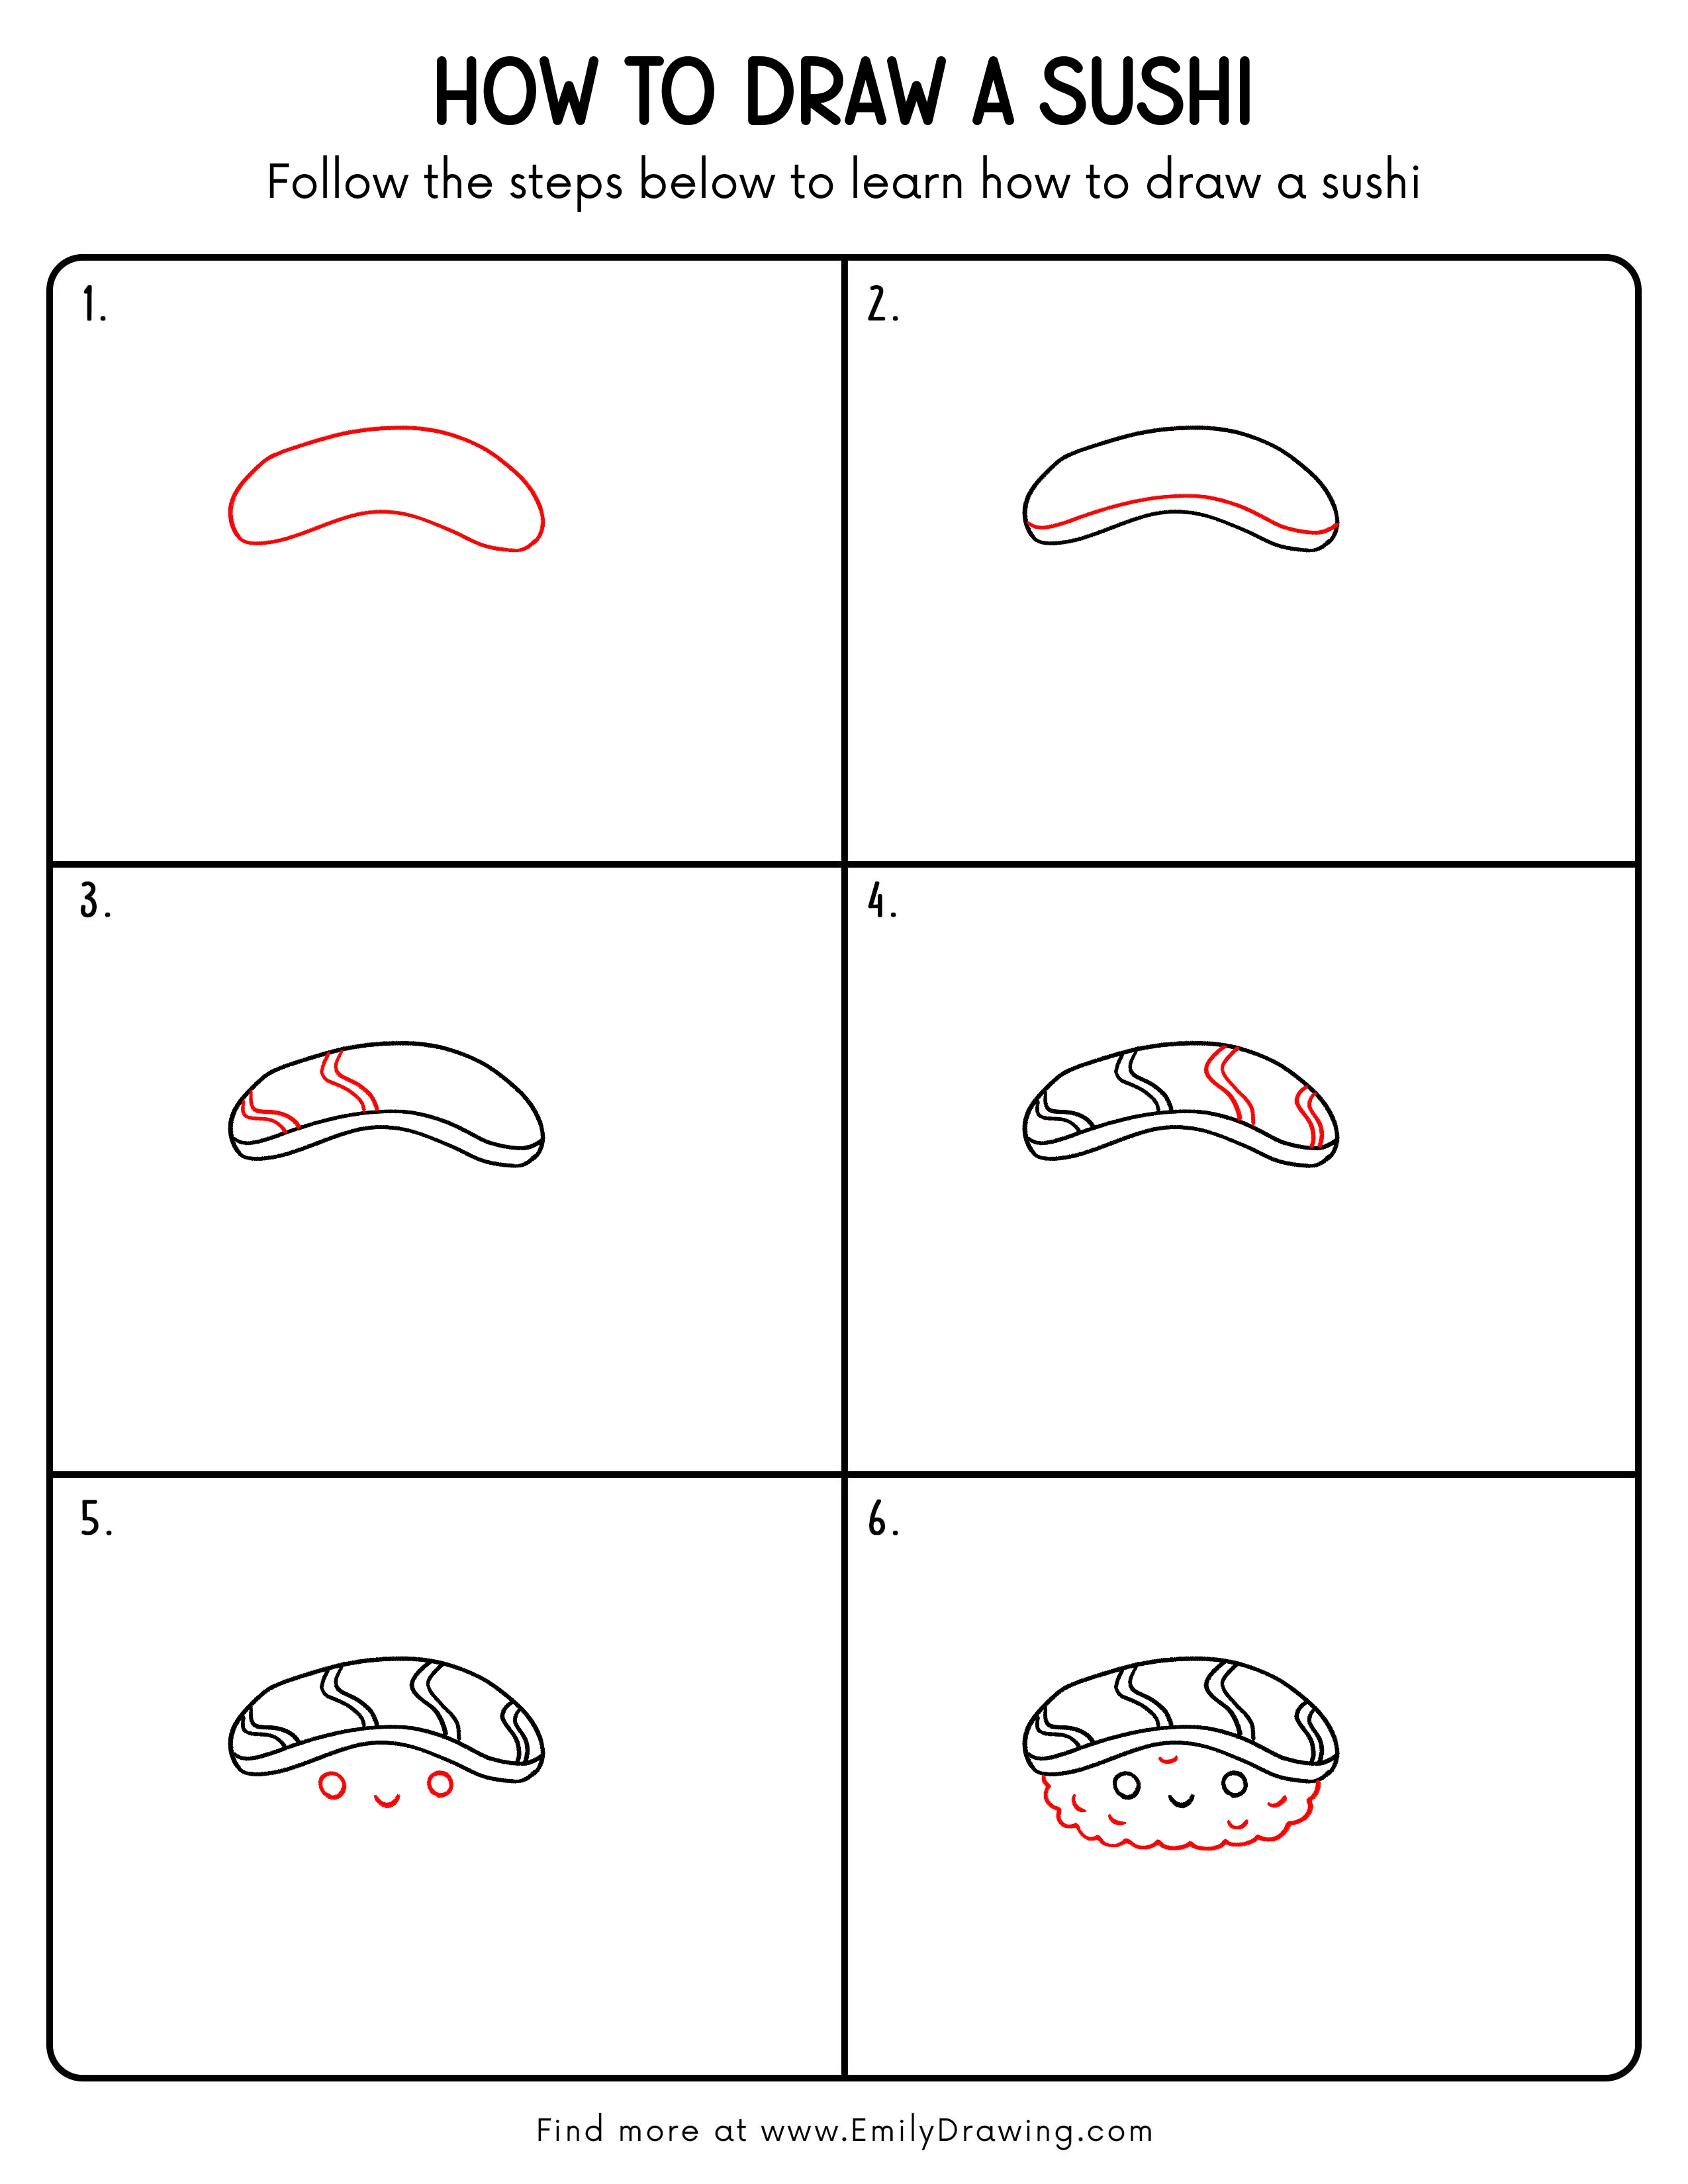
Step 1: Draw the Top Outline of the Sushi
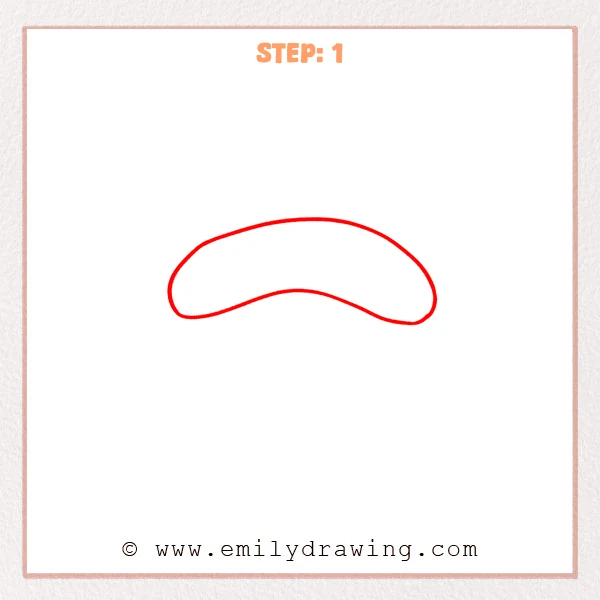
Start with a long curved line to make the rounded top edge of the sushi. Add a gently rising curve between the ends to form a soft, long oval shape.
Pro Tip: Keep both ends rounded so the sushi looks soft and cute.
Step 2: Darken the Outer Shape and Add the Bottom Edge
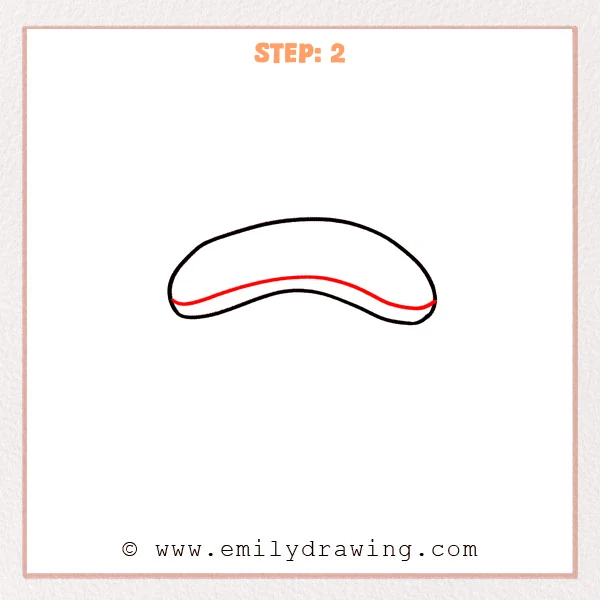
Trace the sushi’s outer top shape with a darker line to make it clearer. Add a curved bottom edge underneath, creating thickness with the inner curve from the first step.
Pro Tip: Match the bottom curve to the top shape so the sushi thickness feels natural.
Step 3: Add Texture Lines on the Sushi
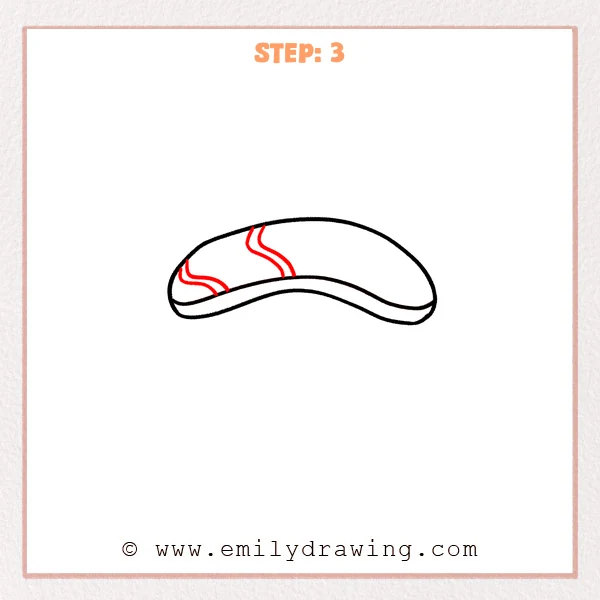
Draw two sets of short curved lines on the top of the sushi. Let each set bend downward with the sushi’s curve, like soft fish-slice texture.
Pro Tip: Avoid making the texture lines too straight, because gentle curves fit the sushi shape better.
Step 4: Continue Adding Fish Texture
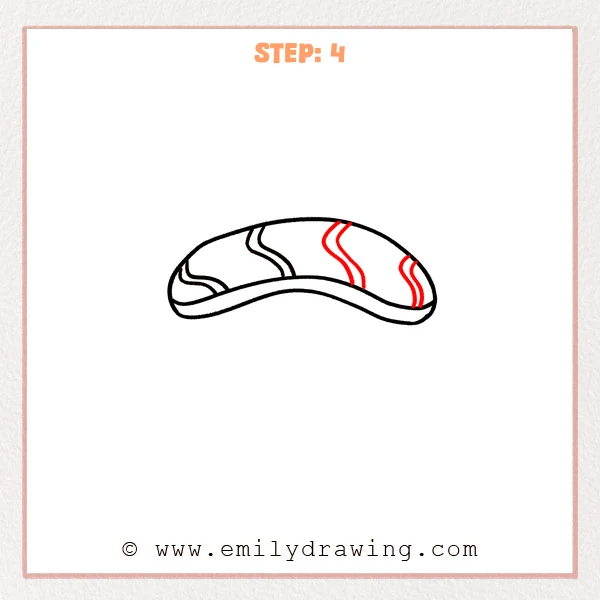
Add two more sets of curved texture lines on the right side of the sushi. Let these lines extend downward from the top edge, following the same curve direction on the fish topping.
Pro Tip: Leave space between each texture group so the drawing stays clear and rhythmic.
Step 5: Draw the Cute Face
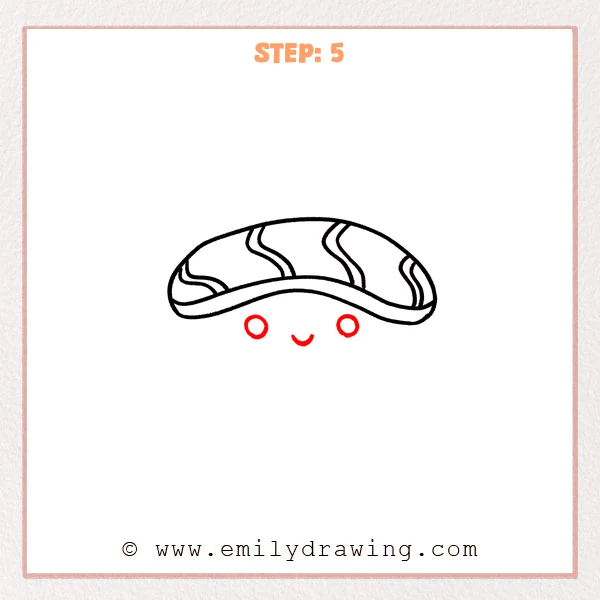
Add two round eyes below the sushi, keeping them balanced on both sides. Draw a small curved line between the eyes to make a happy smiling mouth.
Pro Tip: Keep the eyes and mouth close to the sushi base so the face looks cuter.
Step 6: Add the Rice Base and Small Texture
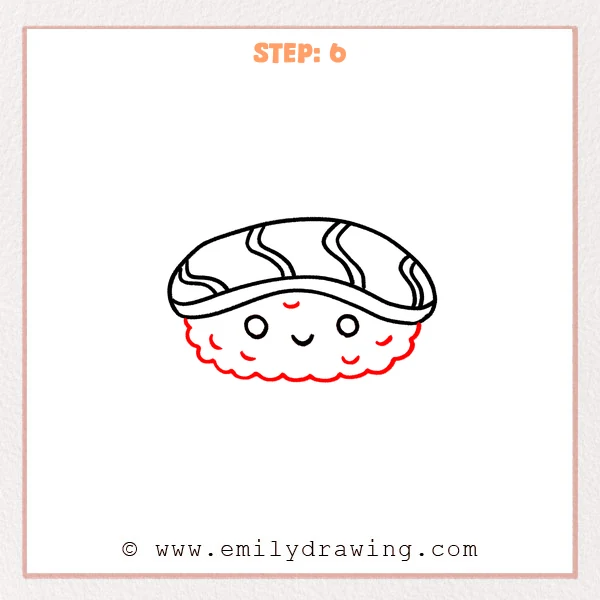
Draw a fluffy rice base around the face, using small connected curves for a cloud-like edge. Add a few short curved marks on the rice so the grains look soft and gentle.
Pro Tip: Vary the small curves slightly so the rice edge looks more natural.
Step 7: Color in your drawing!
Fun Facts
- Sushi often uses rice seasoned with vinegar, which gives it a light tangy flavor.
- Many sushi pieces have simple shapes, making them great for drawing for beginners.
- The fish topping can be drawn with curved texture lines to show softness and movement.
Pin it now, Draw later!
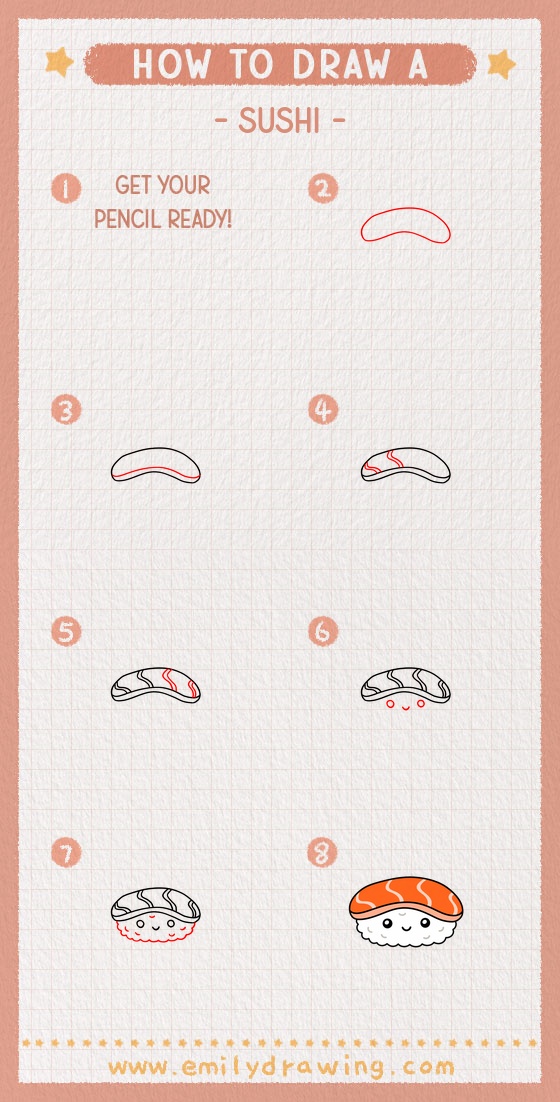
Now your sushi drawing has a soft topping, gentle texture lines, a fluffy rice base, and a cute smiling face. You can color the fish topping orange, pink, or red, then keep the rice white with light shadows. Try this step by step drawing again and add your own small details for a sweeter final picture.
Get the FREE Printable Drawing Guide
FREE Download Printable Sushi Drawing Tutorial
Frequently Asked Questions
Is this sushi drawing good for beginners?
Yes, this tutorial uses simple curves, circles, and short texture lines, so it is friendly for beginners.
What colors should I use for the sushi?
Use warm colors for the fish topping, such as orange or pink, and keep the rice mostly white.
How can I make the sushi look cuter?
Make the eyes round, keep the smile small, and use soft curved lines for the rice base.