Hey there, young artists and creative parents! Are you ready to dive into the world of drawing and create a cool scorpion sketch? In this tutorial, we’ll be drawing a scorpion step by step in just a few simple stages!
Scorpions are fascinating creatures—perfect for a scorpion anatomy drawing—with their curved tails and big pincers. Did you know that they have been around for over 400 million years? That means they lived even before the dinosaurs! Some scorpions even glow in the dark under ultraviolet (UV) light! If you like desert-dwelling creatures, you might also enjoy our guide on how to draw a lizard. In this tutorial, we’ll learn how to draw a scorpion in just a few simple steps. Grab your pencil, find a comfy spot, and let’s get started!
Materials:
- a piece of paper
- a pencil for the guiding lines and sketching
- an eraser
- a black sharpie or a pen for the outlines
- markers or colored pencils for coloring
- our printable drawing guide (Join my Email List below to get this Tutorial)
Here are my RECOMMENDED Art Supplies!
- Crayola Coloring Set (140 Pieces – Mega Value!)
- 24 Colored Crayon Set
- A4 Printer Paper
- Crayola Coloring Pencils
- HP Home Printer with Instant Ink!
Time needed:
15 minutes.
How to Draw a Scorpion — Let’s get started!
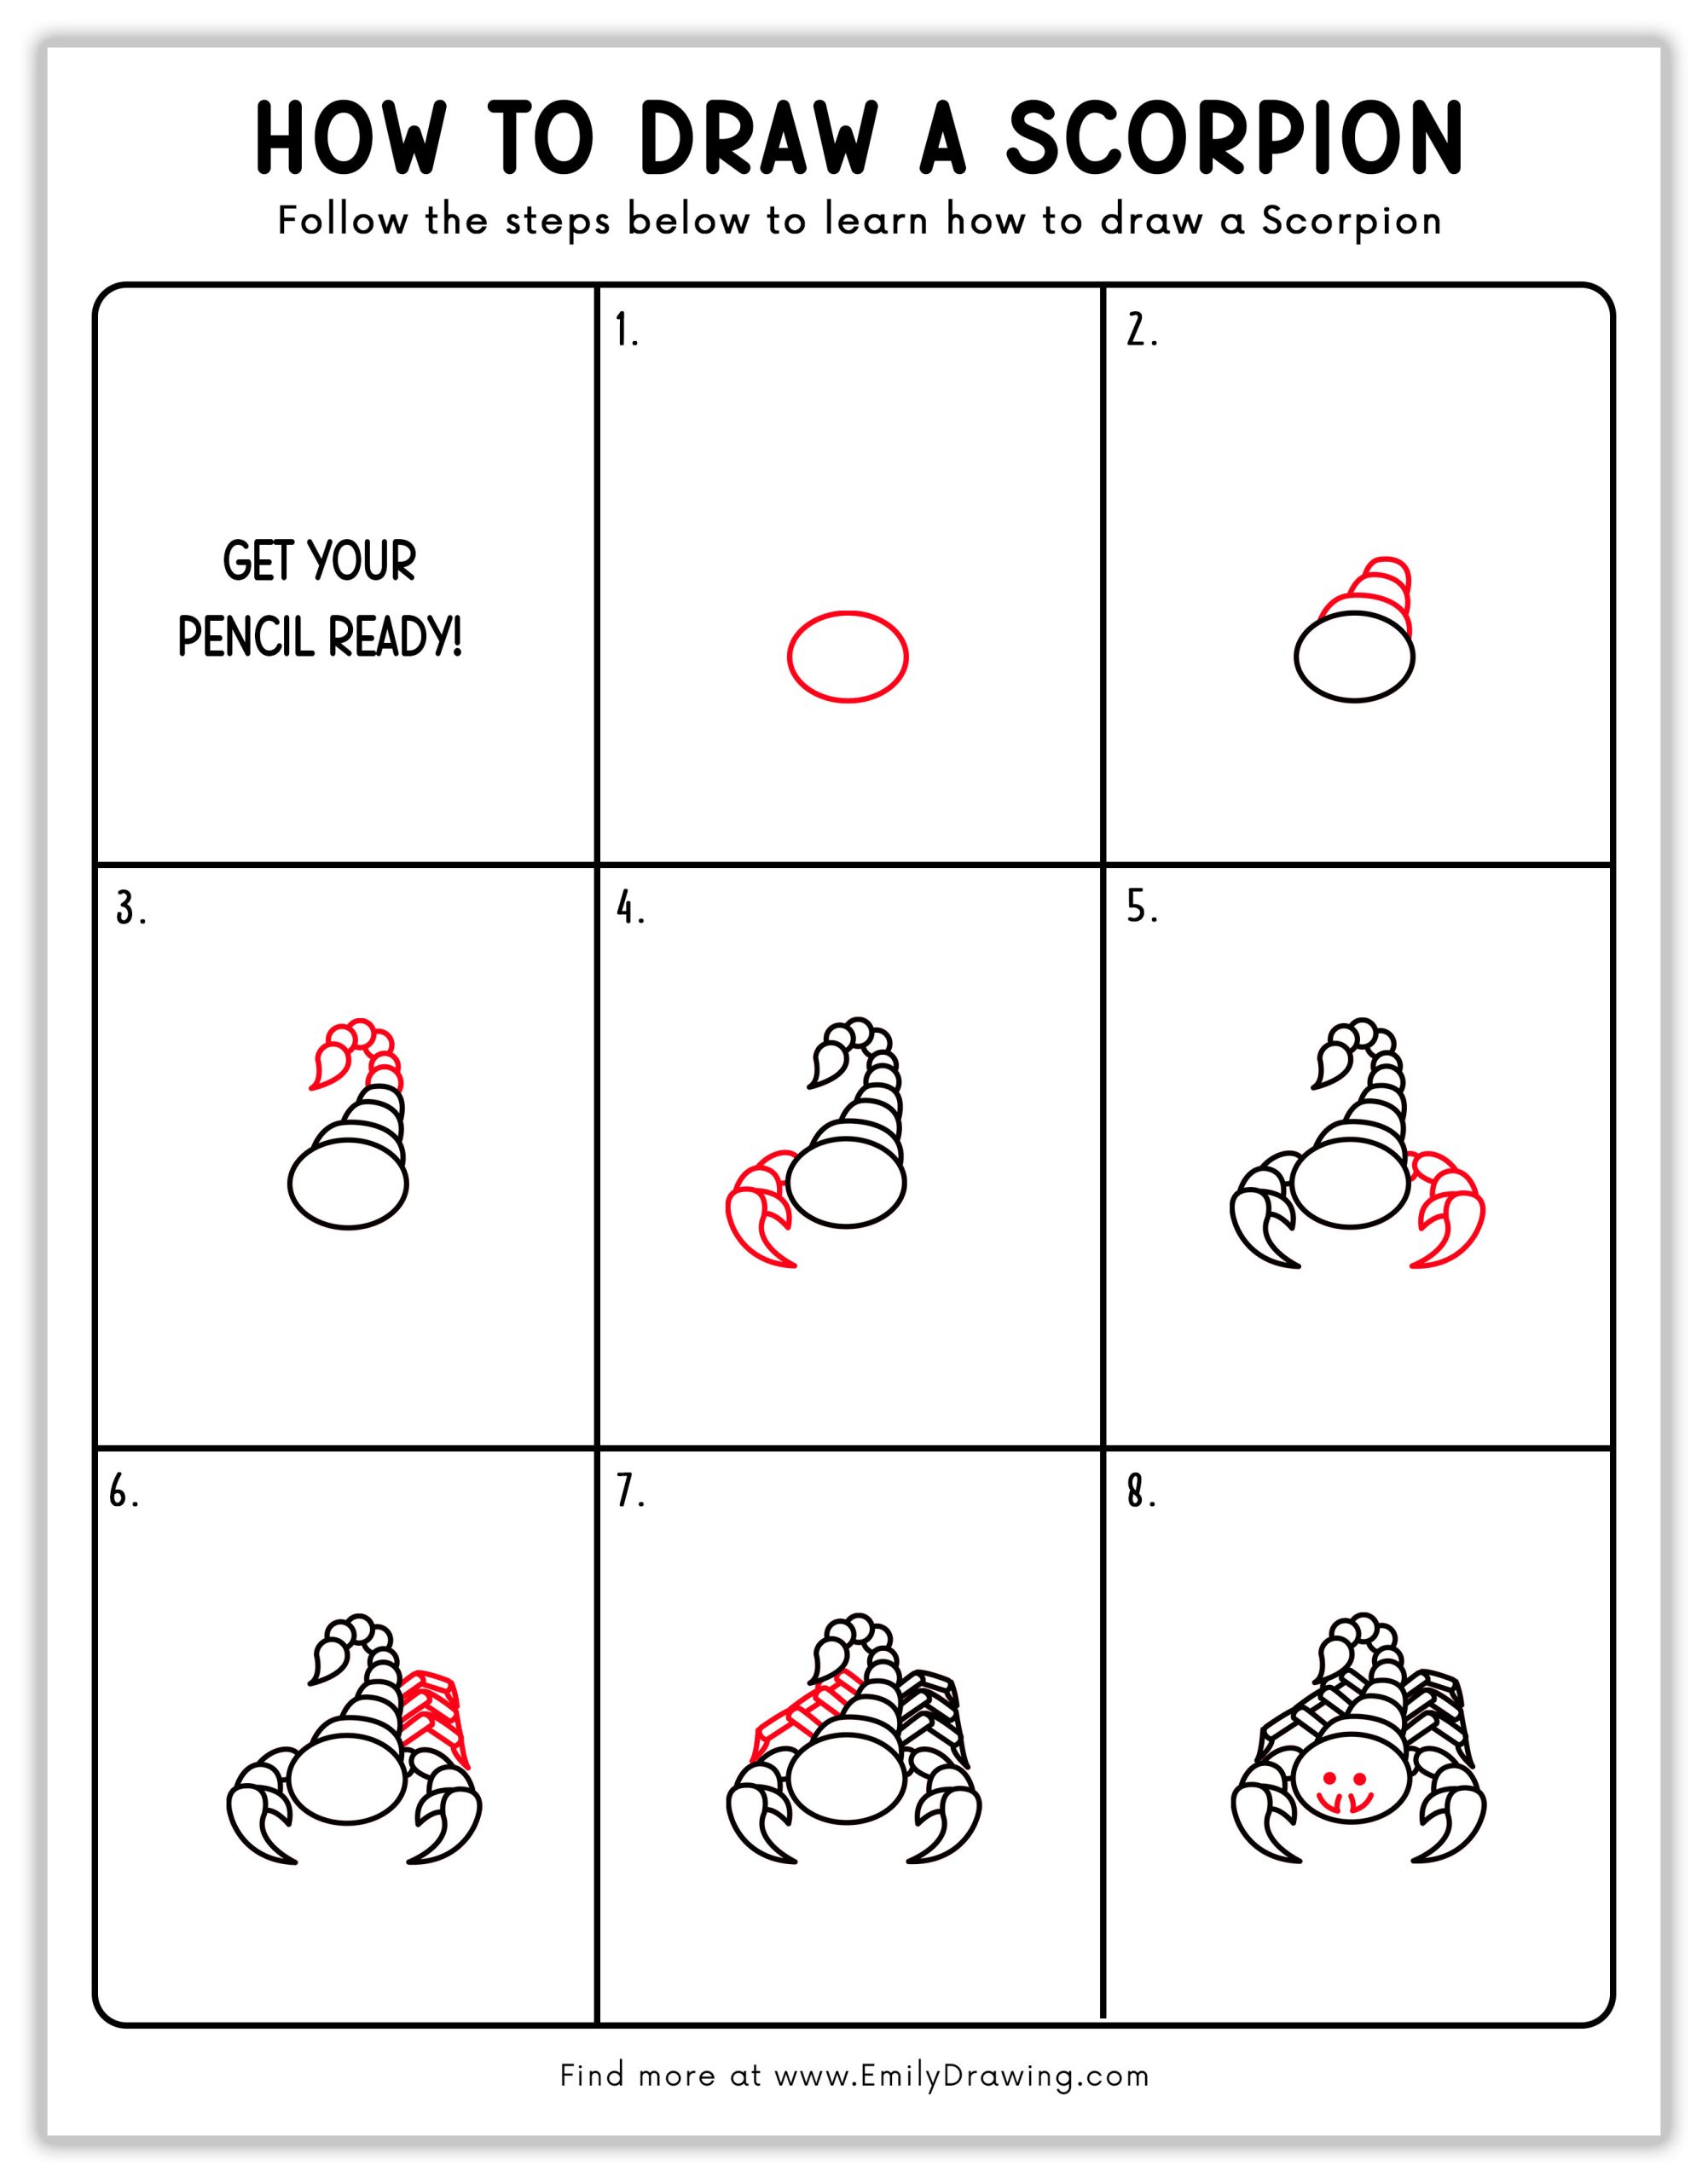
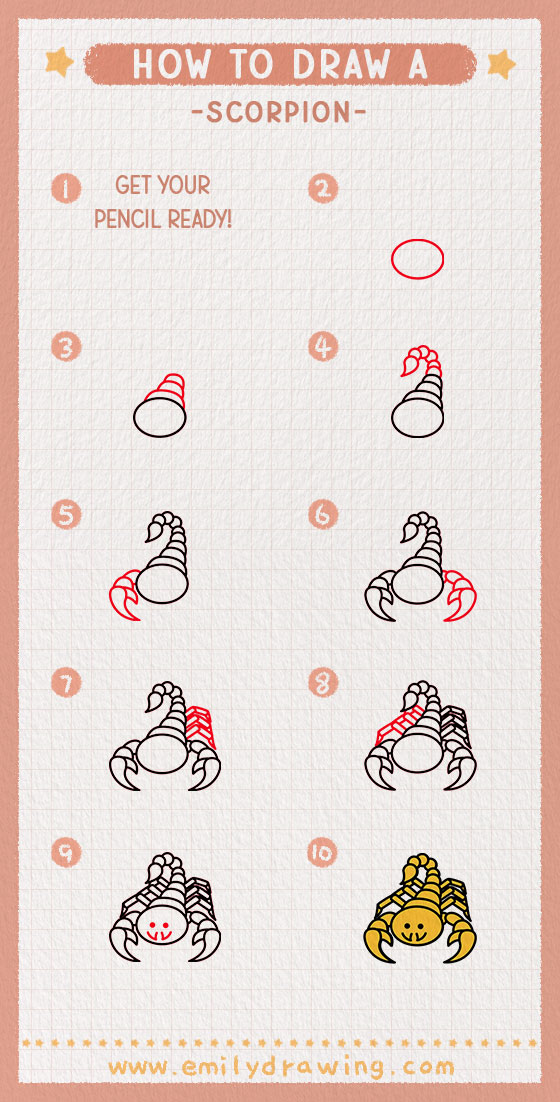
Step 1 – Draw the Head
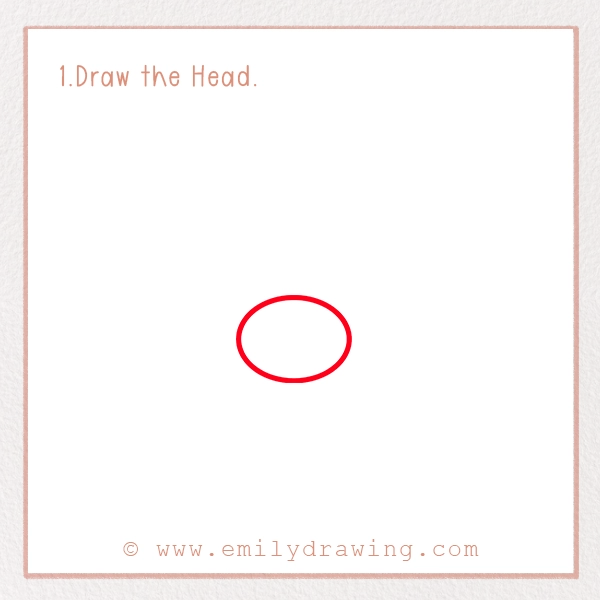
Start by drawing a small oval in the middle of your paper. This will be the scorpion’s head. Try to make it as even as possible! The head is where the scorpion’s eyes and mouth are located. A scorpion’s head isn’t very big, so make sure you keep it proportionate to the rest of the body.
Tip: Draw lightly so you can erase and adjust the shape if needed.
Step 2 – Add the Tail Base
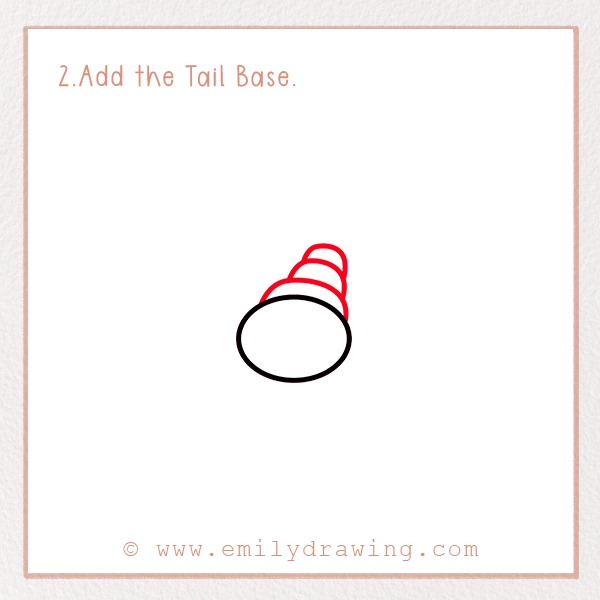
On top of the head, draw a stacked series of small curved shapes leading upward. These will form the scorpion’s segmented tail base. The tail curves upwards at the end, getting thinner as it goes. Scorpions use their tails for self-defense and catching food, so this is an important part!
Fun Fact: A scorpion’s tail has venom that it uses to protect itself or hunt for food.
Step 3 – Draw the Tail
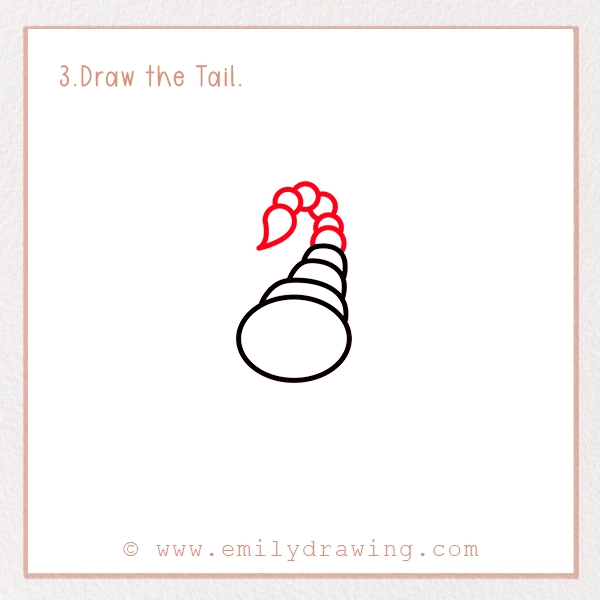
Continue extending the tail upwards, adding more segments, making sure they gradually get smaller. At the very end, add a sharp, curved stinger. The tail is one of the most iconic parts of the scorpion, used for defense and hunting. Try to make it slightly curved to show flexibility.
Tip: If you want your scorpion to look extra scary, make the stinger extra sharp!
Step 4 – Add the Right Pincer
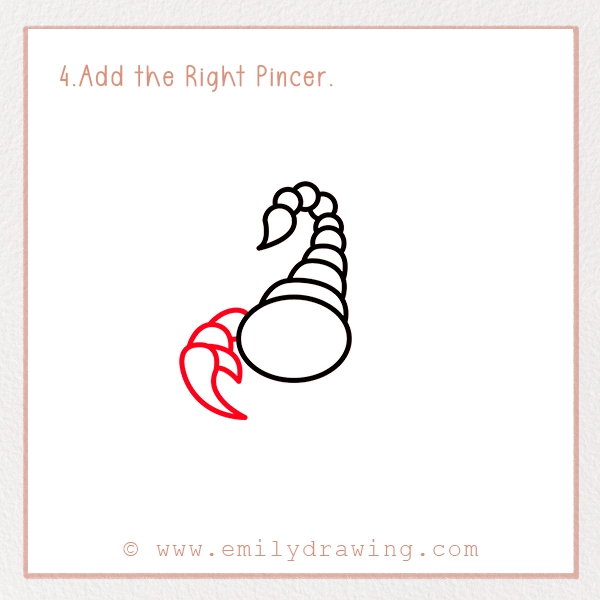
On one side of the head, draw a curvy claw-like shape. This will be one of the scorpion’s pincers, which it uses to catch prey. Keep the lines smooth and slightly rounded. Scorpions rely on their pincers to grab and hold onto their food before using their stinger.
Fun Fact: Some scorpions have bigger pincers than others! A scorpion with large pincers usually has weaker venom, while one with smaller pincers has stronger venom.
Step 5 – Draw the Left Pincer
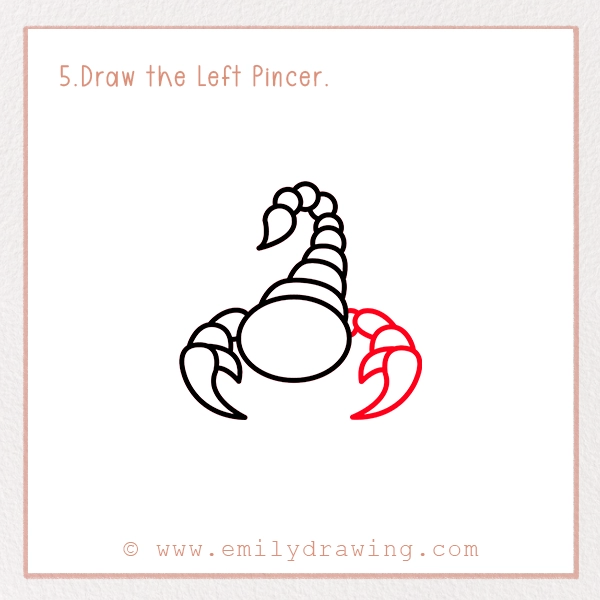
Now, draw the second pincer on the opposite side of the head. Try to make it match the first one so that your scorpion looks balanced. The pincers help the scorpion hold and crush its food. These pincers can vary in size depending on the species, so feel free to experiment with different shapes.
Tip: If the pincers look uneven, adjust the curves to make them symmetrical.
Step 6 – Draw the Right Legs
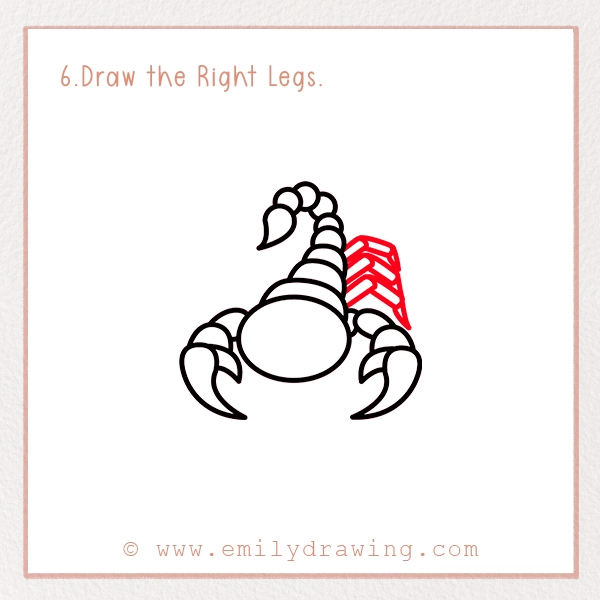
Scorpions have eight legs! Start by drawing four legs on the right side of the body, making them slightly bent. They should look like tiny, curved sticks. Legs help the scorpion move quickly across different surfaces. Some species can even walk sideways like crabs!
Fun Fact: Scorpions can sense movement through their legs, which helps them find prey in the dark!
Step 7 – Draw the Left Legs
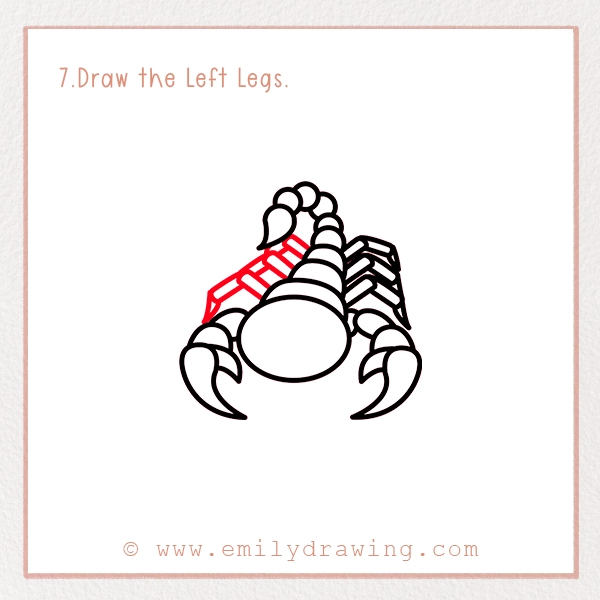
Now, draw the remaining four legs on the left side of the body. These should mirror the ones on the right. Scorpion legs help them sense vibrations in the ground, which helps them detect prey and danger.
Tip: Make sure all eight legs look balanced and evenly spaced.
Step 8 – Add Details to the Face
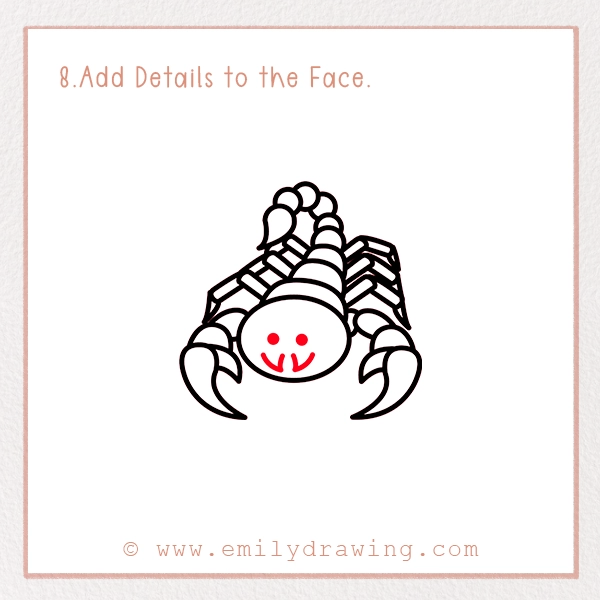
Time to bring your scorpion to life! Draw tiny eyes near the front of the head. Then, add a few texture lines on the tail, pincers, and legs to make them look more realistic. You can also add small dots for extra detail. Scorpions actually have multiple eyes, but they don’t see very well!
Fun Fact: Some scorpions have 6 to 12 eyes but still rely mostly on their sense of touch to find food.
Step 9 – Color Your Drawing!
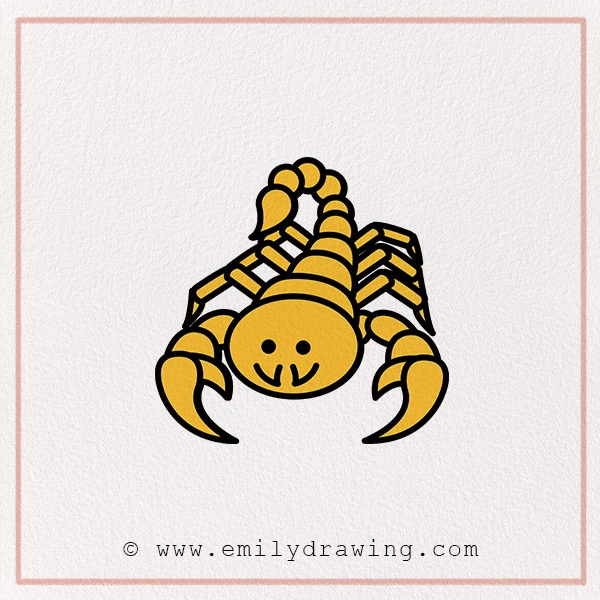
Scorpions come in many colors! Some are brown, black, or even blue under UV light. Use your favorite colors to make your scorpion unique! Adding shadows and highlights will also make your drawing look more realistic.
Tip: If you want your scorpion to look super cool, use a blue highlighter to make it glow under UV light!
Pin it now, Draw later!
Fun Facts About Scorpions
- Scorpions have been on Earth for over 400 million years – that’s older than dinosaurs!
- Some scorpions glow in the dark under ultraviolet (UV) light.
- They can survive almost anywhere, from hot deserts to icy mountains!
- Scorpions can live for months without food but need water to survive.
- They are related to spiders and belong to the arachnid family.
- The biggest scorpion is the Emperor Scorpion, which can grow up to 8 inches long!
- Scorpions don’t lay eggs; they give birth to live young, and baby scorpions ride on their mother’s back until they are strong enough to survive on their own.
Tips and Tricks for Better Drawing
- Sketch lightly at first so you can erase mistakes easily.
- Use reference images to help with details.
- Experiment with shading to make your scorpion look more 3D.
- Make your scorpion unique! Try different colors, patterns, or even add a background.
- Draw slowly and carefully to make sure each part is even and balanced.
- Try different perspectives—scorpions can look cool from a top-down or side view.
- Use a fine-tip pen to outline your final drawing for a polished look.
- Draw a desert background with rocks and sand to place your scorpion in its natural habitat.
We hope you had fun drawing your scorpion! Keep practicing, and don’t forget to show off your masterpiece. Share your drawing with your friends or online using #EmilyDrawing. If you enjoyed this tutorial, check out our other drawing guides for more cool animals!
Get the FREE Printable Drawing Guide