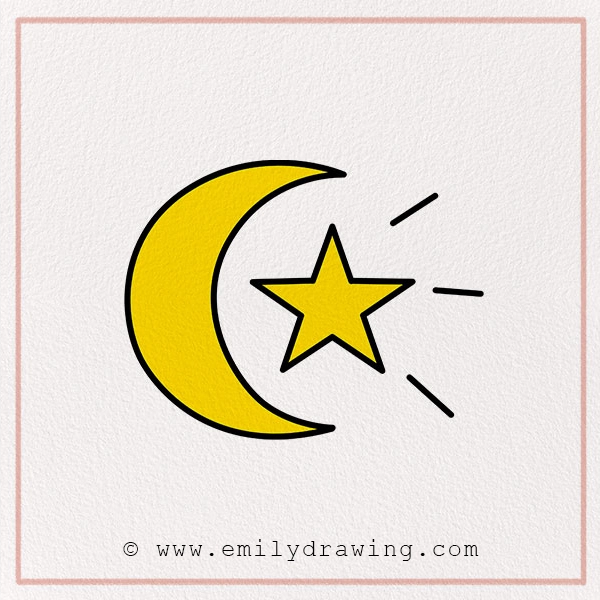
Have you ever looked up at the night sky and seen a glowing crescent moon next to a twinkling star? That magical shape is known as the Ramadan Moon, and in this fun tutorial, we’ll show you how to create a beautiful crescent moon drawing—all by yourself!
Drawing the moon and star isn’t just fun—it’s a form of Islamic moon art that connects us to special moments like Ramadan. 🌟 Did you know the Islamic calendar follows the moon’s cycle? That’s why seeing the crescent moon is such a big part of welcoming this holy month.
Let’s grab our pencils and dive into a sky full of creativity—just like when we explore fun nature scenes in our guide on how to draw a raccoon!
Materials:
- a piece of paper
- a pencil for the guiding lines and sketching
- an eraser
- a black sharpie or a pen for the outlines
- markers or colored pencils for coloring
- our printable drawing guide (Join my Email List below to get this Tutorial)
Here are my RECOMMENDED Art Supplies!
- Crayola Coloring Set (140 Pieces – Mega Value!)
- 24 Colored Crayon Set
- A4 Printer Paper
- Crayola Coloring Pencils
- HP Home Printer with Instant Ink!
Time needed:
15 minutes.
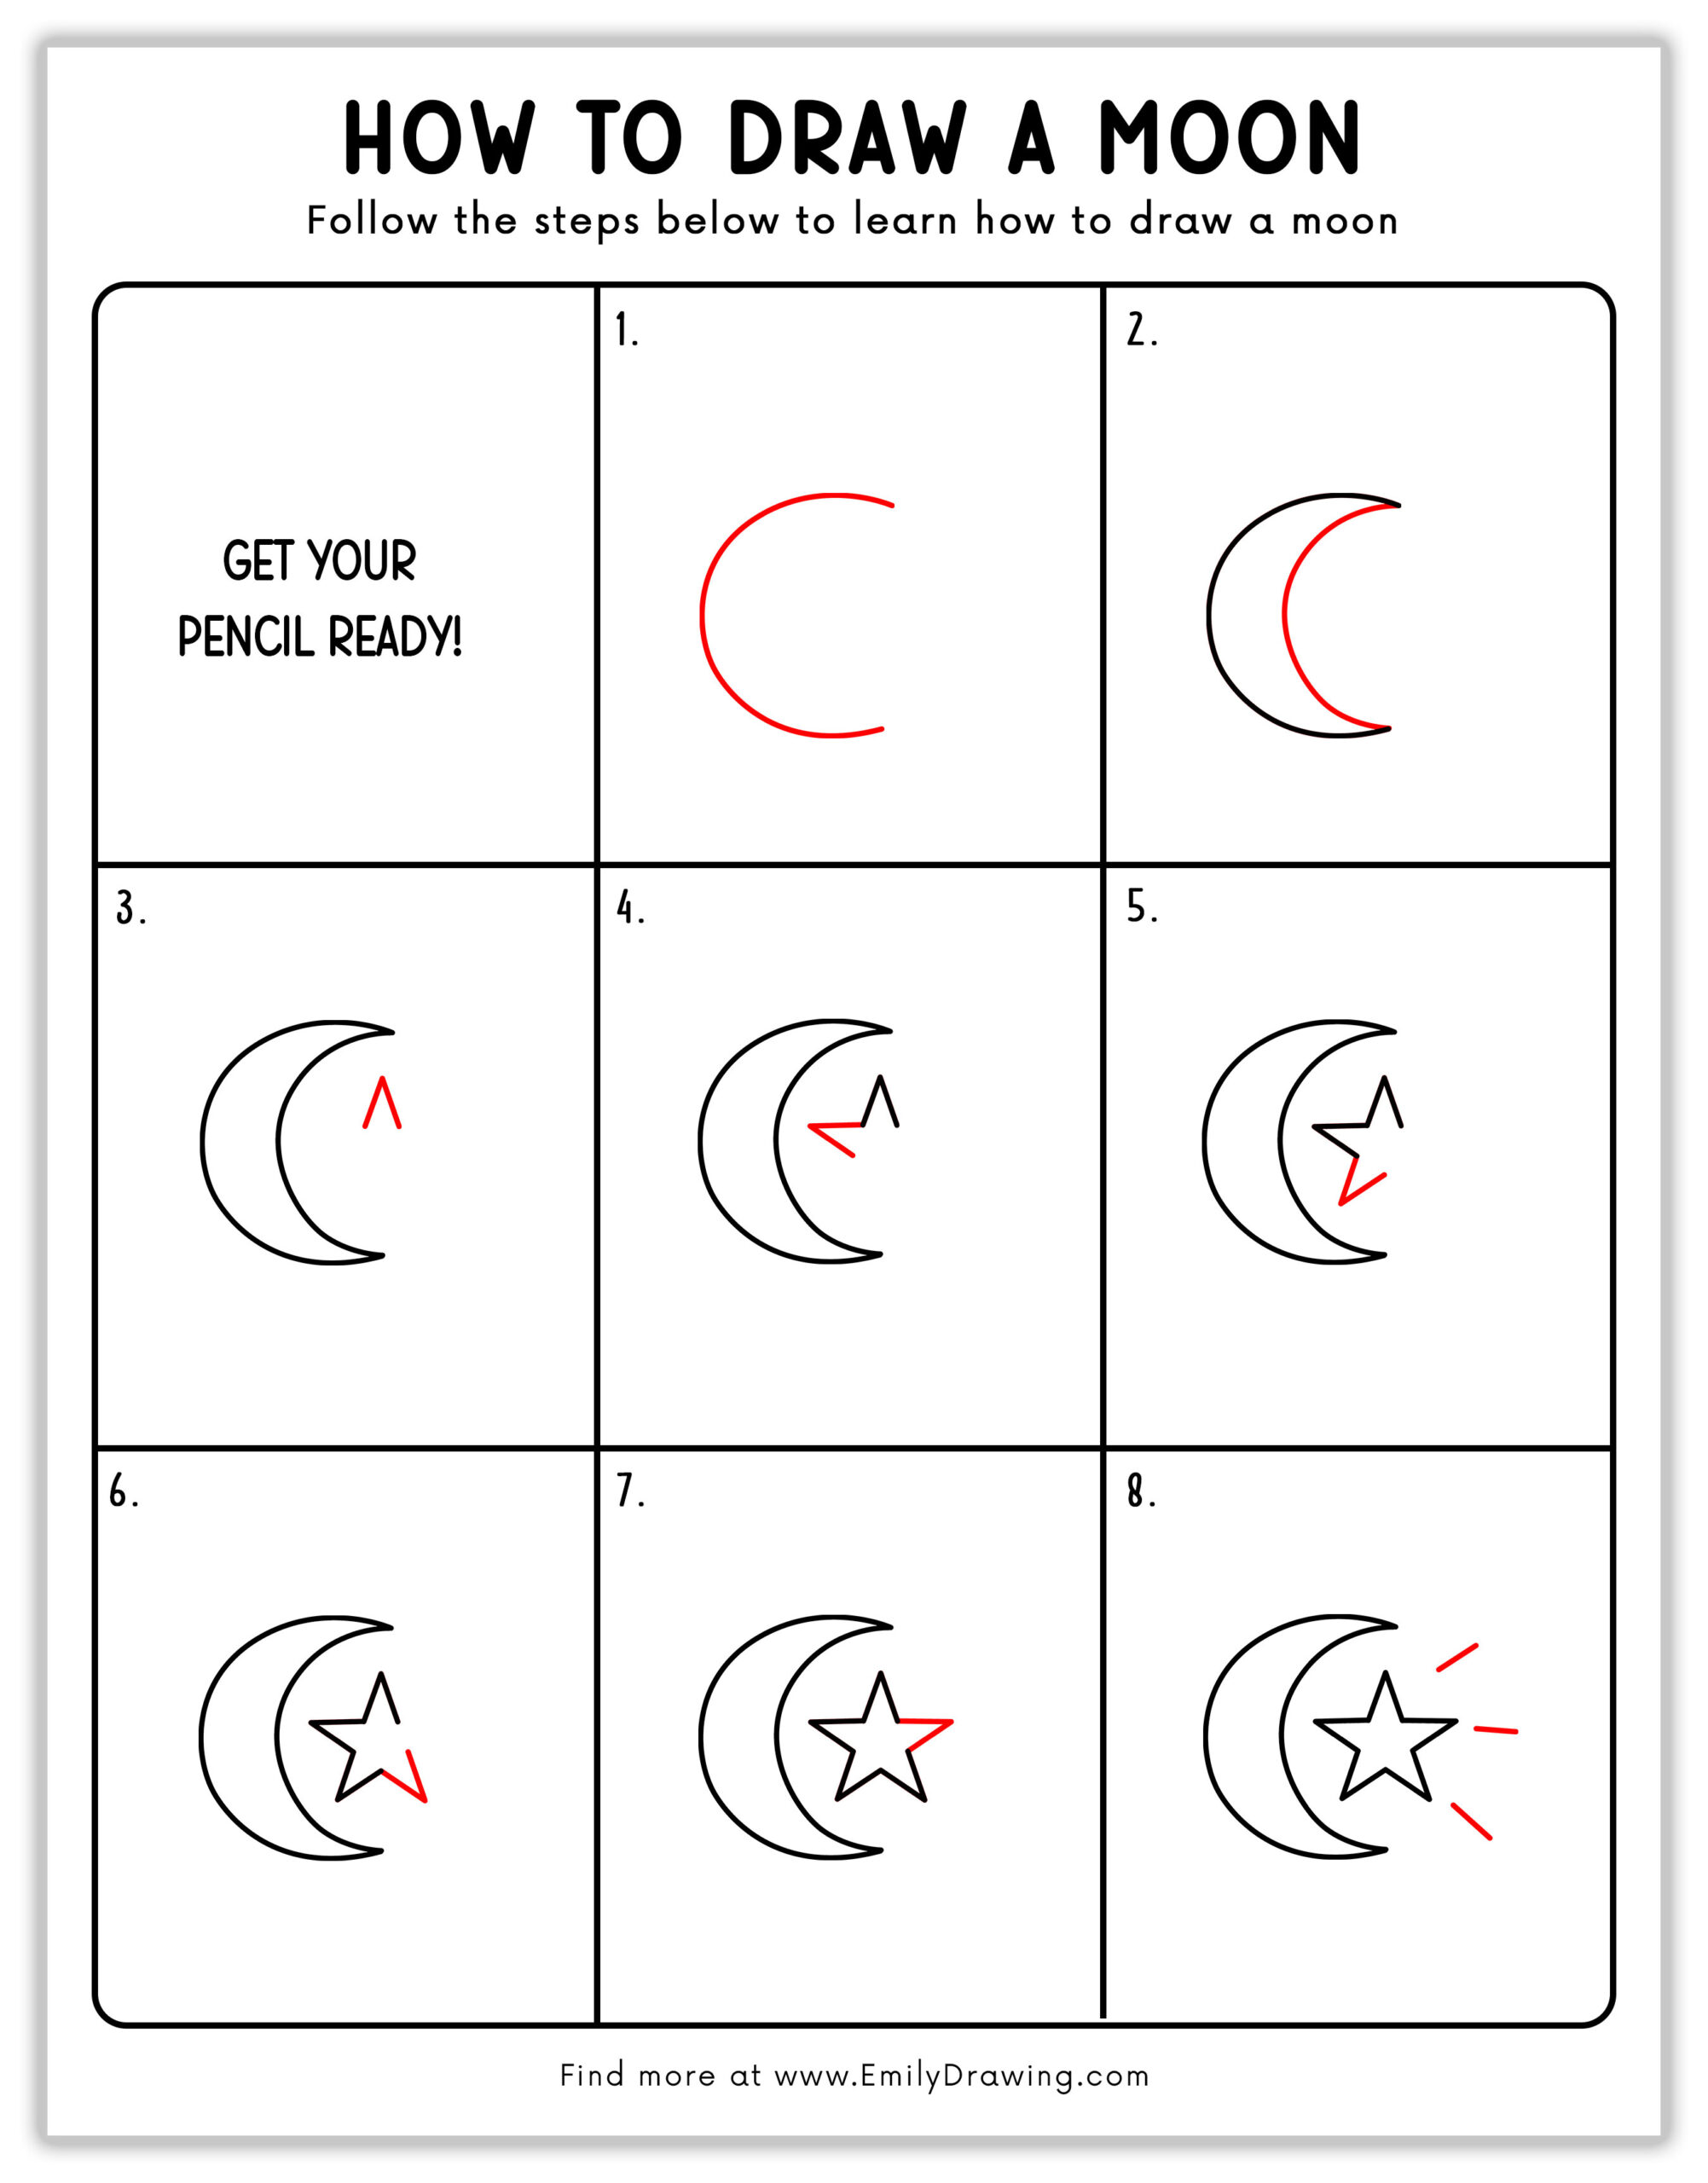
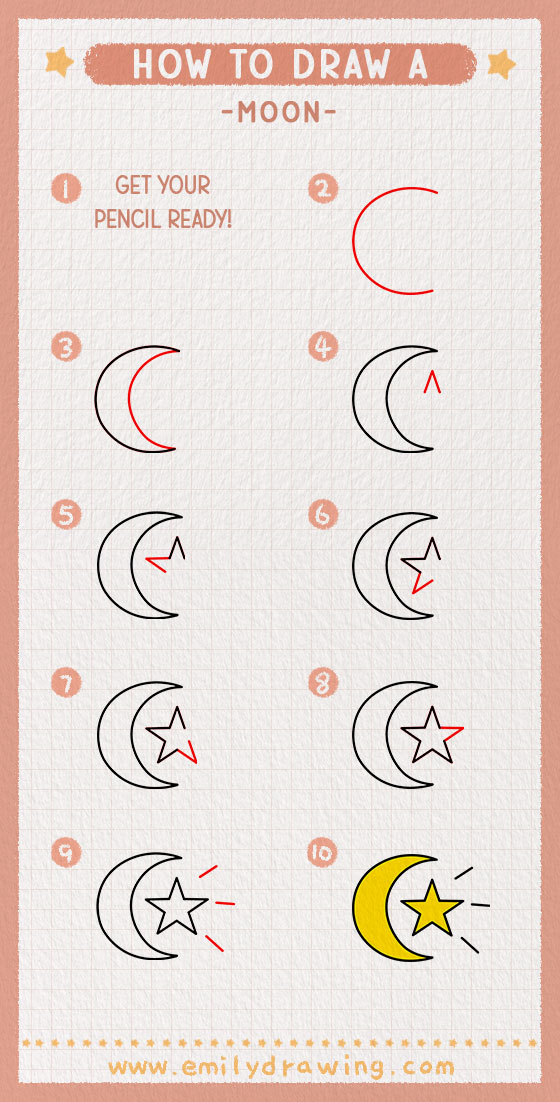
How to Draw a Ramadan Moon — Let’s get started!
Step 1 – Draw a Big Curved Line.
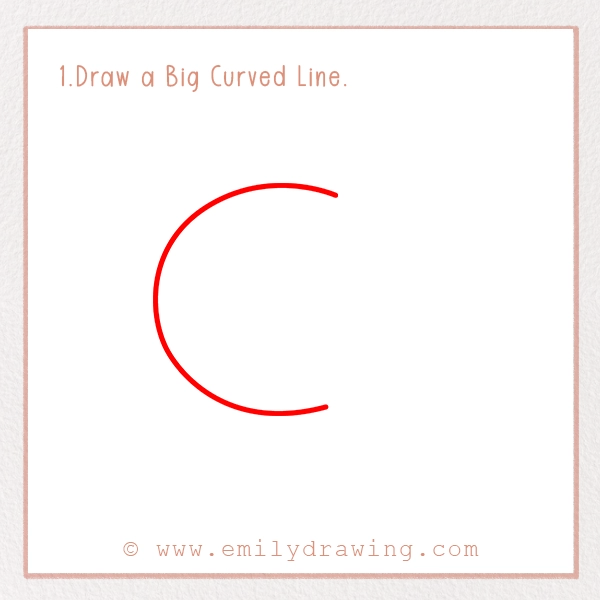
Start by drawing a large, sideways “C” shape. This will be the outer edge of your crescent moon.
💡 Tip: You can trace the edge of a small bowl or lid if you’d like a super-smooth curve!
Step 2 – Add a Second Curve.
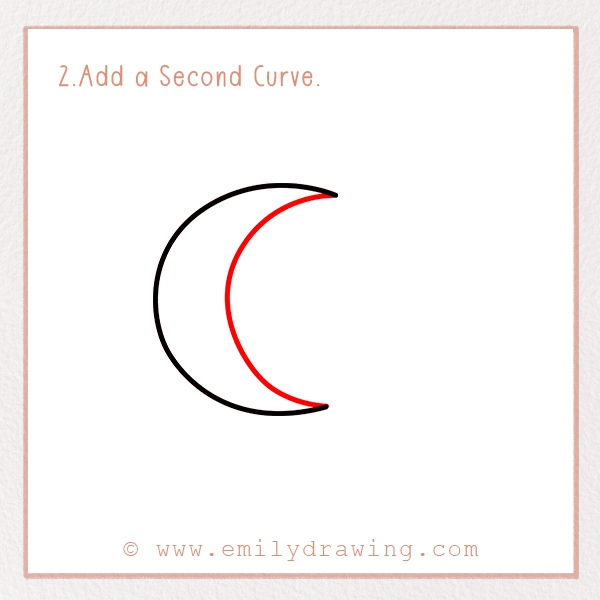
Now draw a smaller curved line inside the “C.” Connect the top and bottom ends to create that classic crescent moon shape!
🌙 Fun Fact: A crescent moon happens when the sun lights up just a tiny sliver of the moon’s surface.
Step 3 – Start the Star.
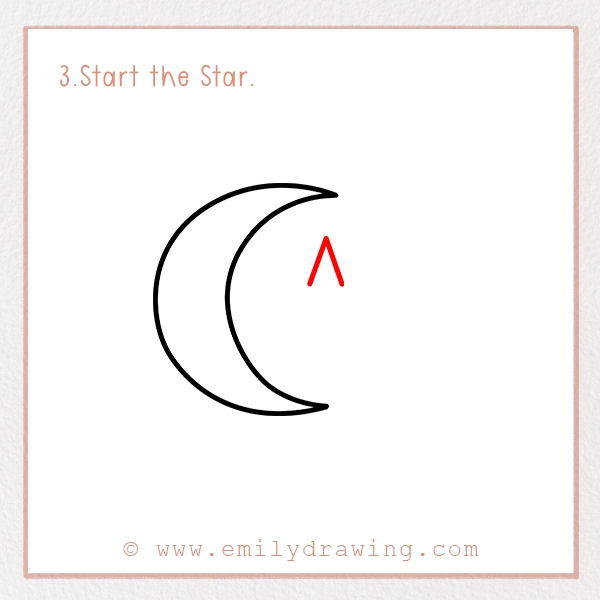
Let’s add some sparkle! Draw an upside-down “V” just next to or inside the moon. This will be the top of your star.
Make sure the point is aiming upward, like it’s reaching toward the sky!
Step 4 – Draw the Left Arm of the Star.
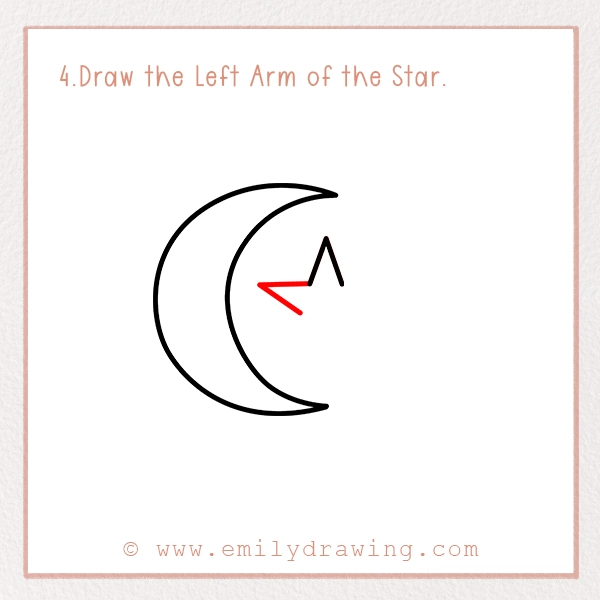
From the tip of the “V,” draw a diagonal line down to the left. This is one of the arms of the star.
Then draw a line going up and in, pointing toward the moon, to finish the first point.
📝 Take Your Time: Stars can be tricky, but line by line, you’ll get there!
Step 5 – Draw the Bottom Point.
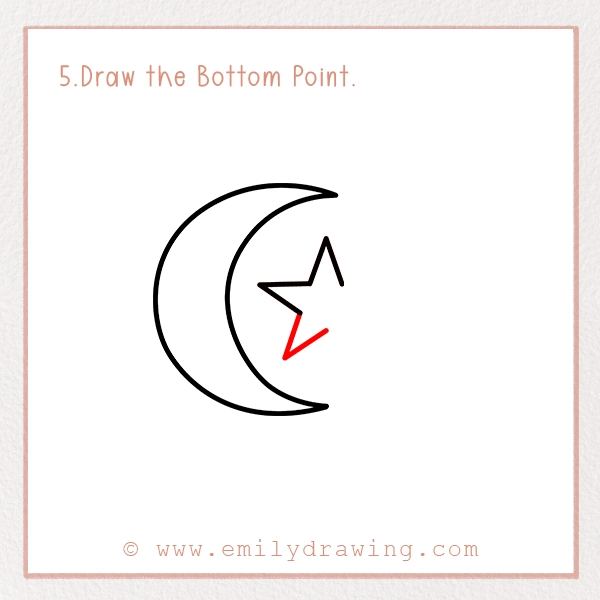
Next, draw a line from the last point downward and slightly to the right. Then bring a line up again toward the middle of the star.
You now have half of your star done!
Step 6 – Finish the Right Side.
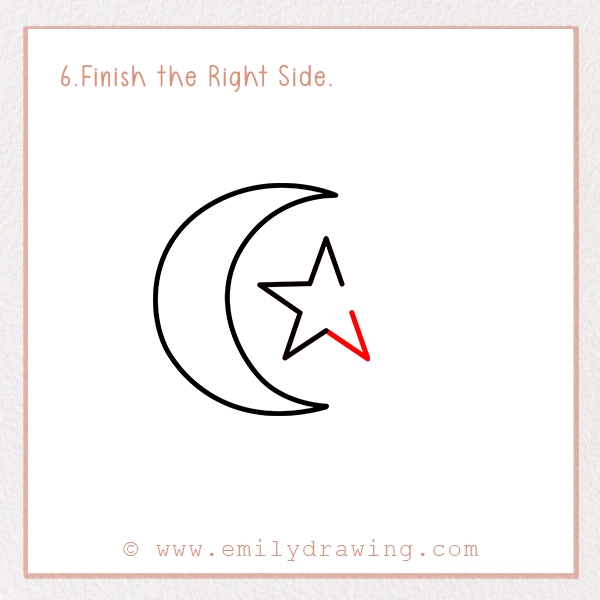
Now draw a line pointing out to the right for the next arm. Then connect that back up to the very top of your star to finish the shape.
🎉 Well done! You’ve now drawn a full, five-pointed star!
Step 7 – Touch Up Your Star.
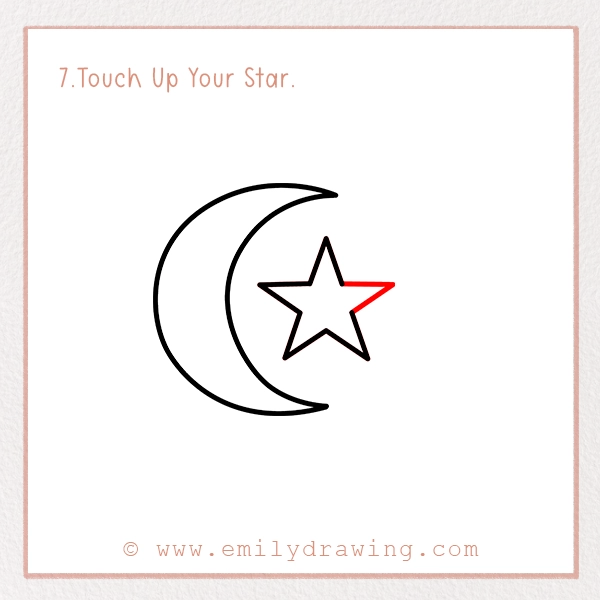
Look over your star. Add the final touches, clean up any sketchy lines, and make sure everything connects smoothly.
🌠 Optional: Erase any overlap inside the moon if your star sits within it.
Step 8 – Add Magical Details.
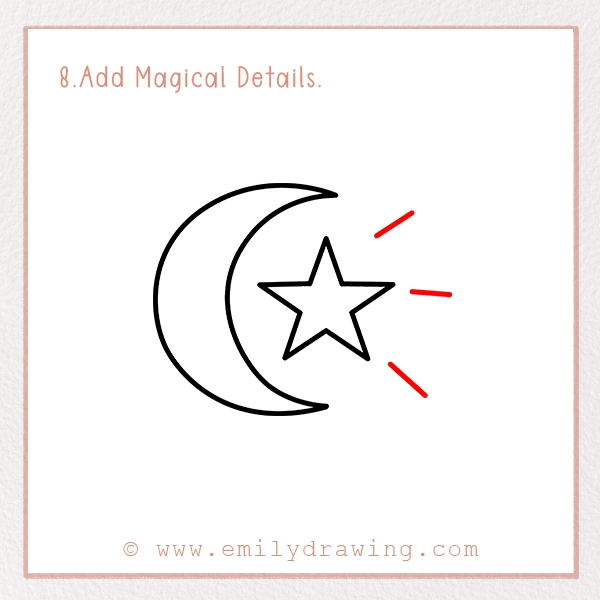
Let’s make the sky sparkle! Add:
Tiny stars ✨
Dots or sparkles around the moon
Swirls or little clouds ☁️
Maybe a tiny mosque or lantern in the background!
This is your night sky—let it shine!
Step 9 – Color Your Drawing!
🎨 Now the fun part—color it in!
Here are some ideas:
- Moon: Golden yellow, silver, or soft white
- Star: Bright yellow or glowing gold
- Sky: Deep blue, purple, or even black
- Extras: Use a white gel pen or crayon to add stars over your dark background
✨ Creative Tip: Try blending dark blue into black for a dreamy Ramadan night sky!
Pin it now, Draw later!
🌙 Fun Facts About the Ramadan Moon
Let’s learn a little more about the moon that inspired your drawing:
- The crescent moon (called hilal in Arabic) marks the beginning and end of Ramadan.
- Muslims sight the moon with their eyes—or telescopes!—to begin the fasting month.
- The Islamic calendar is lunar, based entirely on the phases of the moon.
So cool, right?
Tips & Tricks for Drawing Better
Want your moon and star to shine even brighter? Try these:
- Start light: Always sketch lightly so you can erase easily—just like we recommend when you draw a skunk step-by-step.
- Trace & practice: Draw on tracing paper a few times to practice your moon shape.
- Add a setting: Try drawing a quiet mosque, lanterns, or peaceful village under your moon.
- Use stencils: If stars are tricky, use a paper stencil or sticker as a guide!
Challenge: Create a full Ramadan night scene with a moon, mosque, glowing sky, and stars.
You did it! Your moon looks amazing—and if you enjoyed this, you’ll love exploring nature with our how to draw a woodpecker guide too!
You just drew a beautiful Ramadan crescent moon and star—a symbol of peace, faith, and nighttime magic.
Whether you’re celebrating Ramadan or just love the stars, your art is something to be proud of—especially when paired with other fun sketches like this adorable raccoon tutorial! Every time you practice, you grow more creative and confident. 🌟
Show it off—and consider adding more flair with drawings like this skunk sketch tutorial for your next project!
Take a picture of your masterpiece and share it using #EmilyDrawing—we’d love to see your starry skies!
Get the FREE Printable Drawing Guide