Let’s Light Up Your Creativity with a Glowing Masterpiece!
Are you ready to get creative and draw something magical? In this fun step-by-step tutorial, you’ll learn how to draw a beautiful Ramadan lamp—also known as a fanous—perfect for anyone looking for a simple fanous drawing guide!
These colorful lanterns glow brightly during Ramadan, lighting up homes, streets, and hearts with joy and celebration—just like the vivid scenes we explore in this step-by-step woodpecker drawing tutorial.
Did You Know?
Ramadan lamps symbolize hope, faith, and the spirit of giving. And guess what? You don’t have to be an artist to draw one—just follow along step by step!
Materials:
- a piece of paper
- a pencil for the guiding lines and sketching
- an eraser
- a black sharpie or a pen for the outlines
- markers or colored pencils for coloring
- our printable drawing guide (Join my Email List below to get this Tutorial)
Here are my RECOMMENDED Art Supplies!
- Crayola Coloring Set (140 Pieces – Mega Value!)
- 24 Colored Crayon Set
- A4 Printer Paper
- Crayola Coloring Pencils
- HP Home Printer with Instant Ink!
Time needed:
15 minutes.
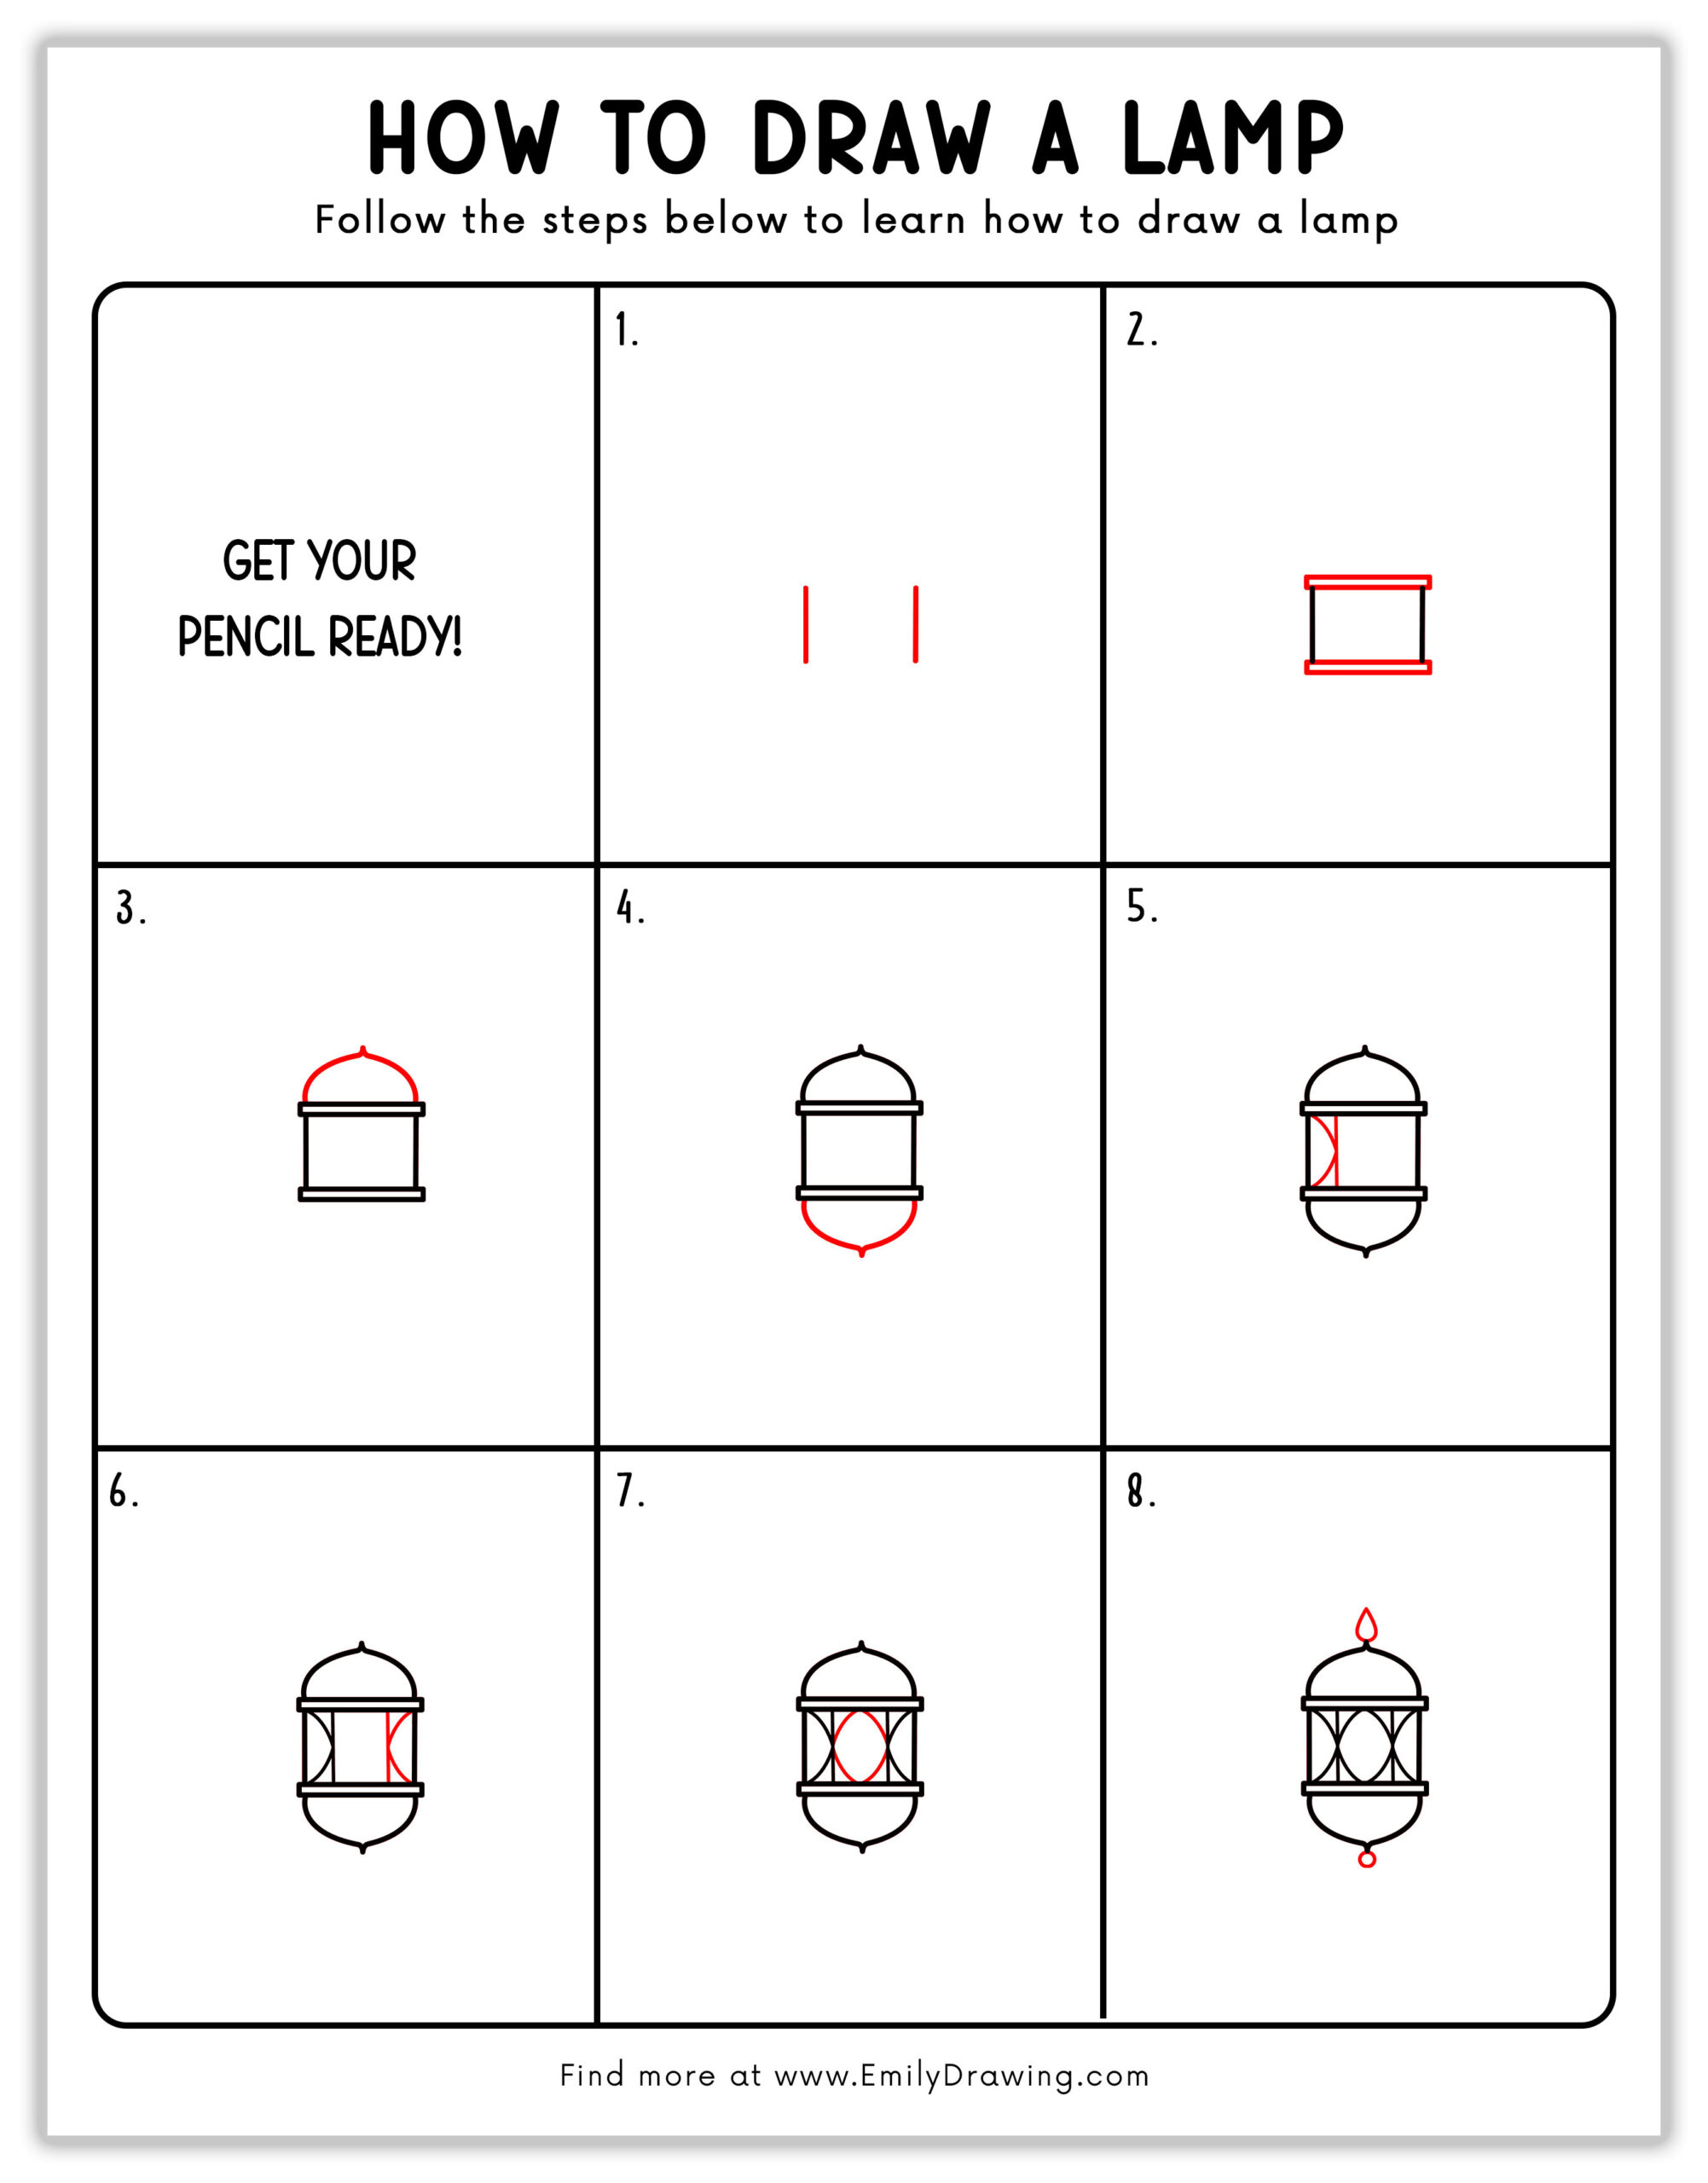
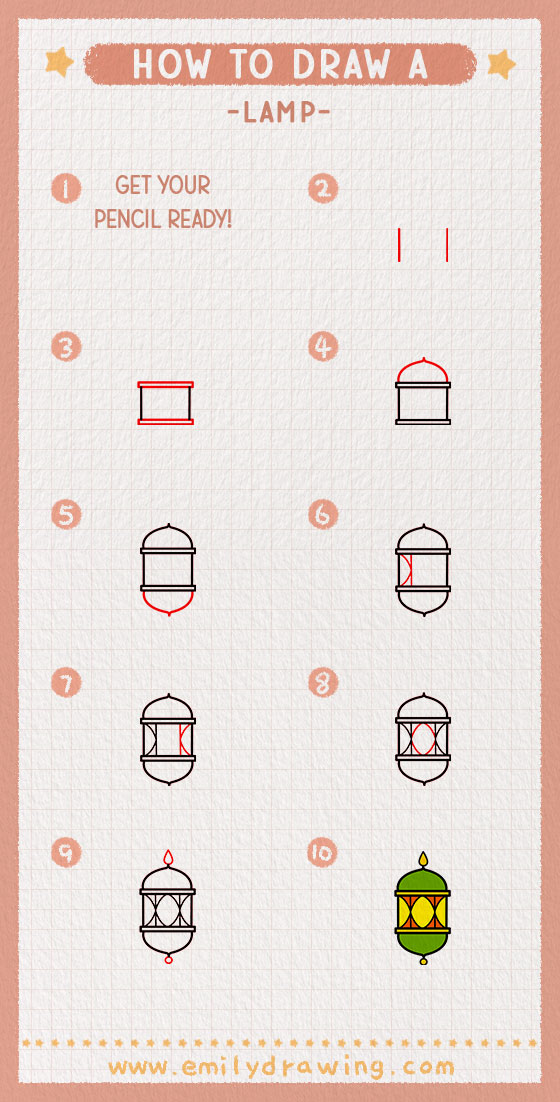
How to Draw a Ramadan Lamp — Let’s get started!
Step 1 – Draw Two Straight Lines.
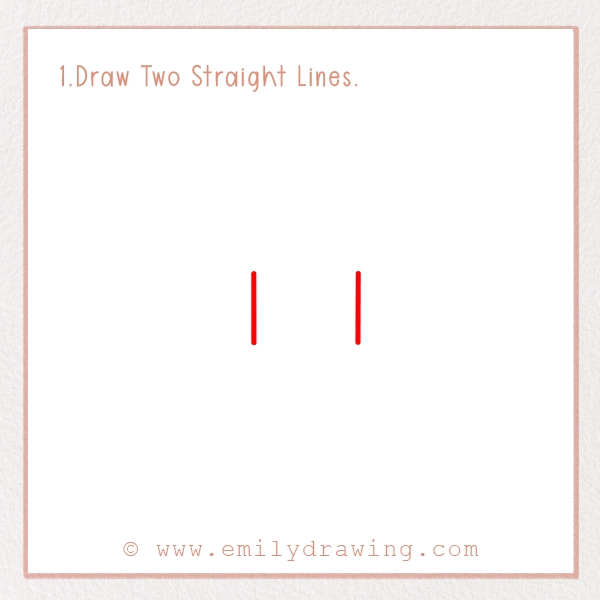
Start by drawing two vertical lines, spaced a little apart.
These are the sides of the lamp’s center frame—like two lamp posts!
Tip: Use a ruler to keep them straight. Try not to draw them too close together.
Step 2 – Add the Top and Bottom Borders.
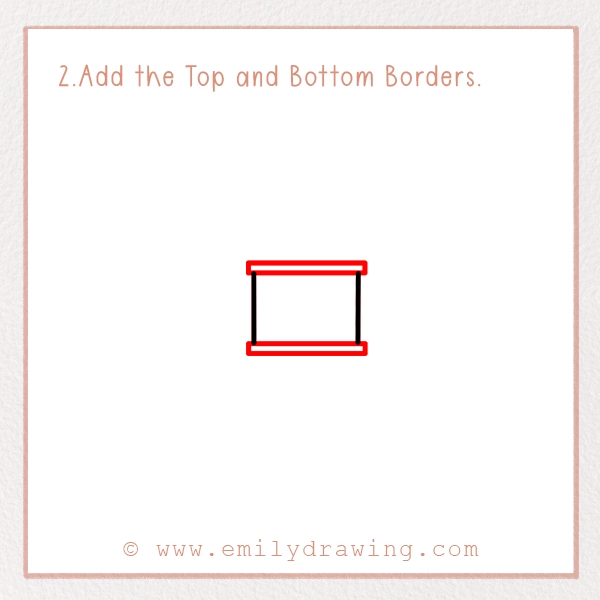
Now draw two horizontal rectangles—one at the top and one at the bottom between the vertical lines. These are the lamp’s top and bottom frames.
Tip: Keep both rectangles the same width so your lamp looks nice and balanced.
Fun Fact: Traditional lamps are often made with brass or copper at the top and bottom!
Step 3 – Draw the Lamp’s Dome.
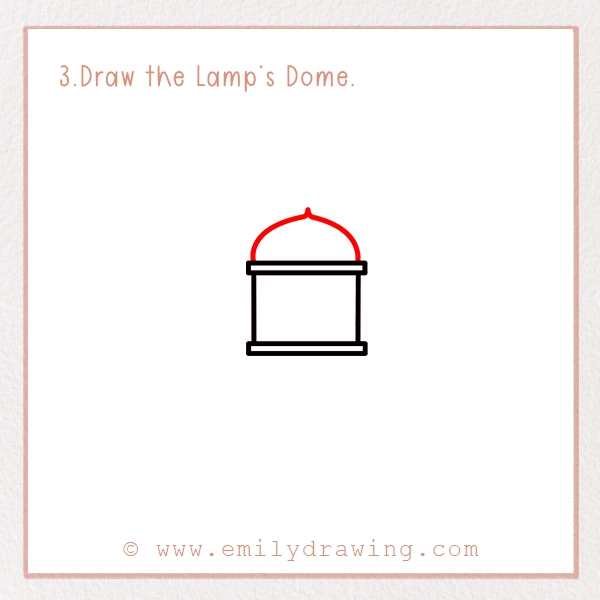
Let’s give your lamp a “hat”!
Draw a half-circle on top of the upper rectangle, curving from one side to the other.
Think of it like a rainbow or mushroom top! This is the crown of your lantern.
Step 4 – Add the Bottom Curve.
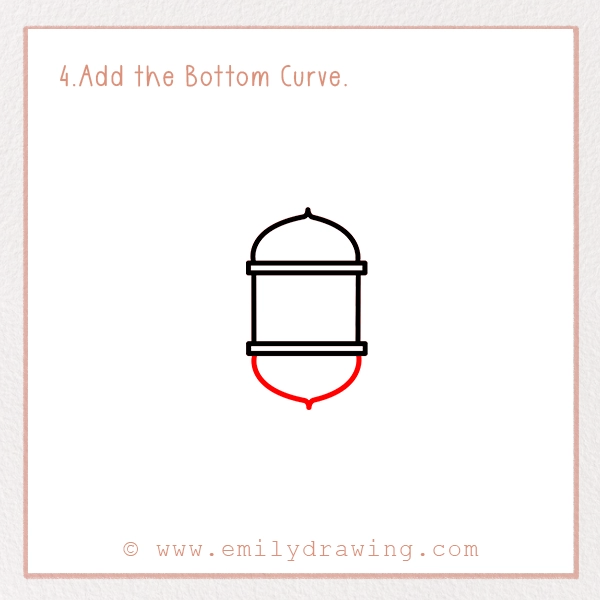
Now do the same thing on the bottom—but curving downward!
Start from the left side of the bottom rectangle and make a U-shaped curve that connects to the right side.
Now your lantern has a graceful, rounded base!
Step 5 – Create the Inner Design (First Curve).
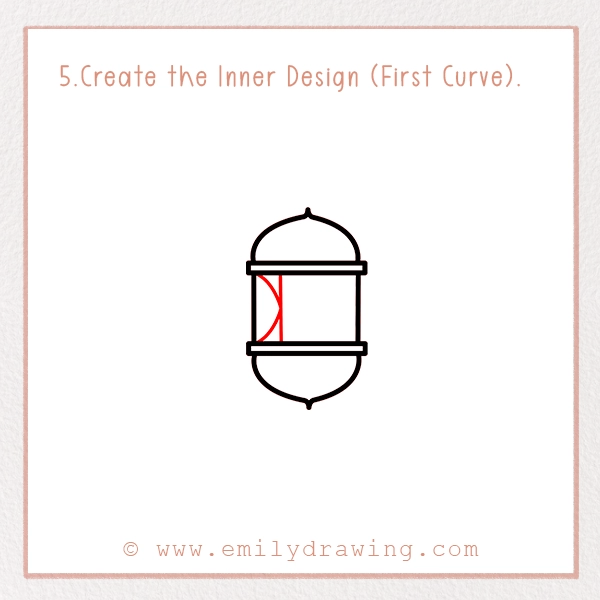
Inside the center rectangle, draw a curved diagonal line from the top left corner to the bottom right.
This forms part of the colorful glass panels!
Step 6 – Add the Second Curve.
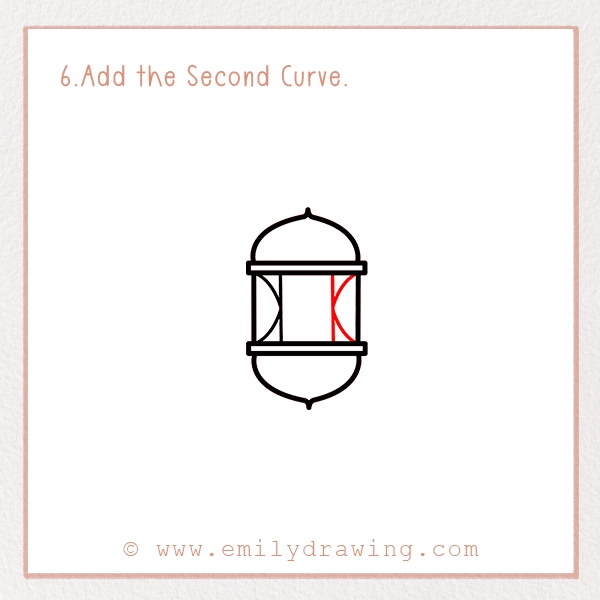
Now draw another curved line from top right to bottom left.
These two crossing curves create a pretty diamond shape in the center!
These shapes represent the glowing panels in a real Ramadan lamp.
Step 7 – Finish the Inner Design.
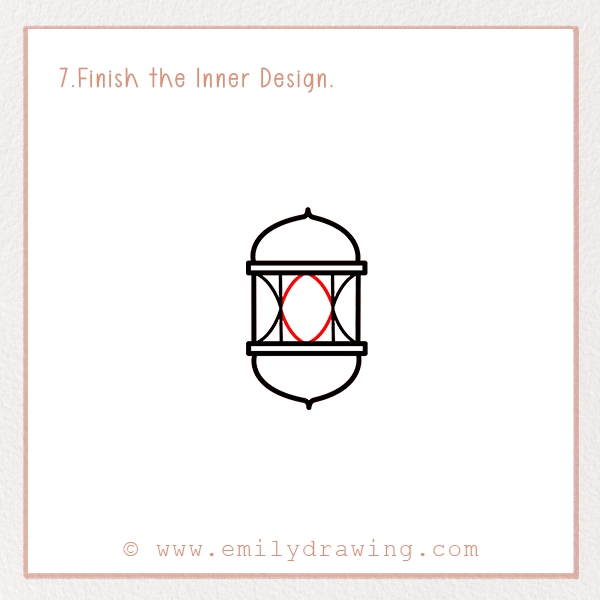
Draw two vertical lines, one on each side of the diamond shape.
This creates three glowing “windows” in your lamp.
Make sure all your lines go from the top rectangle to the bottom one!
Your fanous is looking amazing!
Step 8 – Add Decorative Top and Bottom.
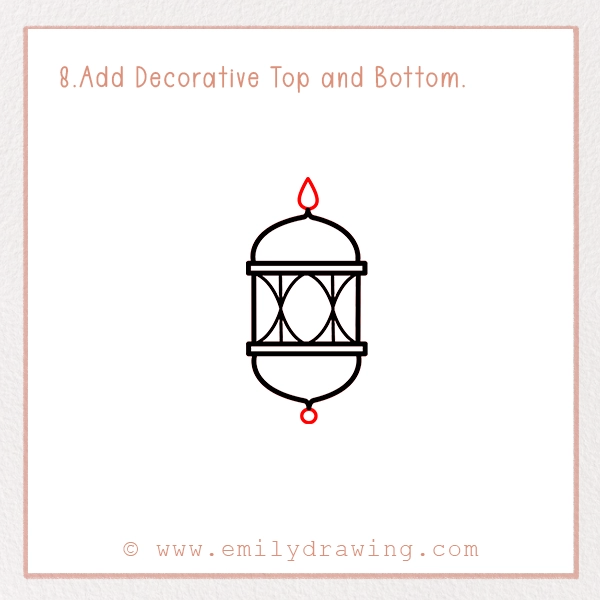
Let’s add some extra sparkle!
Draw a teardrop shape above the top dome (like a flame or topper).
Add a small circle below the bottom curve—similar to circular shaping techniques we use in our raccoon drawing tutorial.
Want more flair? Add little stars, sparkles, or mini moons floating around the lamp!
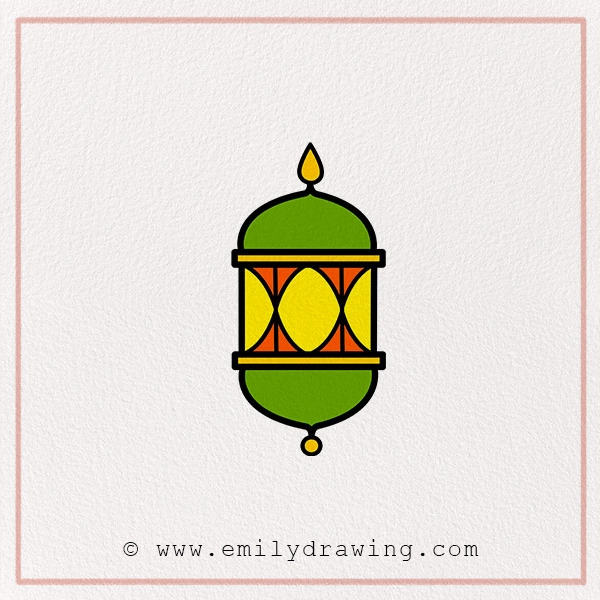
Step 9 – Color Your Drawing!
Now it’s time to bring your lantern to life with color!
Try these combos (based on a traditional fanous):
- Top and bottom domes: Green
- Center background: Orange
- Diamond shapes: Bright yellow
- Borders: Golden yellow or bronze
- Top teardrop & bottom dot: Yellow or red-orange
Creative Tip: Use metallic colors, glitter pens, or even stickers to decorate your lantern—techniques we also highlight in our woodpecker sketching guide for adding realistic textures!
You can also make it rainbow-colored, add glow effects, or even draw a night sky behind it!
Pin it now, Draw later!
Fun Facts About Ramadan Lamps
Let’s learn a little more while we color!
- The word fanous comes from Greek and means “light” or “lantern.”
- Fanous lamps have been used for over 1,000 years—since the Fatimid dynasty in Egypt! That’s longer than the age of many adorable creatures we love to draw—like this skunk.
- Each lamp is often handmade and beautifully unique—no two are exactly alike!
Drawing Tips & Tricks
Want to take your drawing to the next level?
- Sketch lightly first: It’s easier to erase and adjust.
- Use a ruler for neat, straight lines.
- Wash your hands before drawing—keep your paper clean!
- Try metallic colors: Gold, silver, and copper make great accents.
- Add background art: Like stars, moons, or a peaceful night scene.
You learned how to draw a beautiful Ramadan lamp, step by step—from simple lines to glowing decoration! If you enjoyed this, you’ll love the adorable raccoon sketch guide too!
We hope you had a blast drawing and learning. Don’t forget to share your lantern:
Take a photo and post it using #EmilyDrawing
Gift it to family or friends for Ramadan or Eid—or pair it with another creative piece like this playful skunk drawing!
Hang it on the fridge or make a Ramadan art wall!
Get the FREE Printable Drawing Guide