Have you ever wanted to draw a cute and playful meerkat? Well, you’re in luck! In this fun and easy tutorial, we’ll take you step by step to create your own adorable meerkat illustration. Did you know meerkats live in groups called mobs and love to stand on their hind legs to keep an eye out for danger? Let’s grab our pencils and get started!
Drawing is a fantastic way to express creativity, and learning to draw animals helps improve focus and attention to detail. By following these simple steps, you will be able to draw a meerkat from start to finish while having fun along the way. Don’t worry if you’re a beginner—this guide is perfect for kids and parents who want to enjoy an easy and engaging experience as they sketch a meerkat.
Materials:
- a piece of paper
- a pencil for the guiding lines and sketching
- an eraser
- a black sharpie or a pen for the outlines
- markers or colored pencils for coloring
- our printable drawing guide (Join my Email List below to get this Tutorial)
Here are my RECOMMENDED Art Supplies!
- Crayola Coloring Set (140 Pieces – Mega Value!)
- 24 Colored Crayon Set
- A4 Printer Paper
- Crayola Coloring Pencils
- HP Home Printer with Instant Ink!
Time needed:
15 minutes.
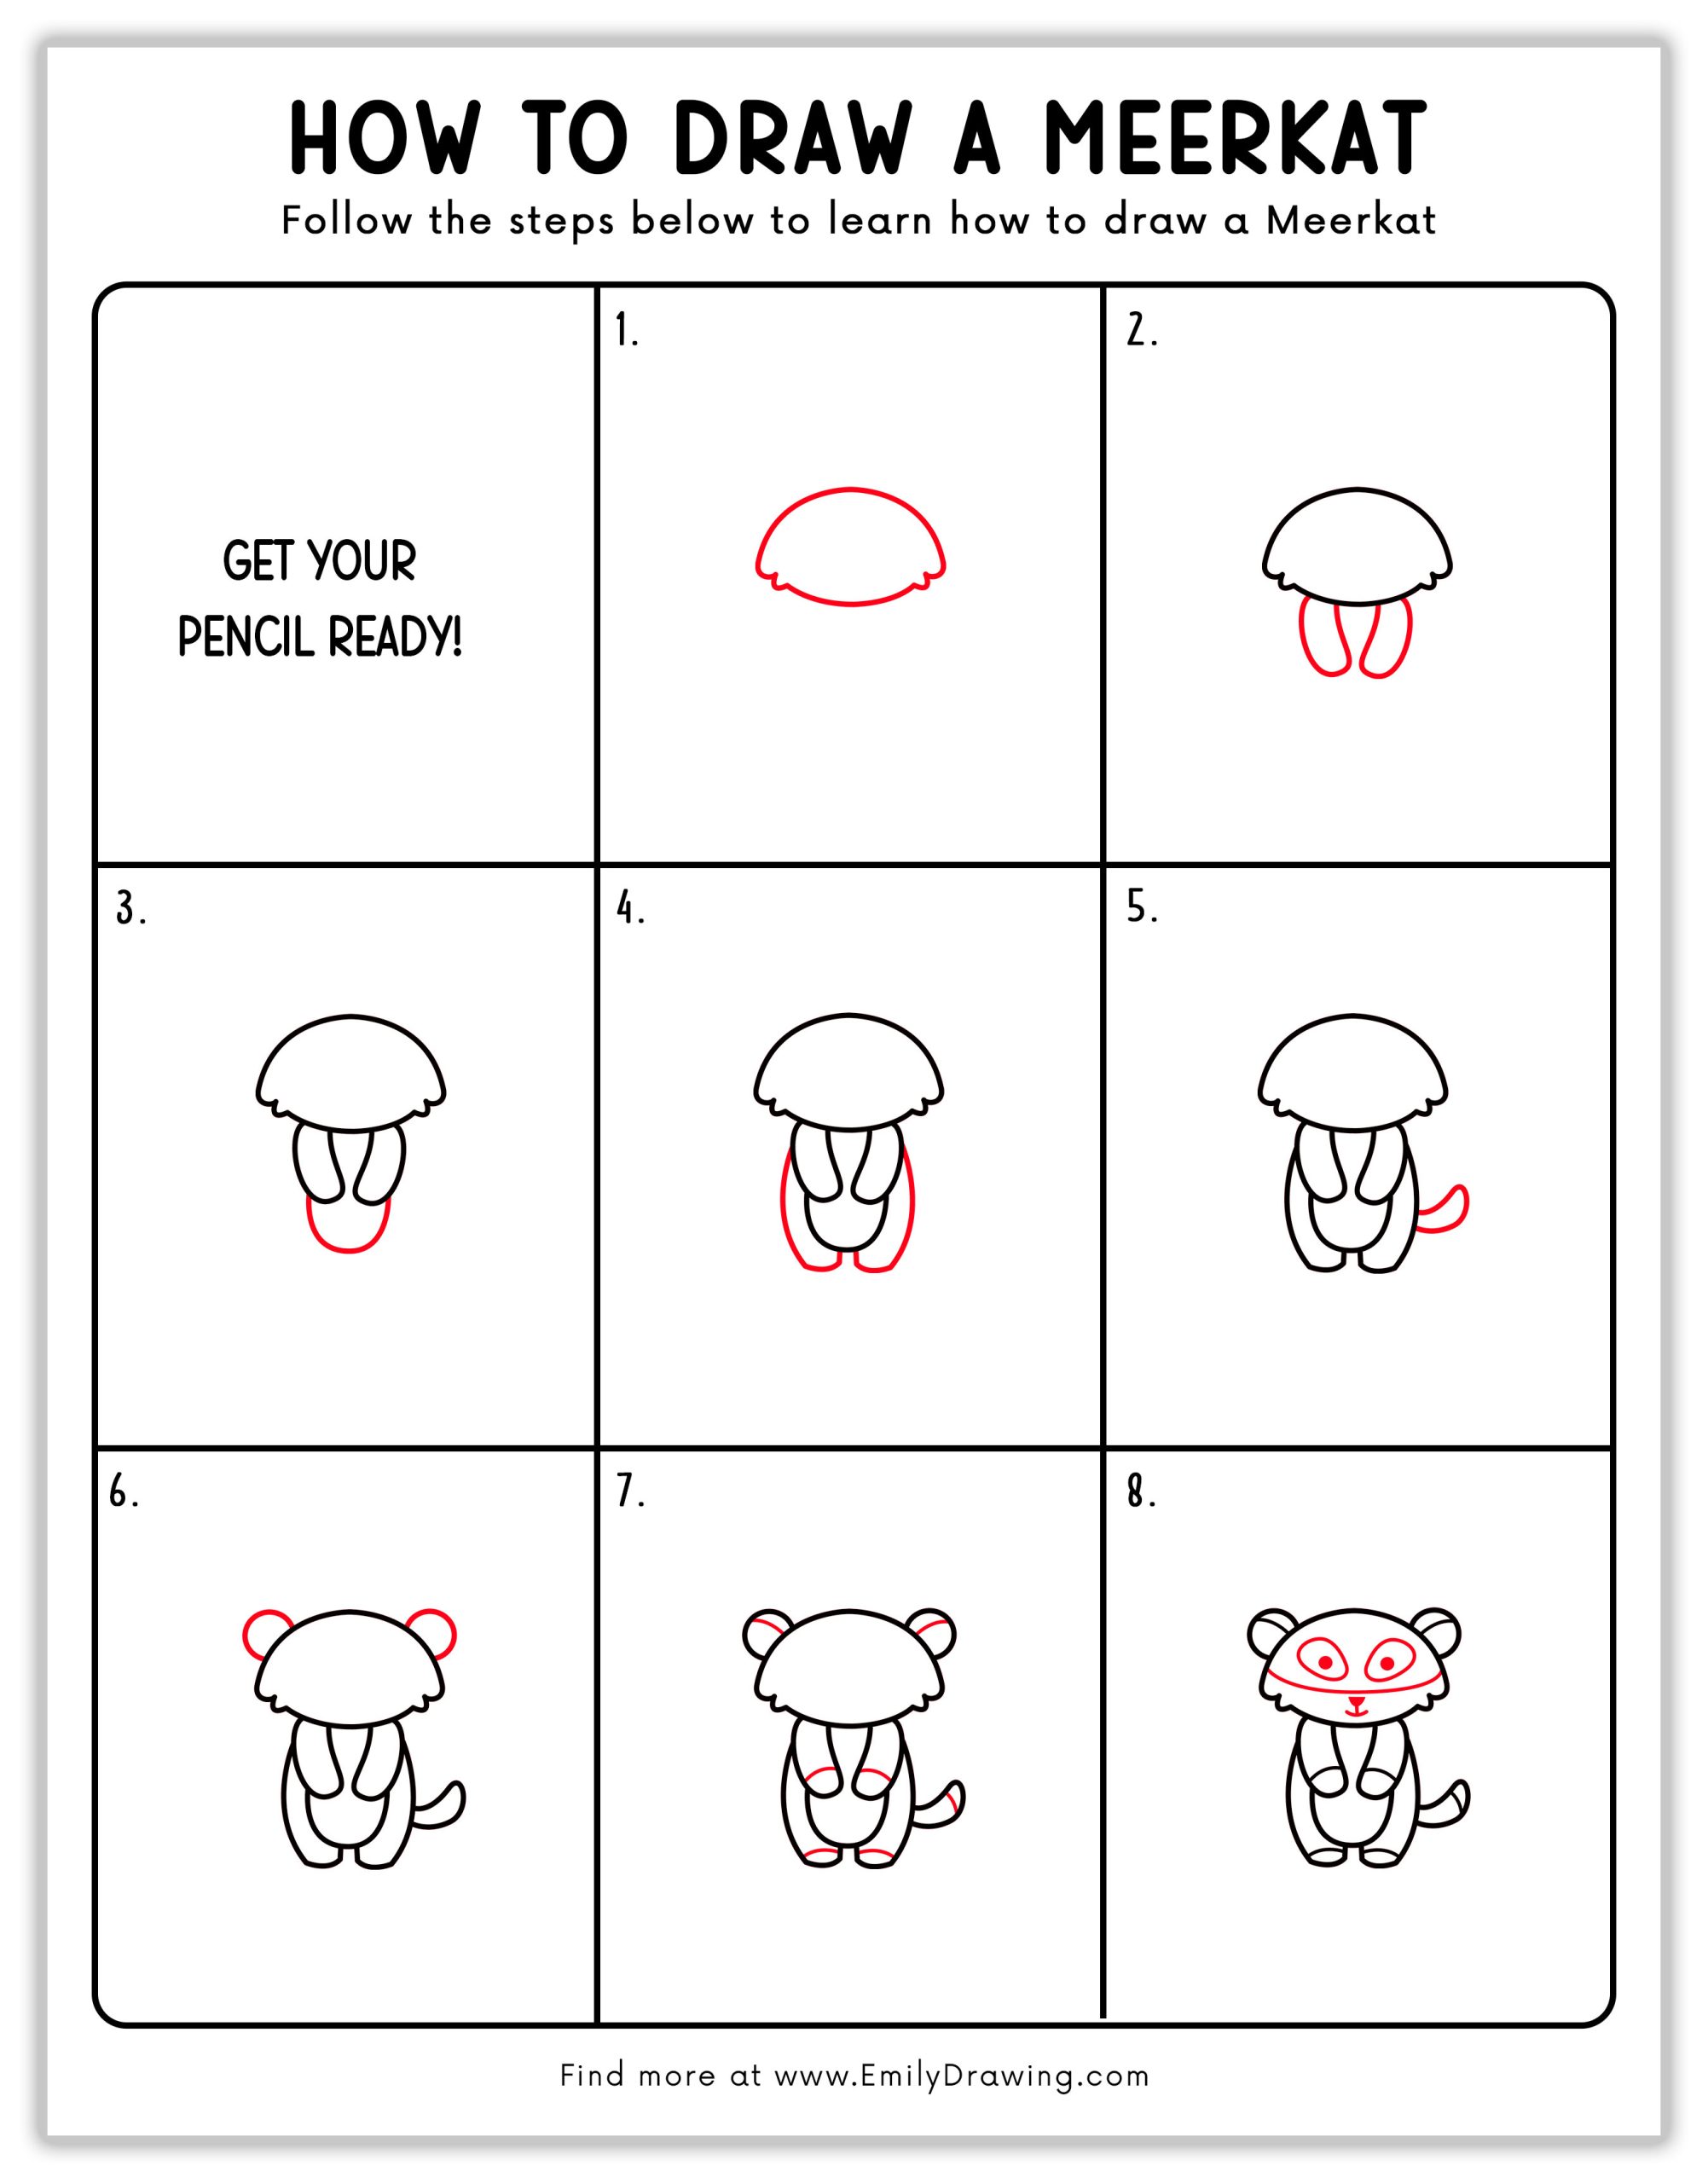
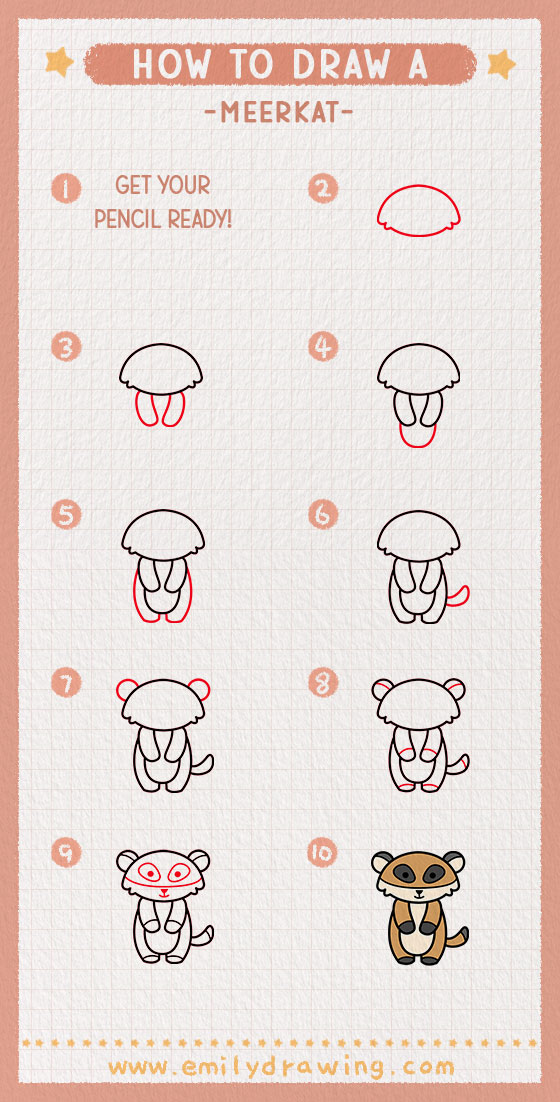
How to Draw a Meerkat — Let’s get started!
Step 1 – Draw the Meerkat’s Head
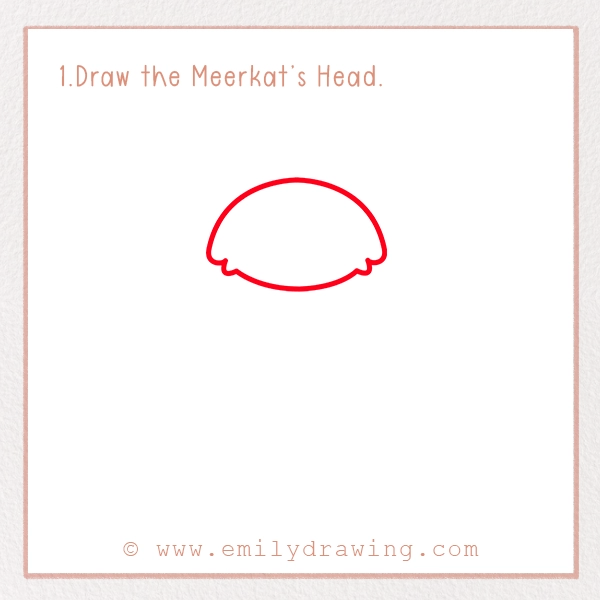
Start by drawing a curved, slightly dome-shaped line for the top of the meerkat’s head. Add small curves on each side to give it a fluffy look. The head should be rounded but slightly wider at the top to give the meerkat its distinctive appearance. This step forms the base of your drawing, so take your time to get the shape just right.
Step 2 – Draw the Front Hands
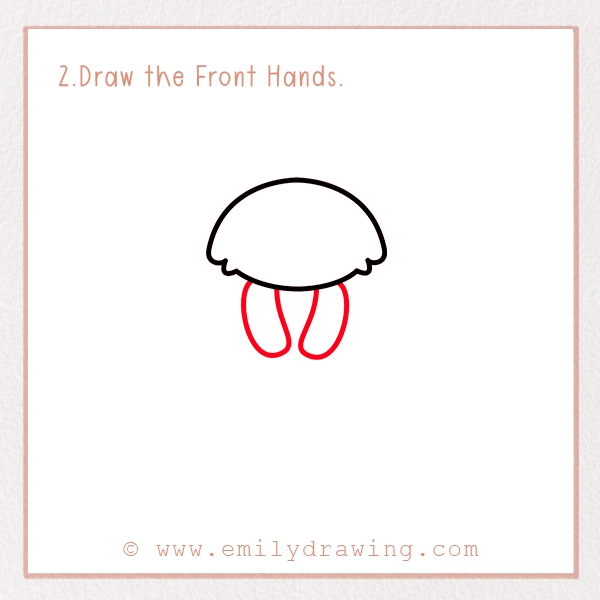
Below the head, draw two small, curved shapes for the meerkat’s front hands. These should be slightly oval and positioned close together. Meerkats often hold their paws near their chest when standing upright, so make sure they look relaxed and natural. You can lightly sketch the hands first to ensure the size and position are correct before making the lines darker.
Step 3 – Sketch the Belly
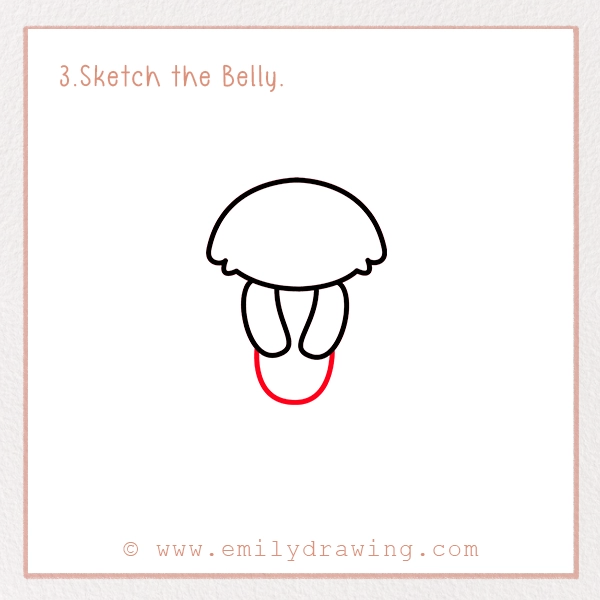
Extend the lines from the front hands downward to form the belly. The meerkat has a slender shape, so keep the sides gently curving inward. The belly should be slightly rounded at the bottom, as meerkats have soft, fluffy stomachs. This step helps define the meerkat’s body structure, so take your time adjusting the proportions.
Step 4 – Add the Back Legs
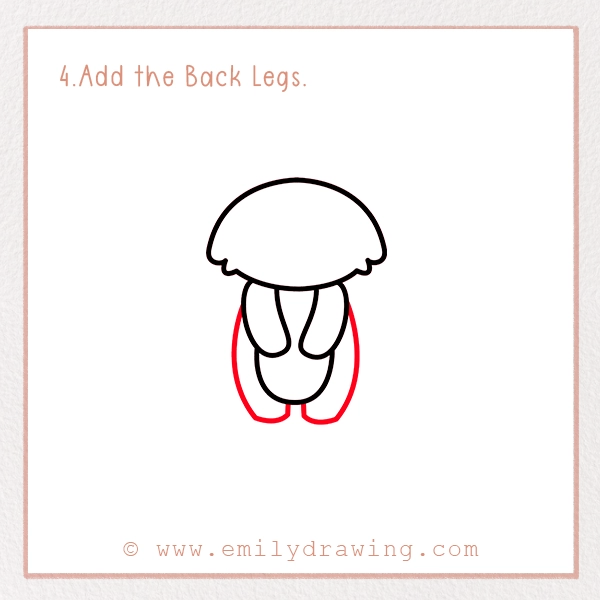
Next, sketch two curved lines on either side of the belly to form the back legs. Meerkats often sit upright, so position the legs as if they are tucked in. The legs should be slightly bent to give the drawing a natural and balanced look. Add small curved lines at the bottom to indicate the meerkat’s feet. Remember, keeping the lines light at first will make it easier to make adjustments if needed.
Step 5 – Draw the Tail
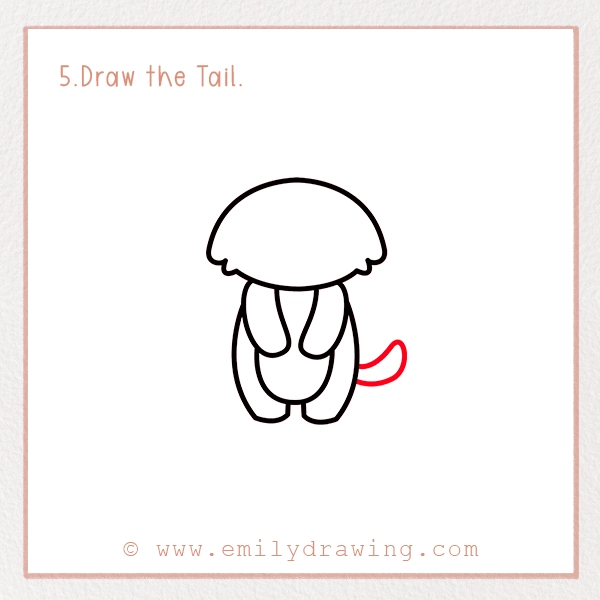
Draw a long, slightly curved tail extending from the lower back. Meerkats use their tails for balance when standing upright! The tail should taper slightly at the end and curve gently to the side. Adding a bit of fluffiness to the tail can make it look more natural and lifelike. Try to make the tail’s curve dynamic, so it gives the illusion of movement.
Step 6 – Sketch the Ears
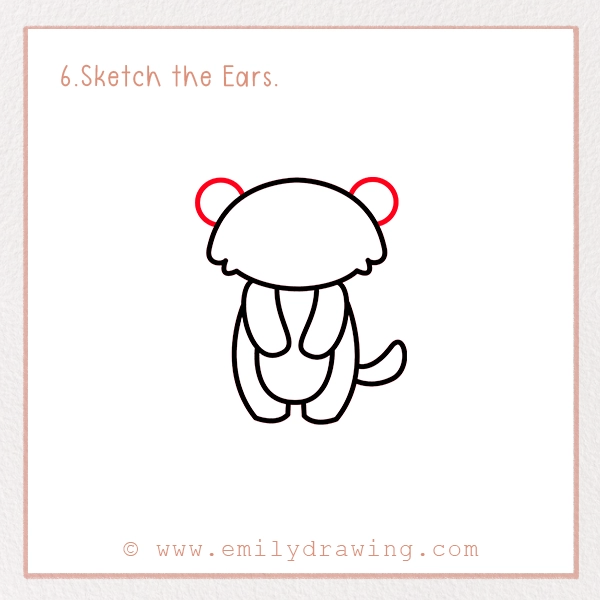
Add two small, rounded ears on top of the head. Meerkats have excellent hearing, which helps them detect predators—similar to their desert cousin, as shown in our how to draw a fennec fox guide. The ears should be slightly curved at the edges to give them a soft and fluffy look. You can place the ears symmetrically on both sides of the head, ensuring they are evenly sized to maintain balance in your drawing.
Step 7 – Add Details to the Legs, Ears, and Tail
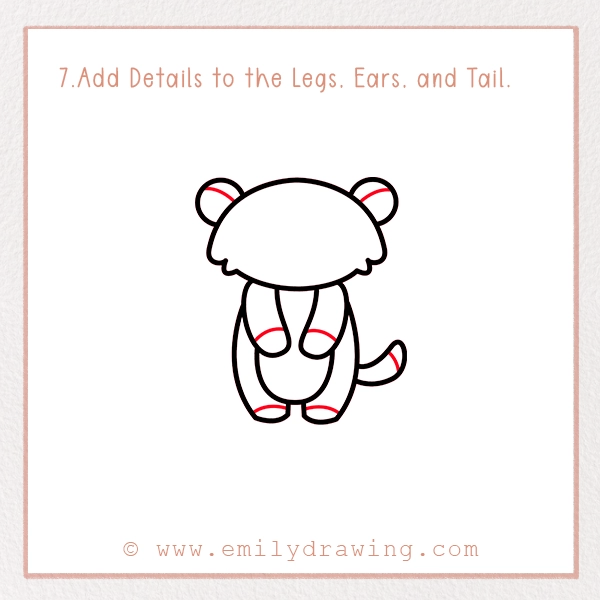
Now, refine the details of the legs, ears, and tail. Draw small ovals on the front and hind legs to show the meerkat’s fingers and toes. Add a few curved lines on the ears to show their inner structure. Enhance the tail by adding some slight fur texture. Adding these details will give your meerkat a more realistic and polished look.
Step 8 – Draw the Eyes, Nose, Mouth, and Add Details to the Face

Now, give your meerkat a cute face! Draw two large, oval-shaped eyes with dark circles around them—just like a real meerkat. Add a tiny triangular nose and a small curved line for a smiling mouth. Meerkats have distinctive markings around their eyes that help reduce glare from the sun, so don’t forget to darken the areas around their eyes. You can also add small whiskers and slight shading to enhance the meerkat’s expression and bring it to life.
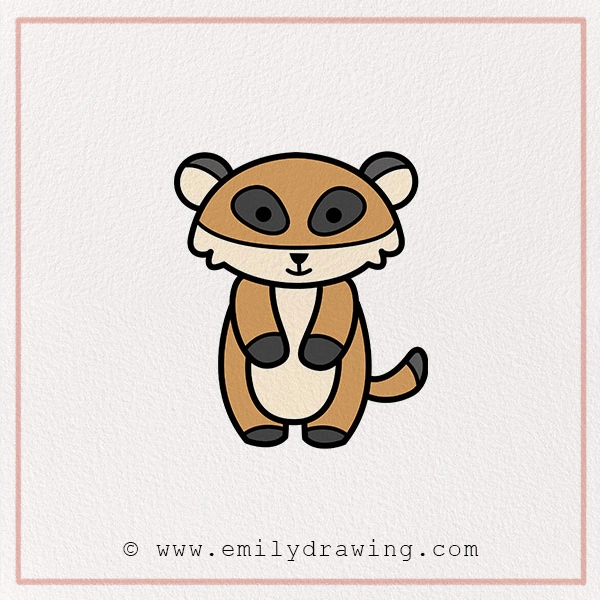
Step 9 – Color Your Drawing!
The final step is to bring your meerkat to life with colors! Use shades of light brown for the fur, dark brown for the markings around the eyes, and a lighter cream shade for the belly. Don’t forget to color in the nose and paws with a darker tone. You can also add shading to give your drawing more depth and realism. Try using colored pencils or markers to blend shades and create a textured fur effect for your cartoon meerkat.
Pin it now, Draw later!
Fun Facts About Meerkats
- Meerkats live in underground burrows with their families called mobs or clans.
- They take turns being the “lookout,” standing on their hind legs to watch for danger.
- A meerkat’s diet includes insects, small reptiles, and even scorpions without getting hurt!
- Meerkats have excellent teamwork skills and communicate using different sounds.
- They are immune to certain venomous bites, making them fearless hunters in the wild.
Tips and Tricks for Better Drawing
- Use light pencil strokes first so you can easily erase mistakes.
- Start with basic shapes before adding details.
- If you struggle with symmetry, fold your paper in half to compare both sides of your drawing.
- Try using different shades of brown and black to make your meerkat look more realistic.
- Experiment with expressions to give your meerkat different moods—happy, curious, or even sleepy!
- Practice drawing meerkats in different poses, such as standing, sitting, or lying down.
- Observe real meerkat photos or videos to get a better understanding of their body structure and movements.
- Use a fine-tipped pen or darker pencil to outline your drawing after you have finished sketching to make it stand out.
Common Mistakes and How to Fix Them
Uneven Proportions – If the head is too big or the body too small, lightly erase and adjust the shapes before finishing your drawing.
Wobbly Lines – Draw slowly and carefully to ensure smooth, controlled lines. Using a guiding sketch can help.
Unnatural Poses – Meerkats have a relaxed but alert stance. If your drawing looks stiff, try loosening your strokes and adjusting limb positions.
Lack of Detail – Small details like fur texture, toe markings, and facial expressions add life to your drawing. Don’t skip them!
Great job! You’ve just learned how to draw an adorable meerkat. If you enjoyed this, you’ll also love our guide on how to draw a rabbit—another delightful animal to add to your sketchbook. Keep practicing, and don’t be afraid to get creative with different poses and expressions. If you enjoyed this tutorial, share your drawing on social media with #EmilyDrawing and check out more of our fun drawing guides!
Drawing is a wonderful skill that improves with practice. Keep a sketchbook and try drawing other animals too! The more you draw, the better you’ll become. We hope you had fun following this meerkat art tutorial and learning how to draw a meerkat.
Get the FREE Printable Drawing Guide