Drawing is a fantastic way to express creativity, and this easy hen drawing guide makes it fun and simple! Whether you love farm animals or just enjoy doodling, this guide will help you create your very own hen step by step—and you can also follow our guide on how to draw a cow for even more barnyard fun.
Why Draw a Hen?
Hens are among the most recognizable farm animals, loved for their gentle nature and amusing behavior—similar to cows, which you can learn to draw in our cow drawing tutorial. Drawing a hen is not only a great way to practice simple shapes but also an opportunity to learn more about these fascinating creatures.
Did you know that hens are highly social animals? They form strong bonds with each other and even have a hierarchy known as the “pecking order,” a trait shared with other birds like ducks—learn how to draw a duck to expand your bird drawing skills. That means some hens are leaders, while others follow their guidance.
Now that we know a bit about hens, Let’s begin this step-by-step hen drawing!
Materials:
- a piece of paper
- a pencil for the guiding lines and sketching
- an eraser
- a black sharpie or a pen for the outlines
- markers or colored pencils for coloring
- our printable drawing guide (Join my Email List below to get this Tutorial)
Here are my RECOMMENDED Art Supplies!
- Crayola Coloring Set (140 Pieces – Mega Value!)
- 24 Colored Crayon Set
- A4 Printer Paper
- Crayola Coloring Pencils
- HP Home Printer with Instant Ink!
Time needed:
15 minutes.
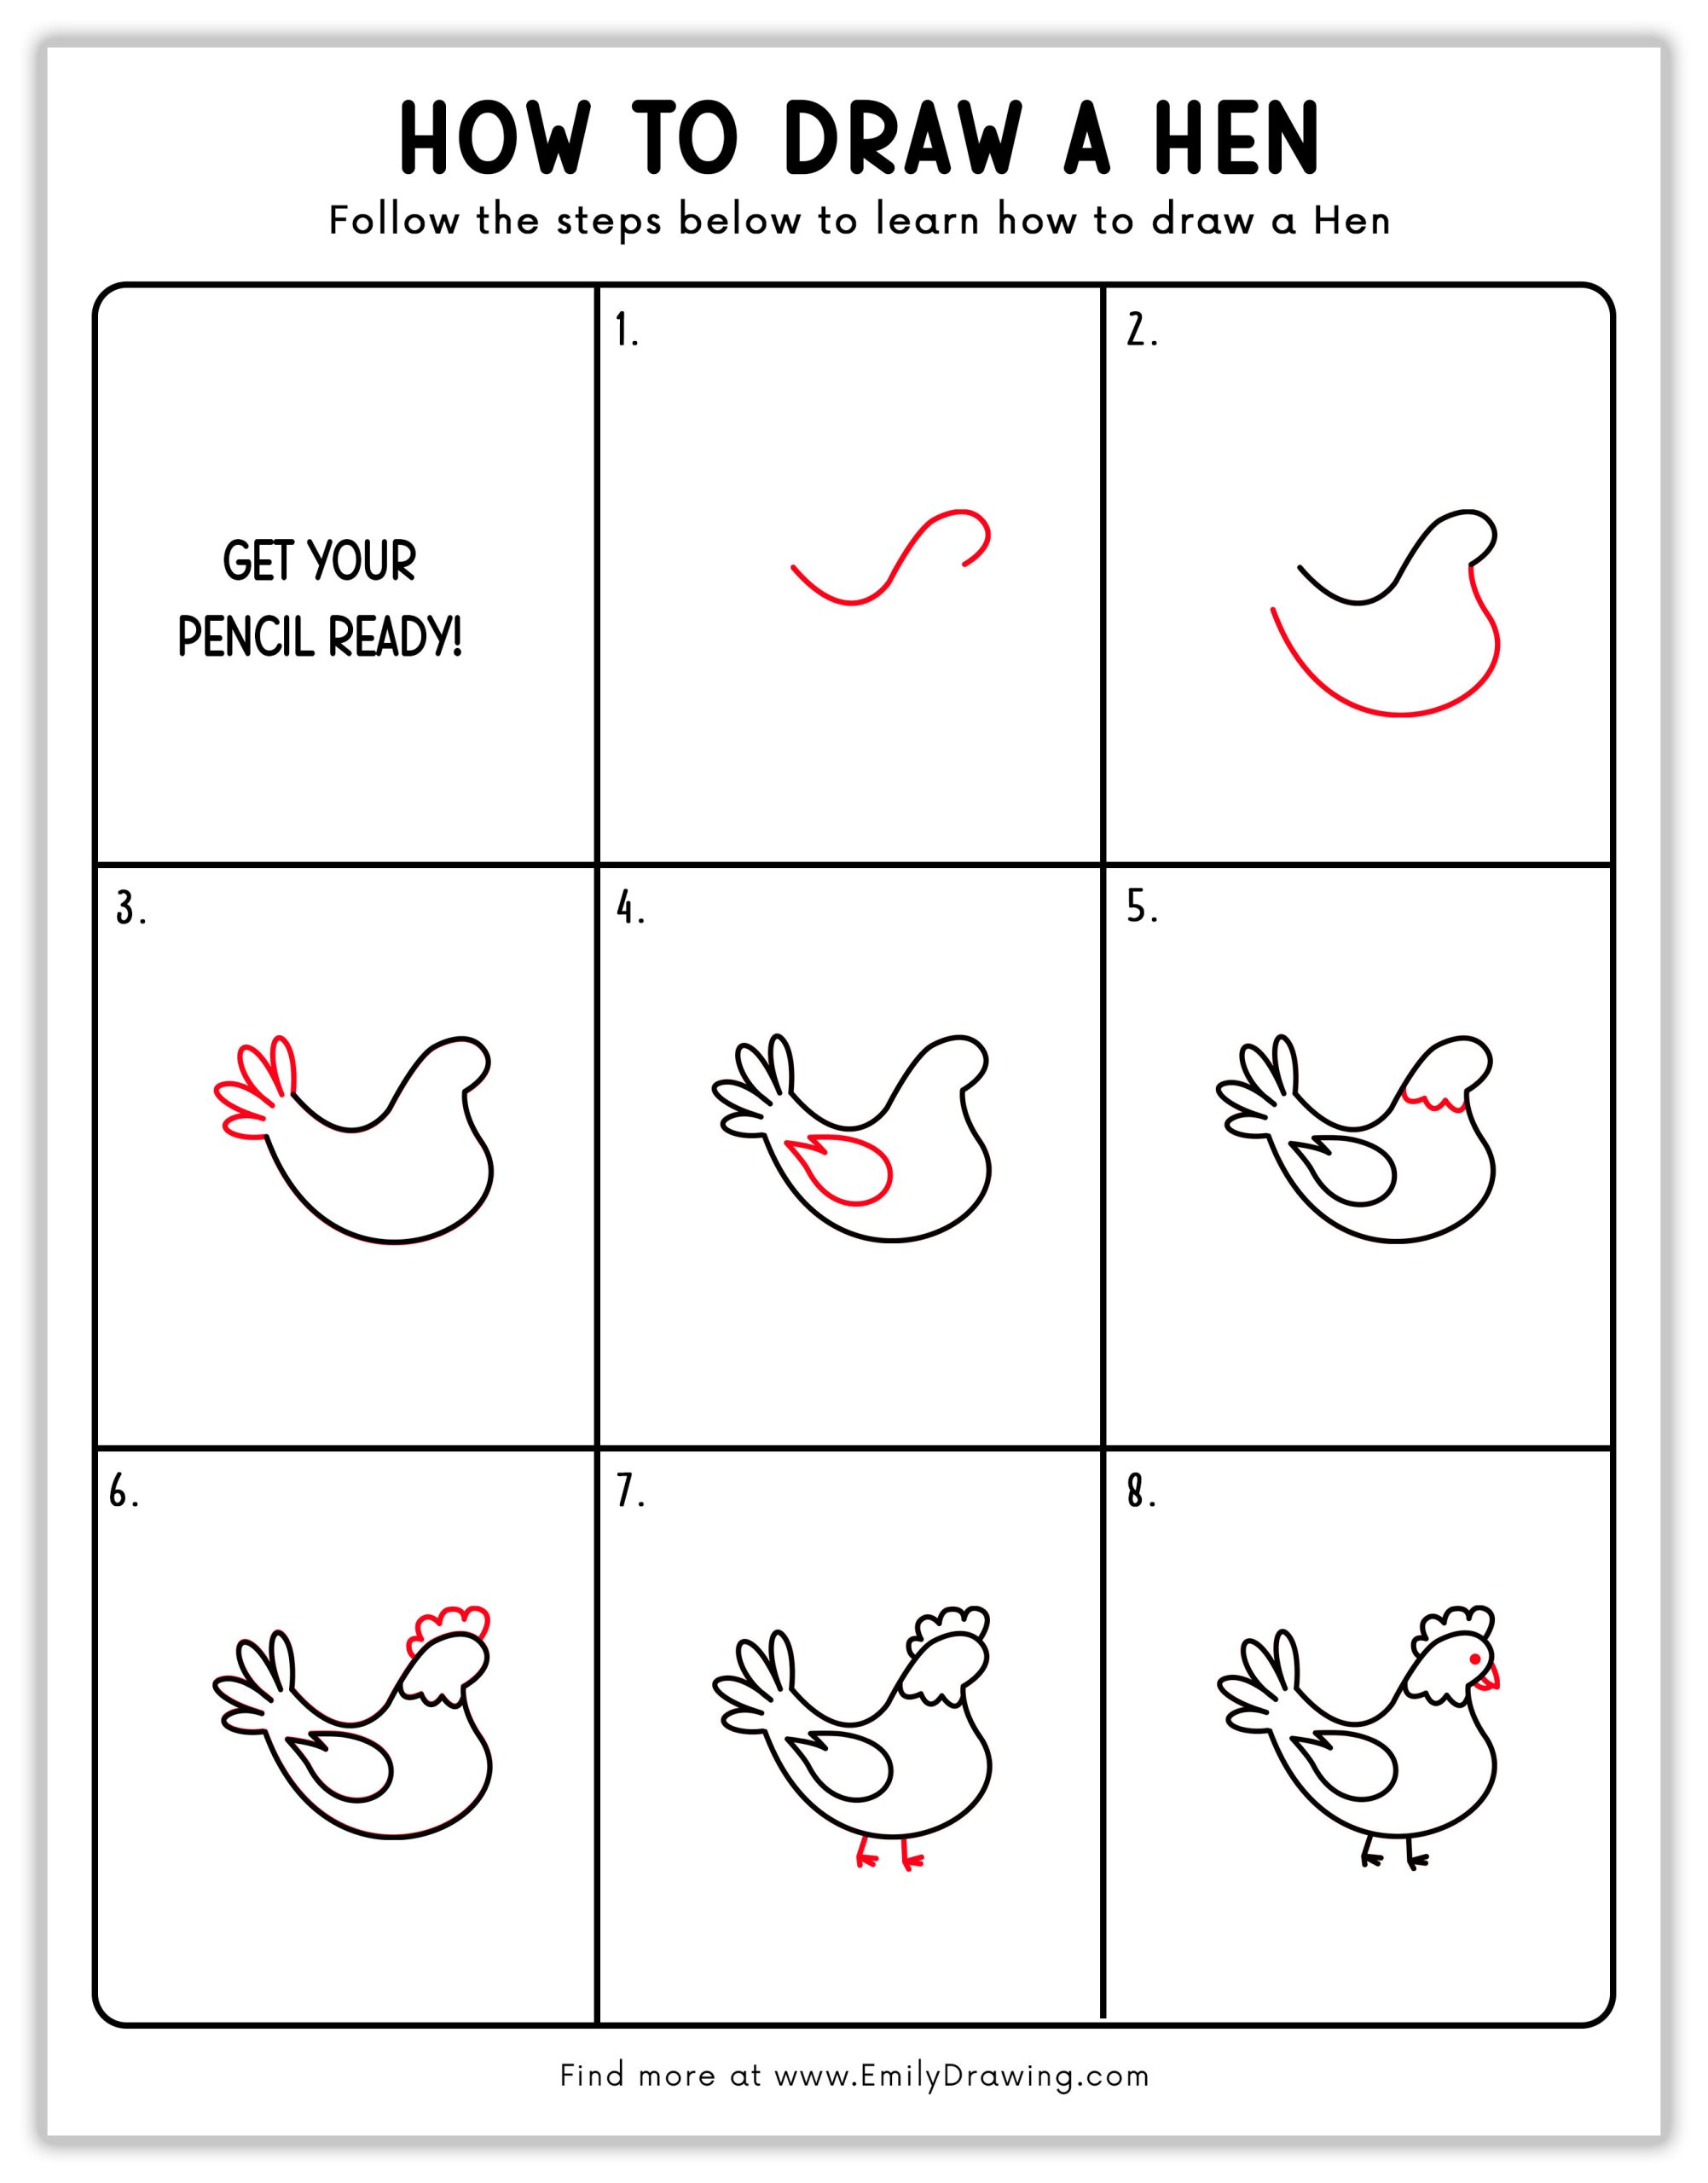
How to Draw a Hen — Let’s get started!
Step 1 – Start with the Head
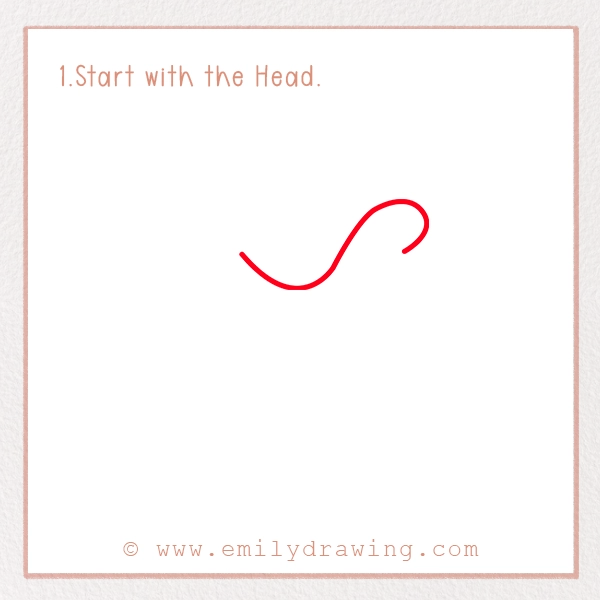
Begin by drawing a small, curved line that looks like an ‘S’ on its side. This will form the top of the hen’s head and neck. Make sure the curve is soft and not too sharp.
Step 2 – Draw the Body
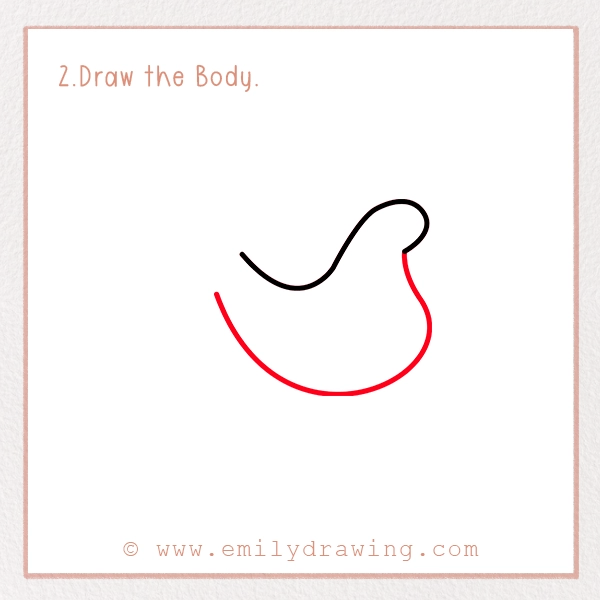
Extend the line downward, curving it into a round shape to form the hen’s plump body. Connect it back up to the head to complete the outline. Hens have round, soft bodies, so avoid making the lines too straight or angular.
Step 3 – Add the Tail Feathers
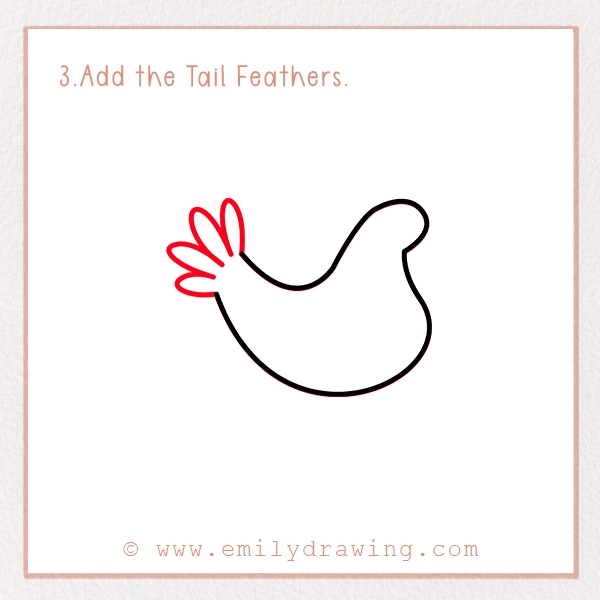
At the back of the hen’s body, draw a few pointed shapes sticking out like a fan. These will be the tail feathers! You can make them short and fluffy or long and elegant, depending on the style you want.
Step 4 – Sketch the Wing
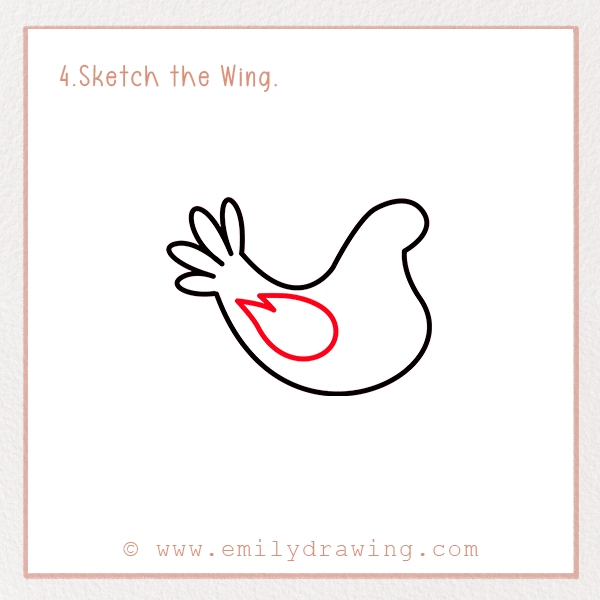
Draw a small oval or curved shape inside the body to form the wing. Make it slightly pointed at the top to give it a natural look. Feathers on the wing can be drawn with simple curved lines.
Step 5 – Draw the Wattle and Comb
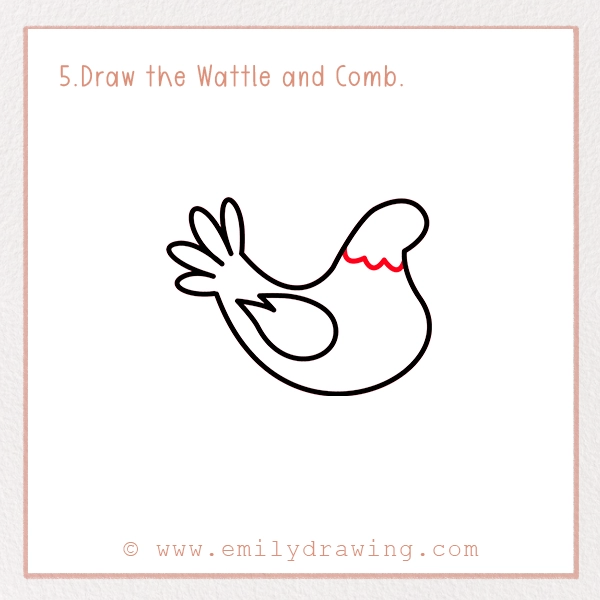
A hen’s comb is the bumpy part on its head, and the wattle hangs below its beak. Draw small, curved bumps on the top of the head and below the chin. These features give your hen its signature look!
Step 6 – Add More Details
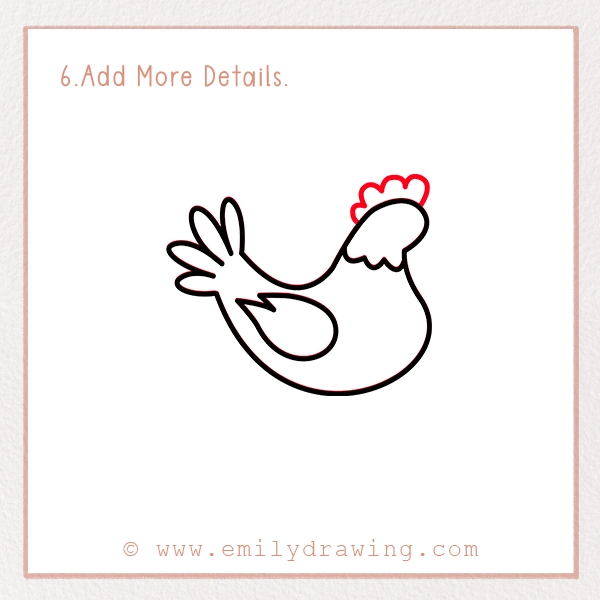
To make the hen look more realistic, add small feather details to the wings and tail. You can use tiny curved lines for texture. This step will make your hen appear more detailed and lifelike.
Step 7 – Draw the Legs and Feet
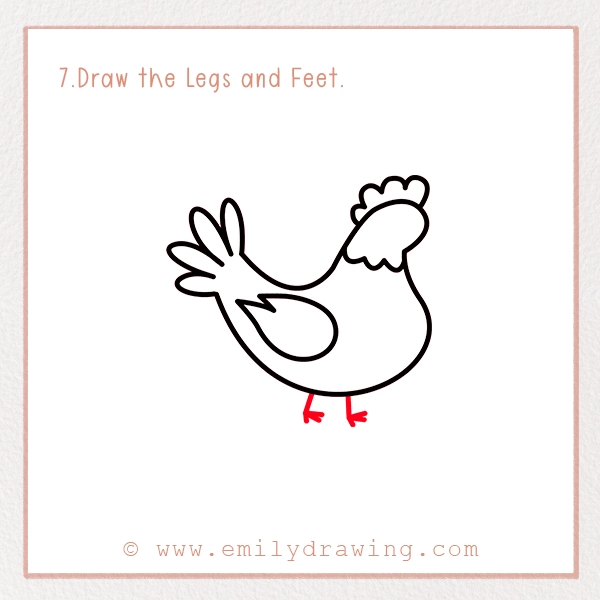
Hens have thin, sturdy legs with three toes in the front and one in the back. Draw two short lines under the body, each splitting into toes with little claws. The feet should be slightly curved to show movement.
Step 8 – Add the Eye and Beak
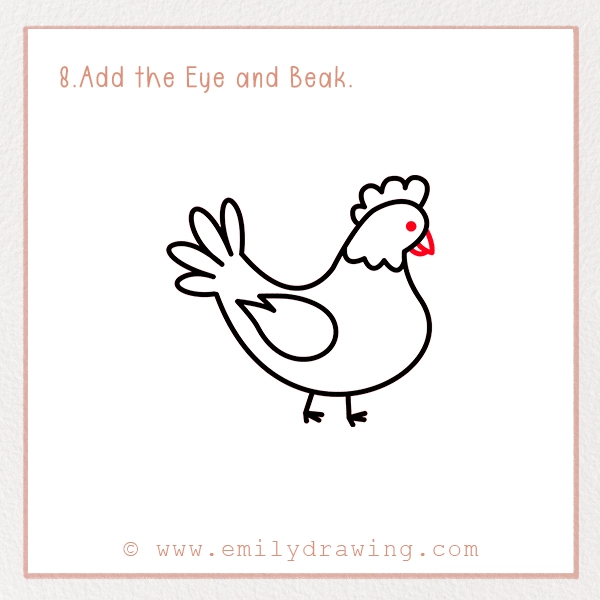
Draw a small dot for the eye and a tiny triangle for the beak. A smiling beak makes your hen look extra friendly! You can also add a small white highlight in the eye to make it look lively.
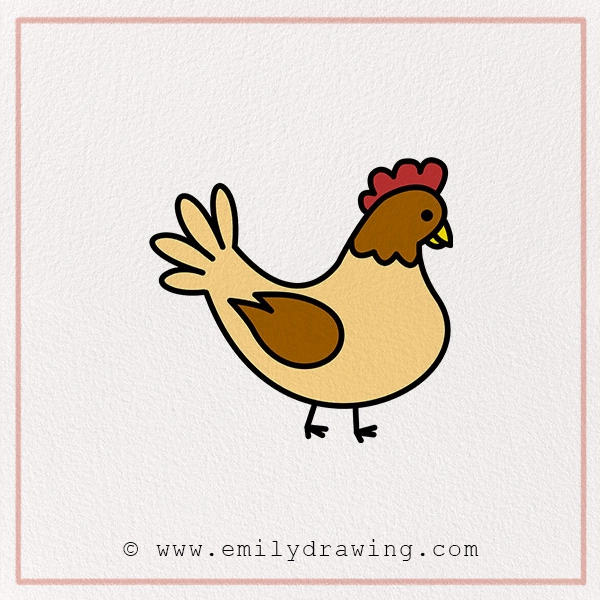
Step 9 – Color Your Drawing!
Now it’s time to bring your hen to life with colors! Use red for the comb and wattle, yellow for the beak and legs, and a mix of brown, white, or even speckled patterns for the feathers.
For extra creativity, try coloring your hen in fun, unexpected colors like brown or buttery yellow!
Fun Facts About Hens
- Hens have been human companions for over 5,000 years!
- They can remember over 100 different faces, both human and animal.
- Hens talk to their chicks before they even hatch by clucking softly!
- A hen can lay up to 300 eggs per year!
- Some hens love to take dust baths to keep their feathers clean.
Tips and Tricks for Better Drawing - Sketch lightly: Use a soft pencil for the initial lines so you can erase mistakes easily.
- Take your time: Don’t rush — drawing is about having fun!
- Practice different styles: Try drawing a hen in cartoon style or even as a realistic farm animal—then explore how to draw a duck to further build your bird illustration techniques.
- Use reference images: Looking at real hens or other drawings can help improve your proportions.
- Experiment with shading: Adding shadows under the wings and tail can make your drawing look more three-dimensional.
The Role of Hens in Different Cultures
Hens have played important roles in cultures around the world. Here are a few interesting examples:
- China: In Chinese culture, the rooster is a symbol of good luck and honesty.
- Ancient Rome: Romans believed that hens could predict the future based on how they ate their food.
- France: The Gallic rooster is a national symbol of France, representing bravery and vigilance.
Hens are more than just farm animals they’ve been a part of human history for centuries!
How Drawing Can Improve Your Skills
Drawing hens (and other animals) is a great way to develop artistic skills—why not also explore drawing a baby chick to complement your farmyard sketches? Here’s how:
- Improves observation skills: Paying attention to details like feather patterns helps you see things differently.
- Boosts creativity: You can experiment with colors and styles to make your drawing unique.
- Develops patience: The more you practice, the better you get!
- Enhances hand-eye coordination: Drawing improves fine motor skills and precision.
So, if you love drawing, keep at it! Every drawing you create makes you a better artist.
Common Drawing Mistakes and How to Fix Them
Sometimes, beginner artists make small mistakes while drawing a hen. Here are a few common ones and ways to fix them:
- Body Shape Looks Wrong
If the body looks too long or thin, try making it rounder. Hens are plump birds, so exaggerate the roundness a little. - Uneven Tail Feathers
Make sure the tail feathers are symmetrical. If they look uneven, adjust the length and direction slightly. - Legs Look Too Short or Too Long
If the legs look too short, make them slightly longer and ensure they are positioned toward the center of the body. If they’re too long, shorten them for a balanced look. - Beak Looks Strange
A hen’s beak is small and triangular. If it looks too big, make it smaller and position it near the center of the face. - Eye Placement
The eye should be slightly above the middle of the head. If it’s too low or too high, adjust its position for a natural appearance.
Great job! You’ve just drawn a fantastic hen. Keep practicing, and don’t forget to experiment with different poses and colors. If you enjoyed this tutorial, why not try drawing other farm animals too, such as following our step-by-step guide on how to draw a baby chick?
We’d love to see your creations—share your drawing on social media with #EmilyDrawing!
Get the FREE Printable Drawing Guide