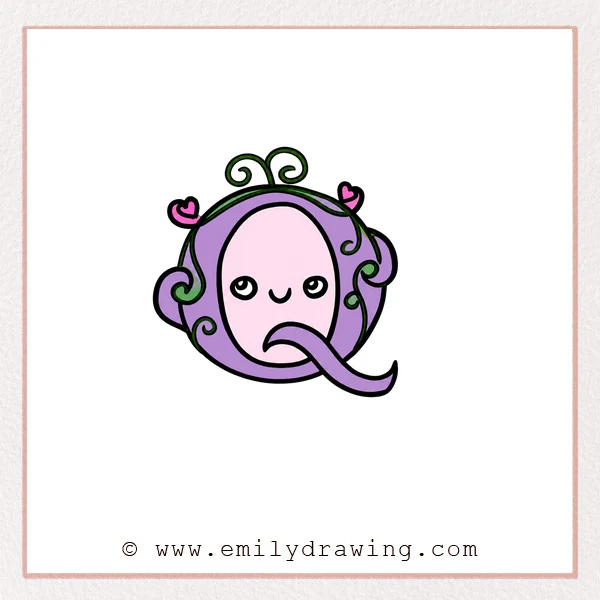
Learn how to draw fancy letter Q with an ornate oval, bright face, and sweeping tail. This easy drawing tutorial practices nested curves, decorative curls, and smooth ribbon strokes.
What You Will Need
- Drawing paper
- Pencil and eraser
- Black pen or marker
Here are my RECOMMENDED Art Supplies!
- Crayola Coloring Set (140 Pieces – Mega Value!)
- 24 Colored Crayon Set
- A4 Printer Paper
- Crayola Coloring Pencils
- HP Home Printer with Instant Ink!
Time needed:
14 minutes.
Step-by-Step Drawing Guide
Step 1: Draw the Inner Oval
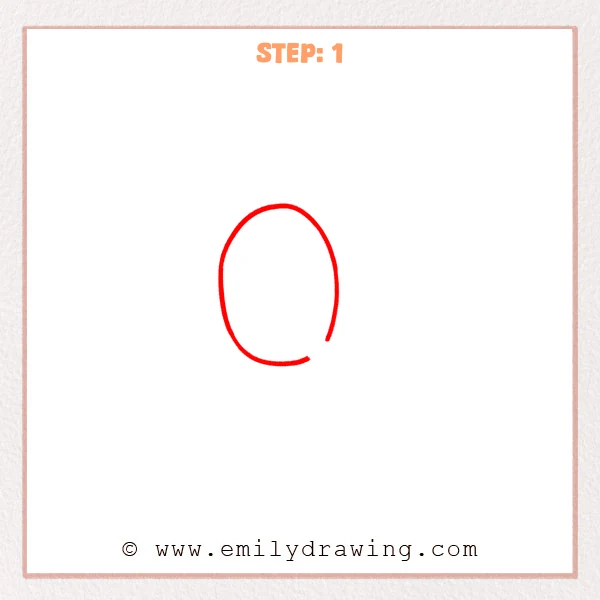
Sketch a tall oval-like curve for the inner opening. Leave a small gap near its lower-right side.
Pro Tip: Make the opening evenly rounded and slightly taller than wide.
Step 2: Add the Outer Border
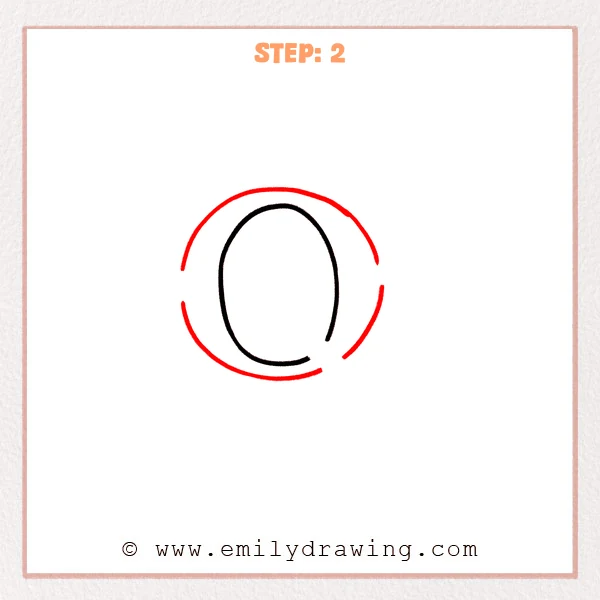
Draw a larger oval around the first curve to create a thick letter. Leave two short openings on the right side of the outer outline.
Pro Tip: Keep the space between both ovals consistent around the letter.
Step 3: Decorate the Top
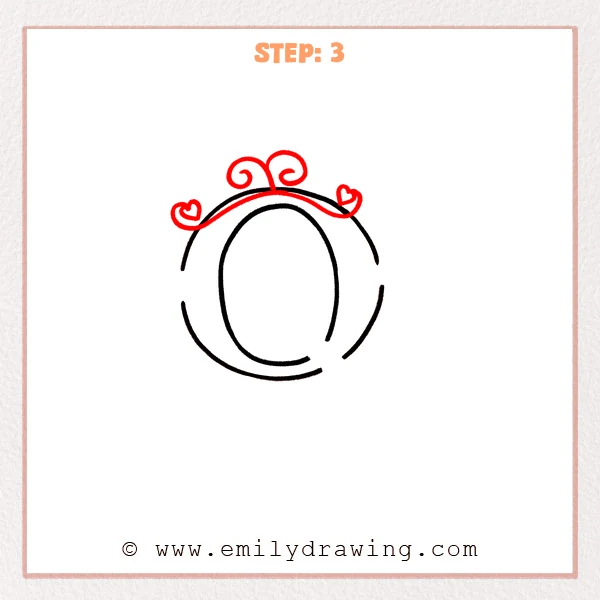
Lay a narrow curved band across the top of the oval. Finish its ends with hearts and add two outward-curling spirals above the center.
Pro Tip: Balance the paired top spirals around the letter’s midpoint.
Step 4: Add Side Flourishes
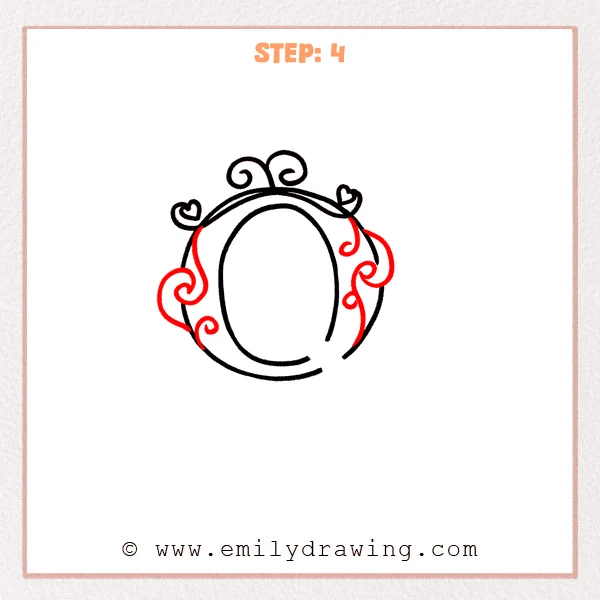
Fill both sides with curling vine shapes that follow the outer oval. Use several inward spirals while keeping the central opening clear.
Pro Tip: Let each flourish follow the oval instead of extending too far outward.
Step 5: Draw the Face
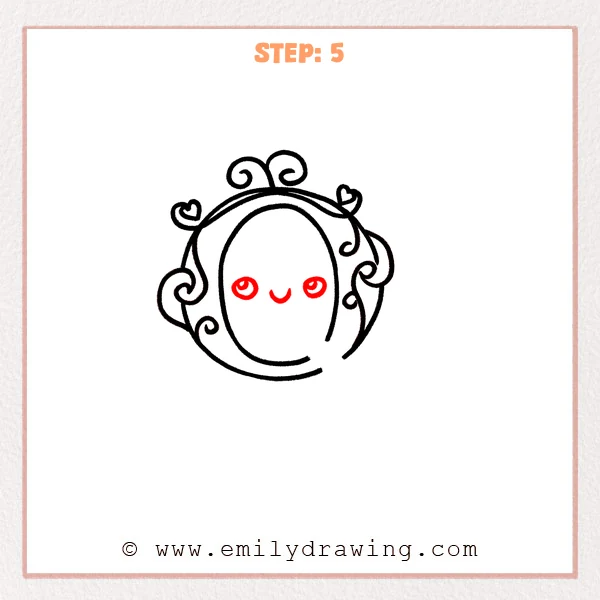
Place two shining round eyes across the middle of the opening. Add a small upward-curving smile centered between them.
Pro Tip: Keep the eyes level and comfortably away from the inner border.
Step 6: Sweep Out the Tail
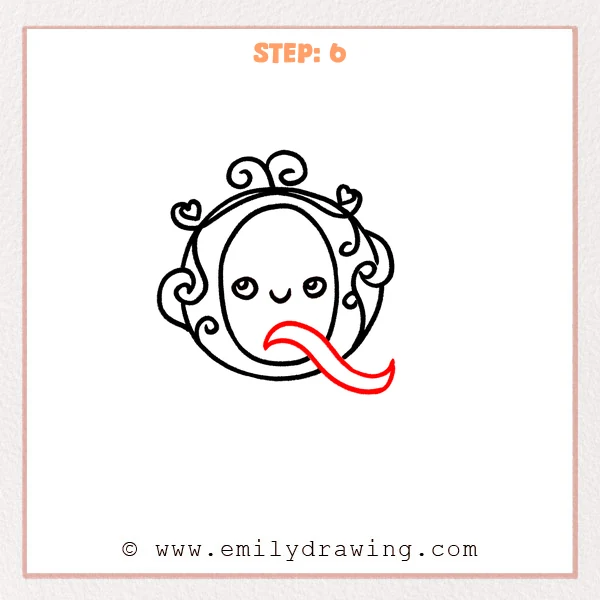
Draw a broad curved tail from the lower inner opening toward the right. Add a parallel lower edge and lift both ends into pointed tips.
Pro Tip: Make the tail long enough to identify the letter clearly as Q.
Step 7: Color in your drawing!
Fun Facts
- Uppercase Q shares its round body with O but adds a distinctive tail.
- Nested ovals give outlined lettering a bold, dimensional appearance.
- Repeated hearts and spirals unify the ornamental border.
Pin it now, Draw later!
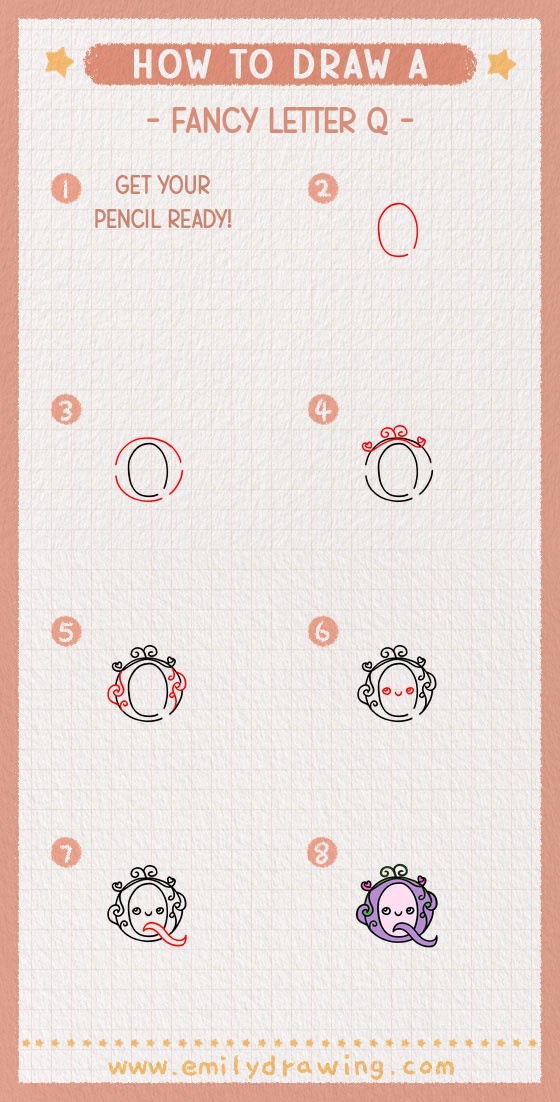
Clean the overlaps and smooth the oval, curls, face, and flowing tail. Your step by step fancy letter Q drawing is complete, so try filling its broad border with lively colors.
Get the FREE Printable Drawing Guide
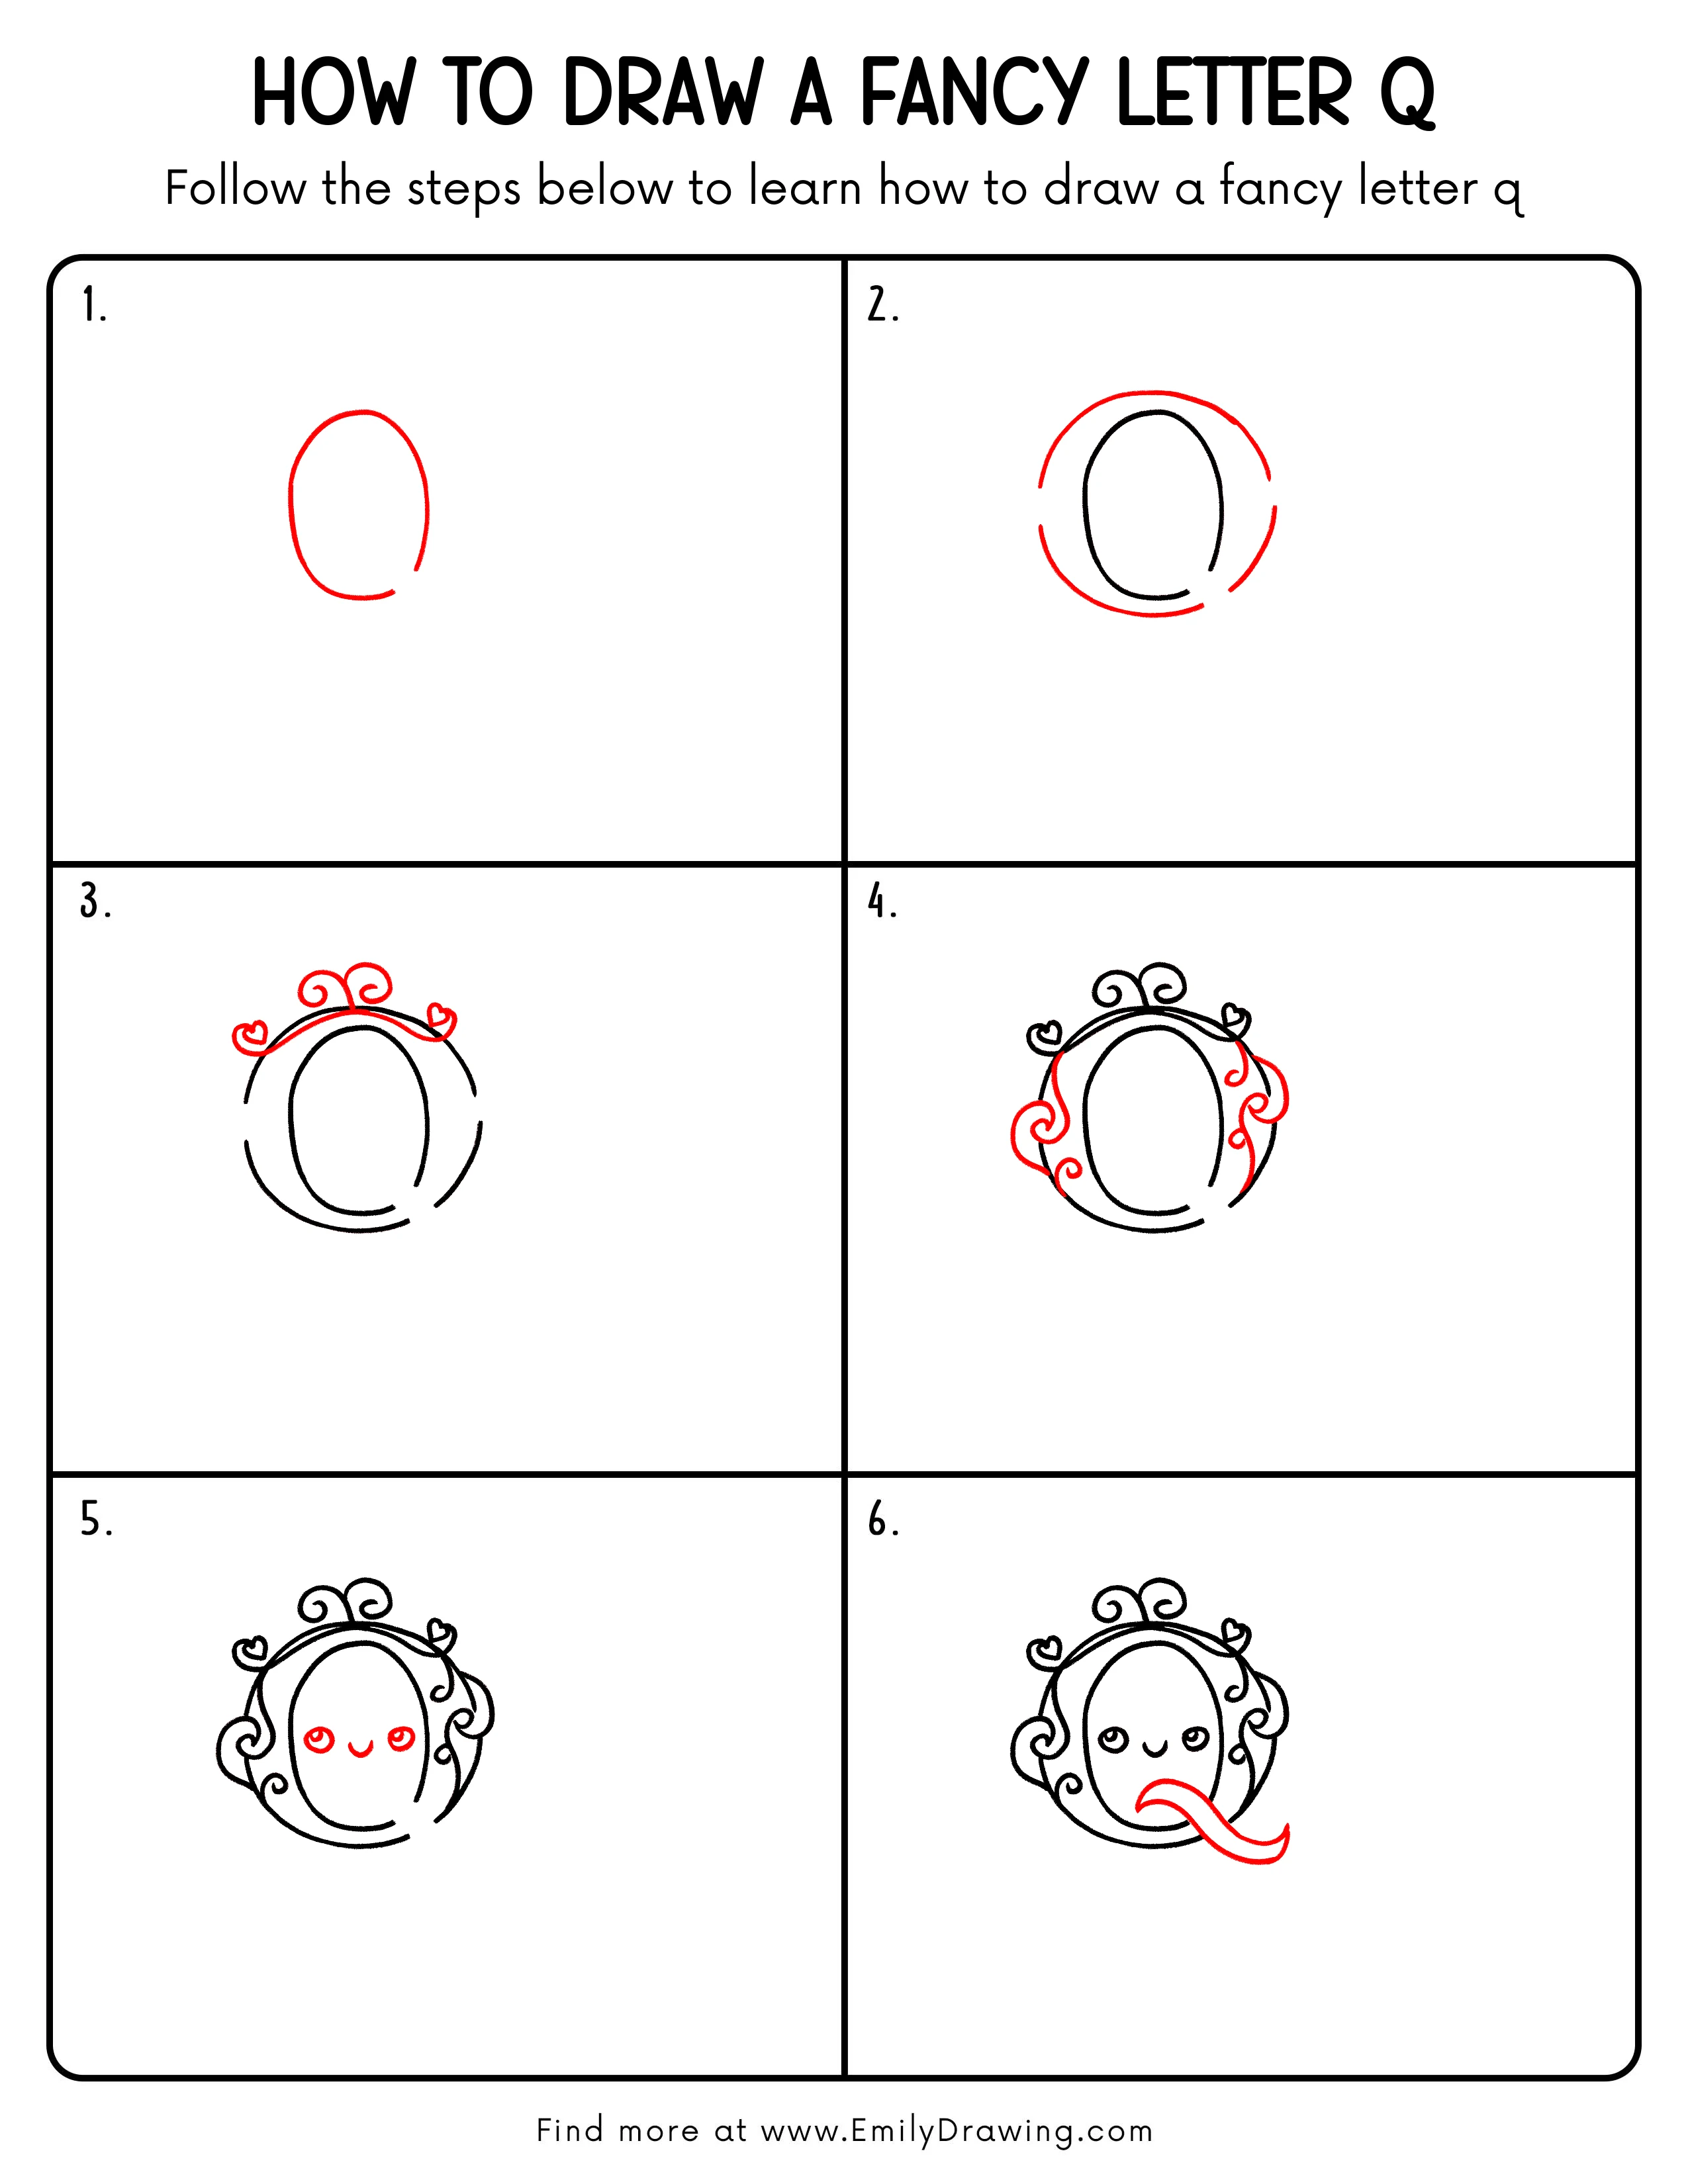
FREE Download Printable Fancy Letter Q Drawing Tutorial
Frequently Asked Questions
How do I make the Q different from an O?
Emphasize the long tail crossing out from the lower-right area.
Can I simplify the top decoration?
Yes, replace the hearts and spirals with one small curved flourish.
How can I keep the nested ovals even?
Mark matching guide points around both shapes before completing the curves.