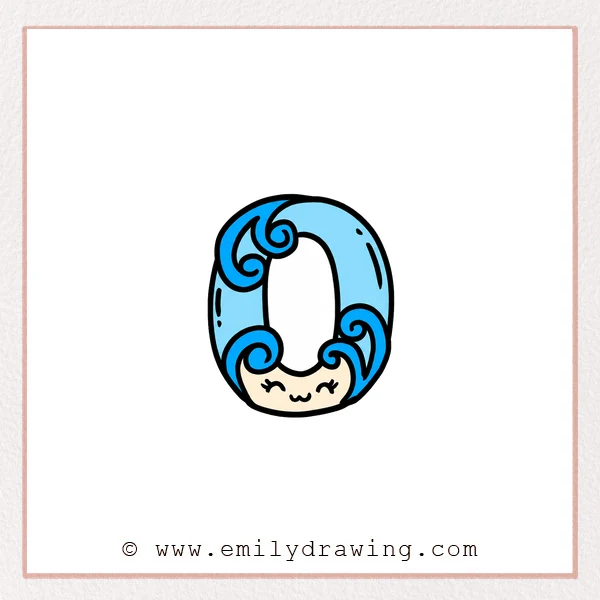
Learn how to draw fancy letter O with an oval frame, curling ornaments, and a sweet face. This step by step drawing practices smooth curves, open spacing, and decorative details.
What You Will Need
- Drawing paper
- Pencil and eraser
- Black pen or marker
Here are my RECOMMENDED Art Supplies!
- Crayola Coloring Set (140 Pieces – Mega Value!)
- 24 Colored Crayon Set
- A4 Printer Paper
- Crayola Coloring Pencils
- HP Home Printer with Instant Ink!
Time needed:
20 minutes.
Step-by-Step Drawing Guide
Step 1: Set the Main Curves
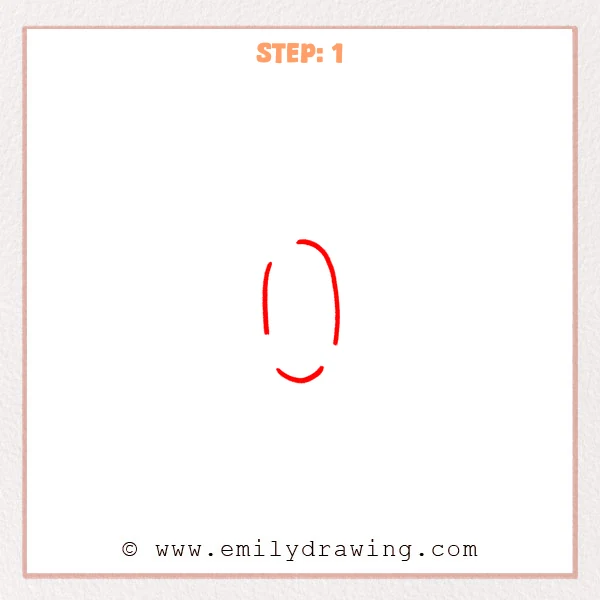
Draw a tall outer curve down the right side. Add a shorter inner curve on the left and a small upward arc near the bottom.
Pro Tip: Leave generous gaps between these first three guide-like sections.
Step 2: Decorate the Upper Left
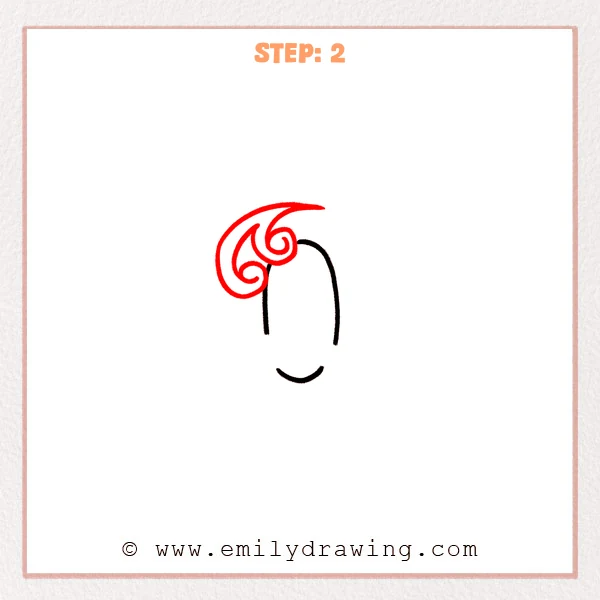
Build a large leaf-like flourish around the top-left opening. Fill it with two inward spirals connected by smooth sweeping lines.
Pro Tip: Keep the smaller spiral tucked beneath the larger one.
Step 3: Complete the Outer Oval
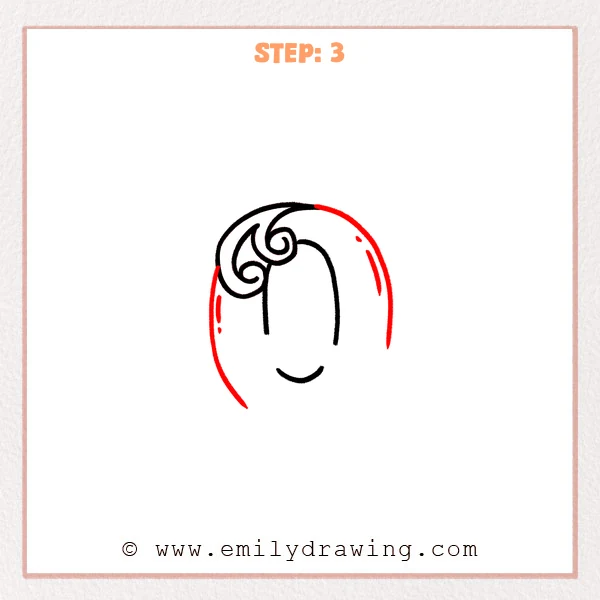
Extend the outer curve across the top and down the left side. Add short curved highlights inside both sides of the thick oval border.
Pro Tip: Check that the oval remains widest through its middle.
Step 4: Add the Lower Left Curl
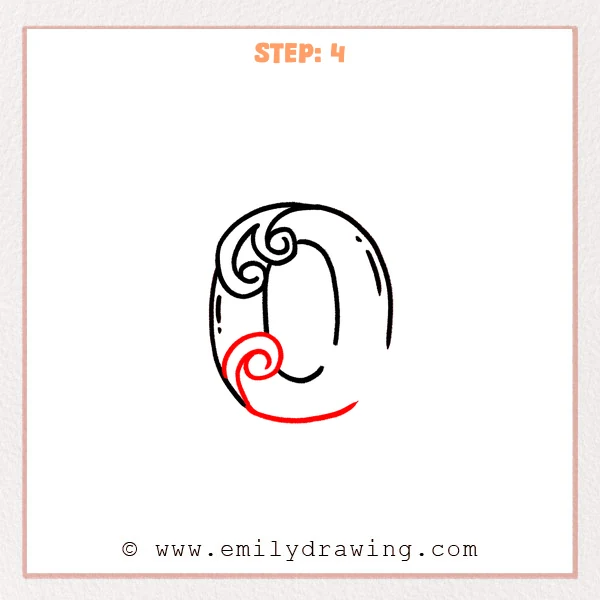
Start a broad spiral inside the lower-left corner. Sweep its outer line across the bottom to continue the letter’s rounded frame.
Pro Tip: Let the new spiral nest below the upper decoration without touching it.
Step 5: Fill the Lower Right
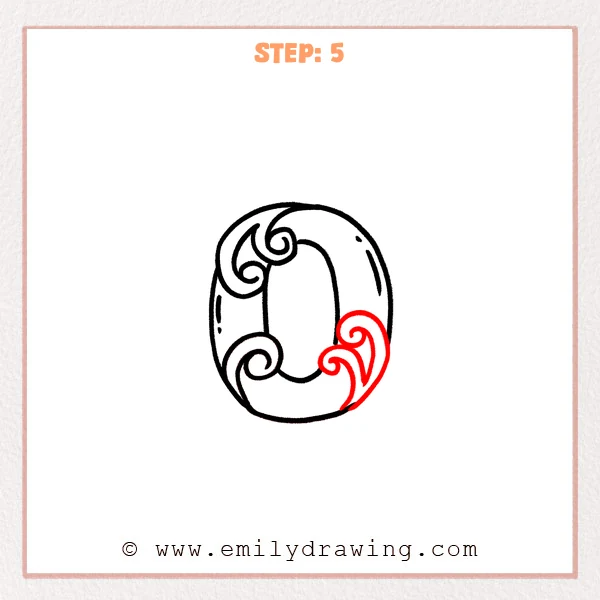
Draw two connected curling leaves in the lower-right corner. Join their outer edges to the side and bottom border of the O.
Pro Tip: Vary the curl sizes so both shapes remain easy to distinguish.
Step 6: Draw the Cute Face
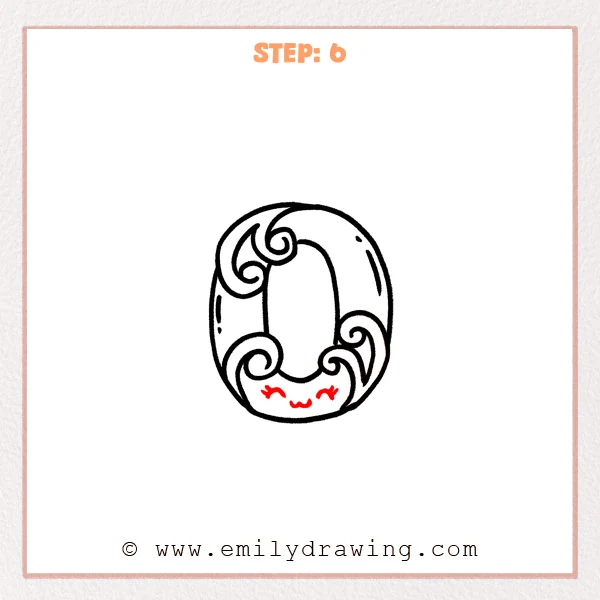
Add two closed curved eyes with tiny lashes near the bottom center. Place a small w-shaped smile between them.
Pro Tip: Keep the face low so the central opening stays spacious.
Step 7: Color in your drawing!
Fun Facts
- The letter O is one of the most naturally symmetrical uppercase letters.
- Spirals echo the circular movement of the main oval.
- Open center space helps ornamental lettering remain easy to recognize.
Pin it now, Draw later!
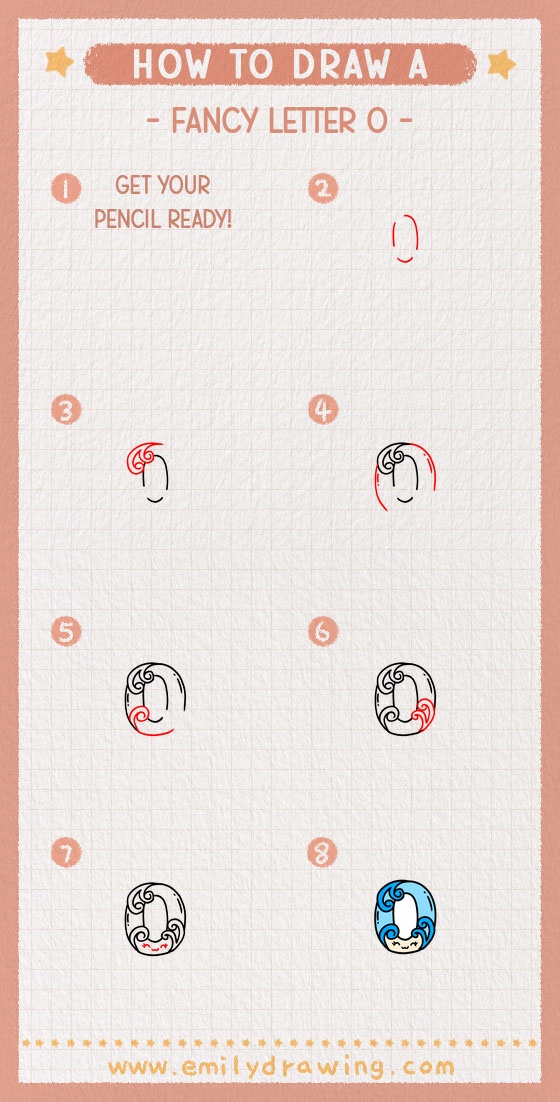
Erase rough marks and smooth the oval border, nested curls, highlights, and face. Your step by step fancy letter O drawing is complete, so add a bright palette or patterned background.
Get the FREE Printable Drawing Guide
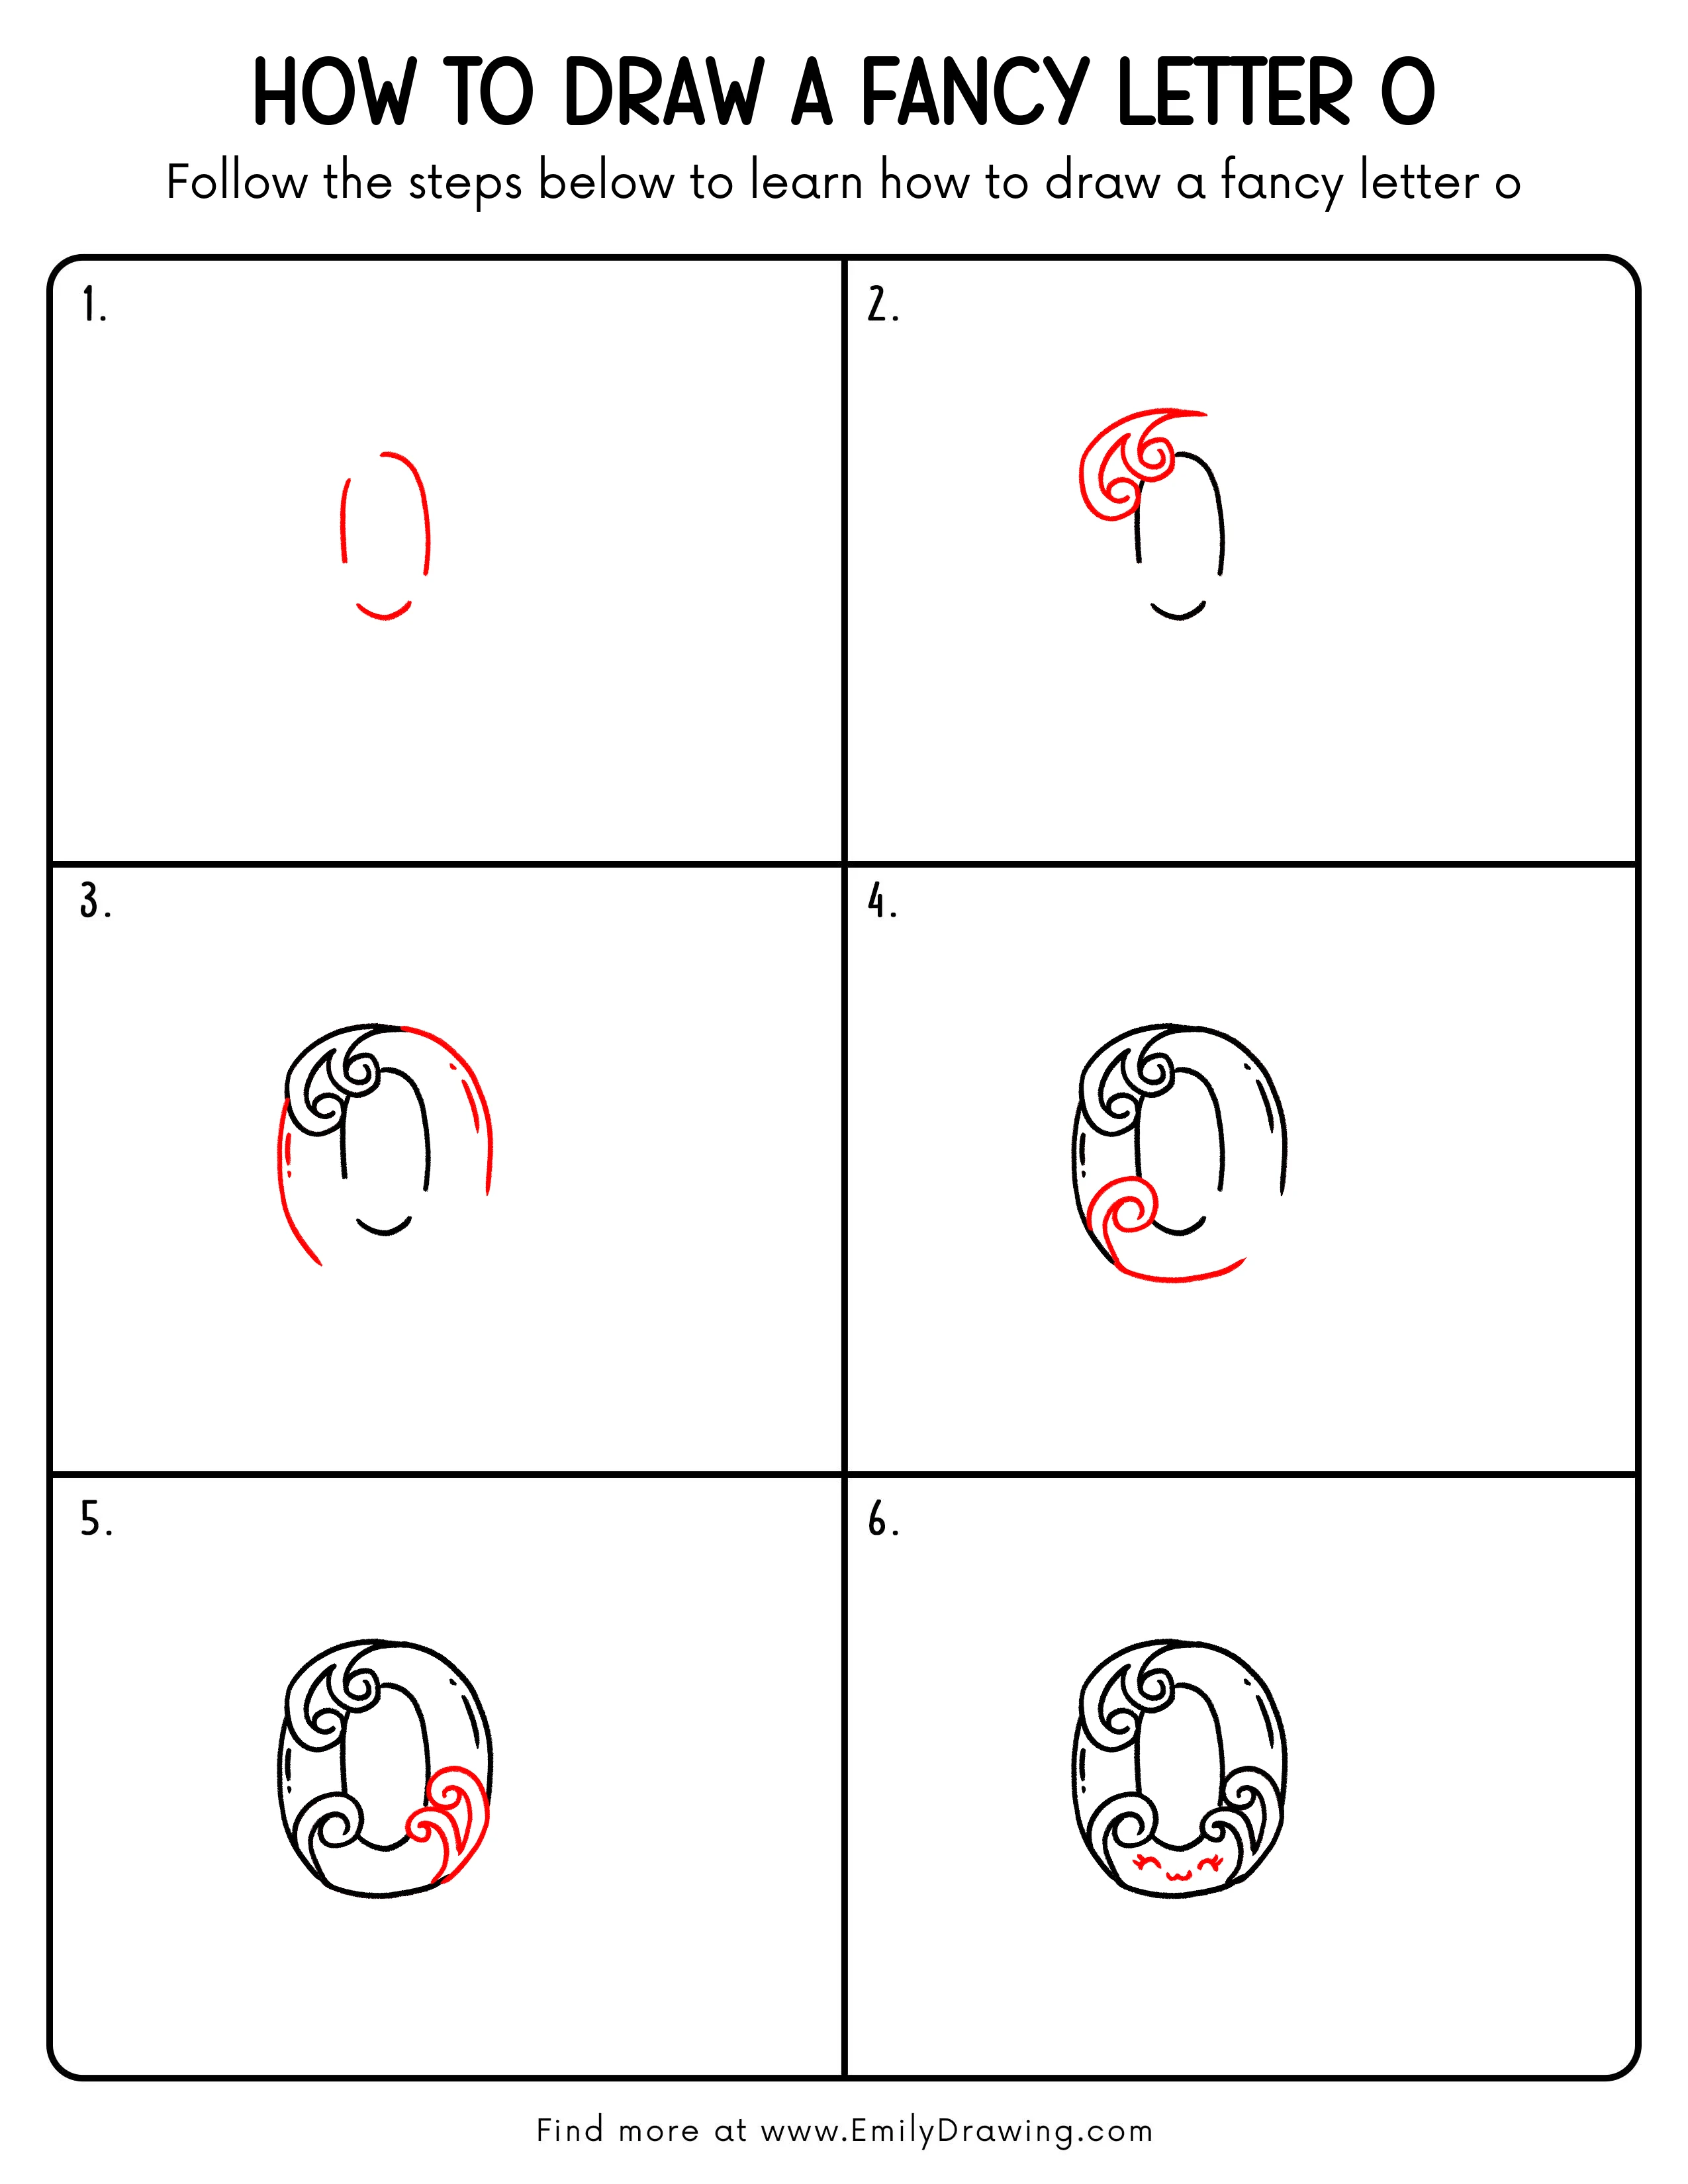
FREE Download Printable Fancy Letter O Drawing Tutorial
Frequently Asked Questions
How can I make the O look even?
Lightly mark its top, bottom, and widest side points before joining them.
Can I simplify the ornaments?
Yes, use one curl in each decorated corner for a cleaner version.
Why should the center stay open?
Clear negative space preserves the letter’s familiar oval shape.