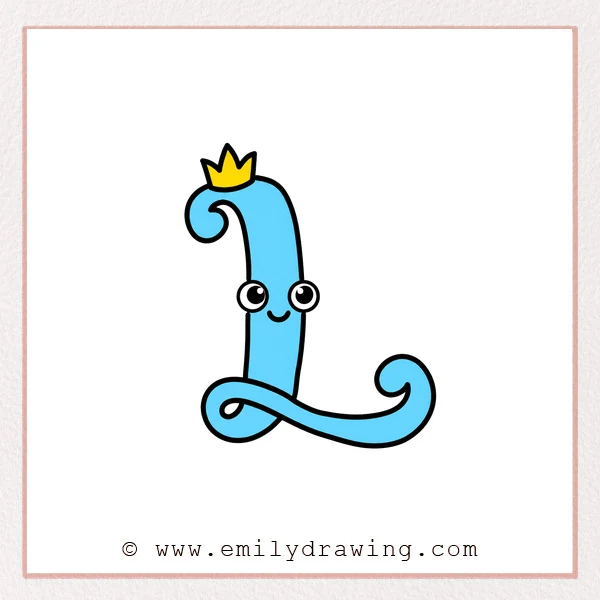
Learn how to draw fancy letter L with royal details, flowing loops, and a happy face. This step by step drawing is a playful way to practice curved decorative lettering.
What You Will Need
- Drawing paper
- Pencil and eraser
- Black pen or marker
Here are my RECOMMENDED Art Supplies!
- Crayola Coloring Set (140 Pieces – Mega Value!)
- 24 Colored Crayon Set
- A4 Printer Paper
- Crayola Coloring Pencils
- HP Home Printer with Instant Ink!
Time needed:
20 minutes.
Step-by-Step Drawing Guide
Step 1: Start the Upper Stem
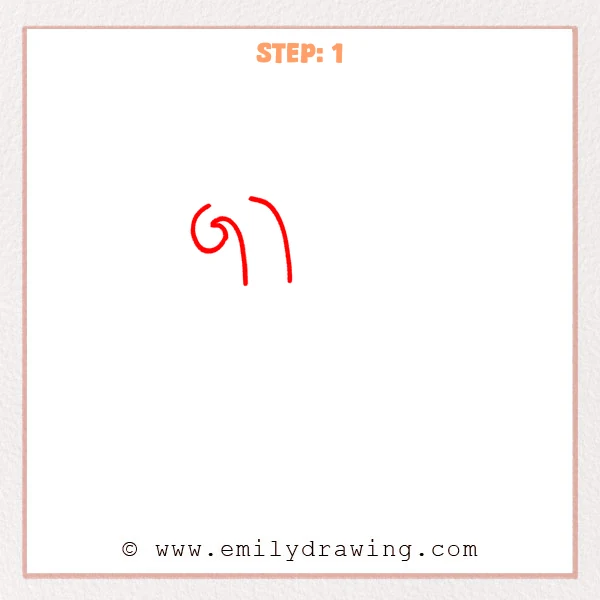
Draw two long downward curves to begin a thick upright stem. Curl the upper left line inward into a loose spiral.
Pro Tip: Keep a steady gap between the two sides of the stem.
Step 2: Add a Crown
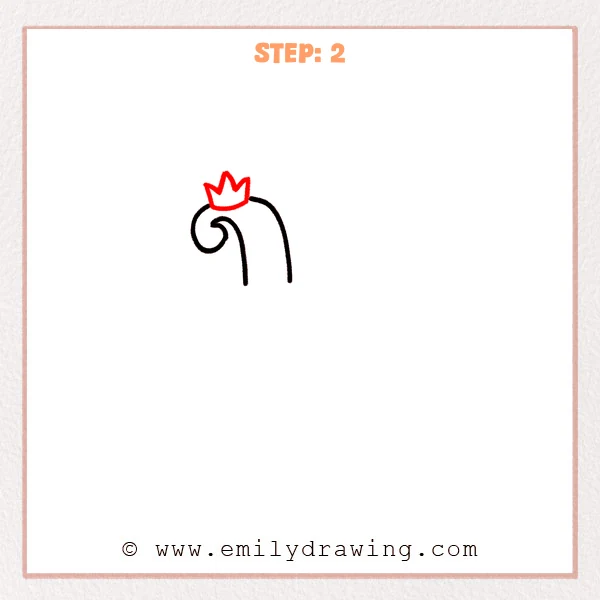
Place a small three-pointed crown across the top curve. Give its base a shallow arc that follows the letter beneath it.
Pro Tip: Center the tallest crown point over the stem.
Step 3: Extend the Lower Stem
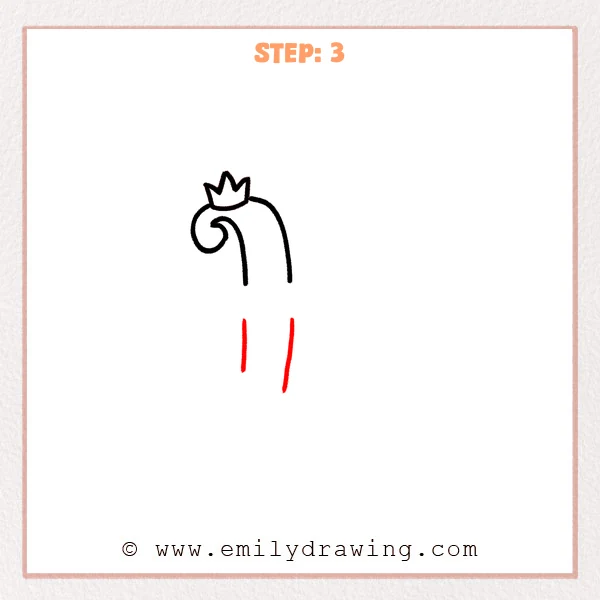
Continue both sides downward with two separated vertical curves. Leave open gaps where the face will appear later.
Pro Tip: Align each lower line with the upper stroke directly above it.
Step 4: Sweep Out the Base
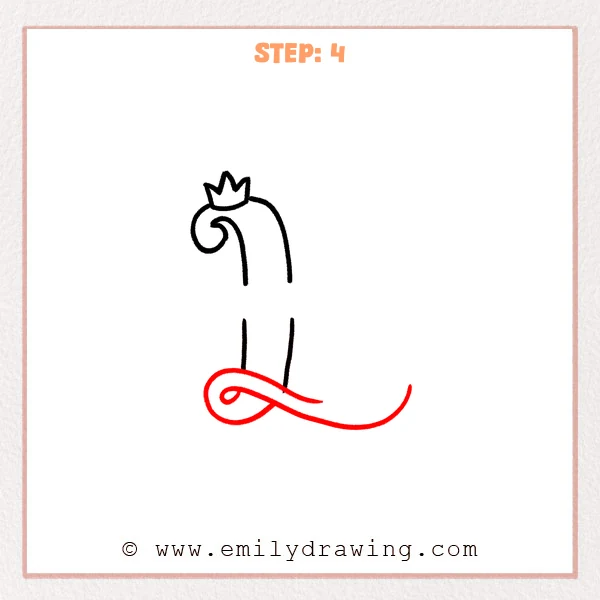
Curve the lower left stroke into a loop, then sweep it far right. Add a second broad curve below it and finish with a lifted tip.
Pro Tip: Use one smooth arm movement for the longest bottom curve.
Step 5: Curl the Final Tip
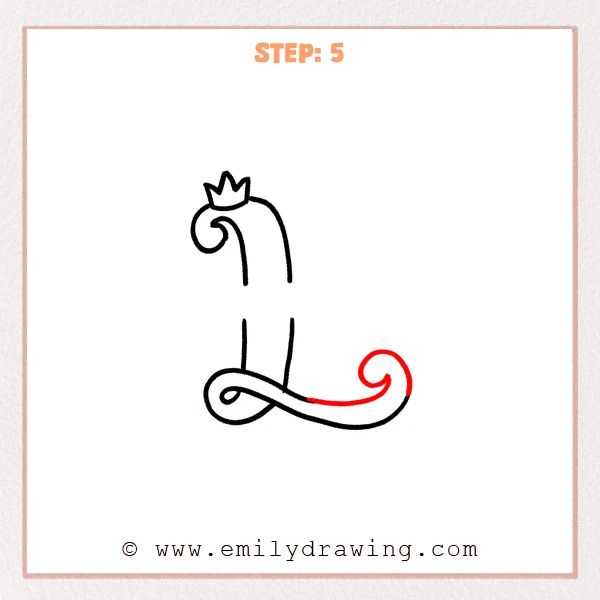
Turn the raised right tip inward to create a rounded spiral. Connect the curl smoothly to the inner line of the base.
Pro Tip: Leave open space inside the spiral to keep it clear.
Step 6: Complete the Face
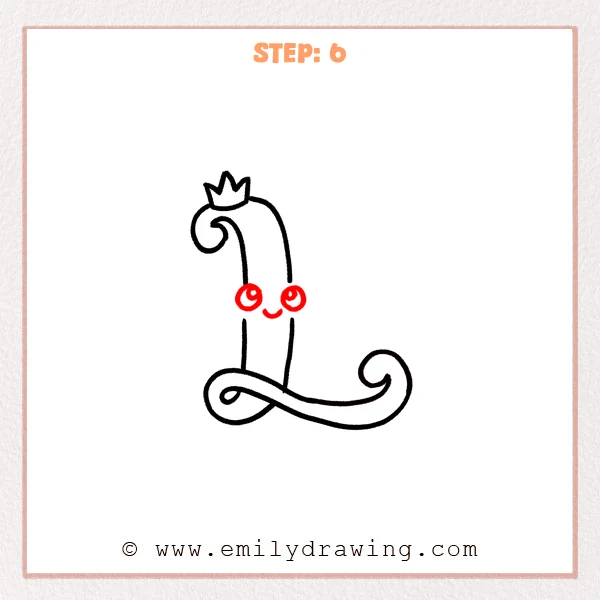
Draw two sparkling round eyes in the open center of the stem. Add a small upward-curving smile between them.
Pro Tip: Keep both eyes similar in size and level with each other.
Step 7: Color in your drawing!
Fun Facts
- The uppercase L is built from one vertical and one horizontal direction.
- A crown can give decorative lettering a playful royal theme.
- Loops and spirals soften the sharp corner of a basic block letter.
Pin it now, Draw later!
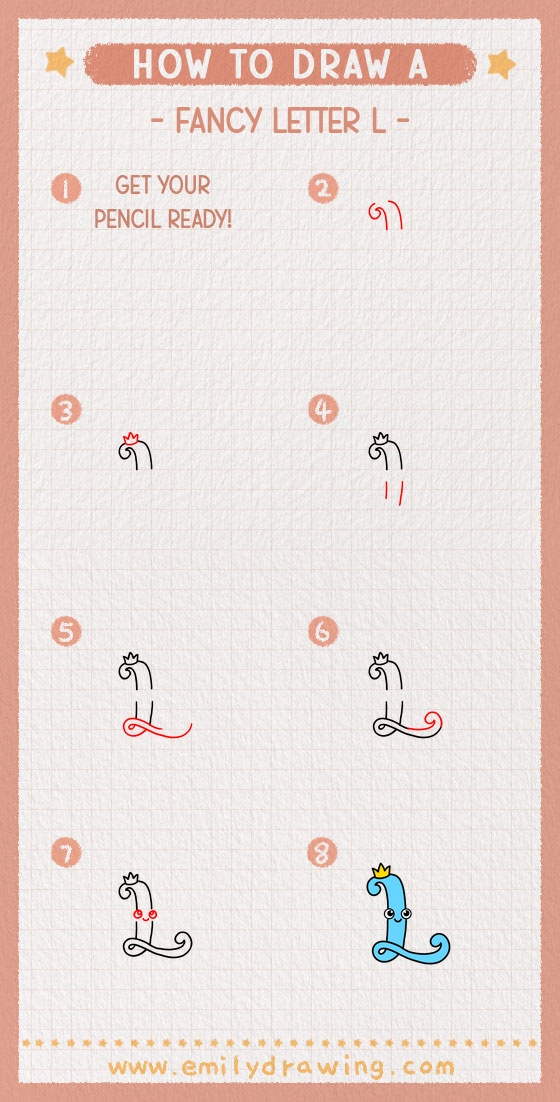
Clean away guides and darken the crown, curls, and smooth parallel outlines. Your step by step fancy letter L drawing is finished, so personalize it with bright colors or tiny jewels.
Get the FREE Printable Drawing Guide
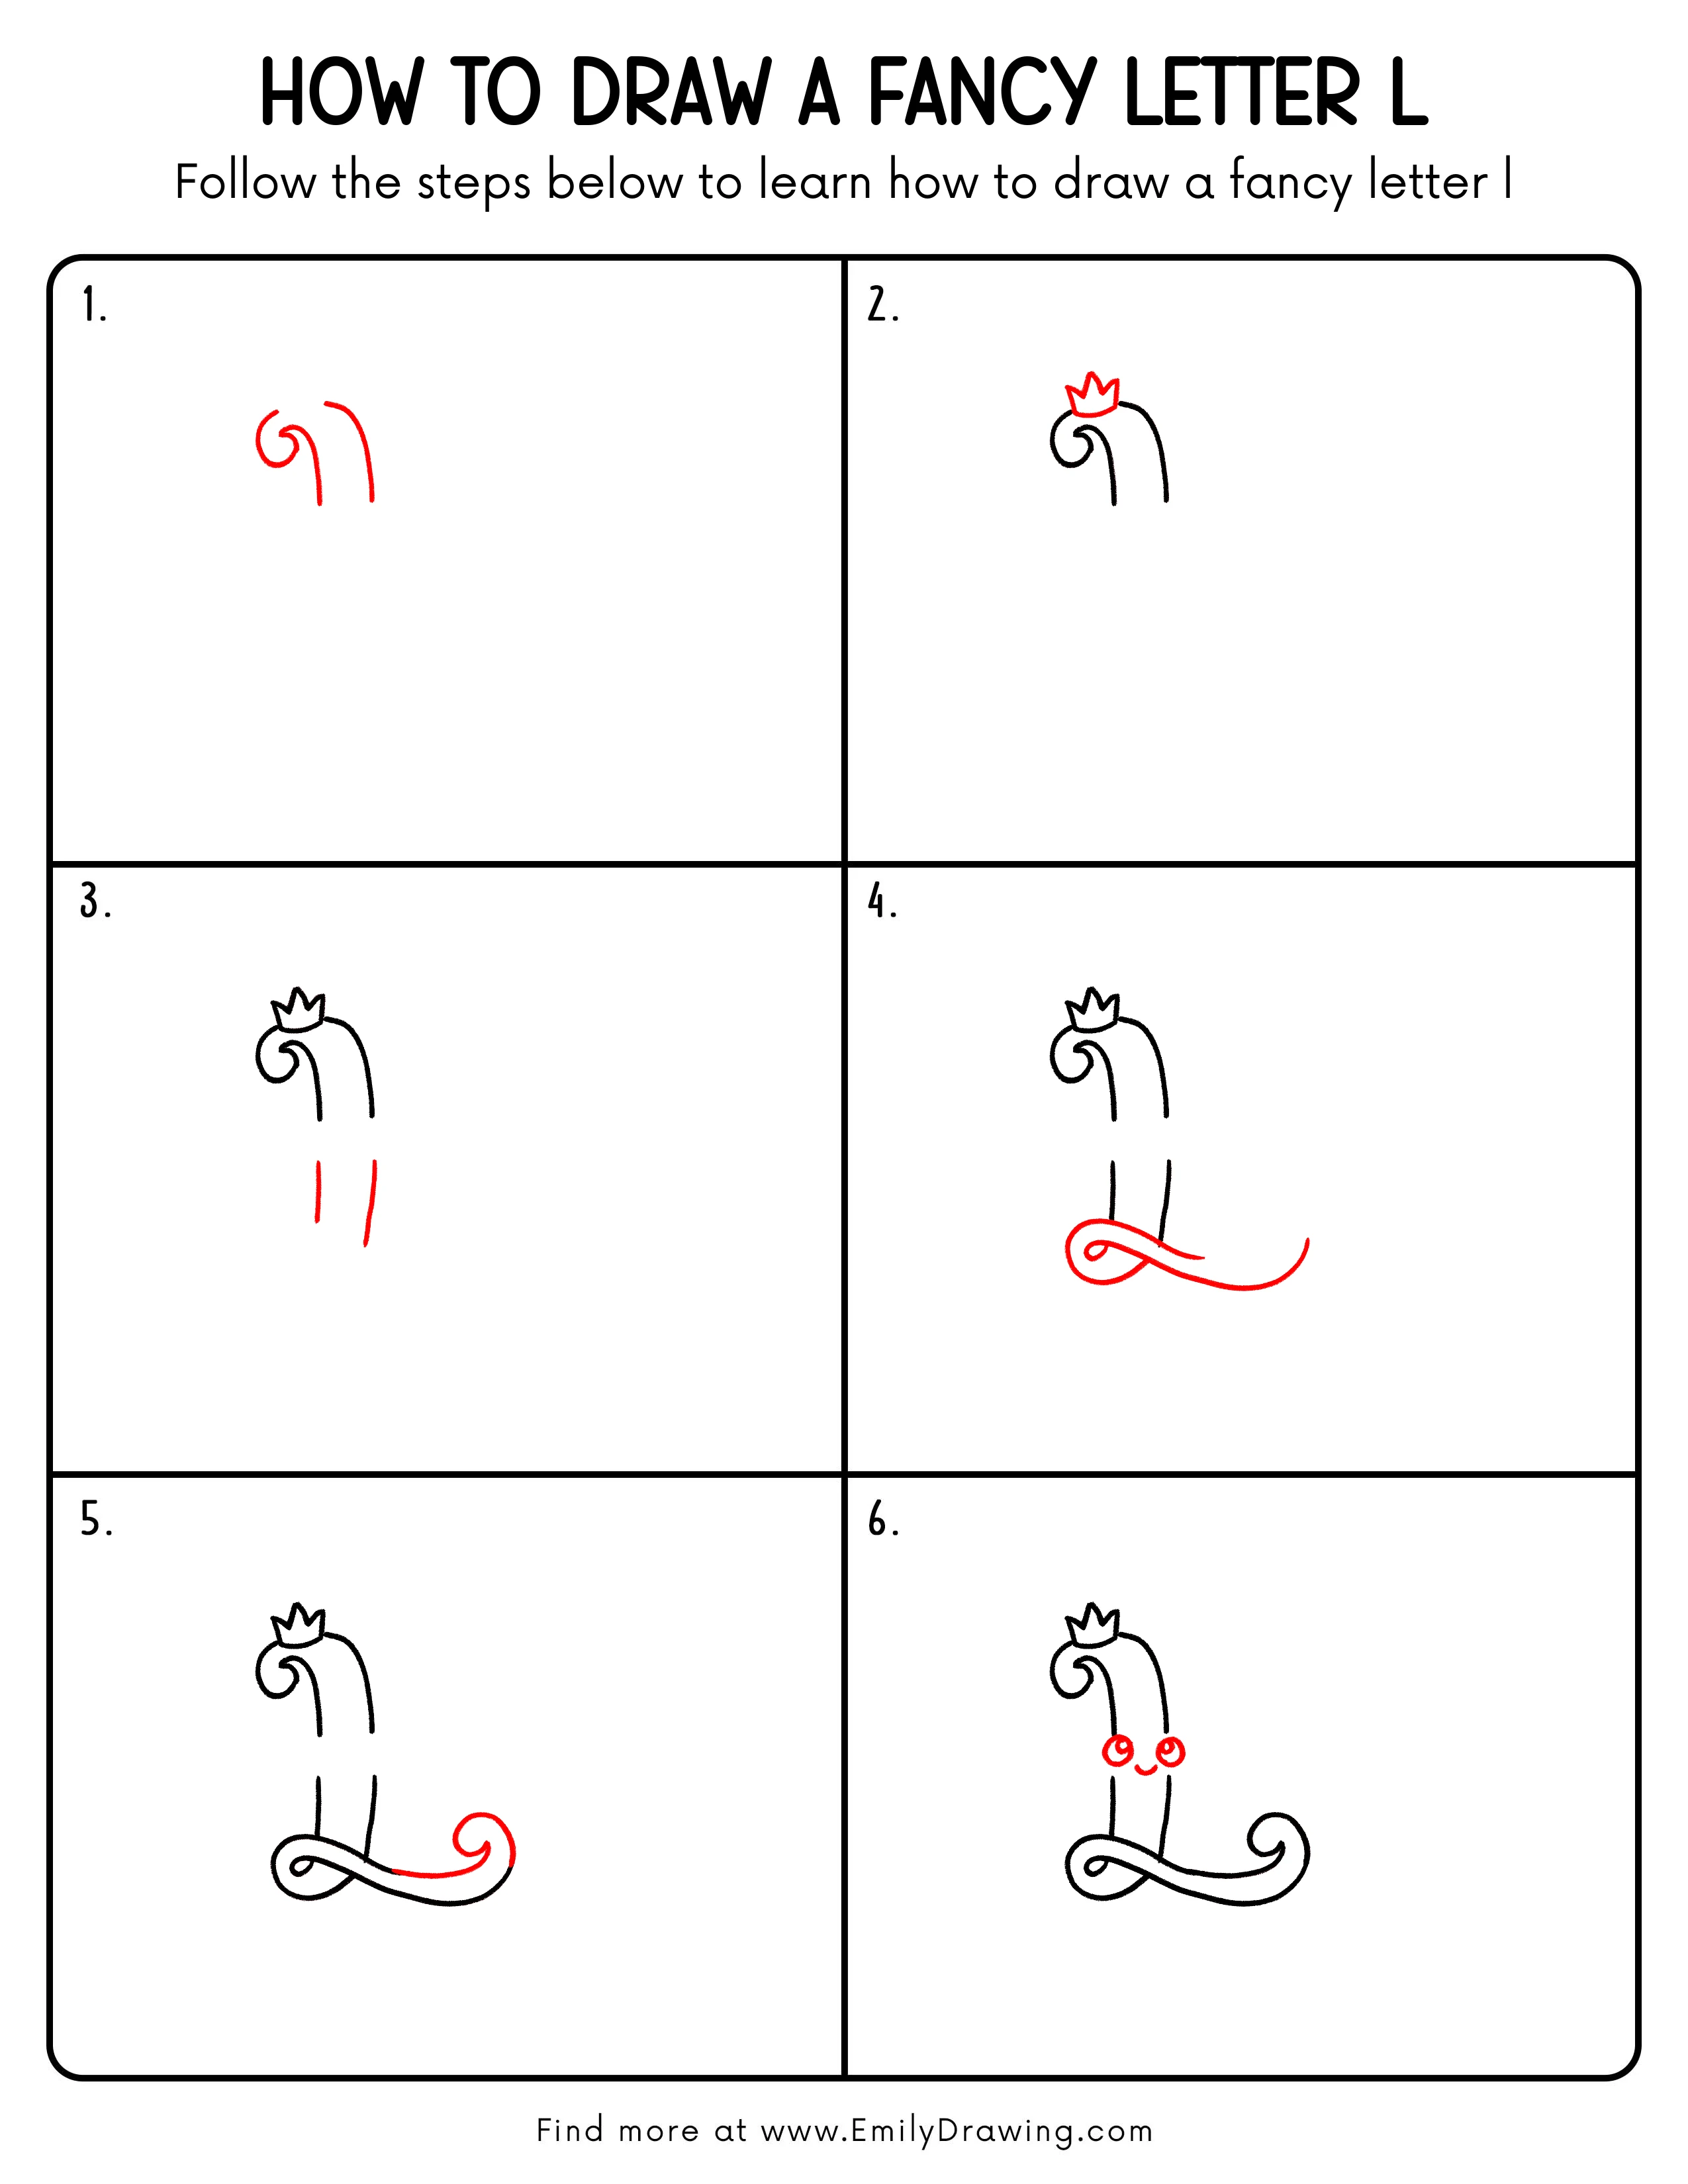
FREE Download Printable Fancy Letter L Drawing Tutorial
Frequently Asked Questions
How can I draw the long base smoothly?
Practice the motion lightly before tracing the curve with firmer pressure.
Does the crown need three points?
No, change the number or shape of the points to suit your design.
Can I make this letter without a face?
Yes, the crowned flourishes still make an elegant standalone letter.