Hey there, young artists and creative parents! Are you ready to learn how to draw a donkey? Donkeys are amazing, hardworking animals that have been human companions for thousands of years—just like horses, which you can learn to draw in this guide. They are known for their intelligence, strong memory, and ability to carry heavy loads over long distances. Today, we’re going to learn how to draw a donkey in just a few simple steps! Grab your pencil, and let’s get started!
Drawing is a wonderful way to express creativity, and by following this step-by-step guide for sketching a donkey, you’ll learn with ease. Even if you’re a beginner, don’t worry! Just take your time and have fun as we go through each step.
Materials:
- a piece of paper
- a pencil for the guiding lines and sketching
- an eraser
- a black sharpie or a pen for the outlines
- markers or colored pencils for coloring
- our printable drawing guide (Join my Email List below to get this Tutorial)
Here are my RECOMMENDED Art Supplies!
- Crayola Coloring Set (140 Pieces – Mega Value!)
- 24 Colored Crayon Set
- A4 Printer Paper
- Crayola Coloring Pencils
- HP Home Printer with Instant Ink!
Time needed:
15 minutes.
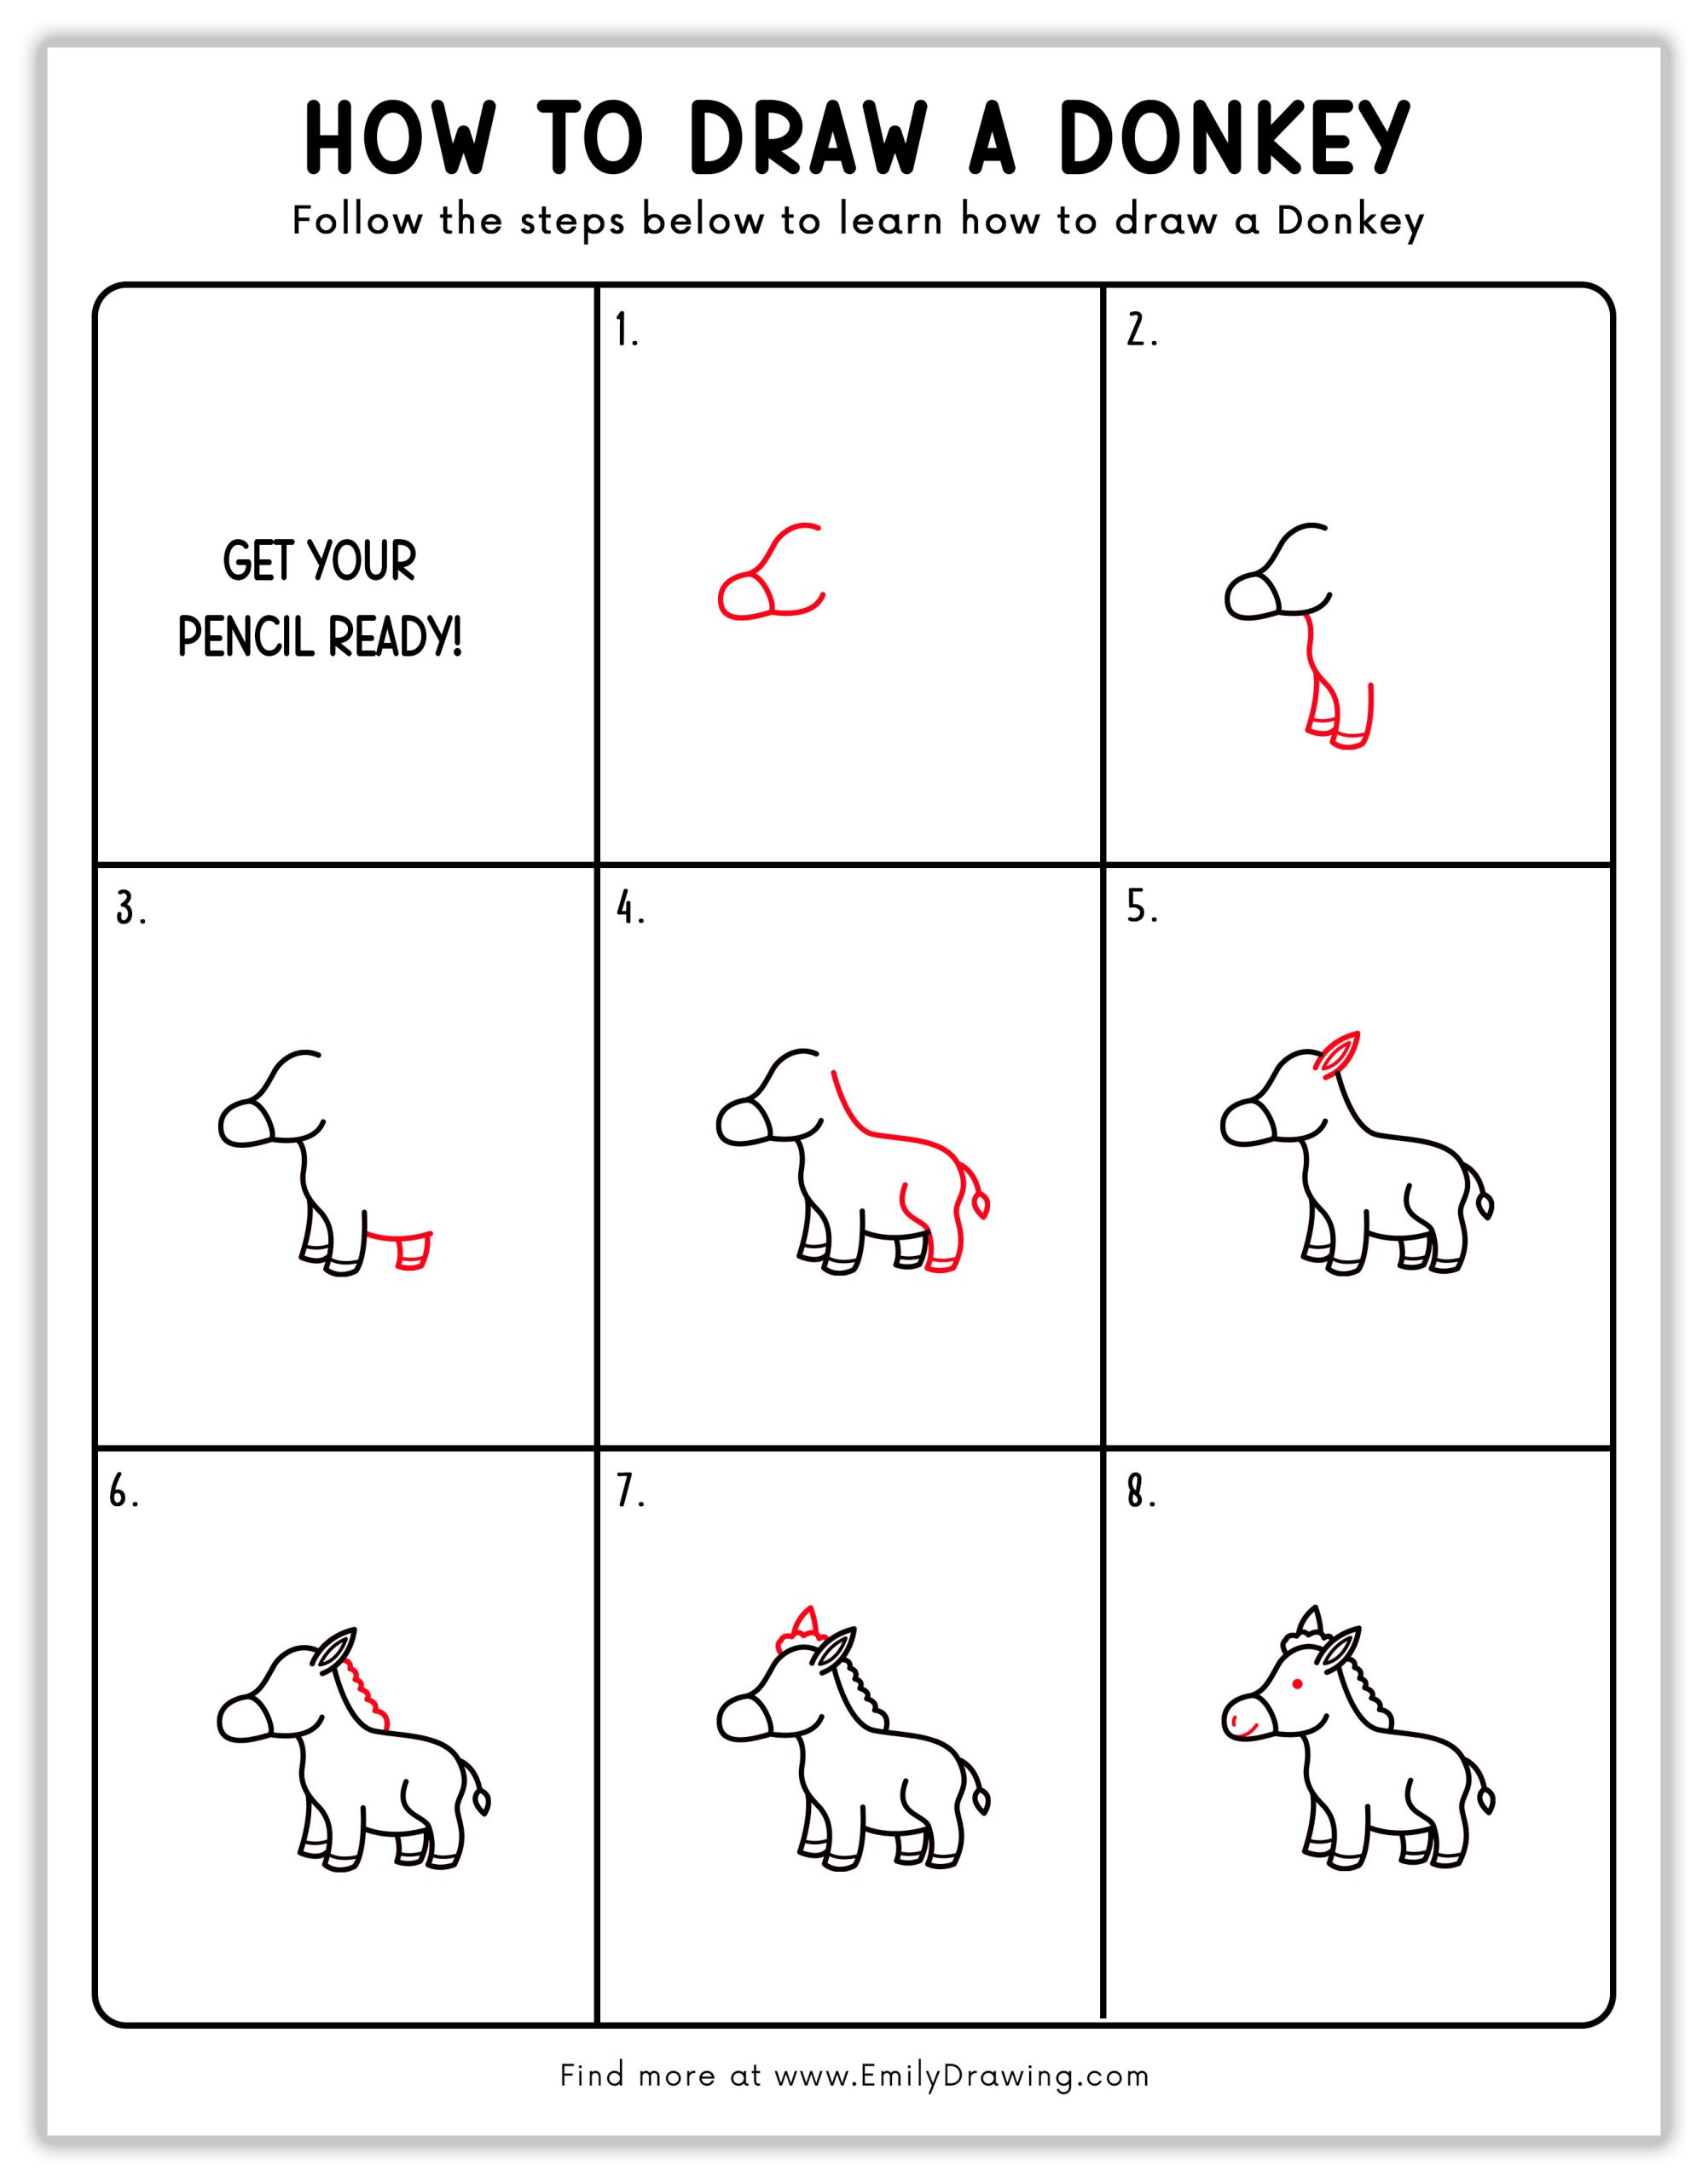
How to Draw a Donkey — Let’s get started!
Step 1 – Start with the Head
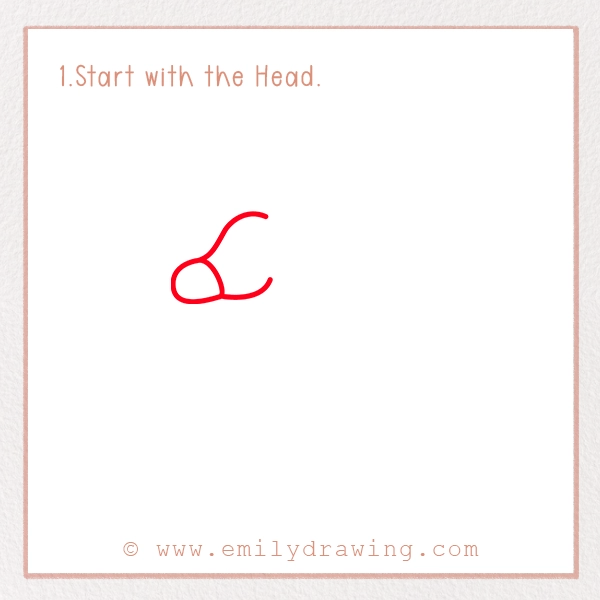
Begin by drawing the donkey’s head shape. Create a curved line for the top of the head and a rounded snout. This will be the foundation of your drawing. Donkeys have slightly elongated faces compared to horses, so make sure to keep the head proportionate—see our full horse drawing tutorial for a great comparison.
Pro Tip: Use a reference picture of a donkey to help you visualize the head shape. This can make the process easier and more fun!
Fun Fact: Did you know donkeys can recognize each other’s voices from miles away? Their ears are super powerful!
Step 2 – Add the Neck and Front Legs
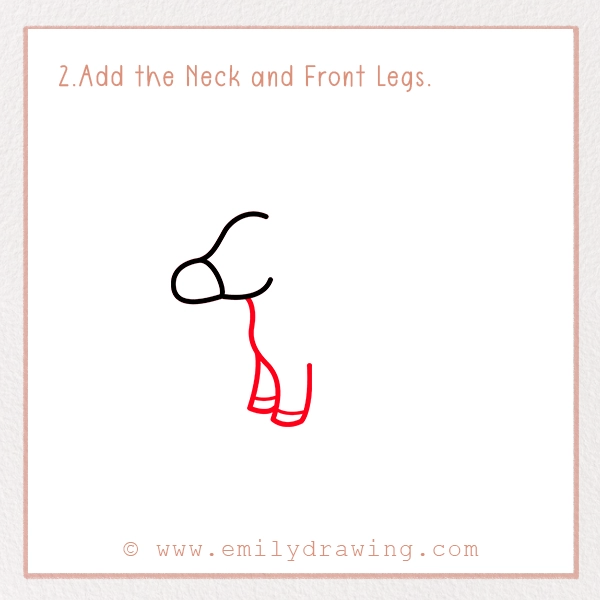
Extend a curved line downward from the head to form the donkey’s neck. Then, draw two straight lines for the front legs and add small hooves at the bottom. Hooves are important for donkeys as they help them walk on rocky and uneven terrain. Make sure the legs are sturdy and slightly bent for a more natural look.
Step 3 – Draw the Body
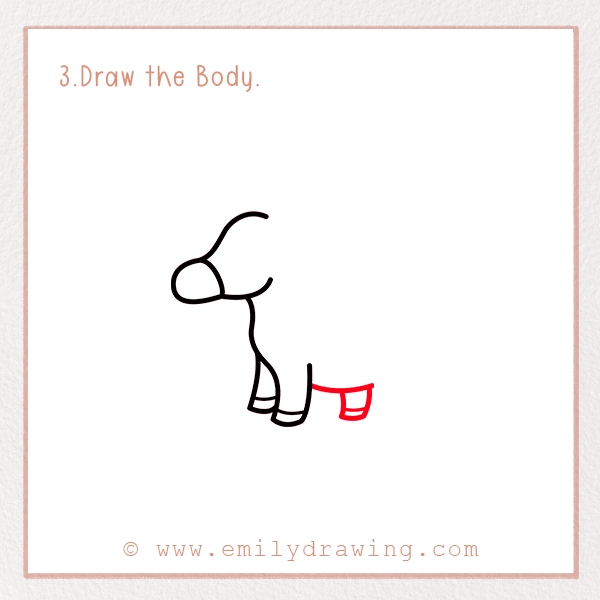
Now, connect the neck to a rounded body shape. Make it slightly wider at the middle and taper it down to where the back legs will go. The body should be well-proportioned so that the donkey looks balanced. Think of an oval shape to help guide you.
Step 4 – Add the Back Legs and Tail
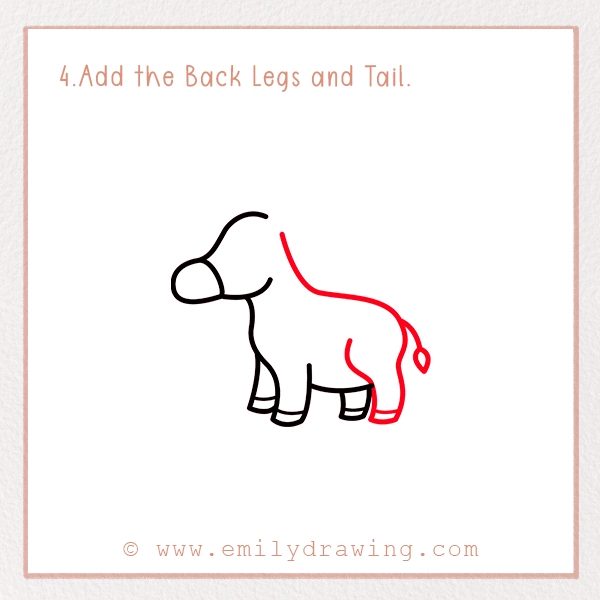
Draw the back legs, similar to the front ones, but slightly angled to show the donkey’s natural stance. Back legs usually have a slight bend at the knee, giving them a sturdy posture. Then, add a small, curved tail with a little tuft of hair at the end. Donkeys often use their tails to swish away flies, just like horses!
Pro Tip: If you’re struggling with the legs, think of them as simple sticks at first. You can always add thickness and detail later.
Step 5 – Sketch the Ears
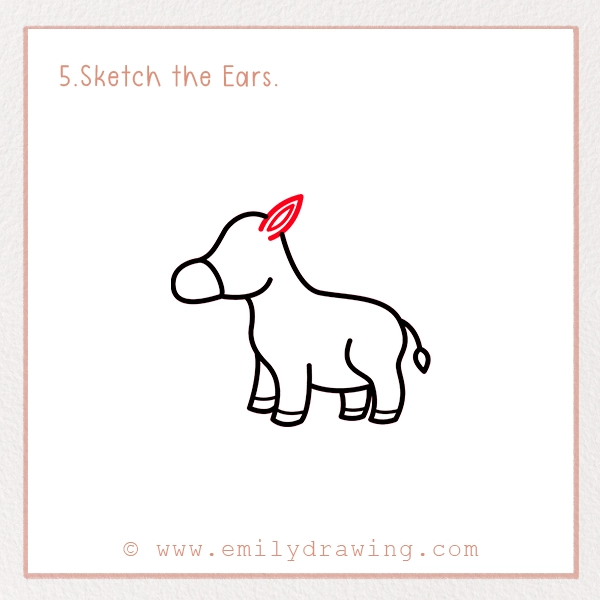
A donkey’s ears are long and pointy! Draw two tall ears on top of the head. You can add a little curve to make them look more realistic. Donkeys are known for their excellent hearing, and their large ears help them detect sounds from far away.
Creative Idea: If you want to make your donkey look extra cute, you can tilt one ear slightly to the side. This gives it a playful, curious expression.
Step 6 – Add the Mane
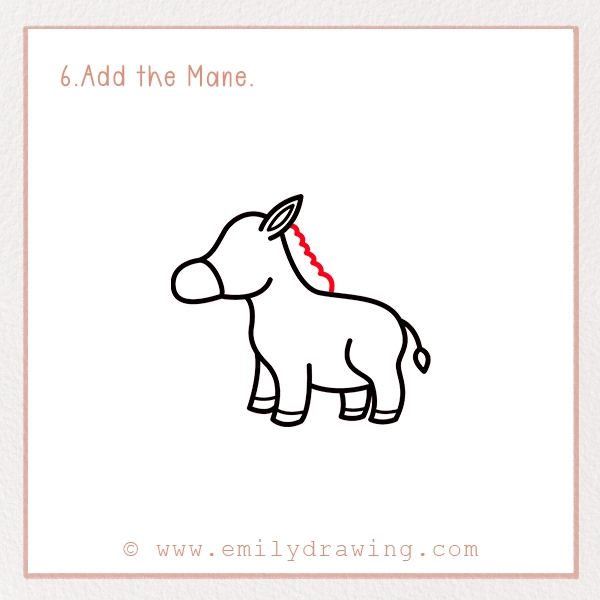
A donkey’s mane is short and fuzzy. Unlike a horse’s flowing mane, a donkey’s mane stands up straight and is often quite bristly. Draw a few small, curved lines along the neck to create a fun, fluffy mane.
Step 7 – Add the Facial Details
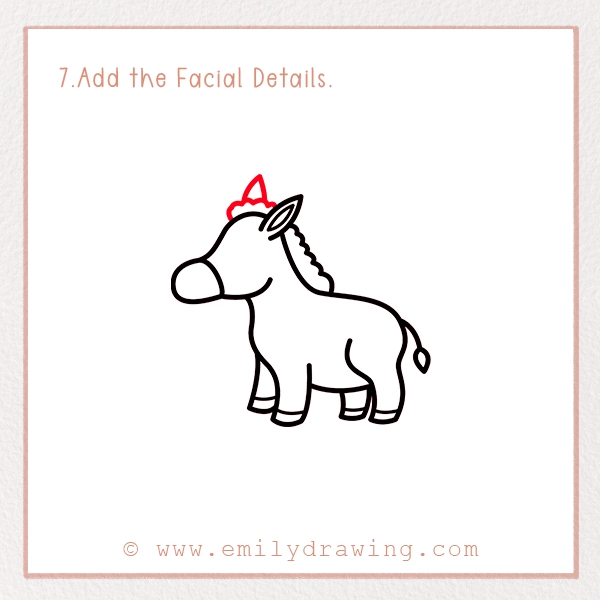
Now, draw a small dot for the eye and a tiny oval for the nostril. You can also add a smiling mouth to give your donkey some personality! Expressions can make a big difference in how your drawing looks, so experiment with different facial expressions if you like.
Pro Tip: If you want your donkey to look more realistic, shade the edges of the eyes lightly to give them depth.
Step 8 – Final Touches
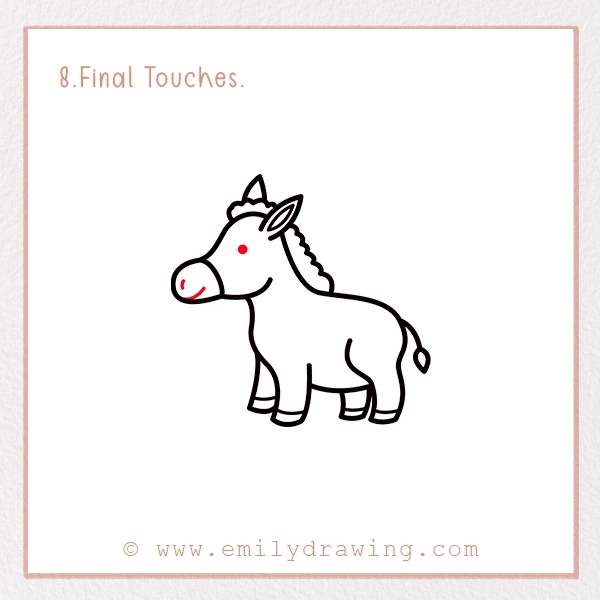
Look over your drawing and add any final details, like extra lines for fur or shading to give your donkey more depth. If you want to make your donkey even more realistic, add some texture by lightly shading around the legs and face. Small details can bring your donkey illustration to life!
Creative Idea: If you’re using colored pencils or markers, try blending colors to give your donkey a more lifelike appearance. For example, use light gray with hints of brown for a natural look.
Step 9 – Coloring your drawings
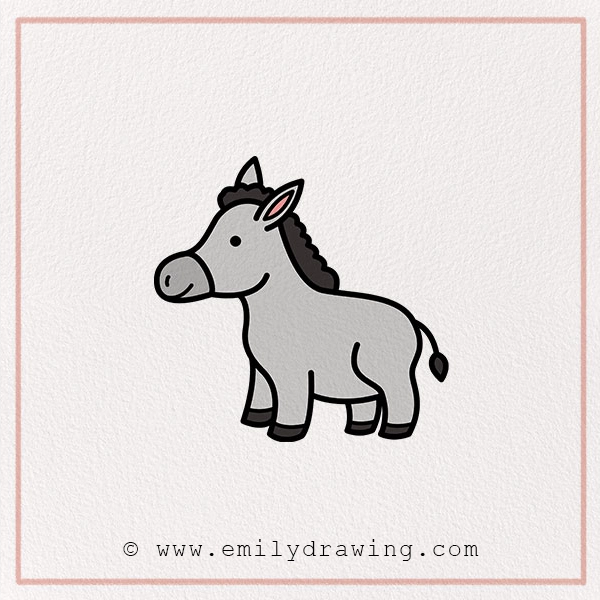
Use brown, grey, or even a mix of colors to bring your donkey to life! Donkeys can come in different shades, so get creative and make your donkey unique. You can also add a background, like a farm or a grassy field, to complete your artwork.
Creative Idea: If you’re using colored pencils or markers, try blending colors to give your donkey a more lifelike appearance. For example, use light gray with hints of brown for a natural look.
Pin it now, Draw later!

Fun Facts About Donkeys
- Donkeys can live for over 40 years — that’s older than some dogs and cats!
- They’re super smart and have excellent memories. Once they learn something, they never forget it.
- Donkeys are very social and love making friends with other animals, even goats and horses—learn how to draw a goat in our step-by-step tutorial.
- A baby donkey is called a “foal,” and they can stand and walk just an hour after being born!
- Donkeys are known for their “hee-haw” sound, which they use to communicate with each other.
Tips and Tricks for Better Drawing
Want to improve your donkey drawing? Here are some helpful tips:
Use light pencil strokes first so you can erase easily if needed. Sketching lightly allows you to adjust shapes before finalizing them.
Try practicing each step separately before putting them together—like we do in our goat drawing tutorial, which breaks things down clearly. This way, you can perfect each part of the donkey before completing the whole drawing.
Observe real donkeys or pictures for reference. Studying how donkeys look in real life will help you understand their body shape and features better.
Experiment with different poses. Once you’re confident, try drawing a donkey walking, running, or sitting down.
Add a background for a fun scene. Your donkey could be standing in a barn, on a farm, or even in a desert setting—maybe with a meerkat nearby, which you can learn to draw in this tutorial.
We hope you had fun learning how to draw a donkey! Drawing is a great way to express creativity and improve artistic skills. Keep practicing, and soon you’ll be drawing all sorts of animals. Don’t be afraid to make mistakes, each drawing is a learning experience.
If you enjoyed this tutorial, share your artwork with friends and family. You can even post your drawing on social media using hashtag #EmilyDrawing to show off your creativity!
Want to learn how to draw more animals? Check out our other step-by-step drawing guides like this one on how to draw a meerkat for more creative fun. Remember, every great artist started with a single drawing, so keep going and let your imagination run wild! Keep drawing, keep exploring, and most importantly, have fun!
Get the FREE Printable Drawing Guide