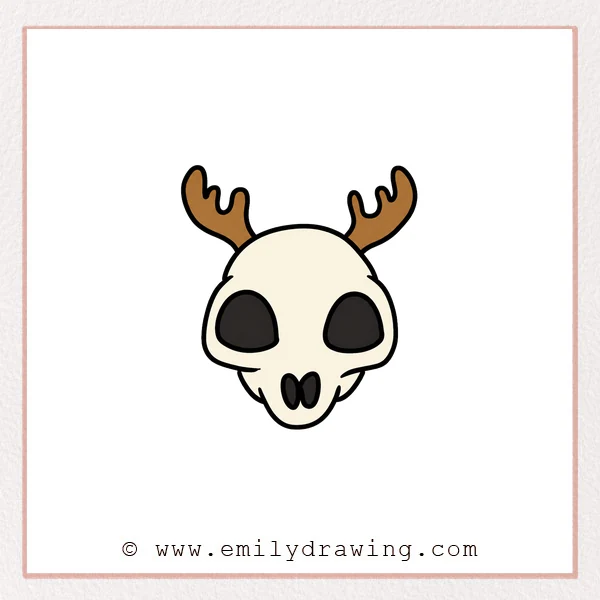
Learn how to draw a deer skull with rounded antlers and bold openings. This easy drawing tutorial simplifies the symmetrical structure into six approachable steps.
What You Will Need
- Drawing paper
- Pencil and eraser
- Black pen or marker
Here are my RECOMMENDED Art Supplies!
- Crayola Coloring Set (140 Pieces – Mega Value!)
- 24 Colored Crayon Set
- A4 Printer Paper
- Crayola Coloring Pencils
- HP Home Printer with Instant Ink!
Time needed:
10 minutes.
Step-by-Step Drawing Guide
Step 1: Draw the Left Antler
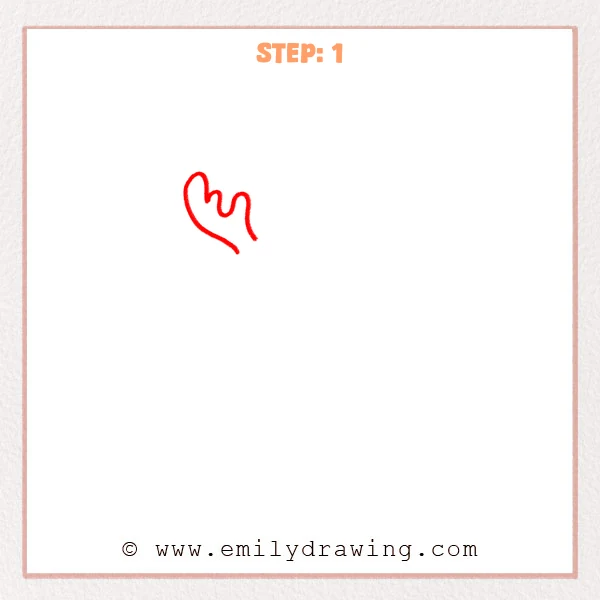
Draw a thick antler curving upward on the left. Shape three rounded points along its inner edge.
Pro Tip: Use one flowing outer curve to unify the antler shape.
Step 2: Add the Right Antler
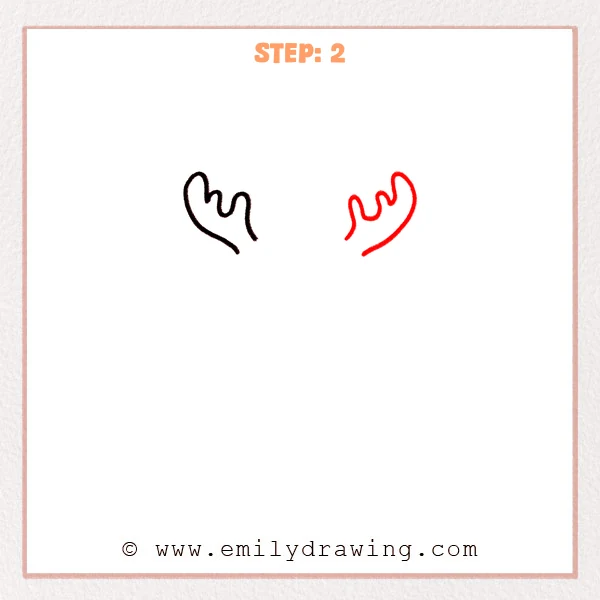
Mirror a second thick antler on the right. Include three smooth branches and taper its base inward.
Pro Tip: Check the overall width before refining the individual antler points.
Step 3: Outline the Upper Skull
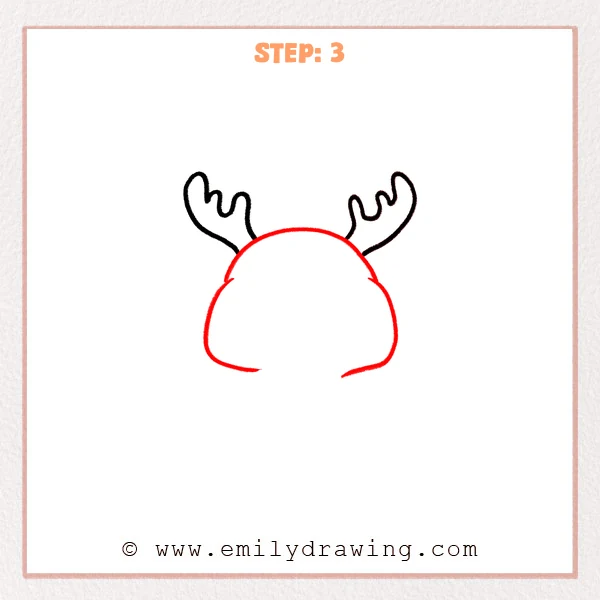
Connect the antler bases with a broad rounded crown. Extend the sides downward, widening gently around the cheek area.
Pro Tip: Keep a centered opening at the bottom for the muzzle.
Step 4: Draw the Eye Sockets
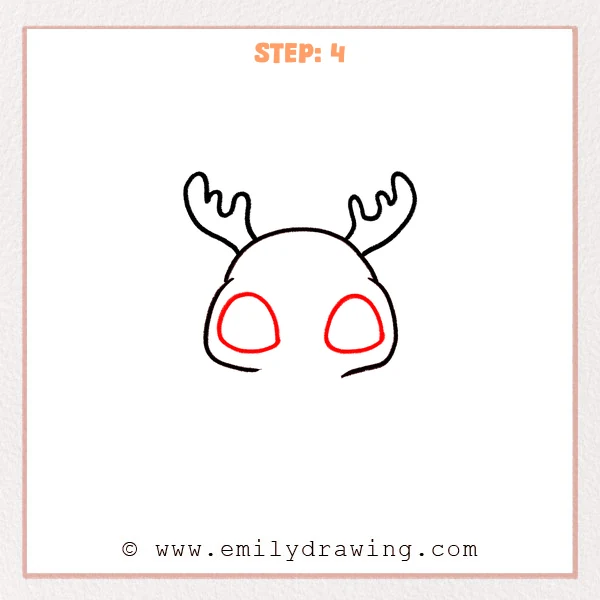
Add two large rounded triangular eye sockets inside the skull. Place them evenly on opposite sides of the center.
Pro Tip: Leave a generous strip of skull between the two sockets.
Step 5: Shape the Long Muzzle
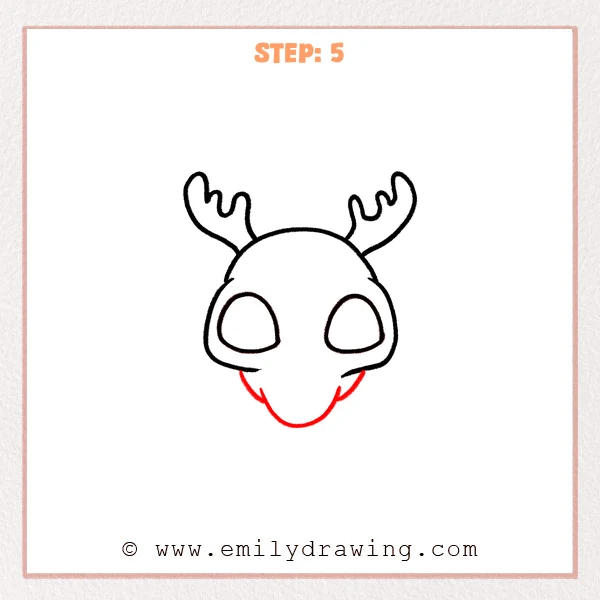
Extend two inward-sloping curves from the lower skull. Add slight side points, then round the narrow bottom of the muzzle.
Pro Tip: Bring both sides inward gradually for a balanced taper.
Step 6: Add the Nasal Openings
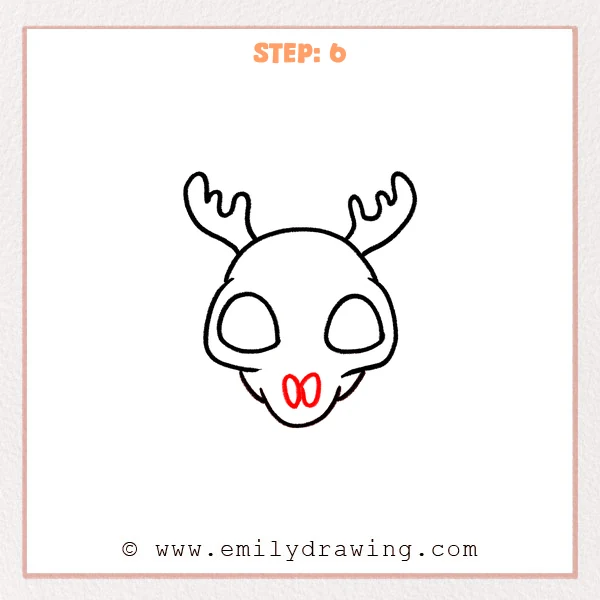
Draw two narrow vertical ovals near the bottom of the muzzle. Angle them slightly toward each other at the top.
Pro Tip: Keep the nasal openings small compared with the eye sockets.
Step 7: Color in your drawing!
Fun Facts
- Deer antlers are made of bone and can branch into multiple points.
- A deer’s elongated facial bones support its long muzzle.
- Large negative shapes make eye sockets especially important in skull drawings.
Pin it now, Draw later!
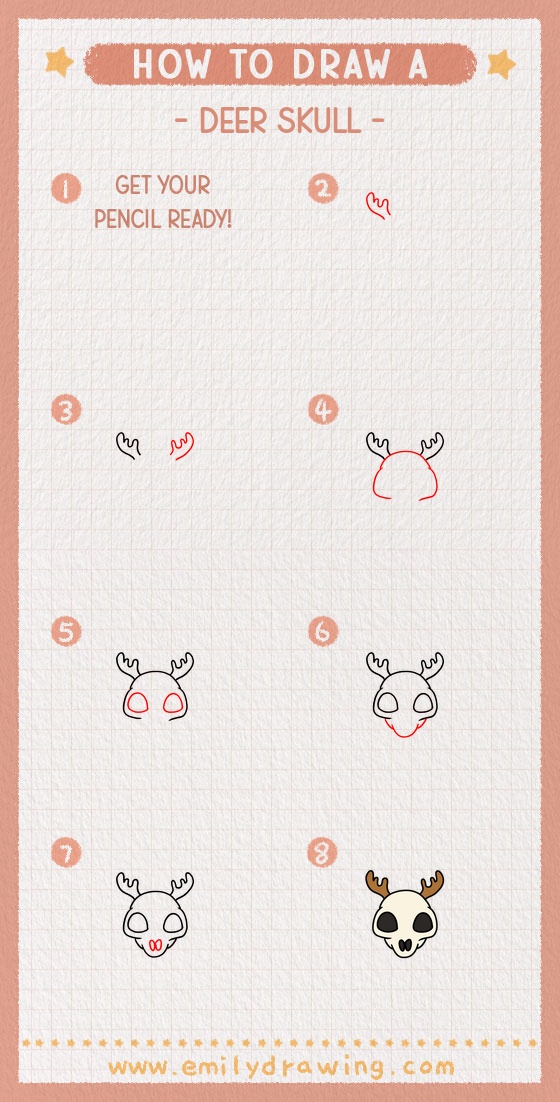
Erase construction marks and darken the eye and nasal openings for contrast. Your deer skull step-by-step drawing is complete, so try adding gentle bone shading around the edges.
Get the FREE Printable Drawing Guide
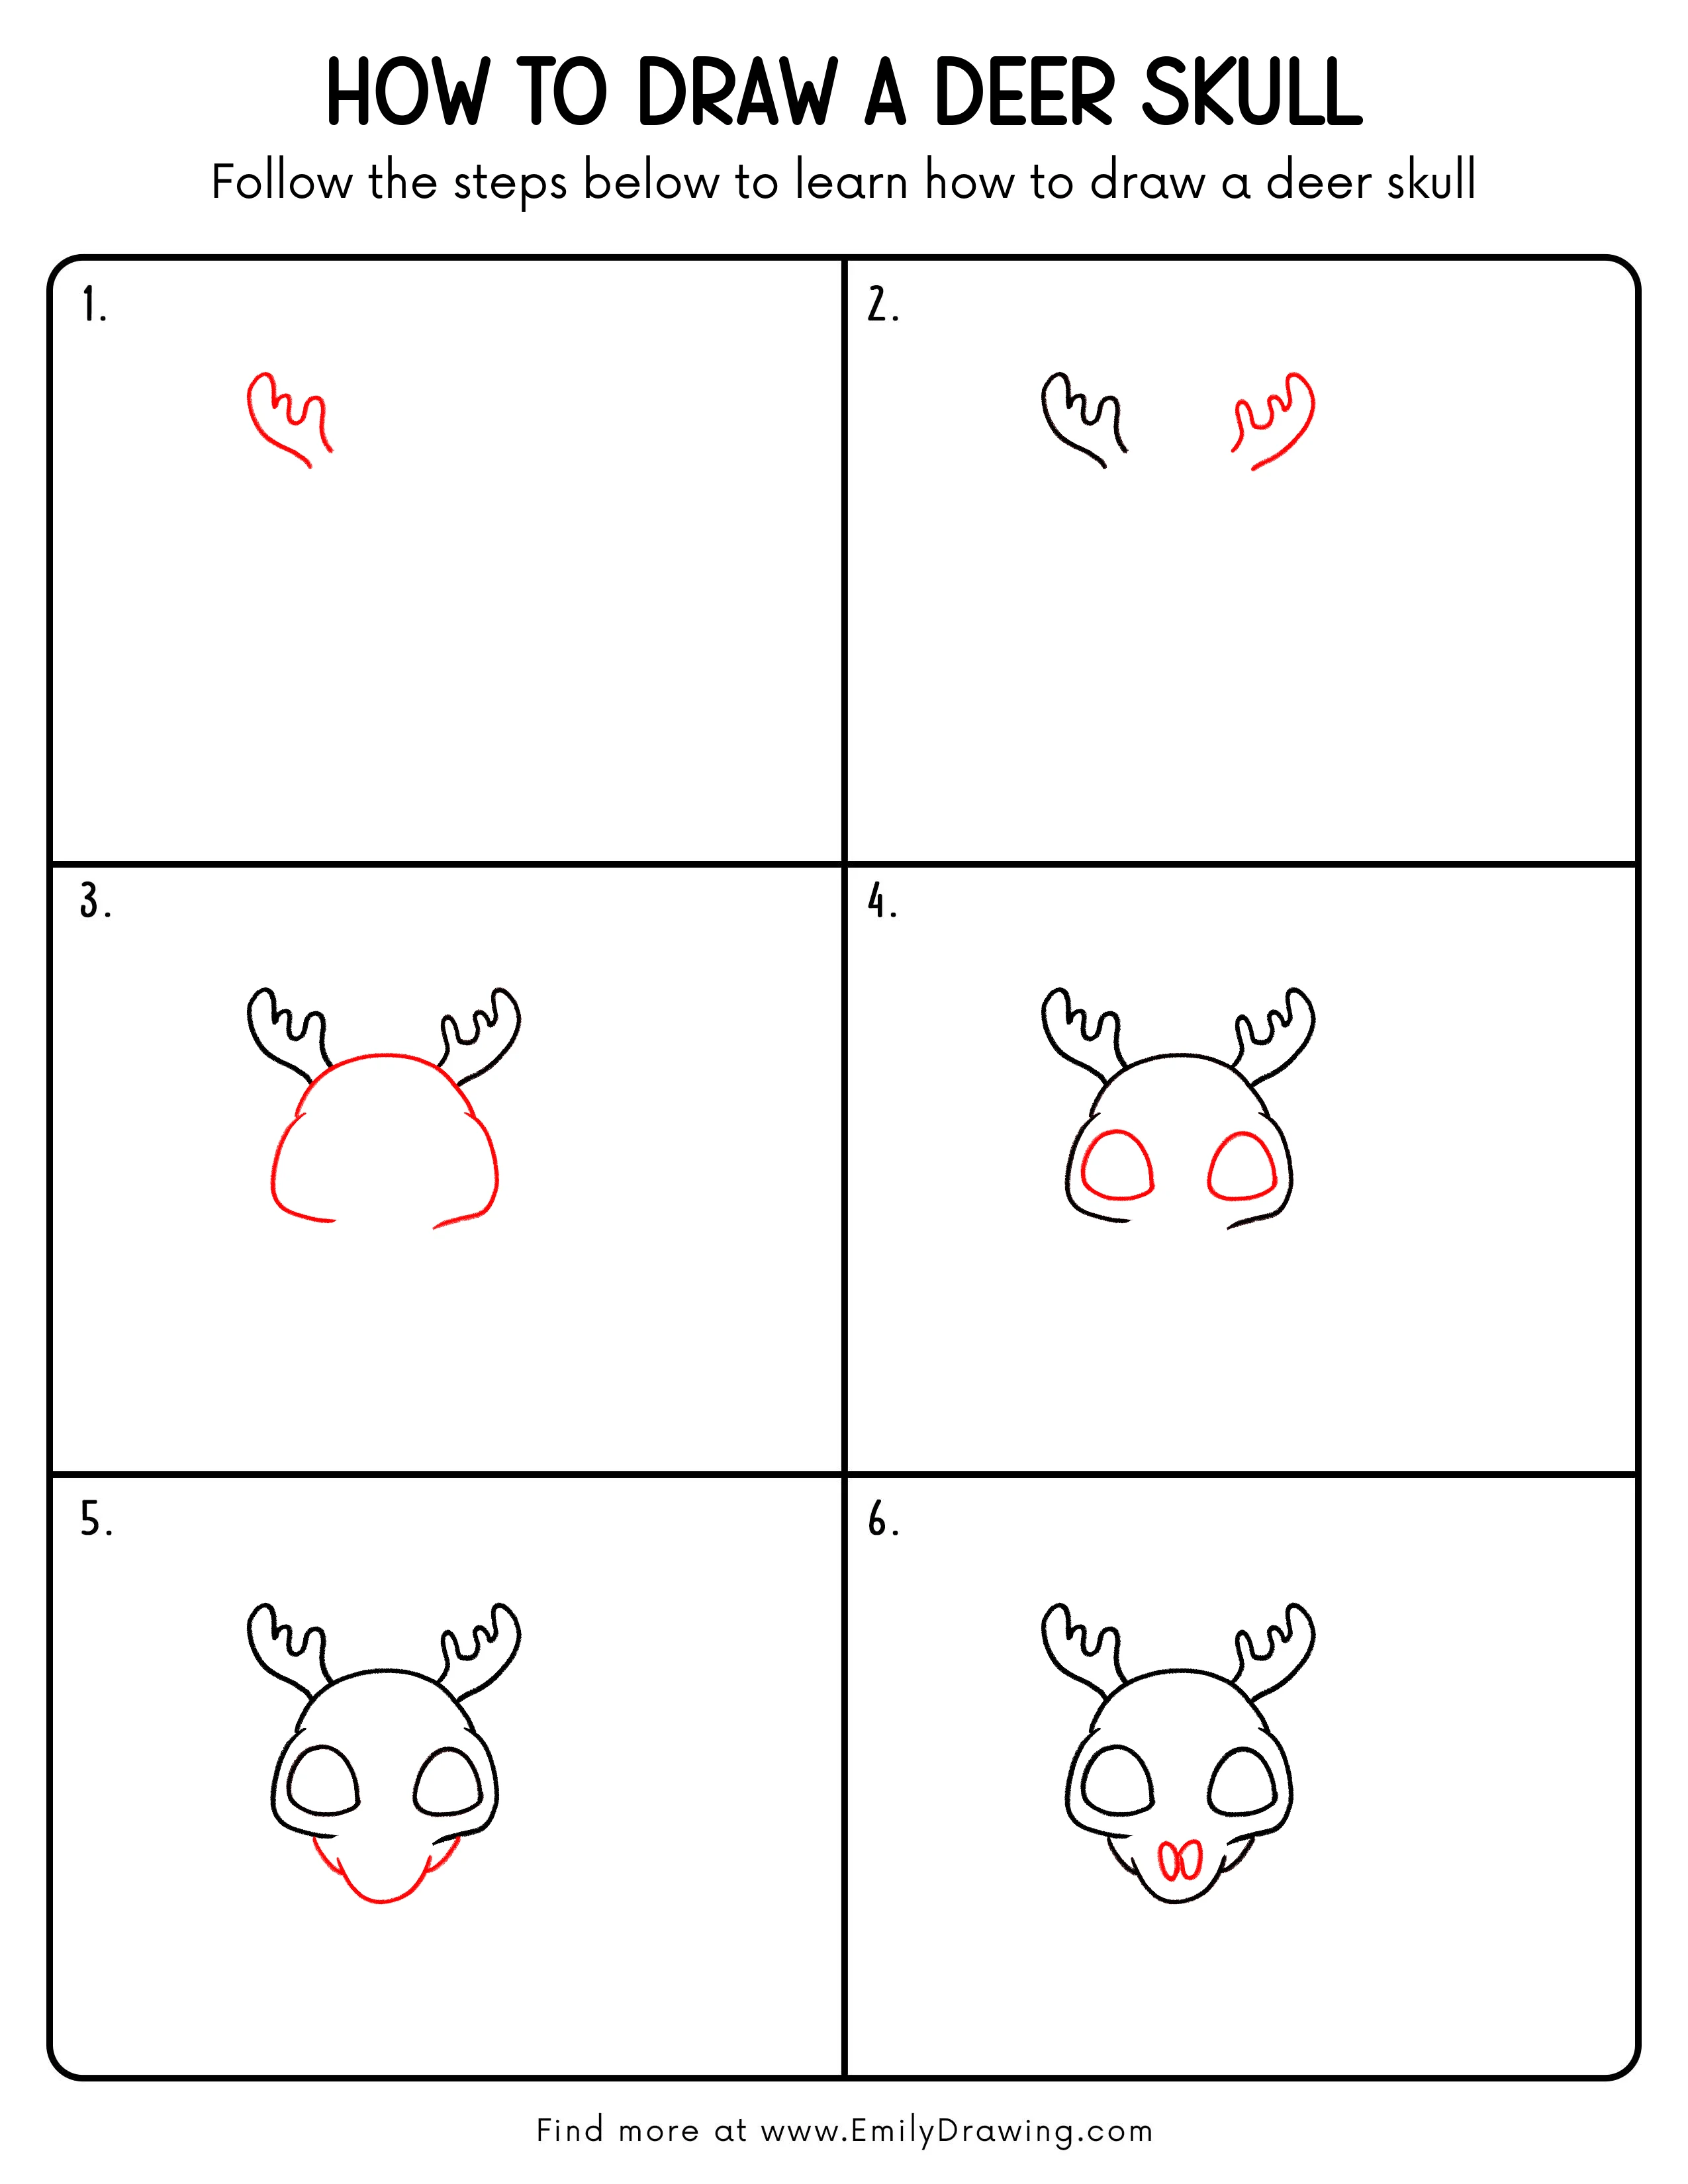
FREE Download Printable Deer Skull Drawing Tutorial
Frequently Asked Questions
How can I keep the antlers balanced?
Mark matching heights and branch positions before drawing their full outlines.
Should the eye sockets be perfect circles?
No, softly rounded triangular shapes better match this simplified skull design.
How do I add depth to the skull?
Shade lightly beneath the antler bases and along one side of the muzzle.