How to draw a fish? Your kids might ask for a cartoon clownfish drawing tutorial often. If yes, then you are in the right place. Because we are going to discuss a step-by-step guide for an easy clownfish drawing for kids and beginners.
We have chosen how to draw a cute clownfish tutorial because this colorful animal attracts young artists a lot, just like our fun piranha fish drawing guide. They love creating clownfish art for kids and often wish to have one as a pet. So, having its drawing in their scrapbook will make them excited and happy.
So, without wasting any time, grab your art supplies and get ready to flex your artistic muscles.
Drawing a clownfish step by step – Easy guide for kids.
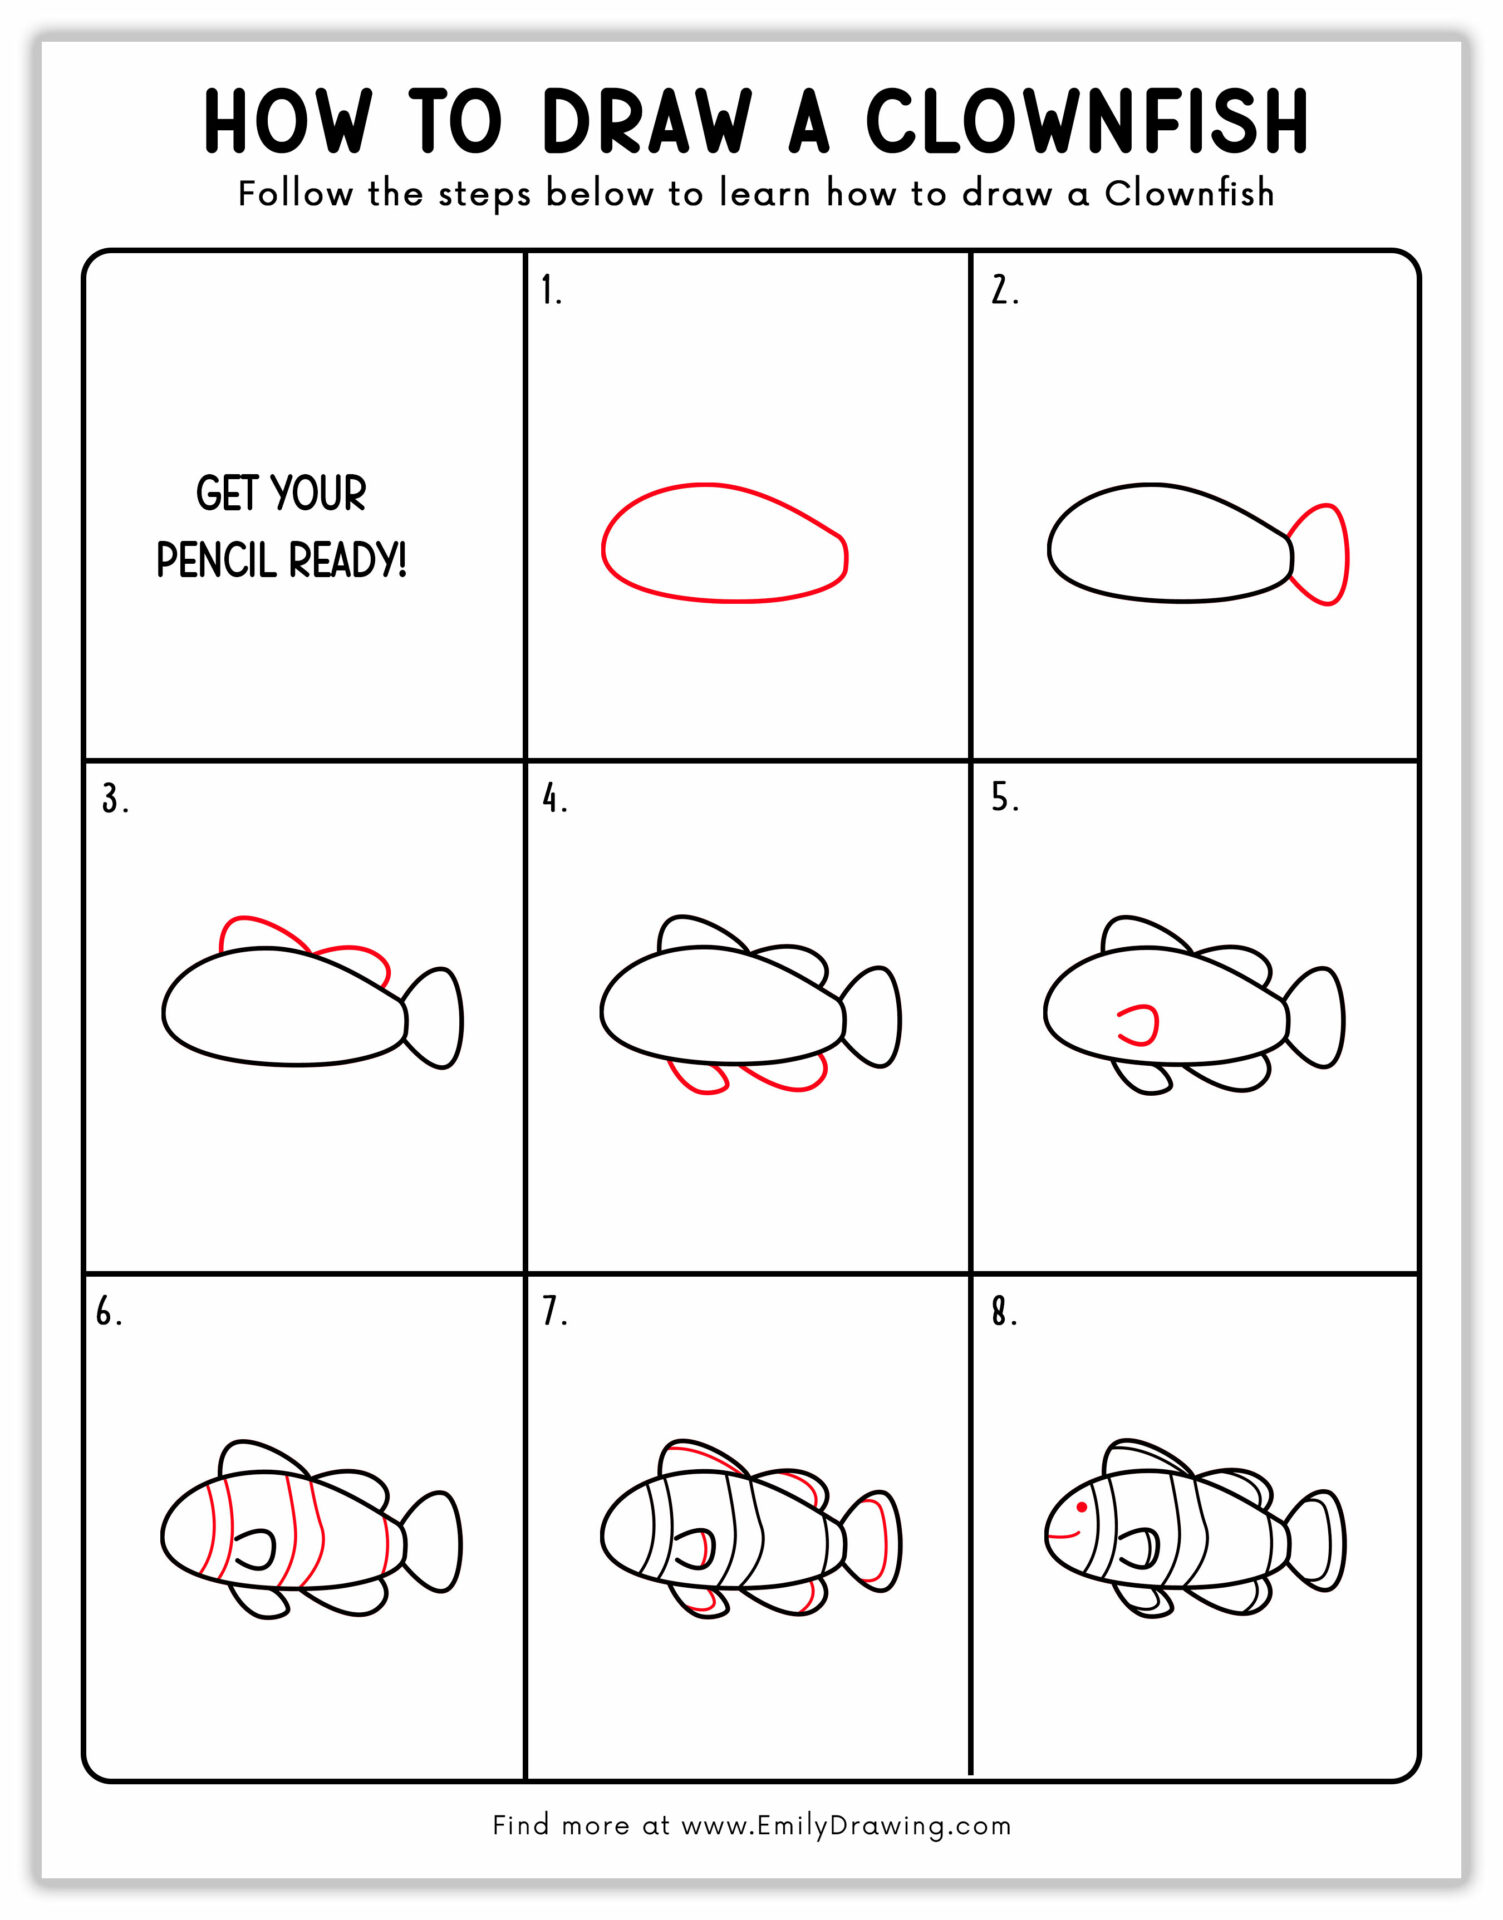
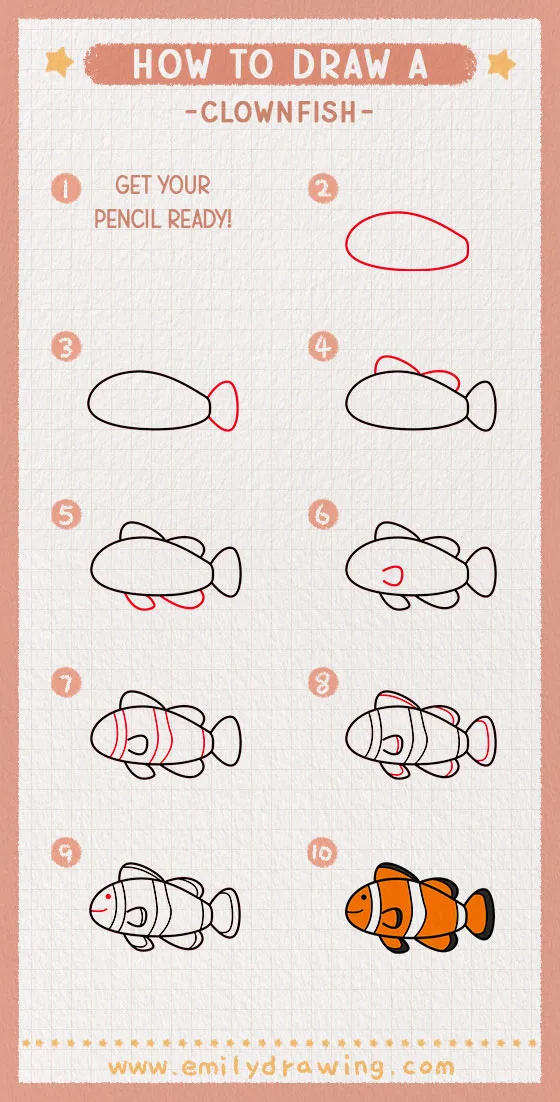
How to Draw a Clownfish- Step By Step Easy Guide for Kids
Materials:
- a piece of paper
- a pencil for the guiding lines and sketching
- an eraser
- a black sharpie or a pen for the outlines
- markers or colored pencils for coloring
- our printable drawing guide (Join my Email List below to get this Tutorial)
Here are my RECOMMENDED Art Supplies!
- Crayola Coloring Set (140 Pieces – Mega Value!)
- 24 Colored Crayon Set
- A4 Printer Paper
- Crayola Coloring Pencils
- HP Home Printer with Instant Ink!
Time needed:
15 minutes.
How to Draw a Clownfish — Let’s get started!
Step 1 – Pencil Sketch Clown Fish’s Body
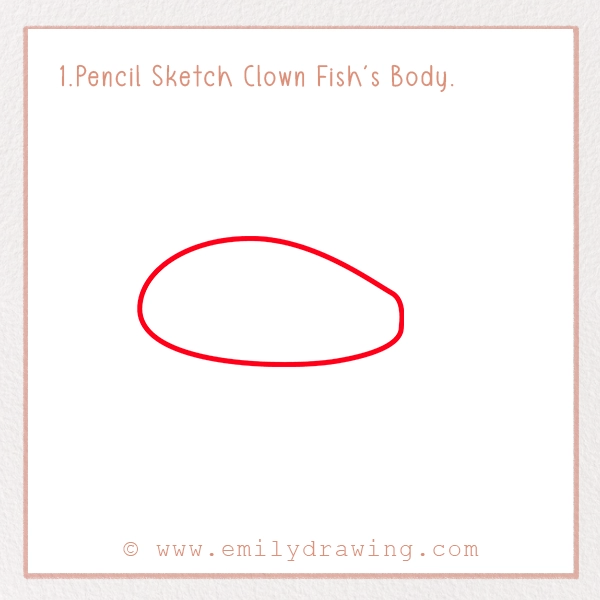
The body is the most crucial part of the clownfish sketch tutorial. So, you should draw its draft with a light pencil to easily erase any mistakes if it happens.
In this step, sketch an oval shape to represent the body. Make the left side slightly rounded and the right side slightly narrower to give it a tapered look. Moreover, make sure that the body is elongated in a horizontal direction to have a realistic clownfish drawing.
Step 2 – Add the Tail
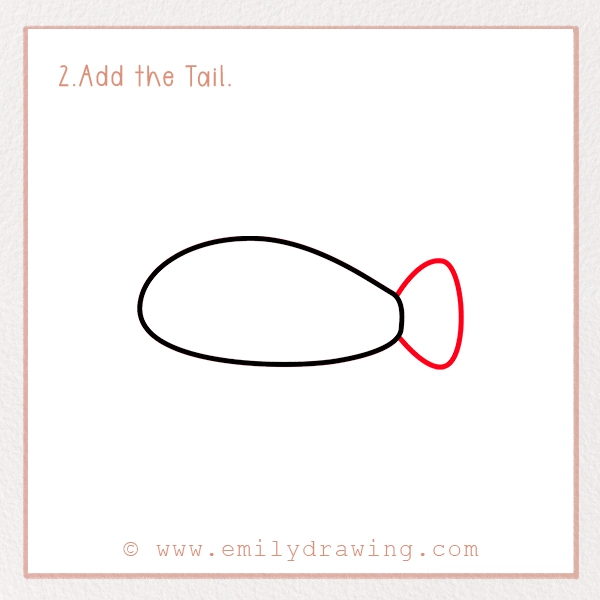
On the slightly narrower side of the body, draw the tail. It should be attached to the body to give it a natural look.
The tail should resemble a small triangular or paddle-like shape. Make sure to keep it small for the perfect body’s proportion.
Step 3 – Sketch Clown Fish’s Dorsal Fins
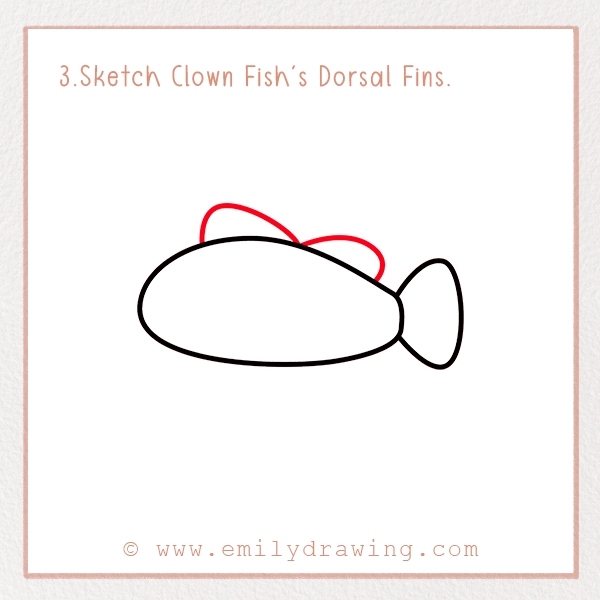
Clownfish have two dorsal fins on the top of the body that help them stabilize themselves while moving. We have to make these two fins in this step of an easy clownfish drawing tutorial for kids.
For this, put your pencil or pen slightly to the left of the body’s center. Now, draw two small rounded triangular shapes that are attached to each other and end near the tail. They should have a curved bottom and a pointy tip.
The first one should have a more pointy tip than the second one.
Step 4 – Sketch Clown Fish’s Pelvic and Anal Fins
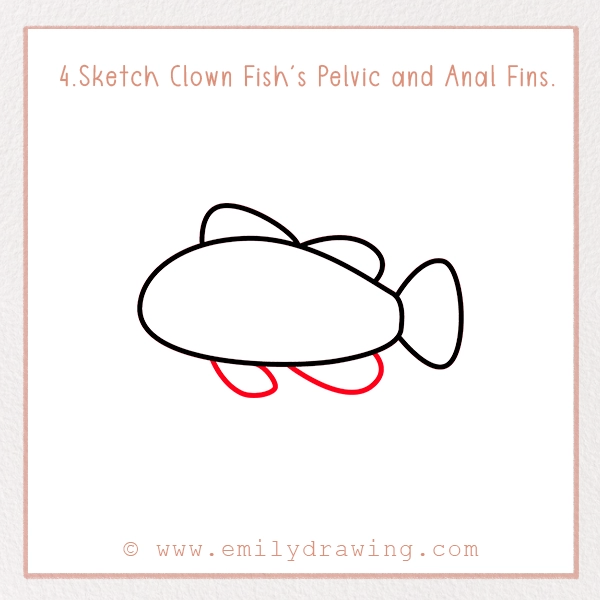
Just like on the upper body, clownfish have two lower fins to stabilize themselves. So, it is time to sketch them.
The pelvic fin should be smaller and near the center of the lower body, while the anal fin should be larger and near the tail.
The pelvic fin should be in the form of a rough oval shape and smaller in size than all other fins. While anal should be larger and in the form of a rounded triangular shape. Make sure it curves slightly to match the shape of the body.
Note: Fins look more realistic when they have a slightly rough appearance.
Step 5 – Sketch the Pectoral Fin
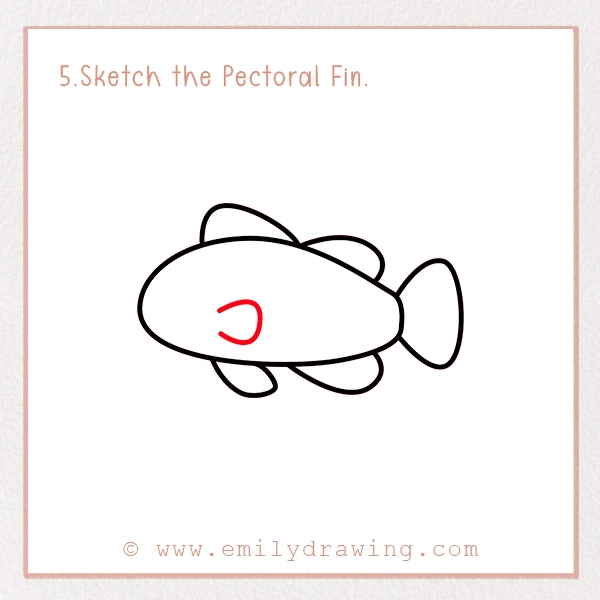
There is another crucial fin of the clownfish that helps it in swimming. This fin is pectoral.
It is the simplest one to draw as it is small and present inside the body. For this, what you have to do is to draw a small fan-like shape near the mouth side of the fish. Refer to our picture for better understanding.
Step 6 – Add the Clown fish’s Stripes
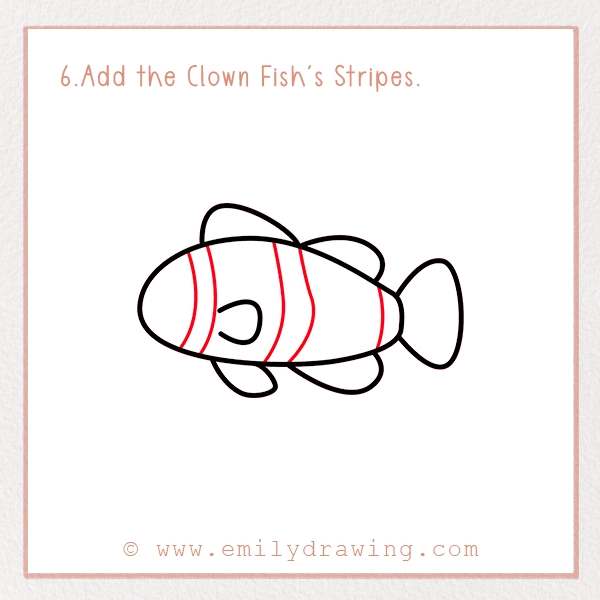
Do you know why we call the golden fish the clown fish? We call it a clownfish because its body colors resemble a clown’s makeup.
There are two to three thick white stripes along its body that give it the appearance of a clown. These stripes are crucial because they help in breaking down the body’s outline of fish, enabling them to protect themselves from predators.
To draw these stripes, you have to draw three pairs of curved lines along the body. One pair should be near the head, touching the pectoral fin.
The second pair should be in the middle and the last pair near the tail. Make sure these curved lines follow the natural body’s shape.
Step 7 – Add Detailing of Fins and Tail
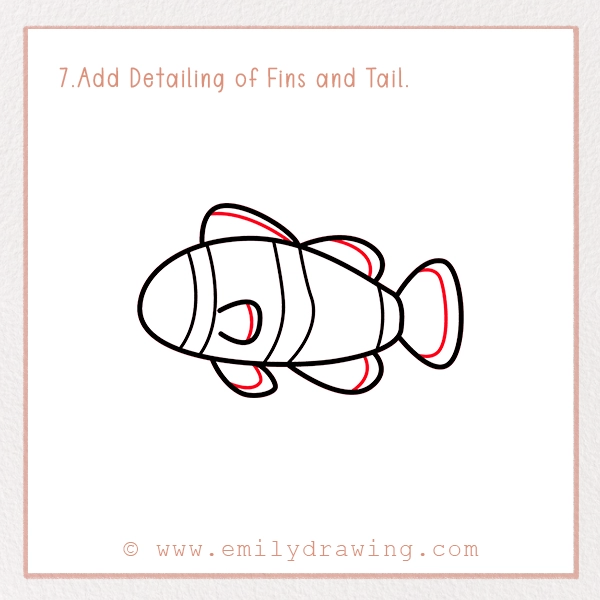
The realistic clownfish drawing needs to have webbed fins and a tail. For this, you need to draw thinner outline lines on the inner side of each fin and tail. Make sure these lines are thinner in shape, and there should be a minor distance between them and the outer outline.
They should be according to the shape of your fins and tail. In between these lines, you can do the shading. The dark shading will give your fish drawing a realistic look.
Step 8 – Add Clown fish’s Face Details
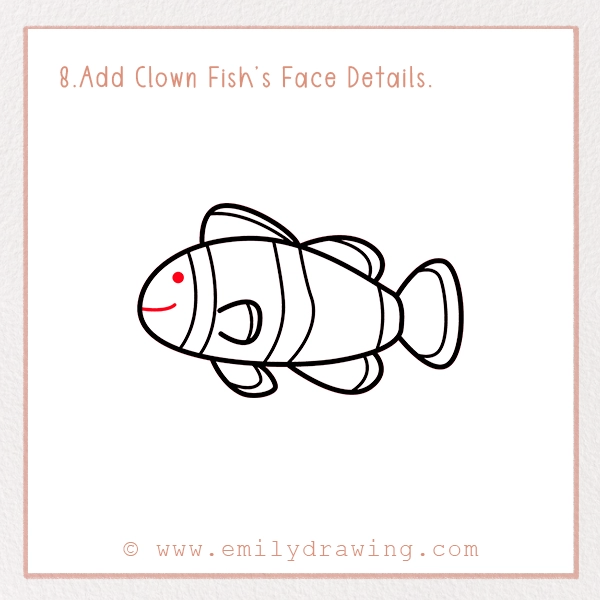
Near the face stripes, draw a small, rounded, dark dot to represent the eye. Beneath it, in the center of the face, add a curved line representing the smile of the fish.
That’s it! Your clownfish drawing is complete.
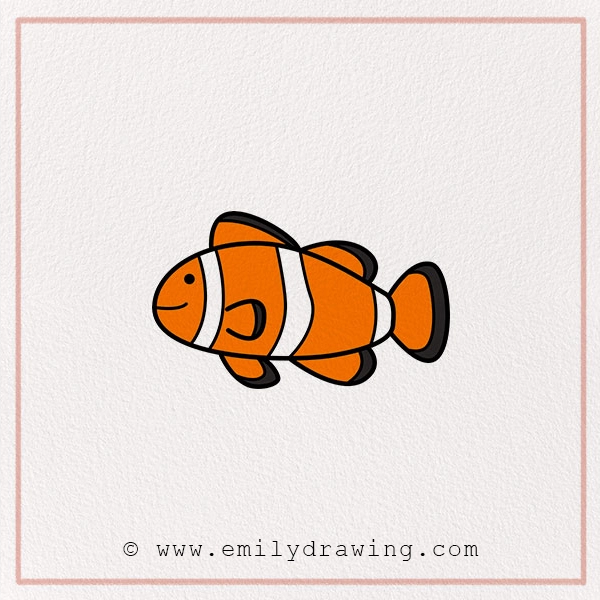
Step 9 – Color Your Clownfish
Though the sketch is complete, the pencil drawing of clownfish for kids is incomplete without colors. So, grab the orange and white color and start your magic on the drawing.
Make sure to use a dark marker to outline your fish’s drawing to give it a realistic look. Moreover, shading your drawing can make it a masterpiece.
For this, add some dark and light highlights in the outline of the body and within the fins. You could draw small lines into the fins and tail to give it an artistic touch.
Additional Tips to Enhance Your Clownfish Drawing
If you want to draw a clownfish in the sea anemone, you should draw the water in the background, similar to how we depict marine life in our jellyfish drawing tutorial. Plants, bubbles, and water will give your clownfish in sea anemone drawing realistic vibes.
Pin it now, Draw later!
You could search for some reference pictures to become more creative with your drawings. There are different species of clownfish so you could experiment with the texture and color.
Moreover, make sure to remain patient while drawing — following other guides like how to draw a jellyfish can also help build your confidence. Be prepared, and don’t rush — tackling creatures like in our how to draw a piranha fish tutorial shows how patience pays off!
Once your drawing is completed, make sure to check it for the proposition and erase some additional lines — just like we recommend in our armadillo drawing guide. For example, there should be no horizontal line in your fins — neatness is also key when learning how to draw an armadillo. If there are any, erase them.
You should ask for feedback from your friends and family members — and explore other guides like how to draw a camel to expand your skills. They will help you refine your artistic skills.
In the end, Keep practicing — try other challenges like how to draw a woodpecker to sharpen your drawing skills. including how to draw a camel and many more fun projects. So, explore them one by one — from clownfish to drawing a woodpecker — and start your journey of becoming an artist.
Get the FREE Printable Drawing Guide