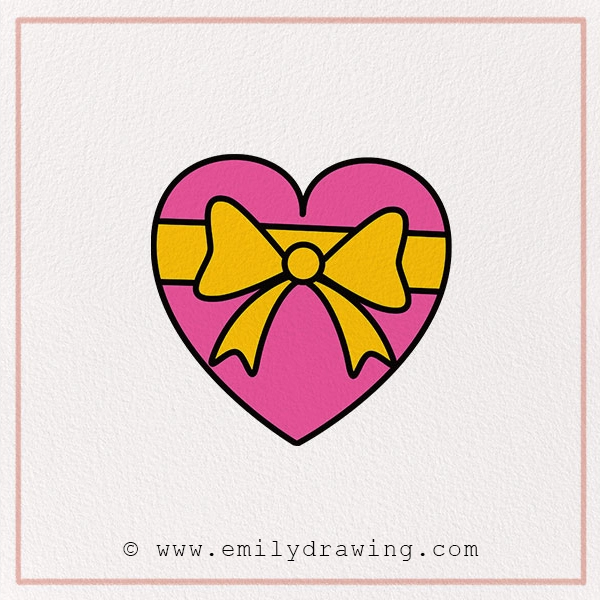
Do you love chocolates? What about beautiful gift boxes tied with pretty ribbons? In this fun tutorial, we’ll learn how to draw a chocolate box in just a few simple steps! Chocolate boxes are perfect gifts for birthdays, and this Valentine’s Day drawing tutorial makes it easy to create your own sweet design. Let’s grab our pencils and start drawing!
Chocolate boxes are not just about sweet treats; they also symbolize love, friendship, and special moments. Did you know that the tradition of gifting chocolates dates back to ancient civilizations? The Mayans and Aztecs used cacao beans as currency and even made bitter chocolate drinks! Over the years, chocolates have evolved into delightful gifts presented in decorative boxes with beautiful bows. Now, let’s create our own special chocolate box drawing!
Materials:
- a piece of paper
- a pencil for the guiding lines and sketching
- an eraser
- a black sharpie or a pen for the outlines
- markers or colored pencils for coloring
- our printable drawing guide (Join my Email List below to get this Tutorial)
Here are my RECOMMENDED Art Supplies!
- Crayola Coloring Set (140 Pieces – Mega Value!)
- 24 Colored Crayon Set
- A4 Printer Paper
- Crayola Coloring Pencils
- HP Home Printer with Instant Ink!
Time needed:
15 minutes.
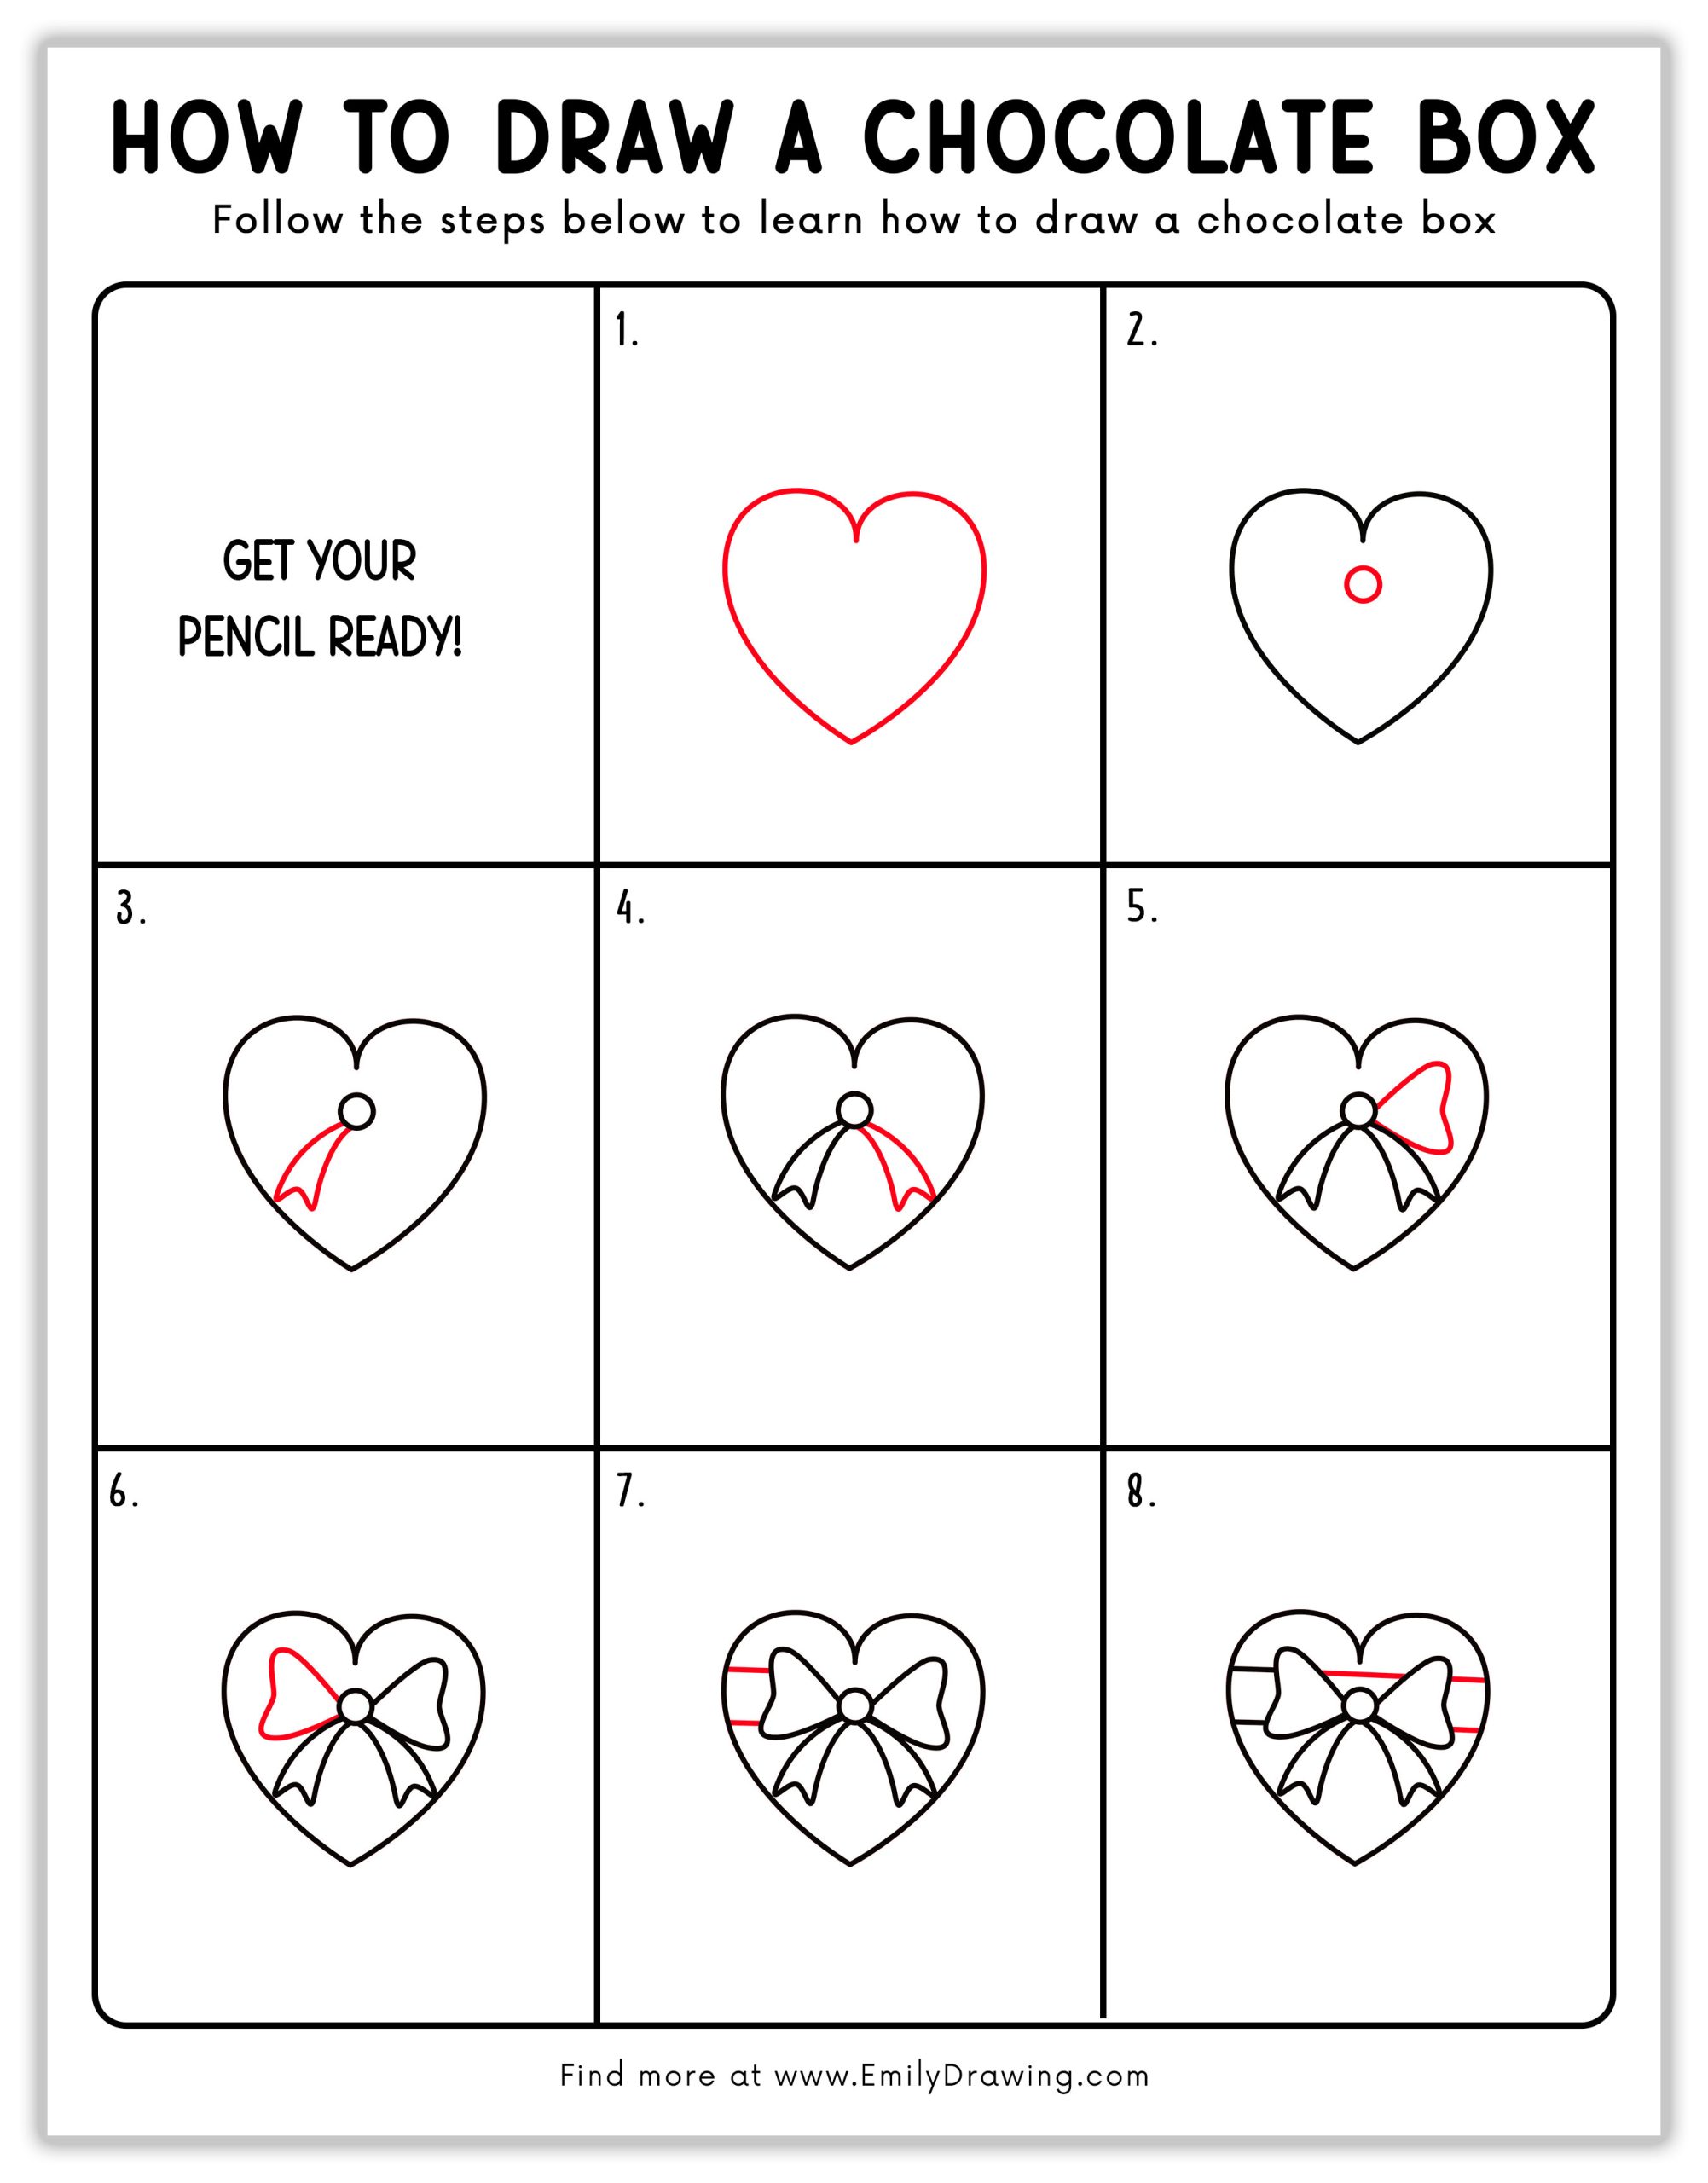
How to Draw a Chocolate Box — Let’s get started!
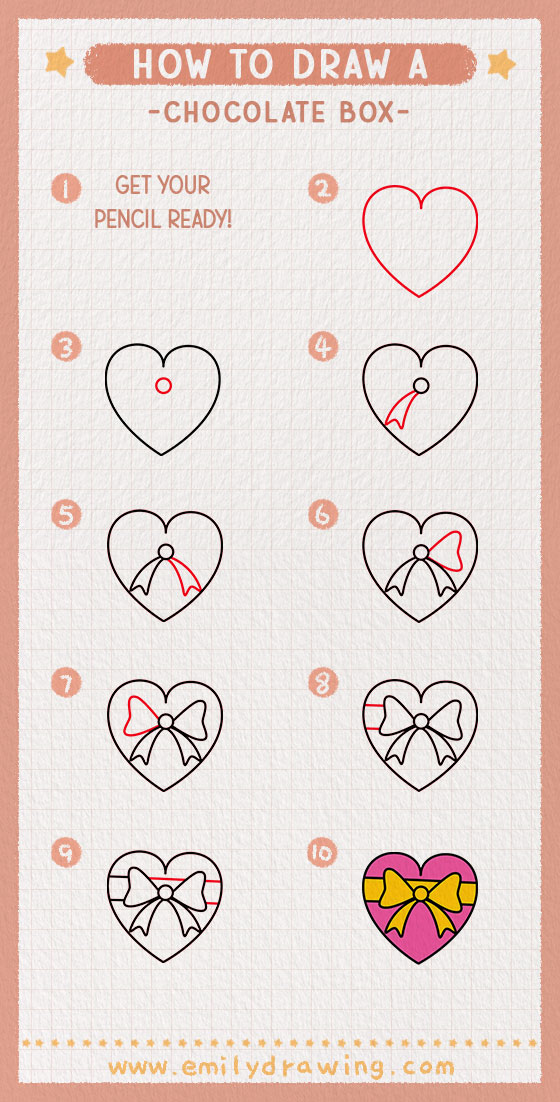
Step 1 – Draw the Heart Shape

Start by drawing a heart-shaped gift box in the center of your paper. This will be the base of your chocolate box. Try to make both sides even, but don’t worry if it’s not perfect—practice makes perfect!
Tip: If drawing a heart is tricky, try drawing two small circles at the top and connecting them to a “V” at the bottom. You can also fold a piece of paper in half, draw one side of the heart, and then trace the other half to make it symmetrical.
Step 2 – Draw the Centre Circle
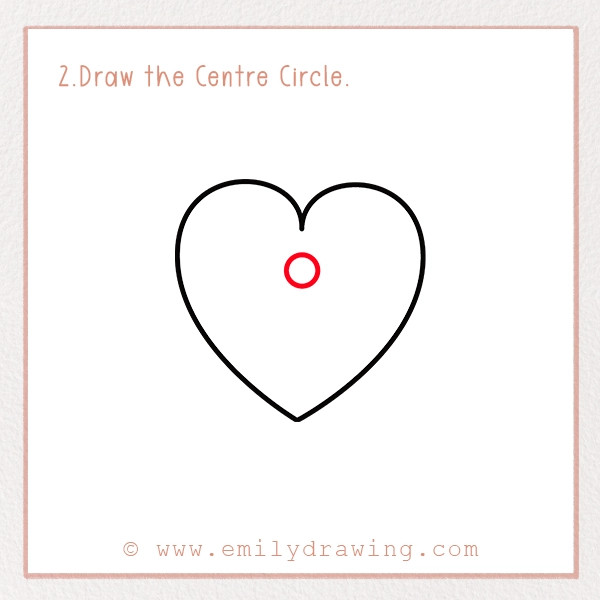
Inside the heart, near the top middle, draw a small circle. This will be the center of the bow that we’ll add in the next steps. Make sure it is evenly placed so that your bow looks balanced when completed.
Step 3 – Draw the First Bow Tail
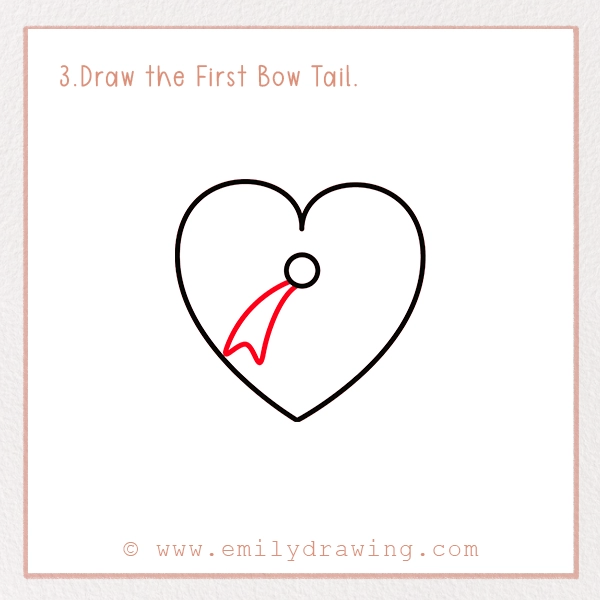
From the small circle, draw one curved ribbon shape coming down the left side of the heart. This is the first part of the bow’s tail. Let it flow naturally, like fabric, to make it look more realistic.
Step 4 – Add the Second Bow Tail
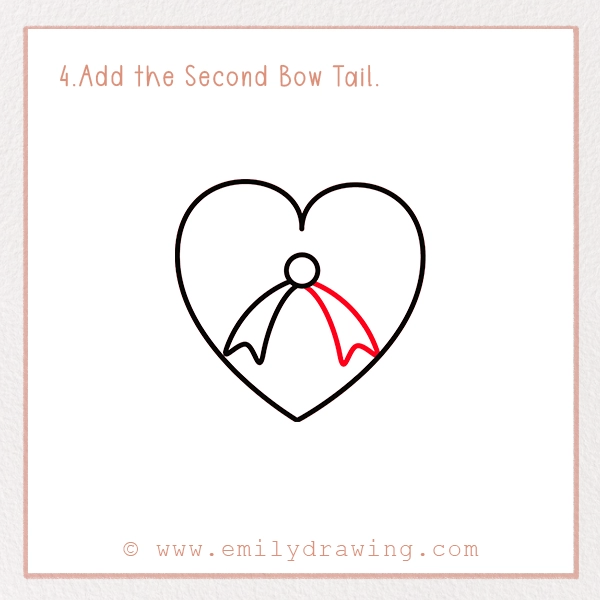
Now, draw another curved ribbon on the right side of the circle. Both tails should look balanced and elegant. If you want, you can make them slightly curved outward to give them a more dynamic appearance.
Step 5 – Add the First Bow
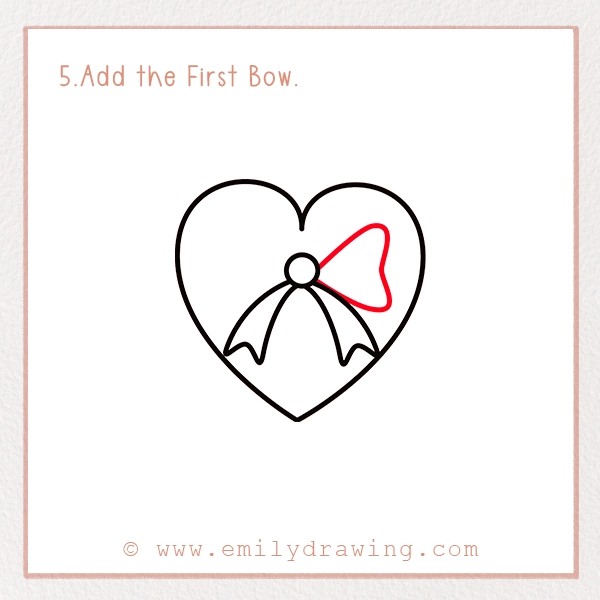
Next, sketch a big loop on the left side of the small circle. This will form the first part of the bow. Make sure it’s round and full to give the bow a soft, fluffy look.
Step 6 – Add the Other Bow
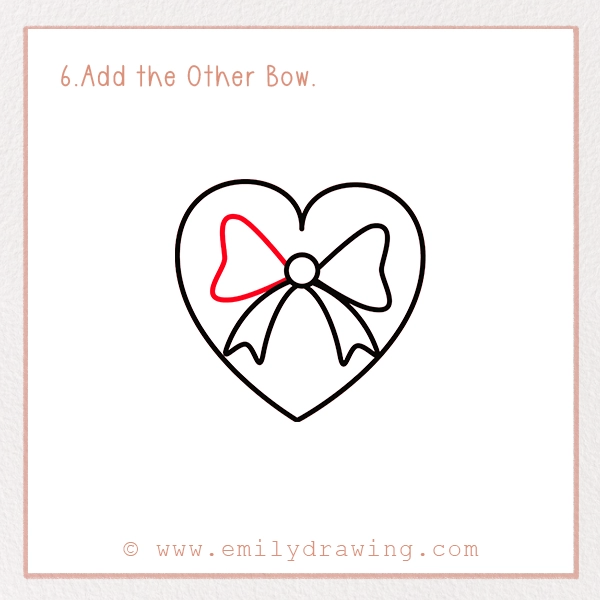
Now, draw another loop on the right side of the circle to complete the bow. Make sure both loops look even and connected to the center circle. If one side looks bigger than the other, don’t worry! You can adjust it by lightly erasing and redrawing.
Step 7 – Add the Bow’s Loops
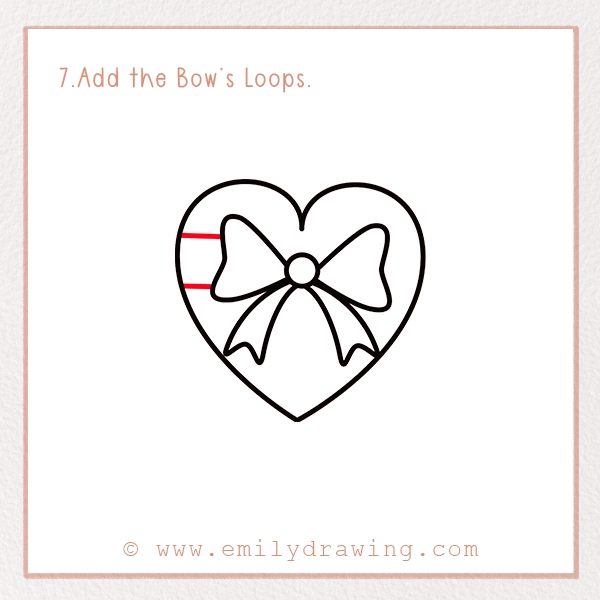
To make the bow look fuller, add extra curved lines inside each loop, giving it more volume and texture. These small details will make the bow appear more realistic and decorative.
Step 8 – Complete the Bow’s Loops
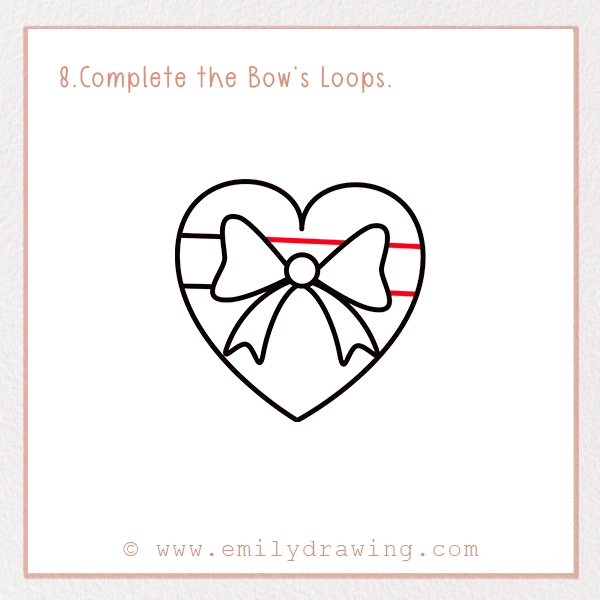
Check your bow and make any necessary adjustments. When drawing a ribbon, add soft curves to give it a three-dimensional appearance. You can also add small crease lines where the fabric folds, making the bow look more natural.
Step 9 – Color Your Drawing
The most fun part: coloring! Use pink or red for the heart-shaped box and a bright yellow or gold for the ribbon. You can also add shading to make it pop.
Tip: Use different shades to make your drawing look more realistic! If you want a shiny effect, add small white highlights on the ribbon to create a glossy look.
Fun Facts About Chocolate Boxes
Pin it now, Draw later!
Did you know?
- The first chocolate box was made in the 1800s by Richard Cadbury, the man behind the famous Cadbury chocolates!
- Chocolate boxes are a symbol of love and friendship in many cultures.
- Some luxury chocolate boxes are decorated with gold and cost thousands of pounds!
- In Japan, there is a tradition called “Giri-choco” where people give obligation chocolates to friends and co-workers on Valentine’s Day.
- The world’s largest chocolate box was created in 2008 and weighed over 2,000 kilograms!
Tips and Tricks for Better Drawing
Practice makes perfect! If your heart shape isn’t even, keep trying — it gets easier with practice.
- Use light pencil strokes when sketching, so mistakes are easy to erase.
- Experiment with colors! Try different shades of red, pink, or even purple to create a unique chocolate box.
- Add texture! To make your chocolate box look more realistic, try drawing small patterns or decorations on the surface.
- Shading techniques: Use a darker pencil to shade one side of the box slightly, giving it a three-dimensional look.
- Try different angles! If you feel creative, draw the chocolate box from a side perspective to challenge your skills.
- Use reference images! Looking at real chocolate boxes can help you get a better sense of how the ribbons and shapes should be drawn.
Expanding Your Creativity
Once you’ve mastered drawing a simple chocolate box, why not try adding even more details? Here are some fun ways to expand your creativity:
Add chocolates inside the box. Draw small truffles, bonbons, or wrapped chocolates inside an open box.
Create a gift tag. Add a cute gift tag to the bow with a message like “Happy Valentine’s Day” or “For You.”
Draw a fancy pattern. Decorate the box with floral designs, stripes, or polka dots.
Experiment with different shapes. Instead of a heart, try drawing a square or round chocolate box.
Create a holiday-themed box. Draw a Christmas-themed box with holly leaves or a birthday-themed box with confetti patterns.
Great job! You’ve just learned how to draw a beautiful chocolate box. We hope you had fun following this tutorial! If you love drawing, why not try sketching other gift boxes or delicious treats? You could also have fun with our step-by-step tutorial on how to draw a rabbit—it’s simple, sweet, and just as charming! Don’t forget to share your drawing on social media using #EmilyDrawing! Happy drawing!
Drawing is an amazing way to express creativity. The more you practice, the better you’ll become. Keep experimenting with colors, shapes, and details, and soon you’ll be able to create even more stunning artwork. Have fun and keep drawing!
Art is a wonderful way to express emotions, tell stories, and create beautiful images that bring joy. Whether you’re drawing for fun, learning new skills, or creating artwork for someone special, every sketch you make adds to your artistic journey. Keep practicing, exploring new techniques, and most importantly, enjoy the process of drawing!
Happy drawing, and may your chocolate box designs be as sweet as real chocolates!
Get the FREE Printable Drawing Guide