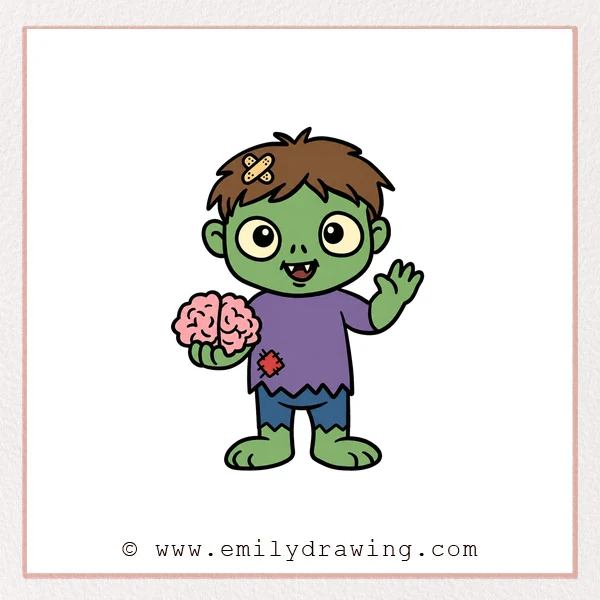
Learn how to draw a funny cartoon zombie with messy hair, huge eyes, torn clothes, and a silly snack. This easy drawing tutorial helps beginners practice expressive faces, simple hands, and a balanced standing pose.
What You Will Need
- Drawing paper
- Pencil and eraser
- Black marker or colored pencils
Here are my RECOMMENDED Art Supplies!
- Crayola Coloring Set (140 Pieces – Mega Value!)
- 24 Colored Crayon Set
- A4 Printer Paper
- Crayola Coloring Pencils
- HP Home Printer with Instant Ink!
Time needed:
19 minutes.
Step-by-Step Drawing Guide
Step 1: Draw the Messy Hair
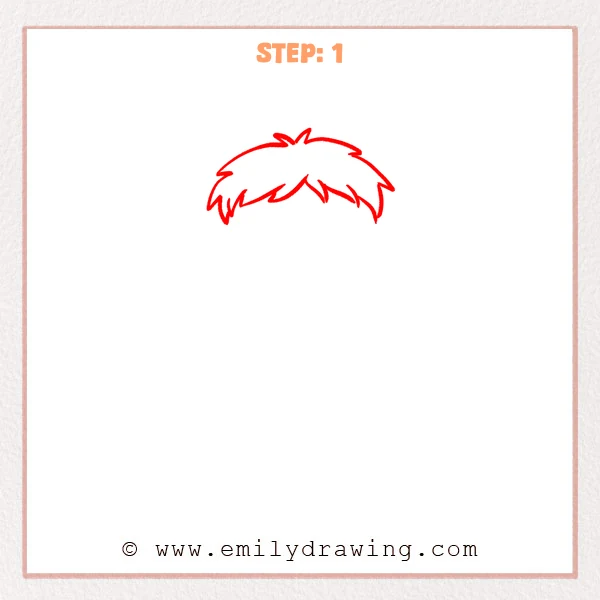
Draw a wide curved hairstyle made from many uneven pointed tufts. Add a few spikes along the top to make the hair look wild and untidy.
Pro Tip: Change the length and direction of the points for a naturally messy look.
Step 2: Add the Head and Eyes
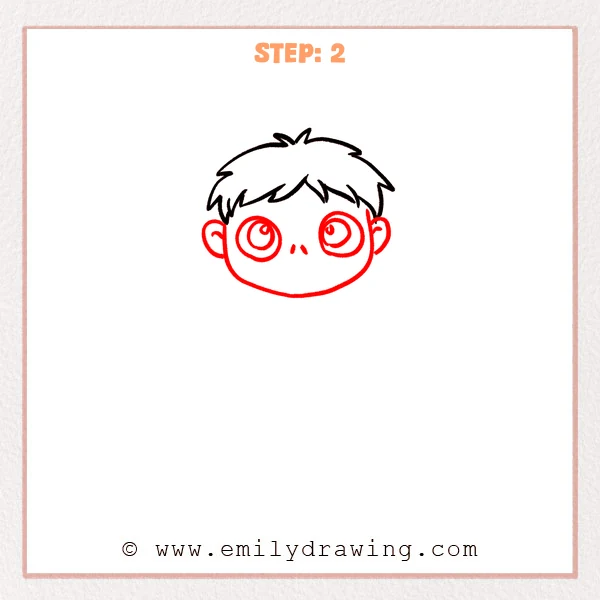
Draw a broad rounded face beneath the hair and place one ear on each side. Add two oversized circular eyes with inner rings and small pupils, then mark the nose with two short curves.
Pro Tip: Make the pupils look in slightly different directions for a goofy zombie expression.
Step 3: Draw the Bandage and Mouth
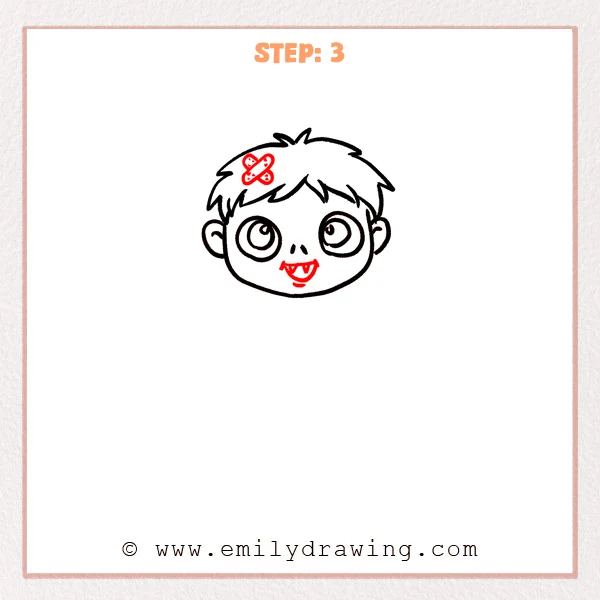
Add two crossed rounded bandages on the left side of the hair and place tiny dots on their ends. Draw a smiling open mouth with several small triangular teeth and a short curve beneath the lower lip.
Pro Tip: Keep the teeth uneven so the smile feels playful rather than perfect.
Step 4: Add the Arms and Brain
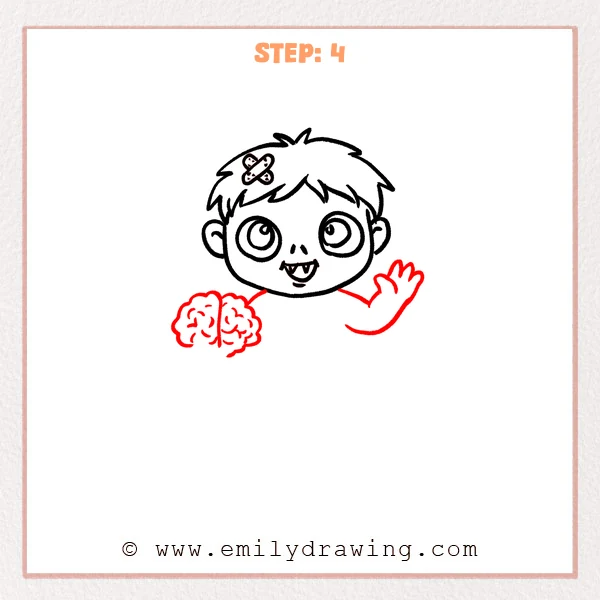
Draw one bent arm reaching upward on the right and finish it with four rounded fingers. On the left, draw a curved hand supporting a bumpy brain shape filled with winding fold lines.
Pro Tip: Use soft cloud-like bumps around the brain instead of sharp corners.
Step 5: Draw the Torn Shirt
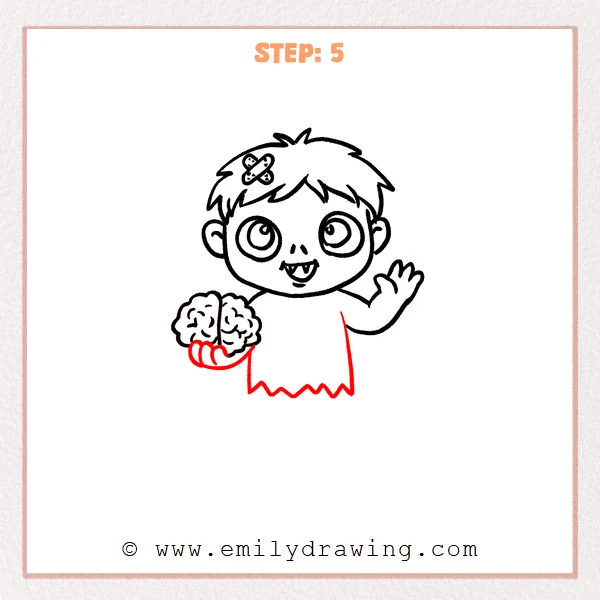
Extend the shoulders into a loose rectangular shirt around the body. Finish the bottom with a row of large zigzag points to create a ragged torn hem.
Pro Tip: Vary the depth of the zigzags so the fabric looks naturally ripped.
Step 6: Finish the Legs and Patch
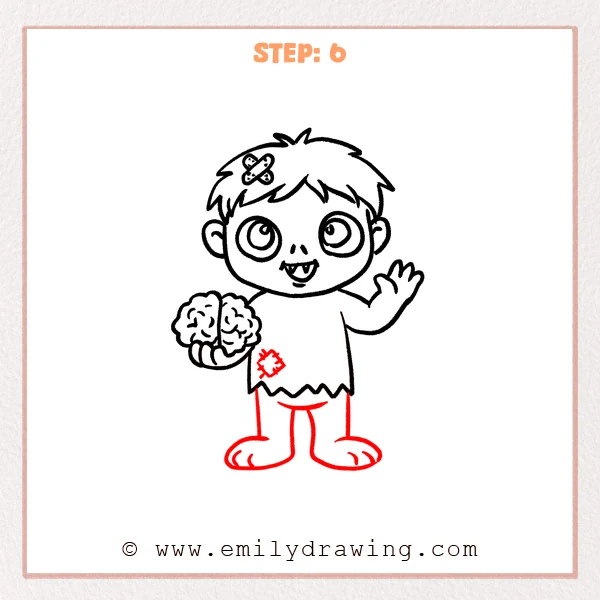
Draw two straight legs below the shirt and add large rounded feet pointing outward. Place a small square patch with short stitch marks on the front of the shirt.
Pro Tip: Make the feet wider than the legs to keep the standing character visually stable.
Step 7: Color in your drawing!
Fun Facts
- Zombies became popular in modern stories through movies, comics, and video games.
- Large eyes and oversized feet are common features in cute cartoon character designs.
- Jagged hems quickly suggest old or damaged clothing in a simple drawing.
Pin it now, Draw later!
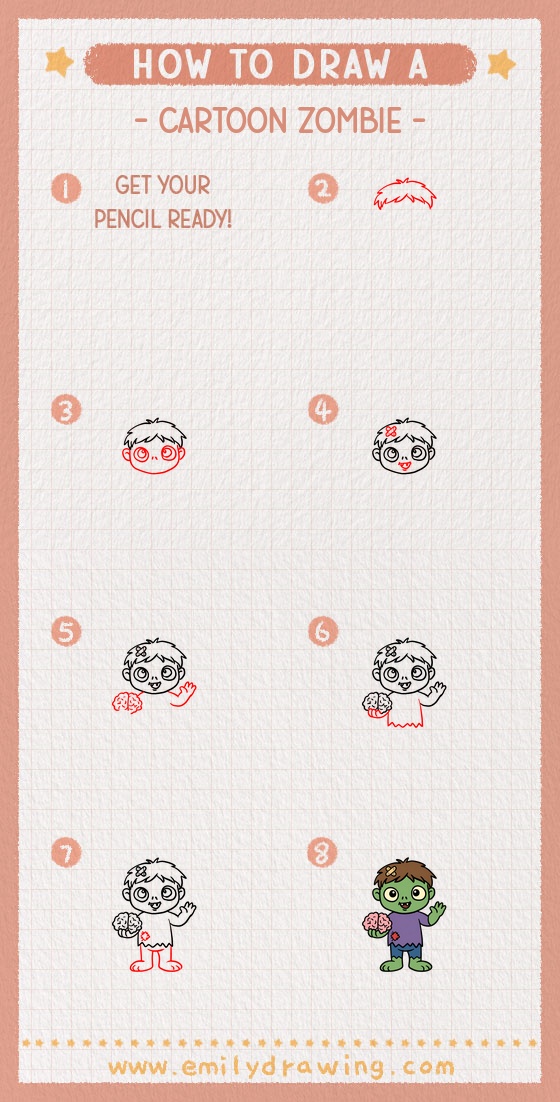
Erase hidden guides, darken the outline, and color the skin green or gray with bright contrasting clothes. Your cartoon zombie is complete, so try adding dirt marks, a moonlit cemetery, or another funny monster nearby.
Get the FREE Printable Drawing Guide
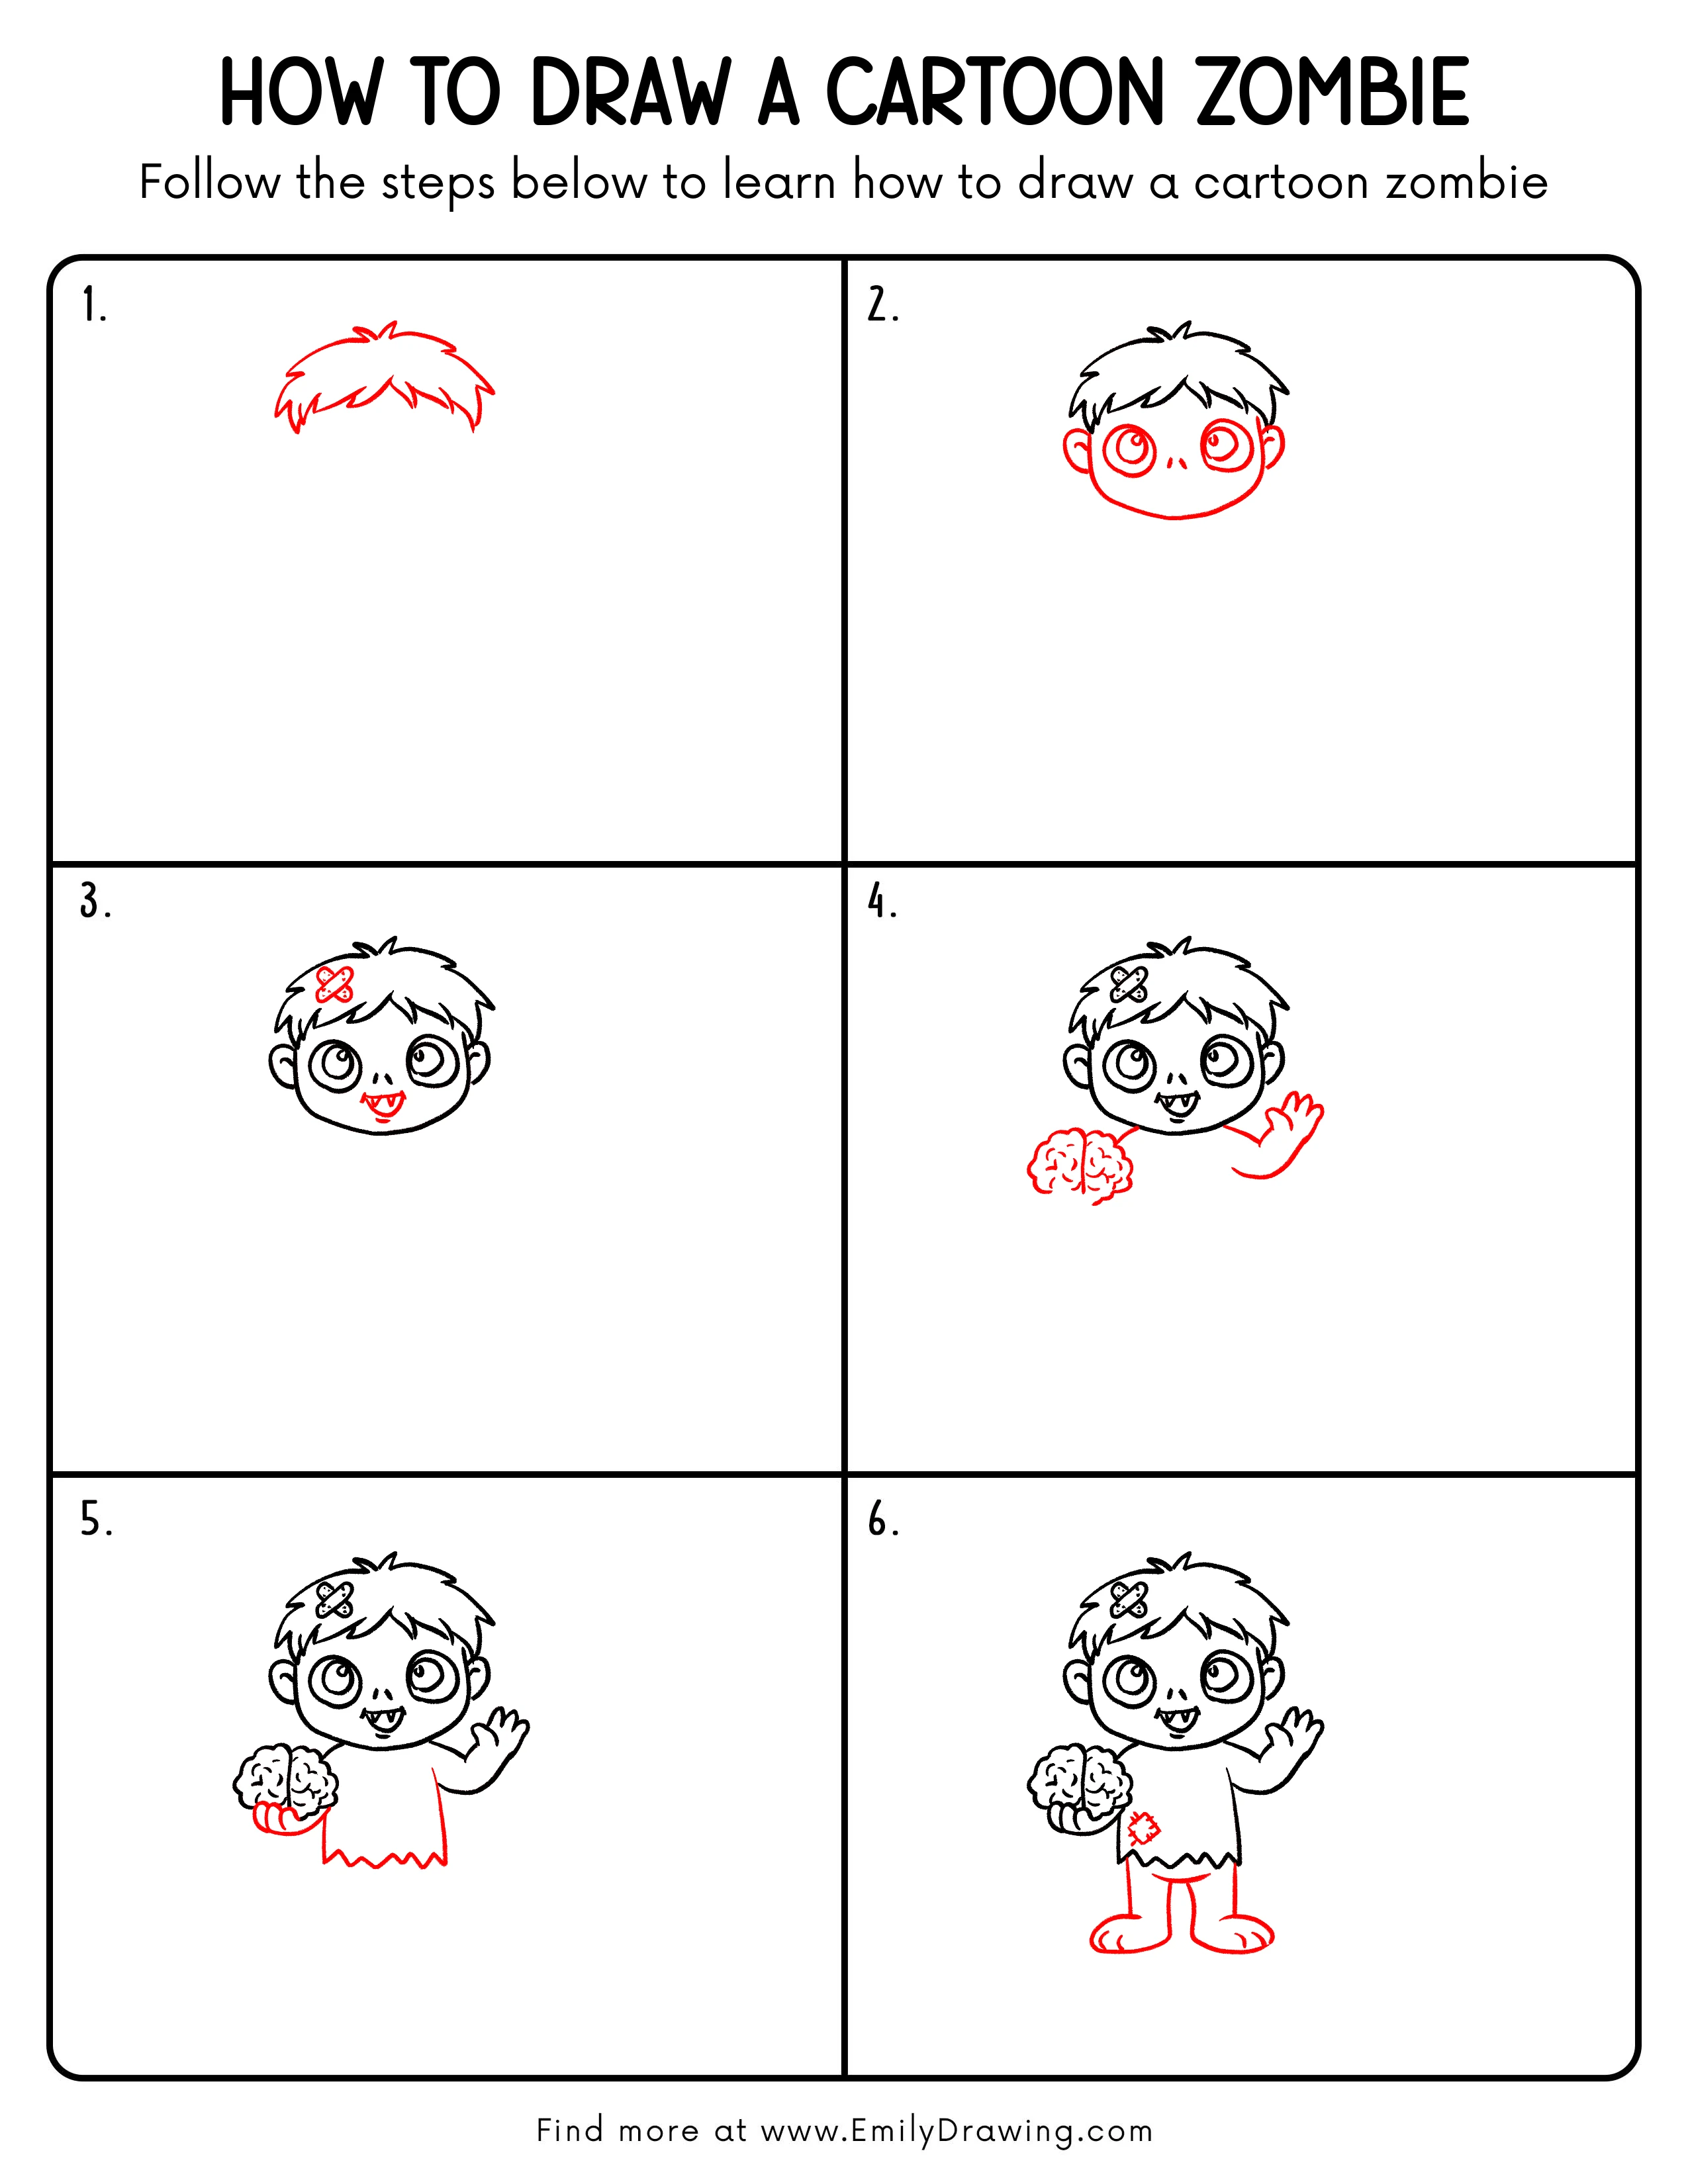
FREE Download Printable Cartoon Zombie Drawing Tutorial
Frequently Asked Questions
How can I make the zombie look less scary?
Use round shapes, large eye highlights, and a cheerful smile instead of sharp features.
How do I draw the brain folds?
Fill the bumpy outline with several short C-shaped and S-shaped curves.
Can I change what the zombie is holding?
Yes, keep the same curved hand and replace the brain with a pumpkin, ball, or snack.