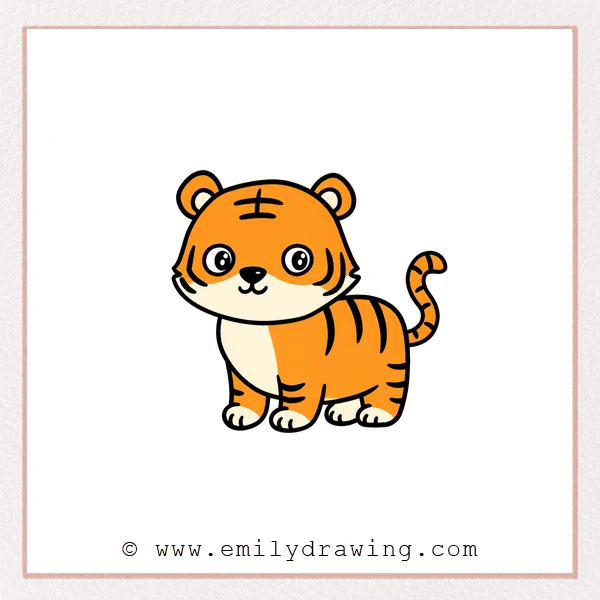
Learn how to draw a cartoon tiger with round ears, short legs, bold stripes, and a curled tail. This easy drawing tutorial helps beginners practice simple curves, balanced features, overlapping shapes, and playful animal details.
What You Will Need
- Drawing paper
- Pencil and eraser
- Black marker or colored pencils
Here are my RECOMMENDED Art Supplies!
- Crayola Coloring Set (140 Pieces – Mega Value!)
- 24 Colored Crayon Set
- A4 Printer Paper
- Crayola Coloring Pencils
- HP Home Printer with Instant Ink!
Time needed:
16 minutes.
Step-by-Step Drawing Guide
Step 1: Draw the Rounded Ears
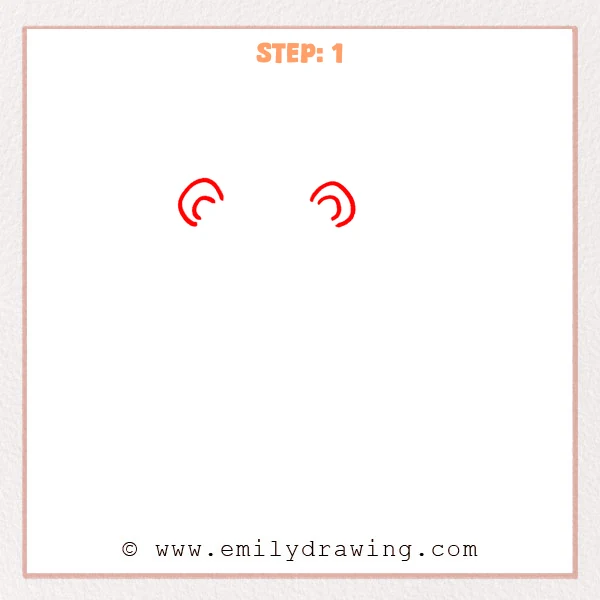
Draw two matching upside-down curves with plenty of space between them. Add a smaller curved line inside each ear to show the inner folds.
Pro Tip: Place the ears at the same height so the head will look balanced.
Step 2: Add the Head and Eye Shapes
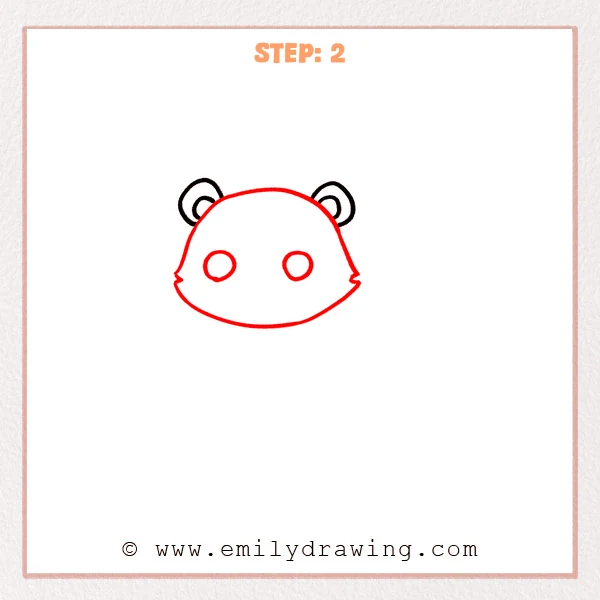
Connect the ears with a large rounded head that widens near the cheeks. Add one small pointed fur tuft on each side, then draw two round eye shapes.
Pro Tip: Keep both eyes level and leave equal space around the center of the face.
Step 3: Draw the Nose, Mouth, and Face Stripes
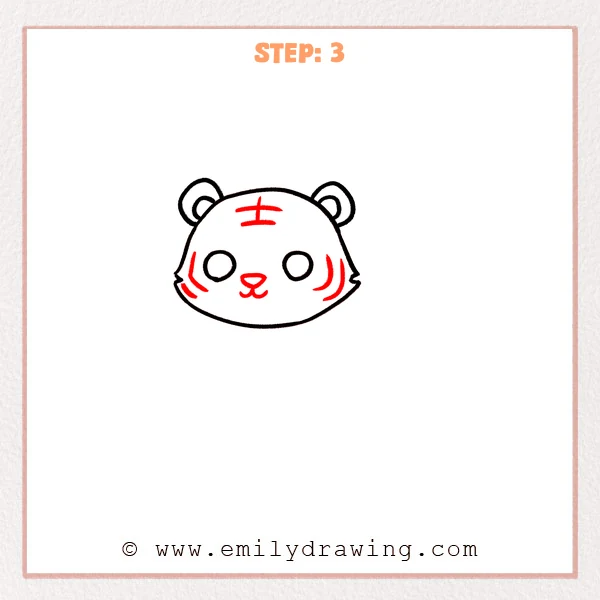
Draw a small rounded triangle nose and two curved mouth lobes beneath it. Add a short vertical stripe and two horizontal stripes on the forehead. Finish with two curved stripes along each cheek.
Pro Tip: Use the nose as a center guide when arranging the forehead and cheek markings.
Step 4: Build the Body and Back Legs
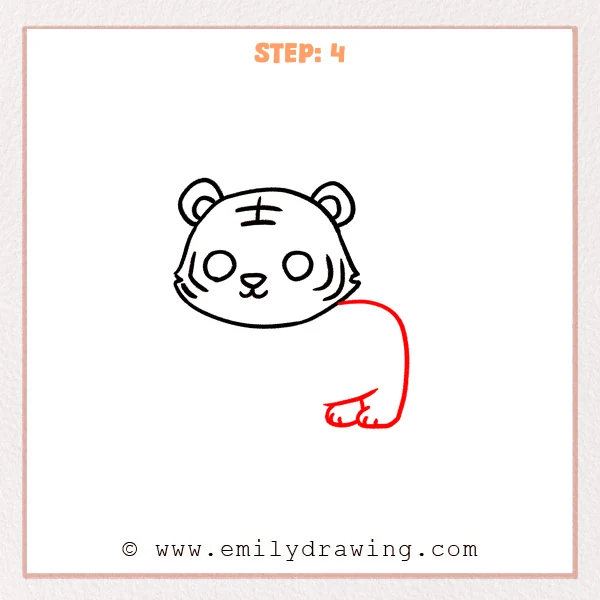
Extend a long rounded back from beneath the right side of the head. Curve the outline downward into a short rear leg, then add a partly visible back paw beside it.
Pro Tip: Make the body wider than it is tall to create a sturdy cartoon pose.
Step 5: Add the Chest and Front Legs
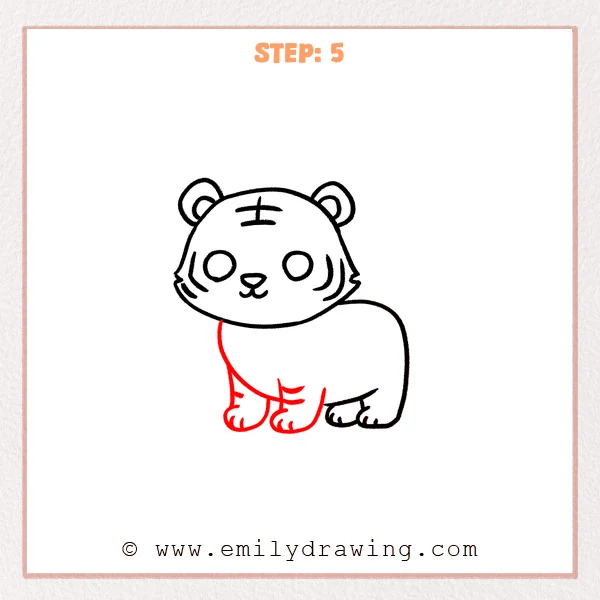
Draw a curved chest line beneath the left side of the head. Form two short front legs with rounded paws, toe marks, and small horizontal stripes.
Pro Tip: Align the paws along one baseline so the cartoon tiger stands evenly.
Step 6: Finish the Eyes, Stripes, and Tail
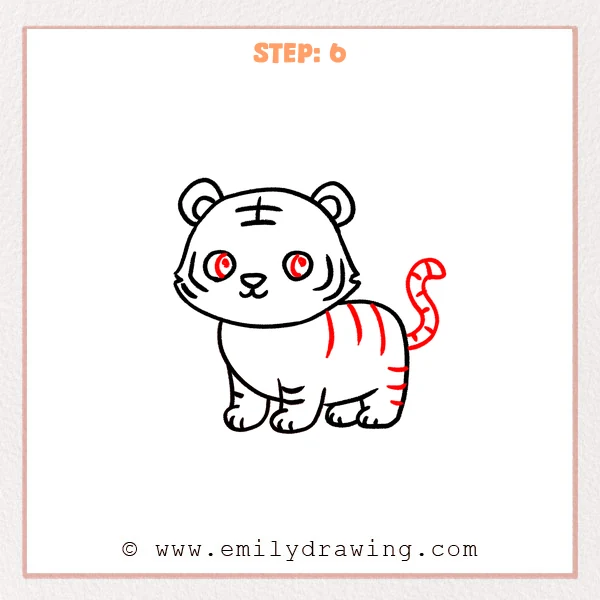
Add curved inner shapes, round pupils, and tiny highlights inside both eyes. Draw three long stripes across the back and three short stripes on the rear leg. Finish with an upward curling tail divided by several stripe lines.
Pro Tip: Follow the body and tail curves when placing stripes so they wrap around each form.
Step 7: Color in your drawing!
Fun Facts
- Every tiger has a unique pattern of stripes, much like a human fingerprint.
- Tigers use their long tails to help with balance while turning and moving.
- Rounded shapes and oversized eyes give this cartoon tiger a friendly expression.
Pin it now, Draw later!
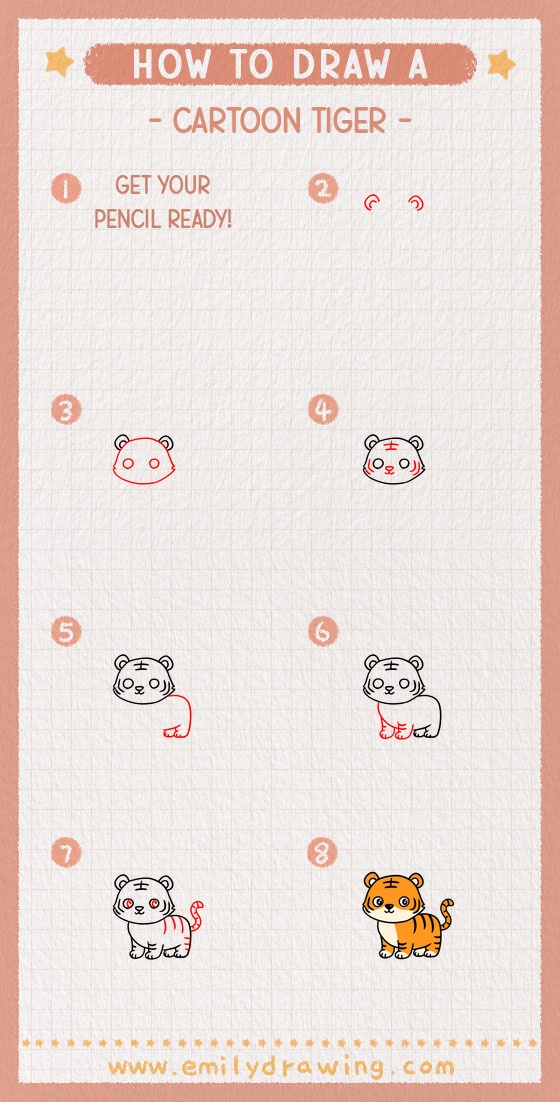
Erase stray guidelines, darken the final outline, and color the coat orange with dark stripes and lighter face details. Your cartoon tiger is complete, so try adding grass, a jungle background, or another playful pose.
Get the FREE Printable Drawing Guide
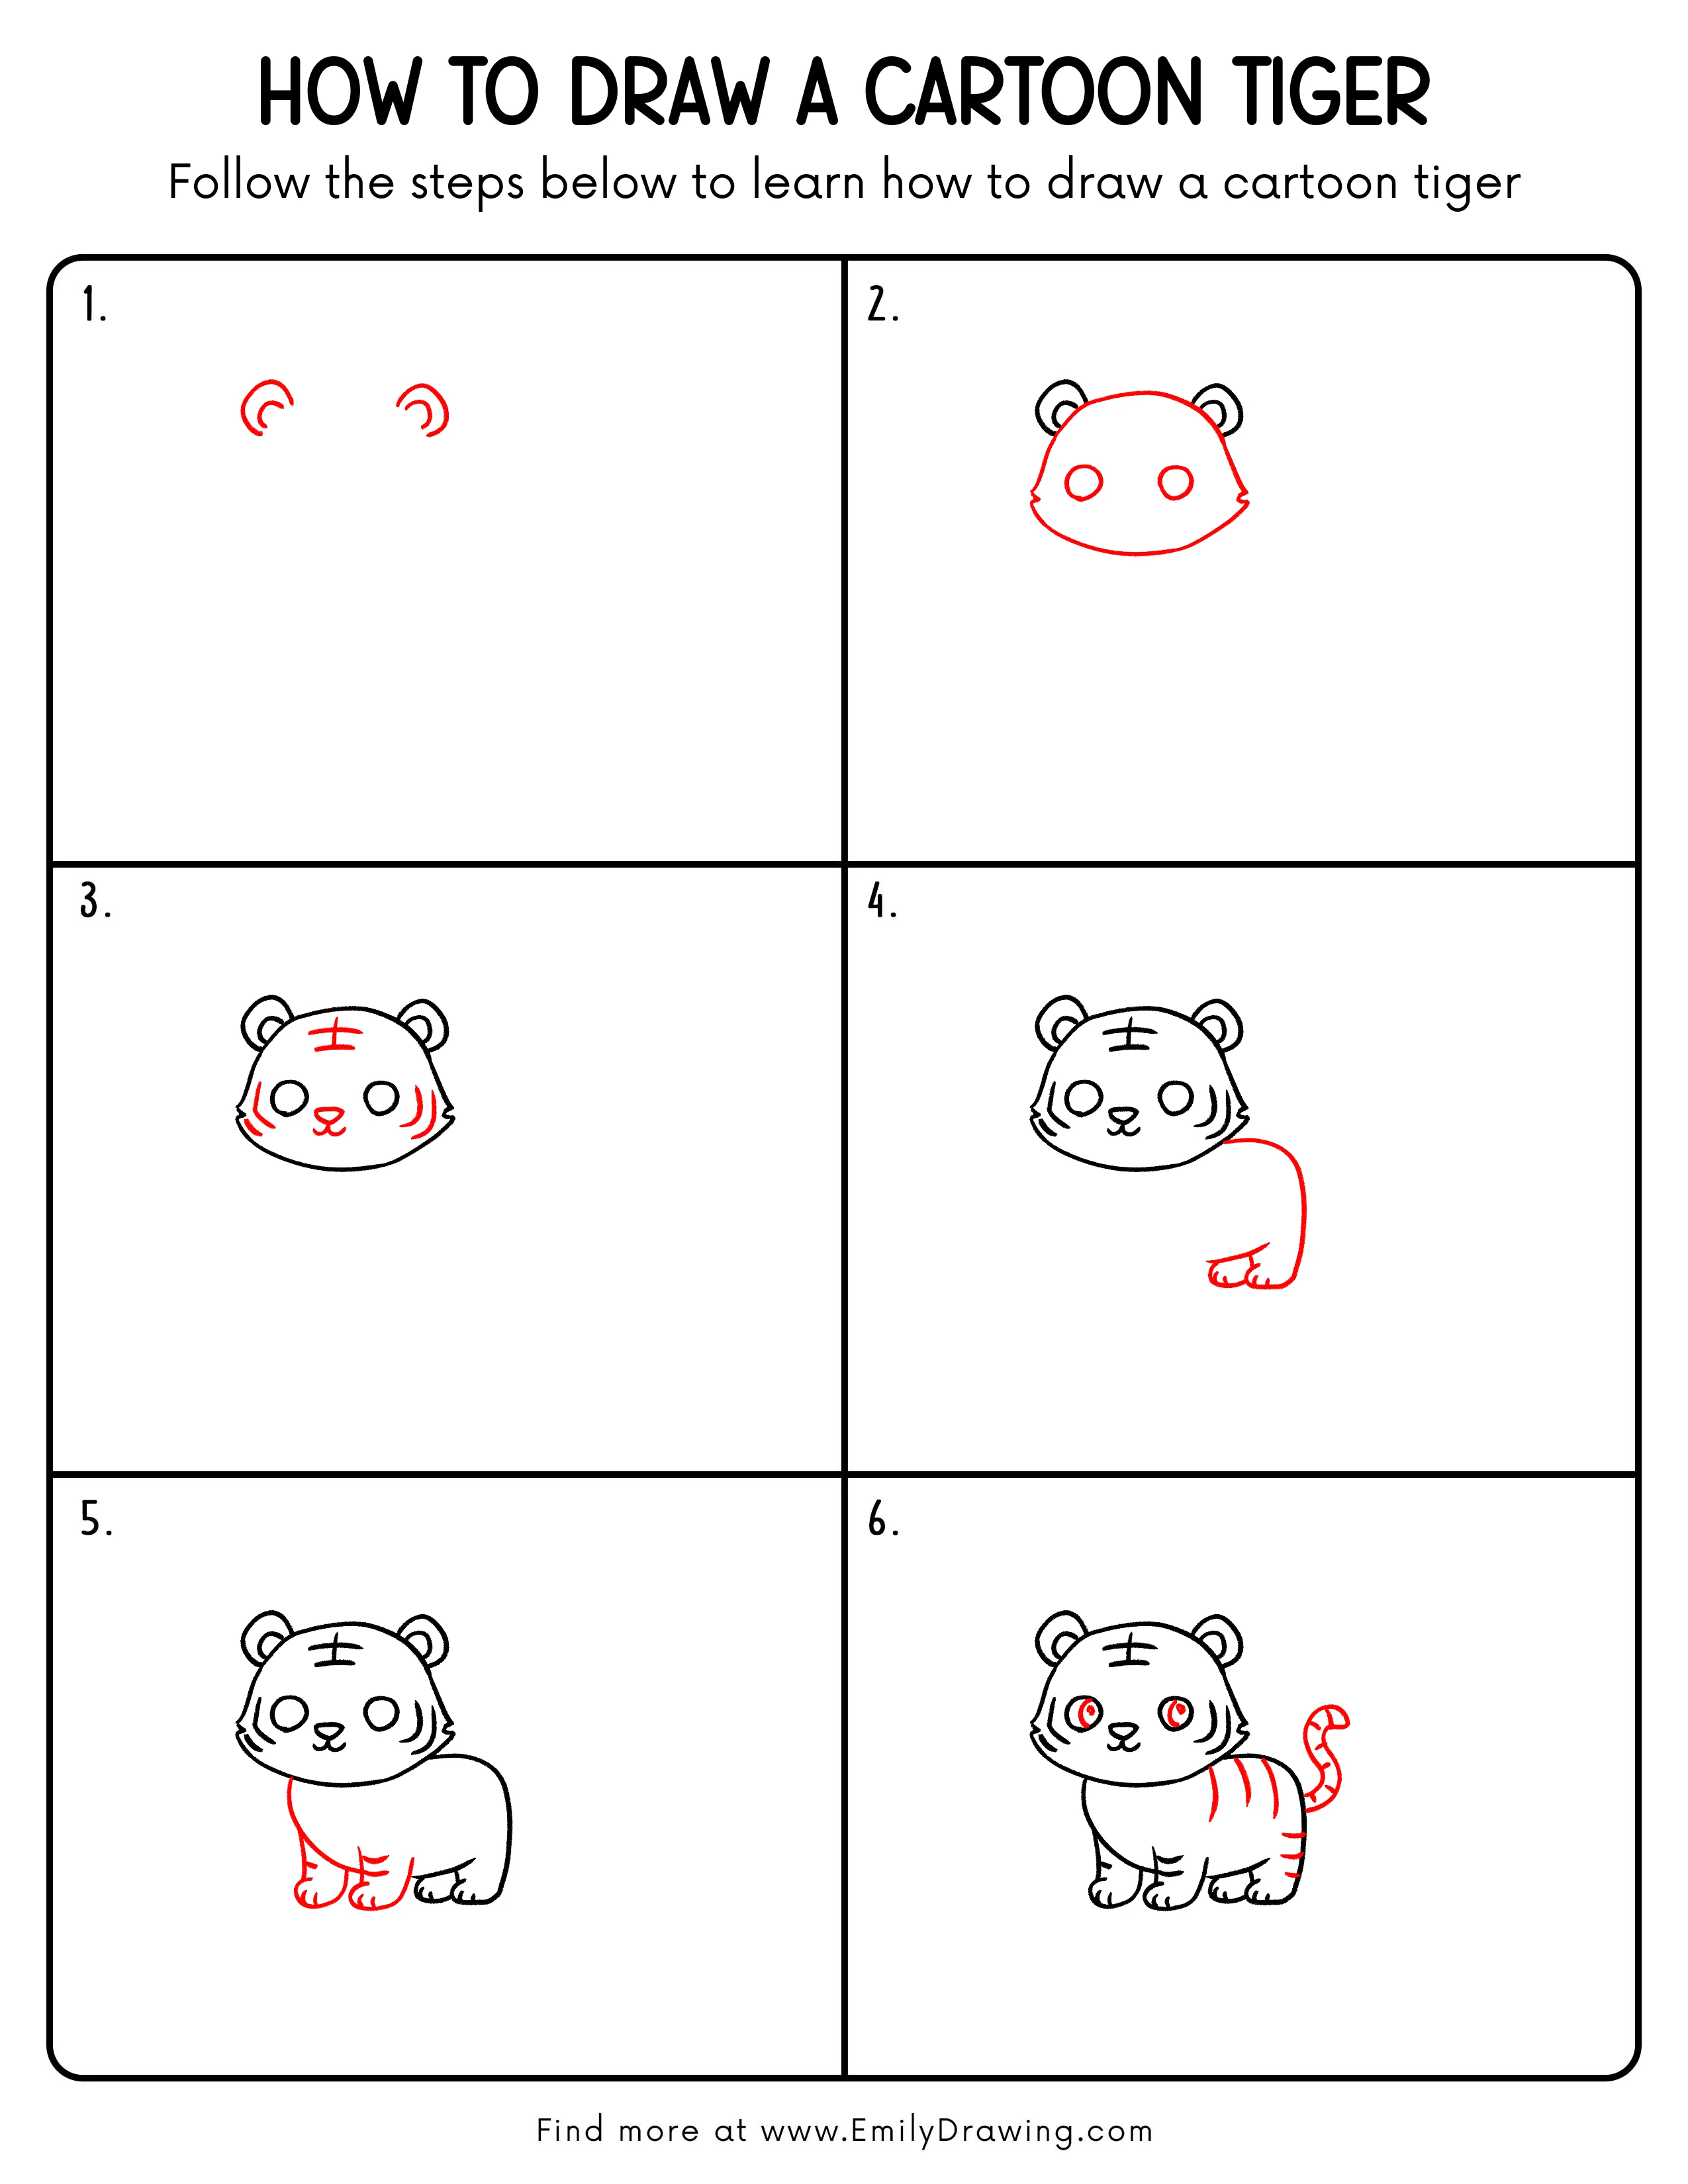
FREE Download Printable Cartoon Tiger Drawing Tutorial
Frequently Asked Questions
How can I keep the face symmetrical?
Draw a faint vertical guide through the forehead, nose, and mouth before placing paired features.
Why do the legs look uneven?
Mark a light ground line first, then make every paw touch that same line.
How should I space the tiger stripes?
Leave visible coat space between each stripe and vary their lengths slightly for a natural pattern.