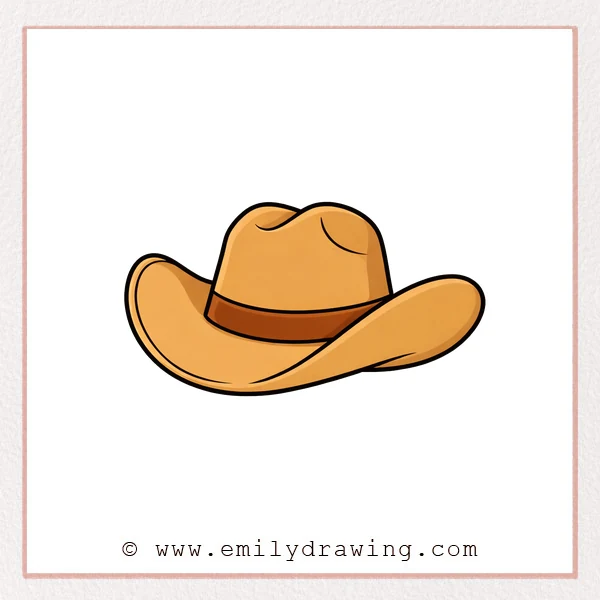
A cartoon cowboy hat is a great shape to practice smooth curves and simple volume.
In this easy drawing tutorial, you will build the crown first, then add a wide, curled brim.
What You Will Need
- Pencil
- Eraser
- Black marker or pen
- Paper
Here are my RECOMMENDED Art Supplies!
- Crayola Coloring Set (140 Pieces – Mega Value!)
- 24 Colored Crayon Set
- A4 Printer Paper
- Crayola Coloring Pencils
- HP Home Printer with Instant Ink!
Time needed:
18 minutes.
Step-by-Step Drawing Guide
Step 1: Draw the crown’s side curve
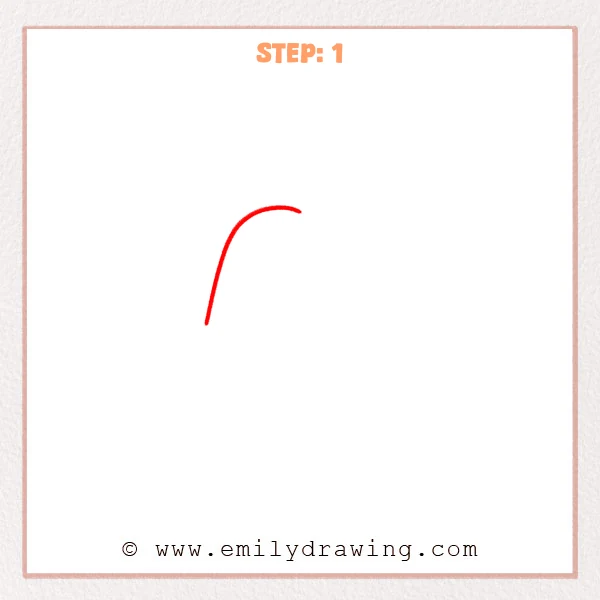
Start with one long curved line that rises upward, like an upside-down “J.”
At the top, bend it slightly to the right to keep the crown rounded.
Pro Tip: Keep the line light so you can adjust the crown height and curve later.
Step 2: Add the crown top and the other side
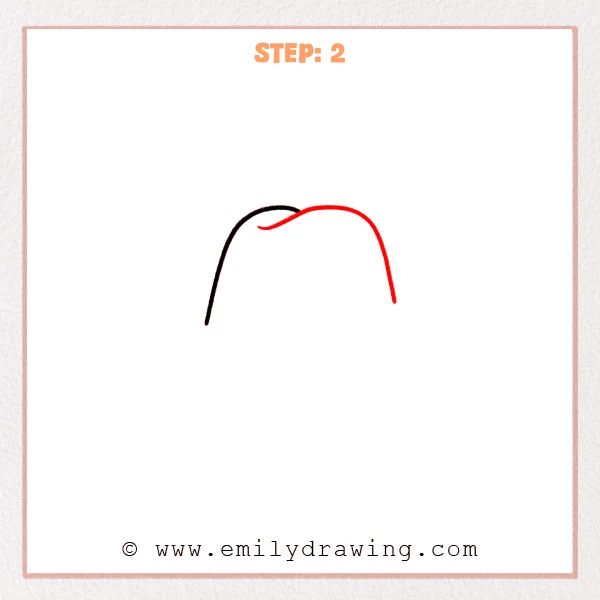
Add a smooth curved line across the top to connect the crown’s upper edge.
Then draw the right side dropping down, and add a second outer curve on the left to complete the crown shape.
Pro Tip: Give the top curve a gentle rise and dip for a classic cartoon cowboy hat feel.
Step 3: Draw the brim with two curves
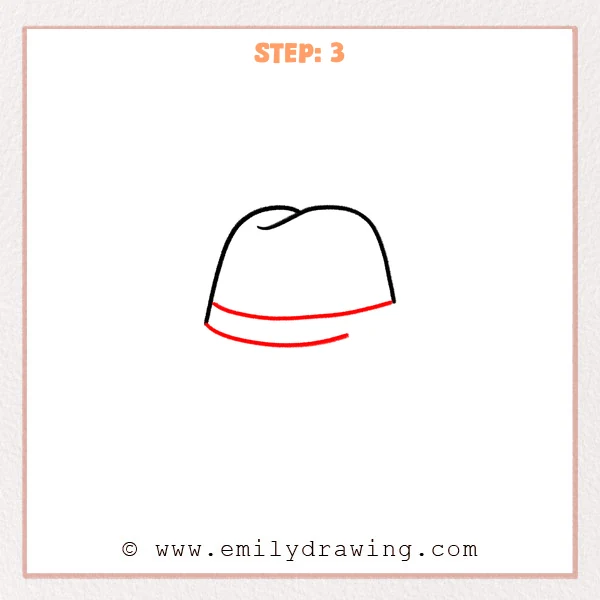
Draw a long curved line along the bottom of the crown for the brim’s inner edge.
Add a second, slightly wider curve below it to show the brim’s outer edge and thickness.
Pro Tip: Make the lower curve a little wider than the upper one for a fuller brim.
Step 4: Draw the big outer brim outline
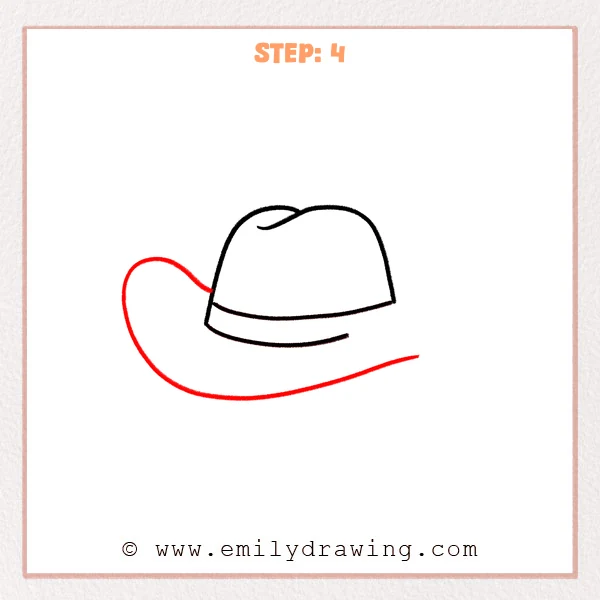
From the left side of the crown, draw a large sweeping curve that lifts up, then dips to form the left brim.
Continue the line far to the right with a long gentle arc to make the brim feel wide and lively.
Pro Tip: Keep the left upturn lower than the crown’s highest point for a natural look.
Step 5: Add the right-side brim curl
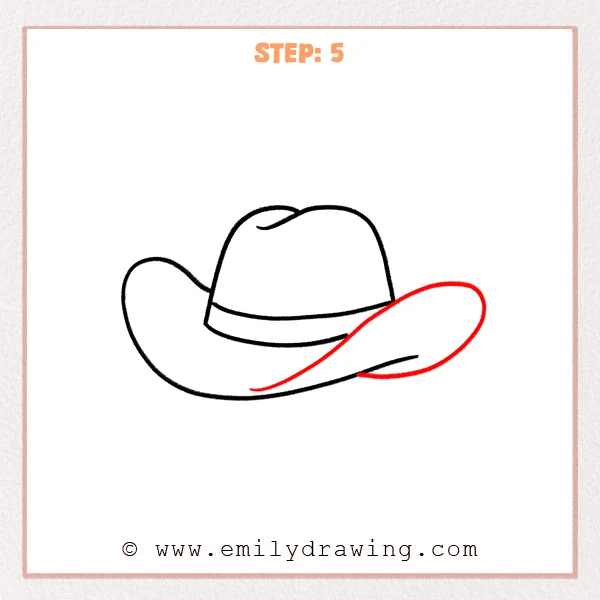
Draw a large oval-like curl on the right to show the brim folding upward.
Add an inner curve along the lower brim and connect it into the curl to show thickness.
Pro Tip: Keep the curl rounded, not pointy, for a more cartoon look.
Step 6: Add the inner curve on the left brim
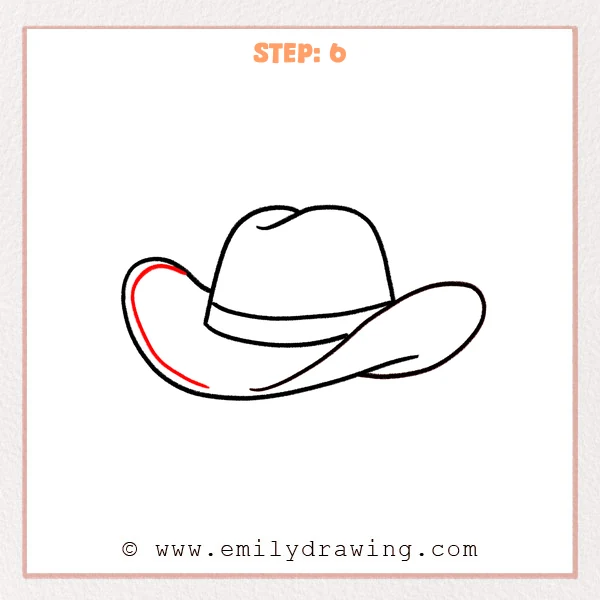
Inside the lifted left brim, draw a second curve that follows the outer edge.
Let it flow down toward the front brim to show thickness and the upward flip.
Pro Tip: Keep an even gap between the inner curve and outer edge for a clean thickness.
Step 7: Color in your drawing!
Fun Facts
- Traditional cowboy hats often have curled brims to help with sun and rain.
- Hat crowns come in many shapes, and cartoons exaggerate them for extra style.
- A simple brim curl can instantly make a hat feel more “western.”
Pin it now, Draw later!
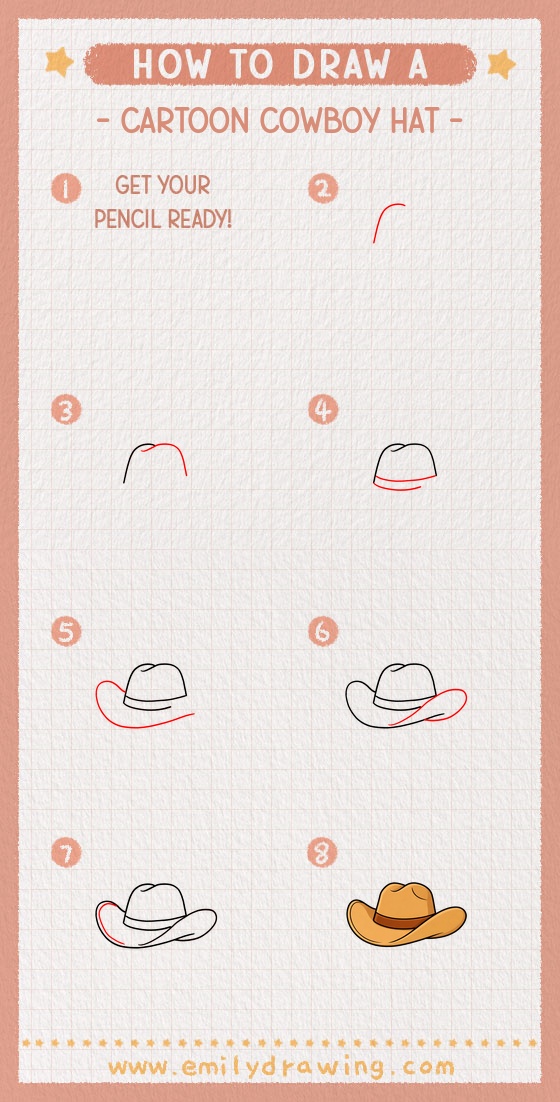
Trace your final lines with a pen, then erase leftover sketch marks.
You can add a hatband, small stitch marks, or a tiny star badge for personality.
Now you know how to draw a cartoon cowboy hat step by step—try changing the brim curl to make your own style.
Get the FREE Printable Drawing Guide
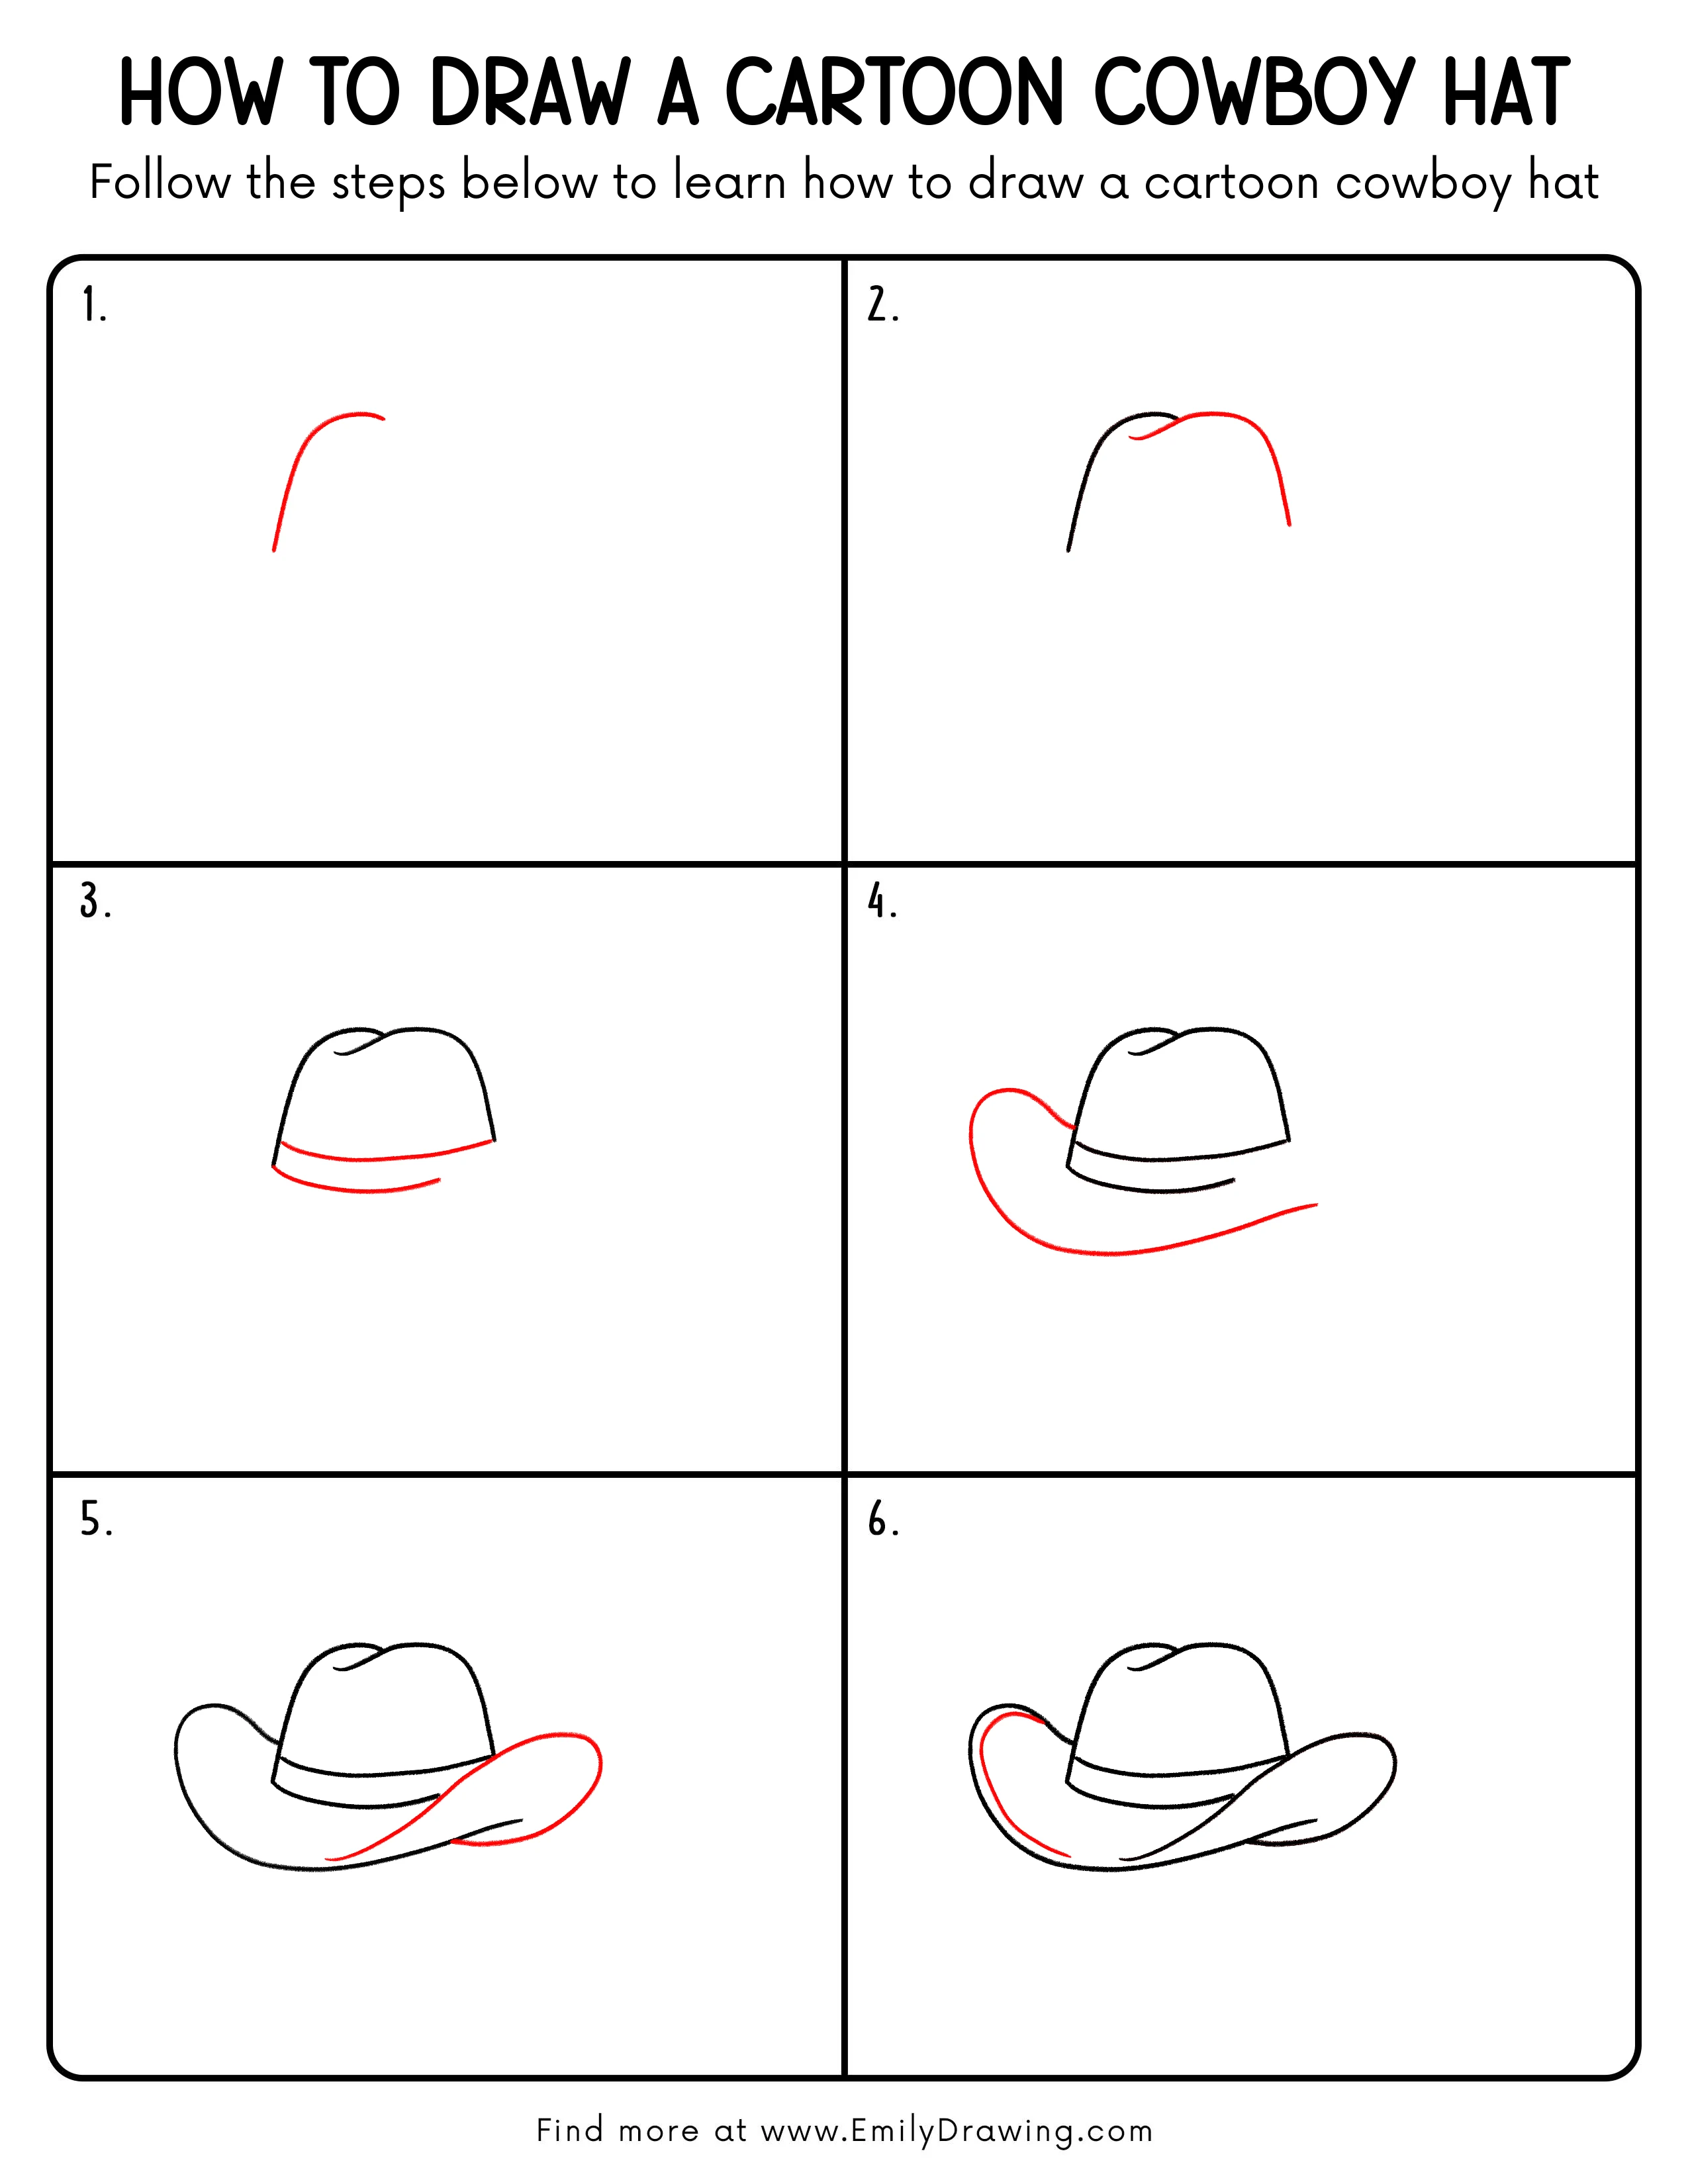
FREE Download Printable Cartoon Cowboy Hat Drawing Tutorial
Frequently Asked Questions
How do I make the hat look more cartoonish?
Make the brim wider, round the corners more, and exaggerate the left and right curls.
What if my brim looks uneven?
Lightly redraw the outer brim curve and keep both inner thickness lines evenly spaced.
Can I color the cowboy hat?
Yes—use one main color for the hat and a darker or contrasting color for the hatband.