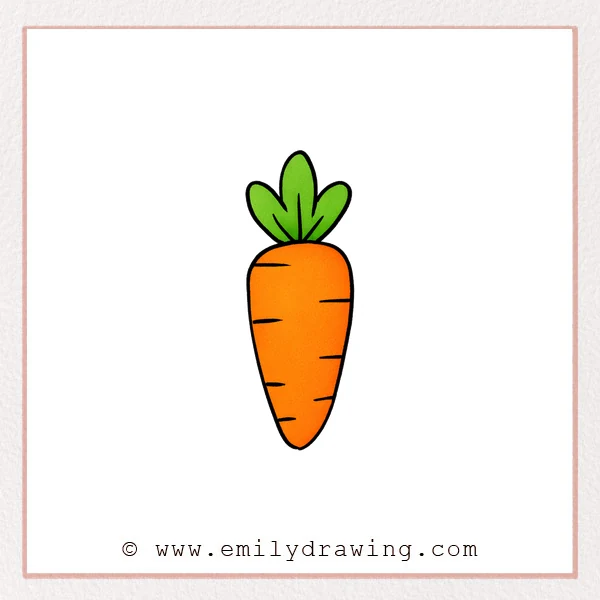
This easy drawing tutorial shows how to draw a carrot step by step using simple shapes. It is a calm drawing for beginners, with clear lines that grow a little at a time.
What You Will Need
- Pencil or black marker
- Eraser
- Paper
- Optional: orange and green coloring tools
Here are my RECOMMENDED Art Supplies!
- Crayola Coloring Set (140 Pieces – Mega Value!)
- 24 Colored Crayon Set
- A4 Printer Paper
- Crayola Coloring Pencils
- HP Home Printer with Instant Ink!
Time needed:
12 minutes.
Step-by-Step Drawing Guide
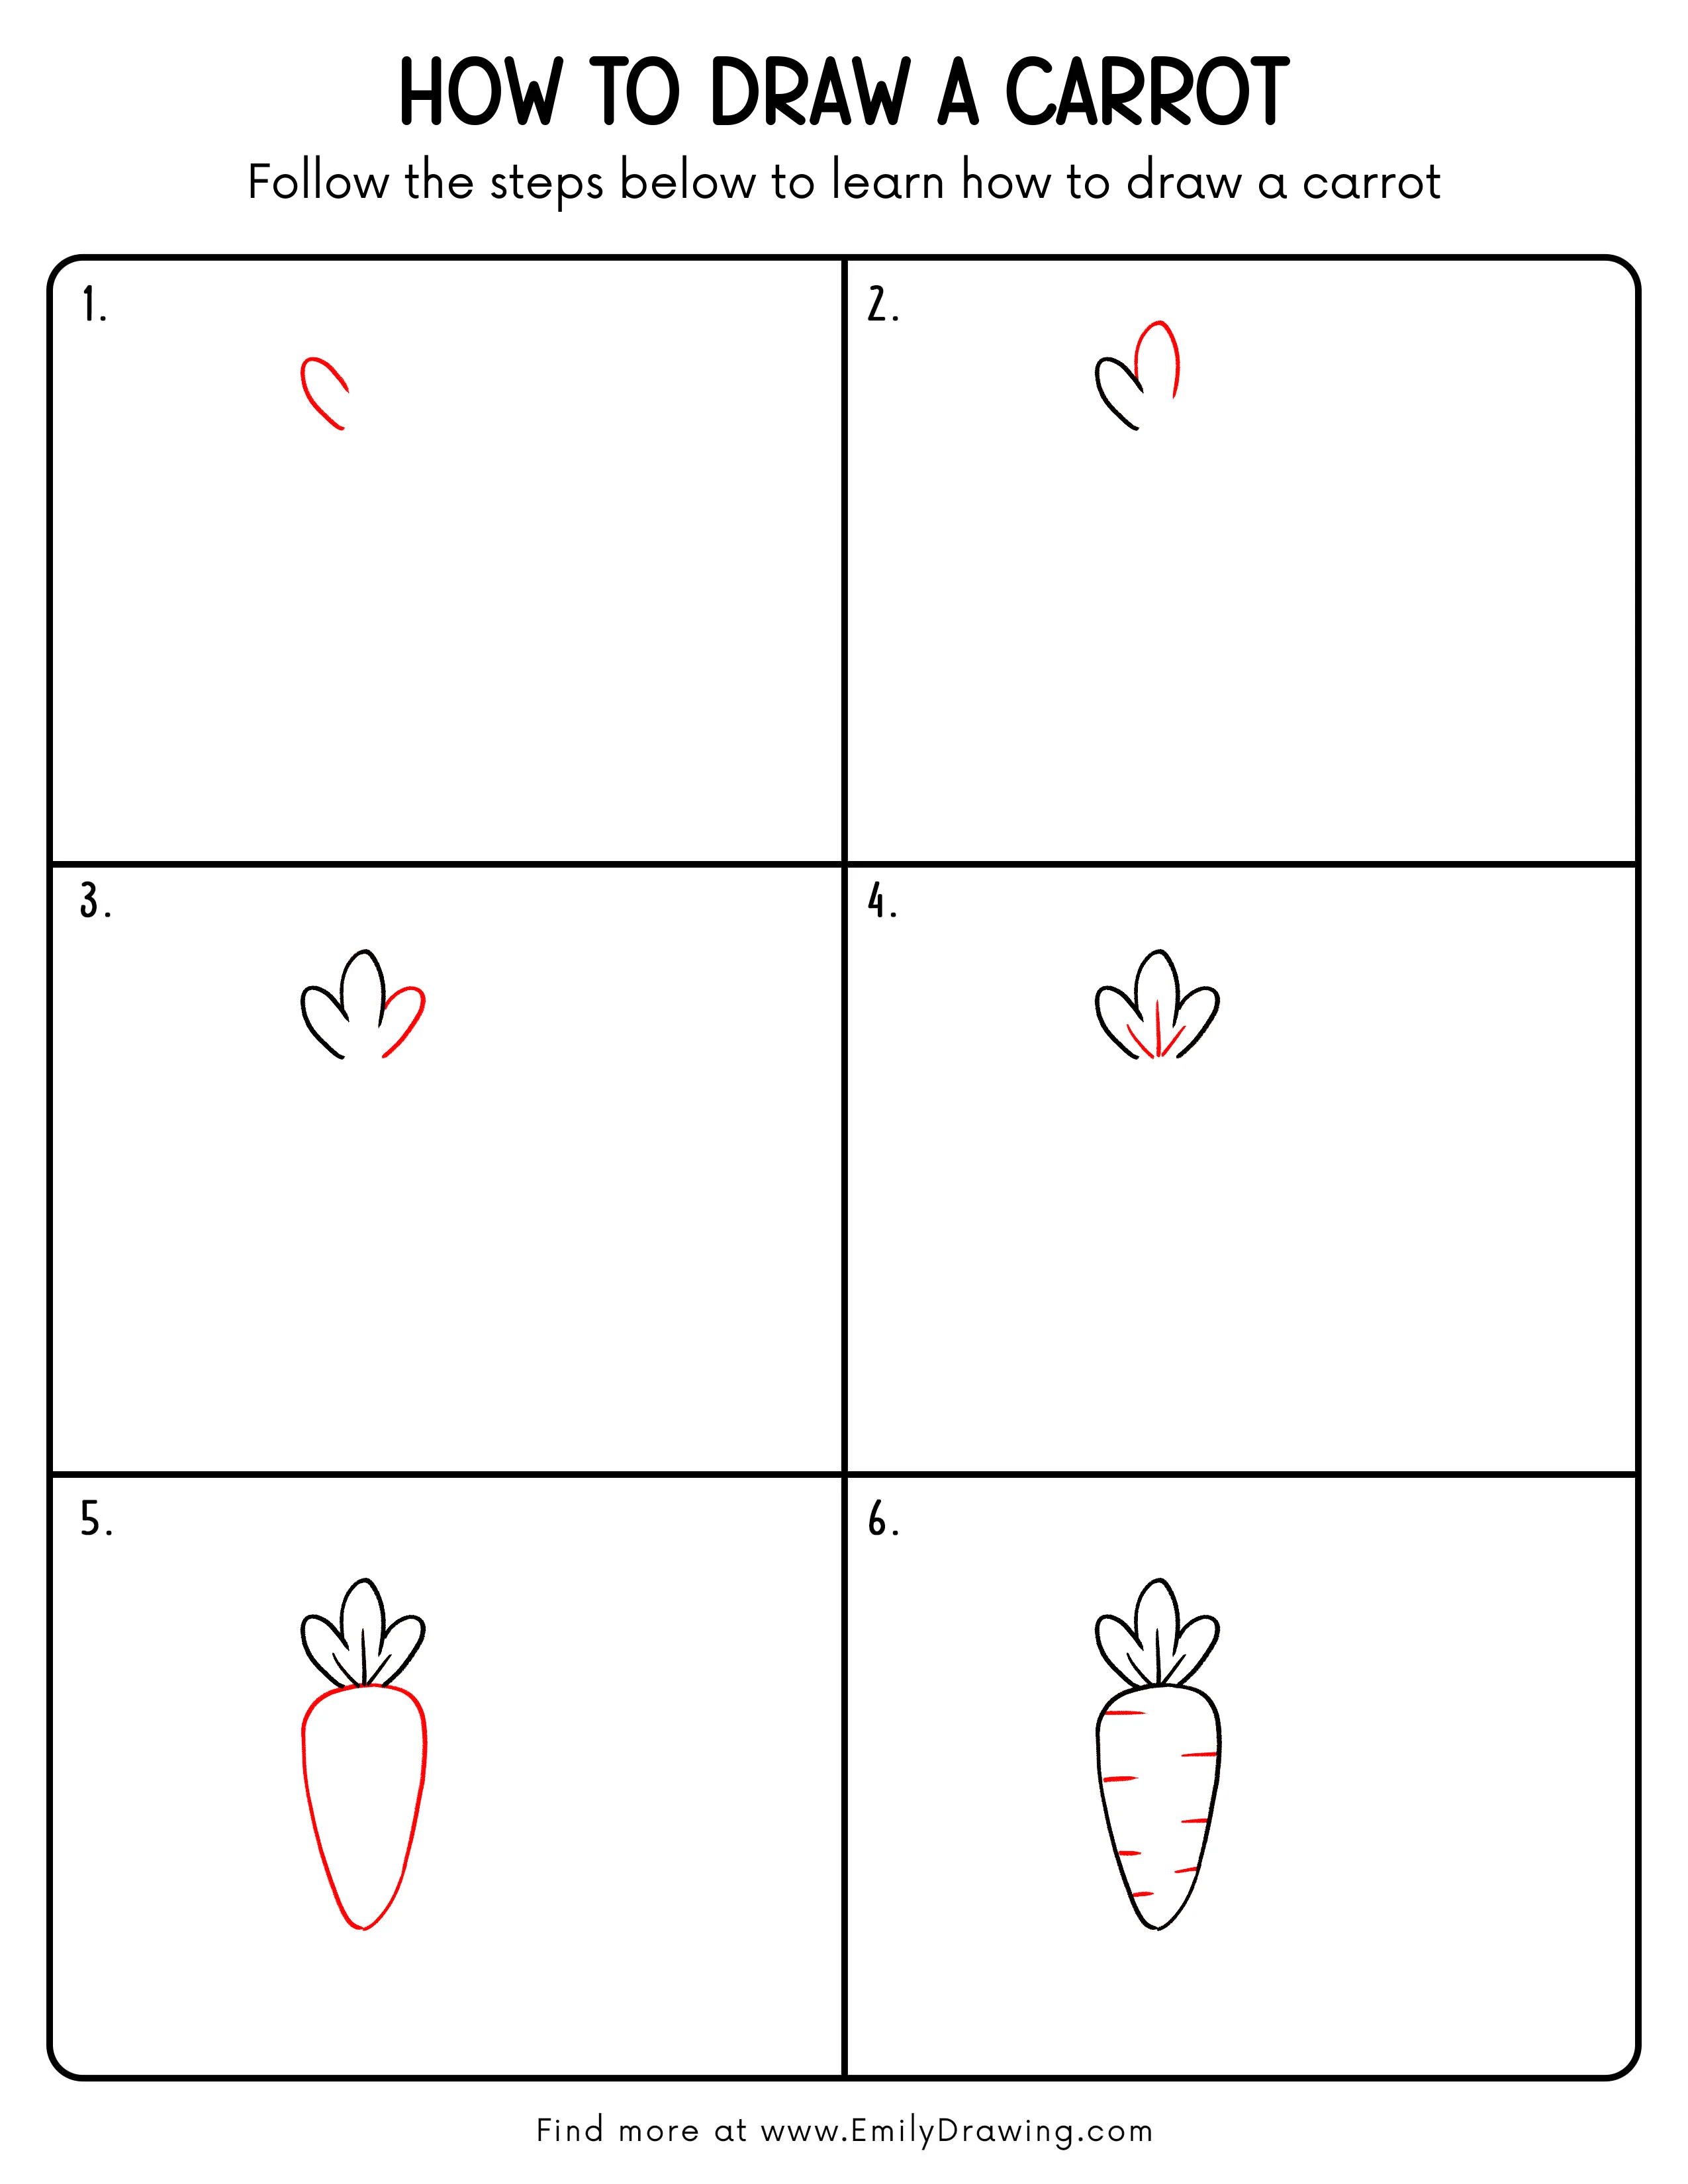
Step 1: Draw the Outer Edge of the Left Leaf
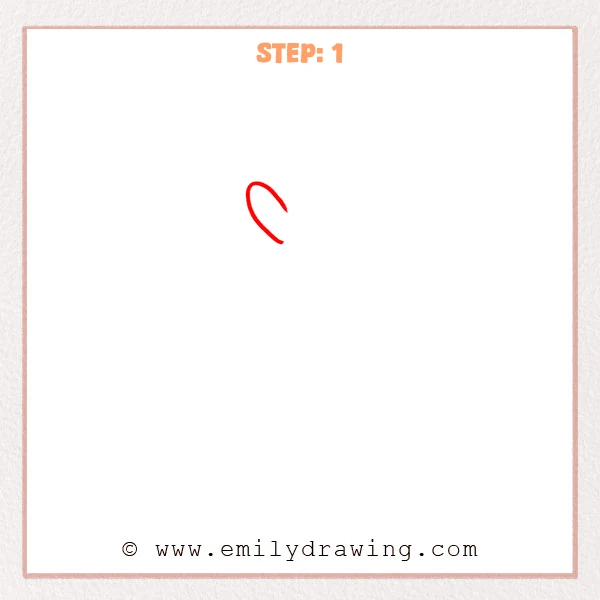
Near the upper middle of the page, sketch one long curved line to form the left edge of a leaf. Keep the top rounder, let it narrow slightly as it goes down, and leave the bottom open for now.
Pro Tip: Focus on a smooth curve first, then place the leaf base.
Step 2: Add the Second Leaf Shape

Above and slightly to the right of the first curve, sketch a taller curved line. Let it come down close to the first one so they read as two little leaves sitting together on top of the carrot.
Pro Tip: Make the right leaf a bit taller to create clear layering.
Step 3: Add the Third Leaf
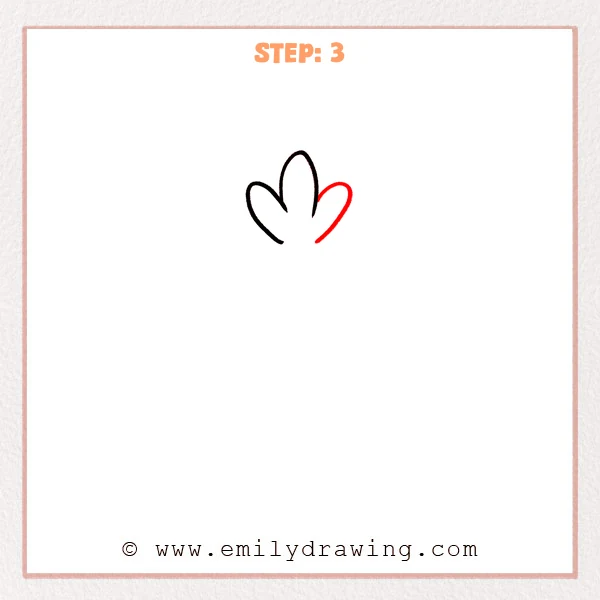
On the right side, sketch another curved leaf that grows beside the tall middle leaf and opens slightly outward. Keep its lower end near the same base level as the other leaves so the leafy top feels neat and connected.
Pro Tip: Don’t make the right leaf too wide; a small gap keeps it clean.
Step 4: Add Simple Vein Lines to the Leaves
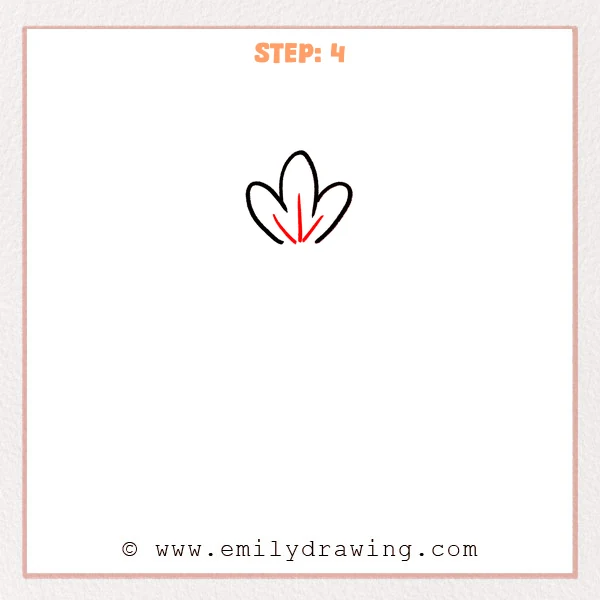
Inside each of the three leaves, add a thin inner line that starts near the base and travels upward, following the curve. On the right leaf, add one short diagonal line to give the leafy top extra detail.
Pro Tip: Keep the vein lines light and thin for a natural look.
Step 5: Draw the Carrot Body Outline

Start just under the leafy top and sketch a rounded cap to connect the greens to the carrot. Then pull two long outer lines downward, letting both sides taper gently until they meet in a soft point.
Pro Tip: Taper slowly on both sides so the carrot stays nicely plump.
Step 6: Add Texture Lines on the Carrot
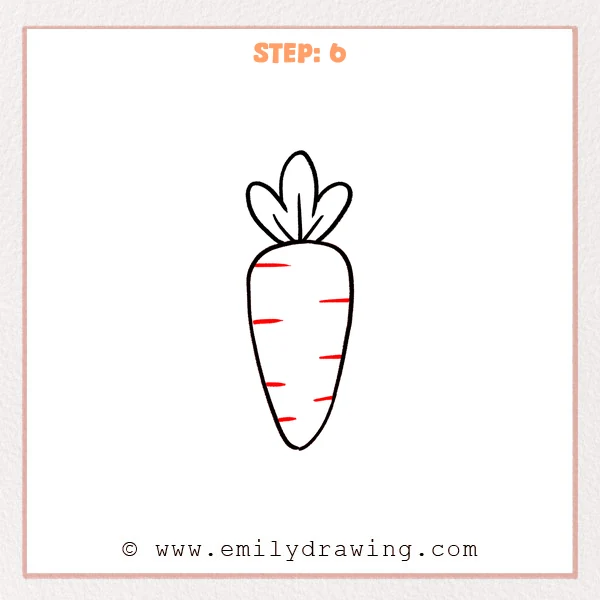
Across the carrot body, add several short horizontal lines like tiny scratches. Place fewer near the top and a few more toward the lower half so the skin texture feels natural.
Pro Tip: Vary the lengths slightly so the texture looks more lively.
Step 7: Color in your drawing!
Fun Facts
- Carrots can be orange, purple, yellow, red, or white.
- The leafy top is called carrot greens, and it is edible.
- Carrots are root vegetables, so most of the plant grows underground.
Pin it now, Draw later!

You now have a full carrot drawing, from the leafy top to the tapered point. Color the carrot body orange and the leaves green. For soft shading, darken one side of the carrot and leave a lighter strip as a highlight.
A common beginner mistake is tapering the carrot too quickly, which makes it look thin. Let the sides stay wider for longer, then narrow gently near the bottom.
Keep practicing this step by step drawing, and try drawing carrots in different sizes. Explore more easy drawing tutorial subjects to build confidence and control.
Get the FREE Printable Drawing Guide
FREE Download Printable Carrot Drawing Tutorial
Frequently Asked Questions
How do I make my carrot look more three-dimensional?
Add gentle shading on one side and keep a small highlight unshaded.
What if my carrot sides look uneven?
Lightly redraw the outline to smooth it, then erase any extra bumps.
Can I make a cute cartoon carrot instead?
Yes. Make the body rounder, shorten the tip, and add a small smile or cheeks.