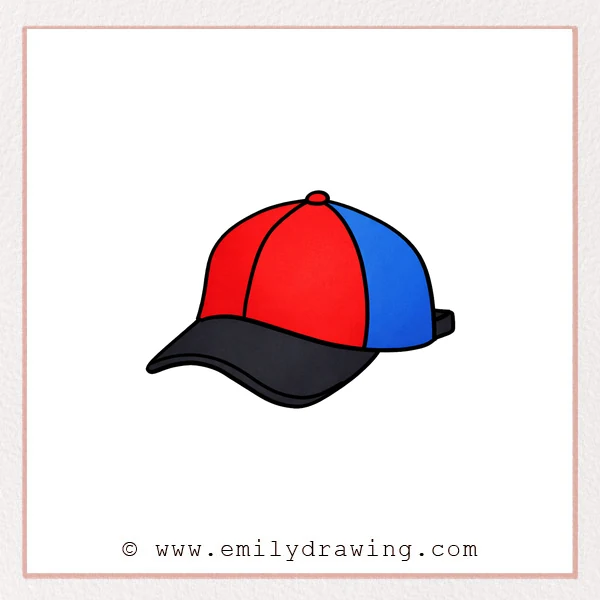
If you want to learn how to draw a cap, this step by step drawing guide will help you build it calmly and clearly. We will start with a simple curve, then refine it into an easy drawing tutorial that beginners can follow.
What You Will Need
- Pencil
- Eraser
- Black marker or pen
- Paper
- Colored pencils or markers (optional)
Here are my RECOMMENDED Art Supplies!
- Crayola Coloring Set (140 Pieces – Mega Value!)
- 24 Colored Crayon Set
- A4 Printer Paper
- Crayola Coloring Pencils
- HP Home Printer with Instant Ink!
Time needed:
30 minutes.
Step-by-Step Drawing Guide
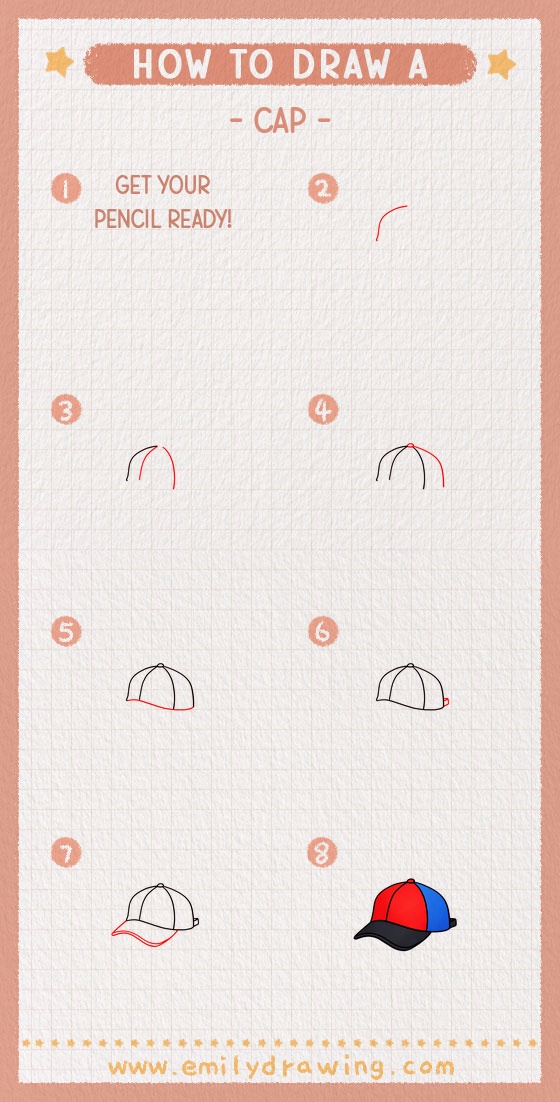
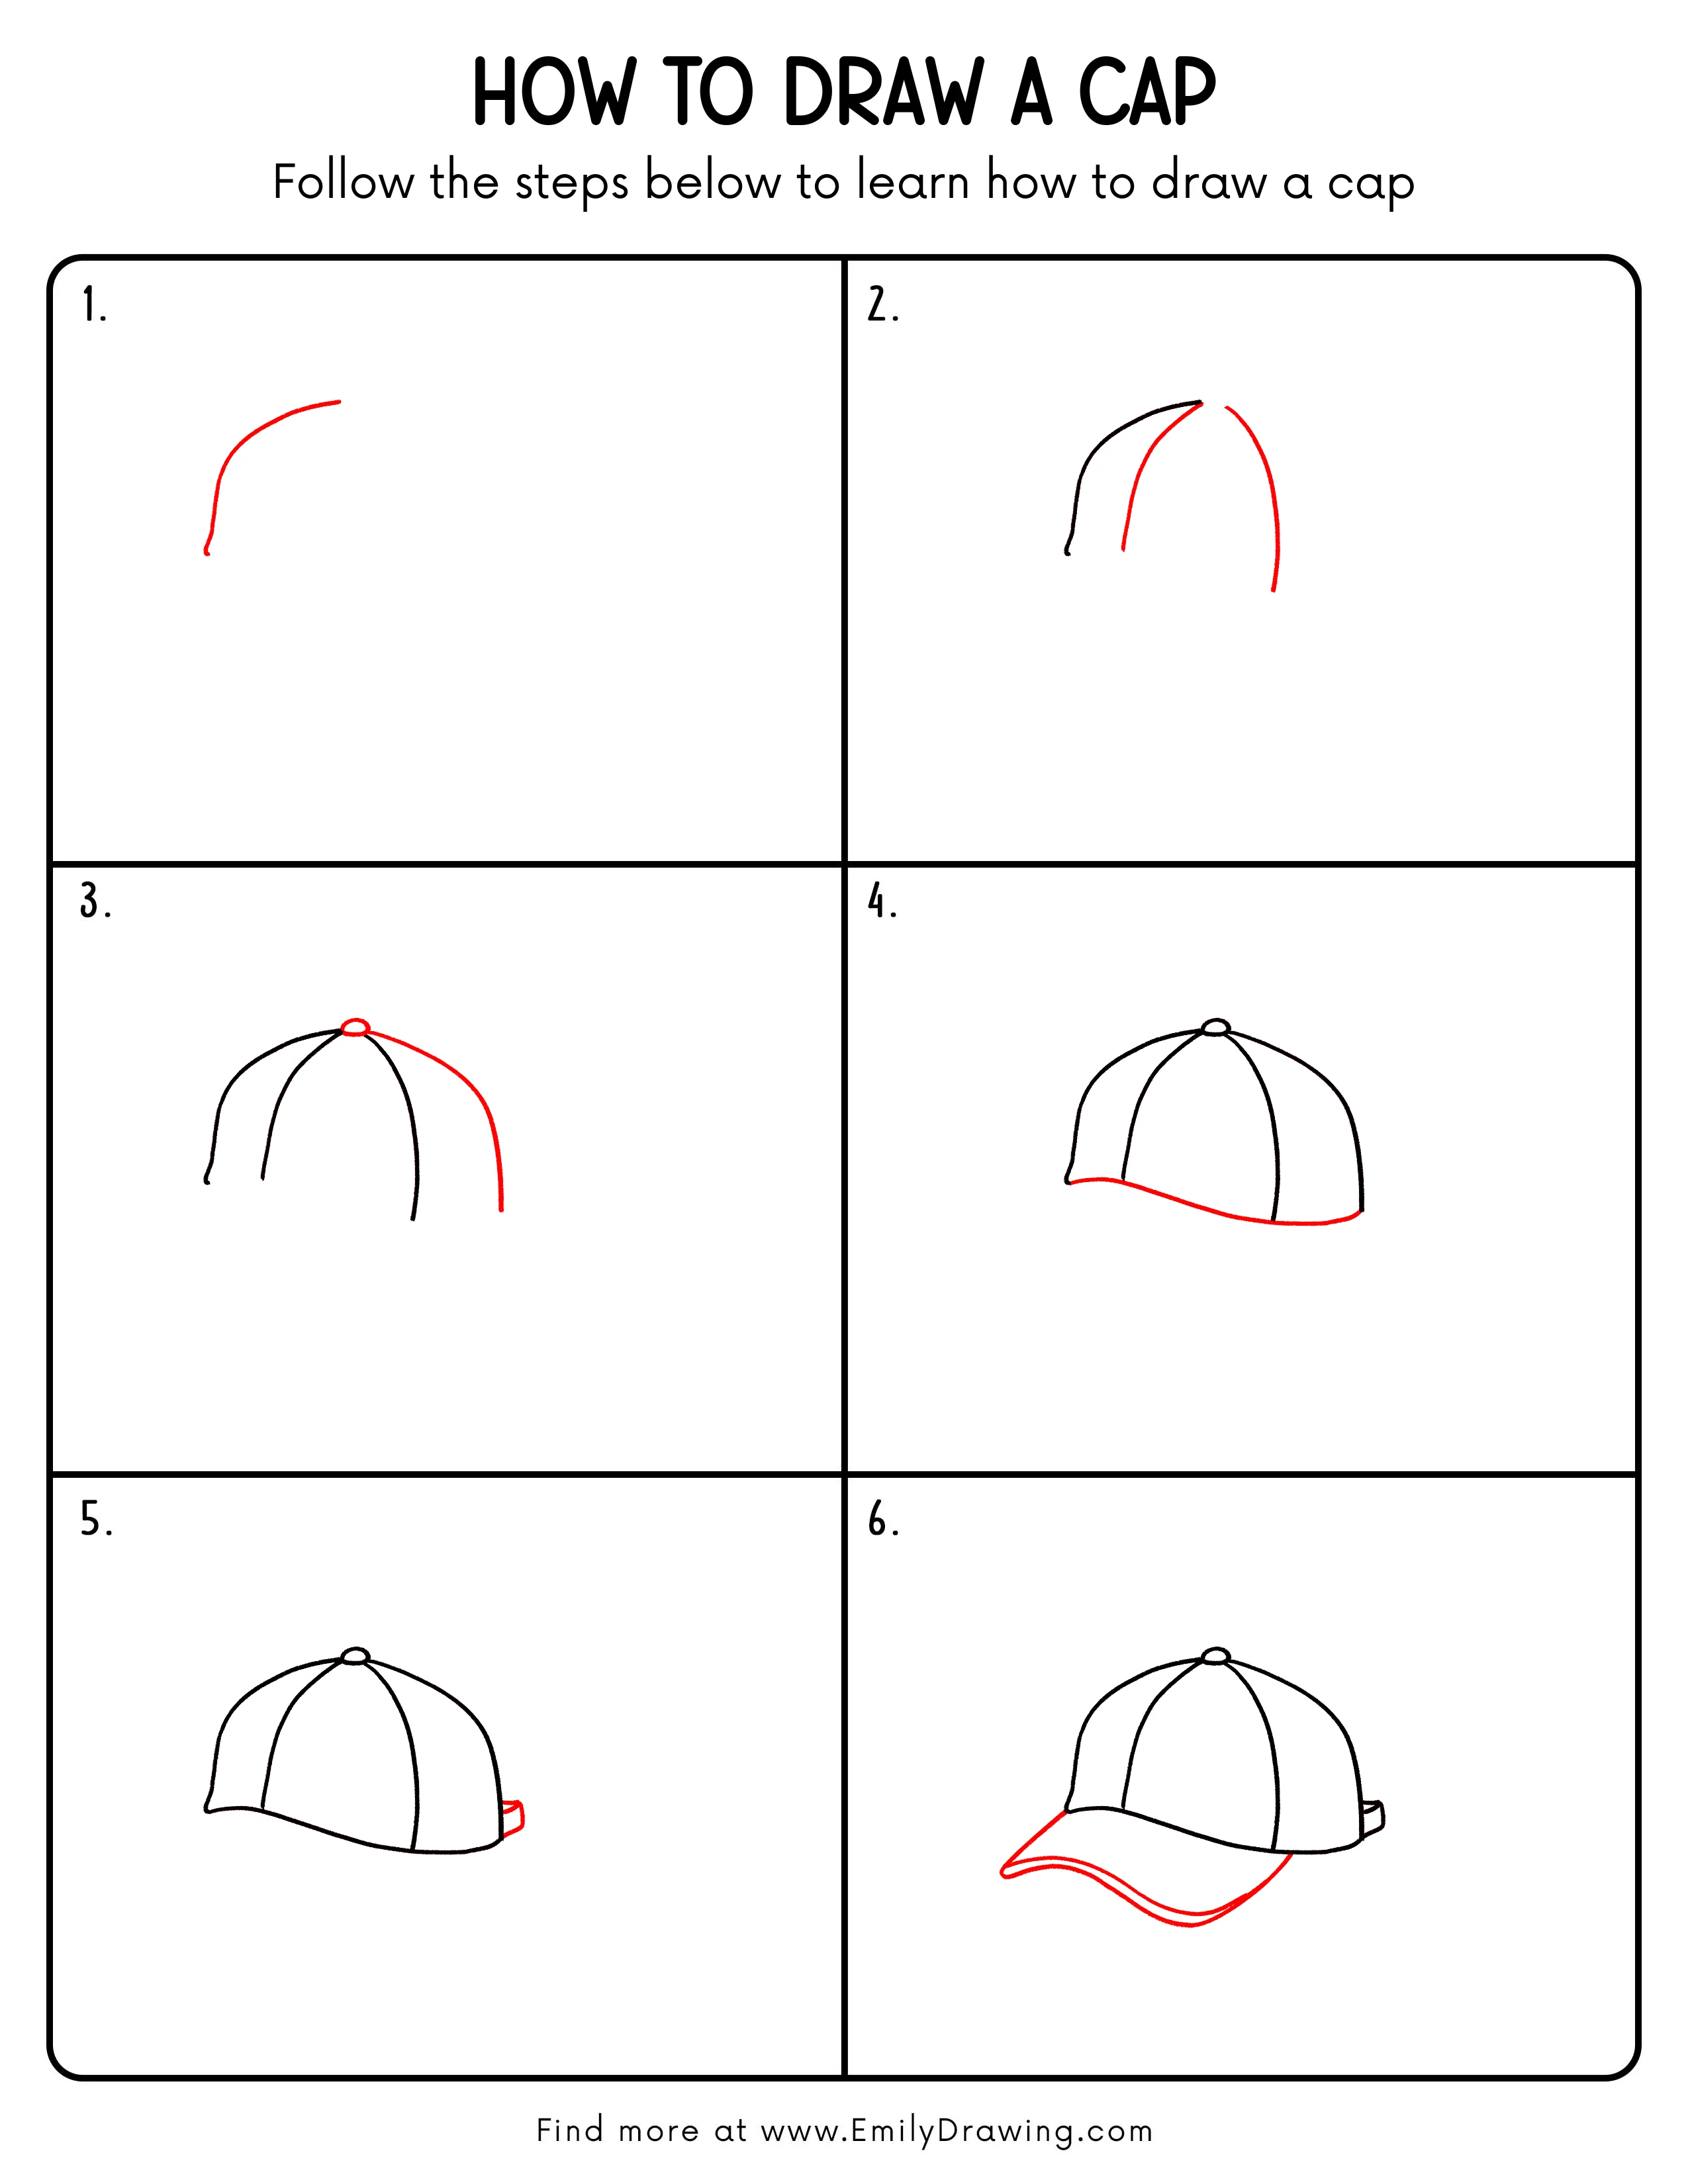
Step 1: Sketch the Main Brim Curve
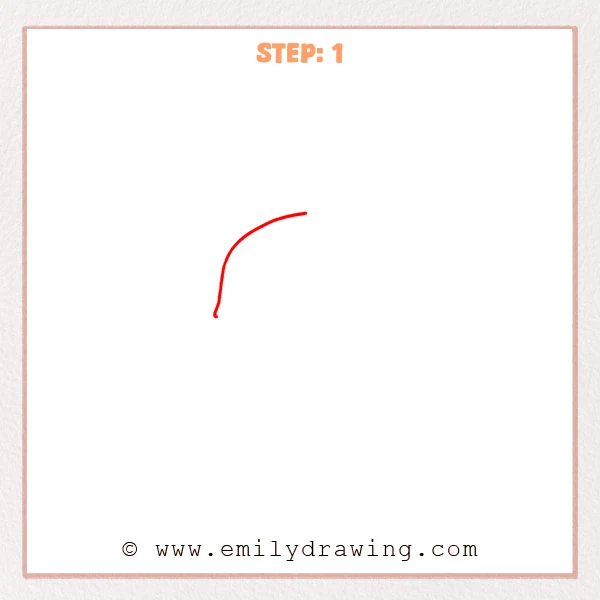
Start near the upper-left area and draw one long curved line that lifts gently toward the right. Let the left end dip slightly downward so it feels like the brim’s starting point.
Pro Tip: Keep the curve smooth, not pointy, so it reads like a cap brim.
Step 2: Add the Crown’s Outer Curves
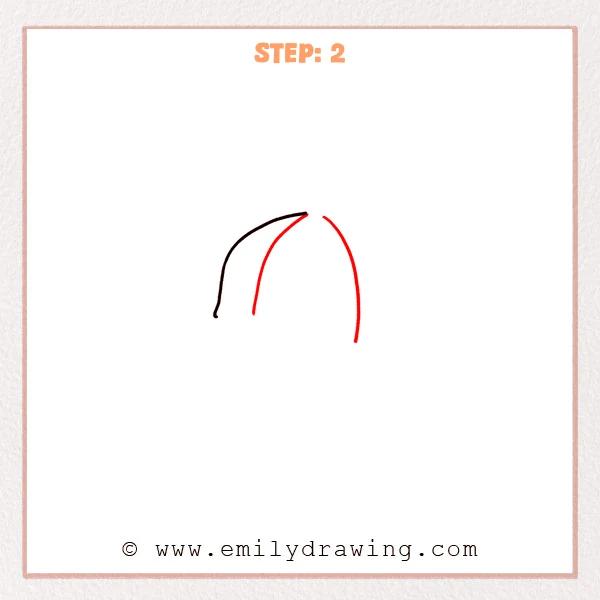
From the brim tip, pull down a long curved line on the right to form the cap’s outer edge. Then add a shorter curved line dropping from the inner brim area, like a panel seam to give the crown shape.
Pro Tip: Let the right outer curve fall smoothly for a round, natural cap shape.
Step 3: Add the Top Button and Another Crown Panel
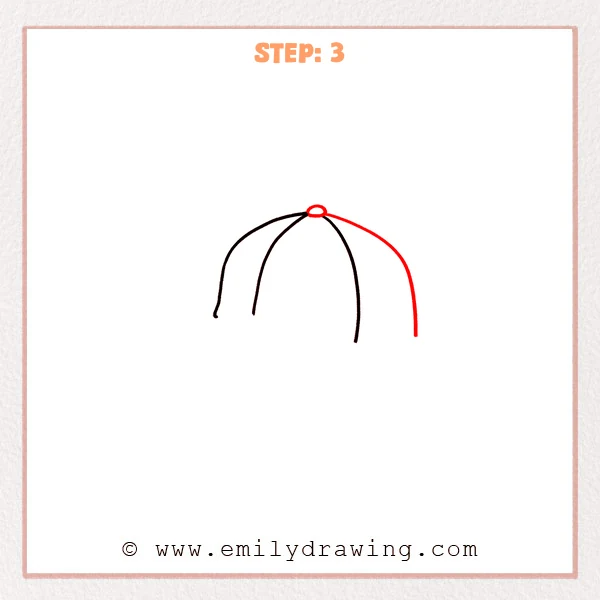
Draw a small oval at the highest point to form the cap’s top button. Then pull a wider long curve down from the button’s right side to complete another crown panel.
Pro Tip: Keep the top button small, with a little white space around it.
Step 4: Add the Underside of the Brim and the Bottom Edge

Add a curved line under the left brim that sweeps to the right to show the brim’s underside. Keep the line going into a gentle base curve, then let it meet the right outer edge smoothly.
Pro Tip: Make the bottom curve smooth and steady so the cap feels solid.
Step 5: Add the Small Strap Tab on the Back
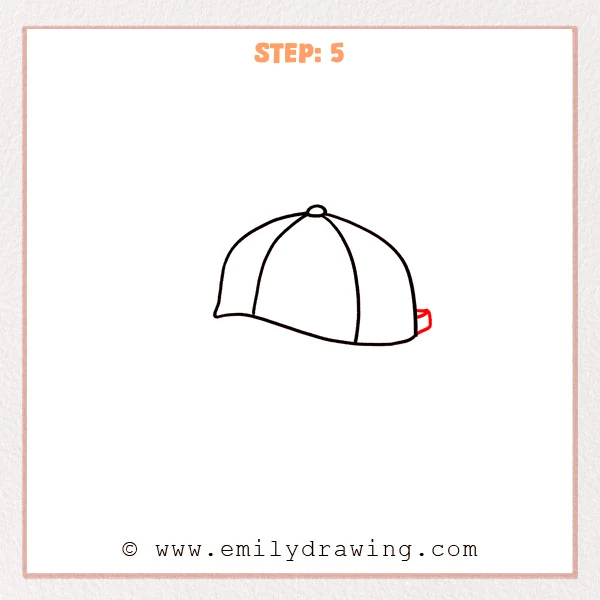
On the right back edge, sketch a short rectangle that sticks out to show the strap end. Add a second, shorter line above it to suggest thickness, so the tab feels three-dimensional.
Pro Tip: Keep the tab small so it does not compete with the brim.
Step 6: Turn the Brim into a Thick, Curved Shape
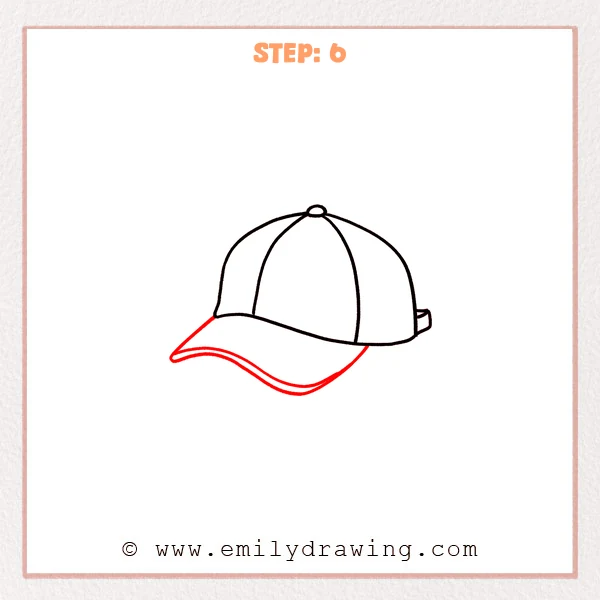
Extend the front of the cap outward to the left to form a larger, wavy brim shape. Add a second, parallel curve inside the brim to show its thickness and inner edge.
Pro Tip: Keep the inner curve evenly spaced from the outer edge.
Step 7: Color in your drawing!
Fun Facts
- Many caps have several fabric panels stitched together, which is why seam lines help your drawing look real.
- The small top button is often called a “squatchee,” and it sits where the panels meet.
- A curved brim helps block sunlight, which is why caps are popular outdoors.
Pin it now, Draw later!
You have now learned how to draw a cap step by step, from a simple brim curve to a finished crown and thick brim. Try adding light shading under the brim to show shadow, and shade one side of the cap to make it look round. If you color it, keep one area a little lighter for a soft highlight. A common beginner mistake is making the inner brim line uneven, so take your time and keep the spacing steady. Practice this easy drawing tutorial a few times, then try drawing caps from different angles or adding a logo for your own design.
Get the FREE Printable Drawing Guide
FREE Download Printable Cap Drawing Tutorial
Frequently Asked Questions
How can I make my cap look more 3D?
Add gentle shading on one side of the crown and a darker shadow under the brim. Keep the seam lines smooth so the round shape stays clear.
What if my brim looks too flat?
Let the brim curve up slightly at one end, and add the inner brim line to show thickness. A wavy outer edge can also help it feel more curved.
Can I change the style of the cap?
Yes. You can make the brim longer, add more panel seams, or draw a flat brim instead of a curved one. Small changes in curves can create a new look.