You’ve come to our easy, step-by-step, and fun guide to How To Draw a Halloween Pumpkin!
Halloween is one of the most fun and memorable days in fall. There are a lot of things to love about the season—cozy clothes, cool weather, pumpkin-flavored-everything, hayrides, and all the tree leaves changing colors.
The origins of this Halloween craft trace back to Ireland, where originally people carved faces into turnips. Later, the practice spread to the United States, where pumpkins were more popular, and countless Halloween pumpkins have been carved every year since. They often decorate porches to welcome kids as they trick-or-treat for Halloween sweets.
We’ll be coloring this in later, so make sure to grab some bright colors! Grab your art materials, let’s get started!
Materials:
- a piece of paper
- a pencil for the guiding lines and sketching
- an eraser
- a black sharpie or a pen for the outlines
- markers or colored pencils for coloring
- our printable drawing guide (Join my Email List below to get this Tutorial)
Here are my RECOMMENDED Art Supplies!
- Crayola Coloring Set (140 Pieces – Mega Value!)
- 24 Colored Crayon Set
- A4 Printer Paper
- Crayola Coloring Pencils
- HP Home Printer with Instant Ink!
Time needed:
10 minutes.
How to Draw a Halloween Pumpkin — Let’s get started!
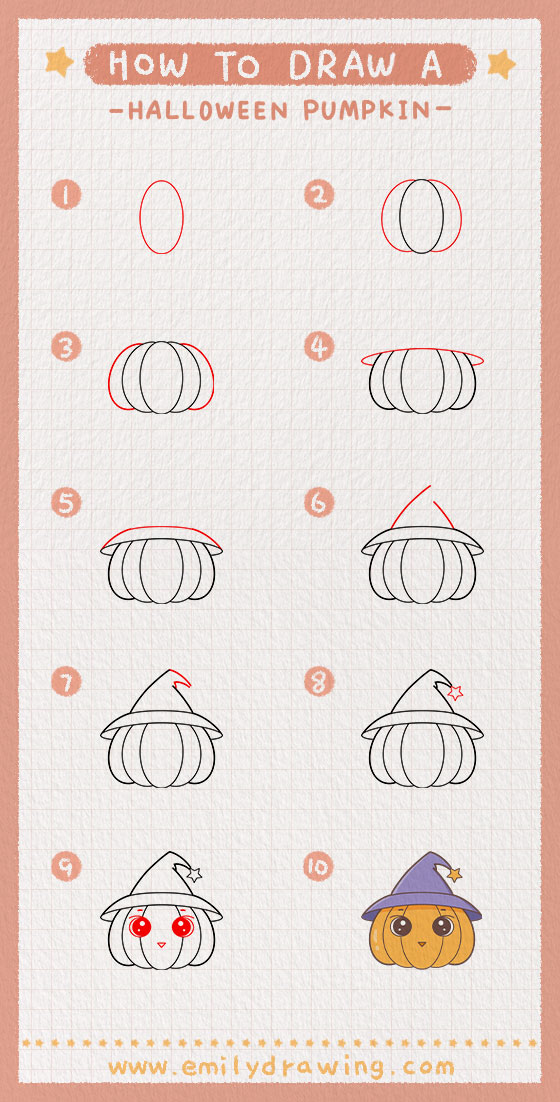
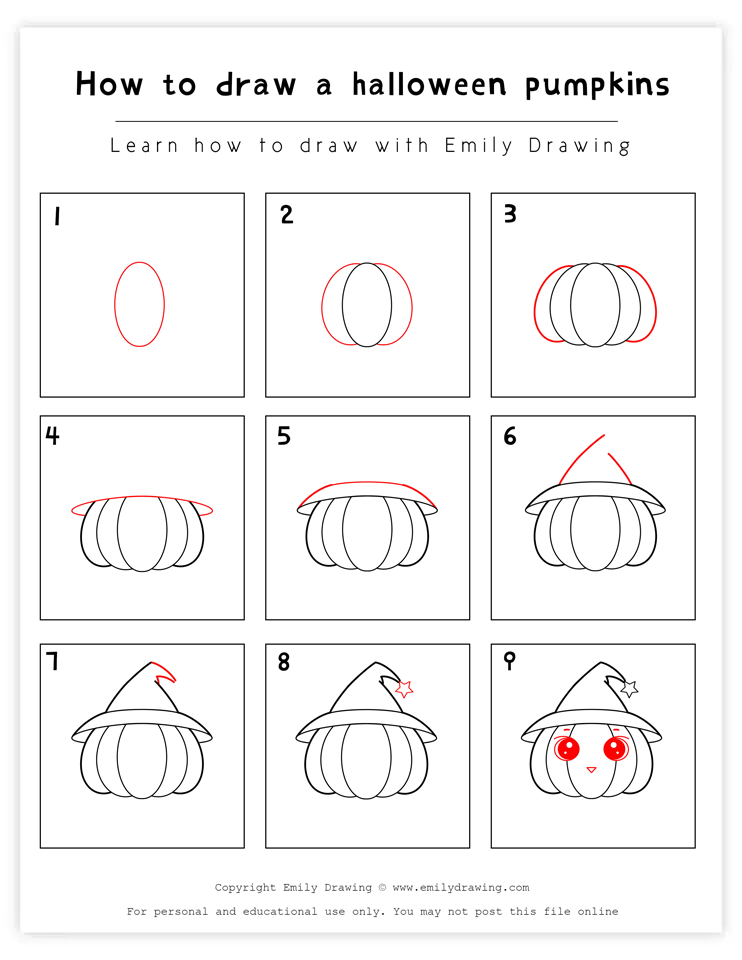
Step 1 – Draw the center of the pumpkin.
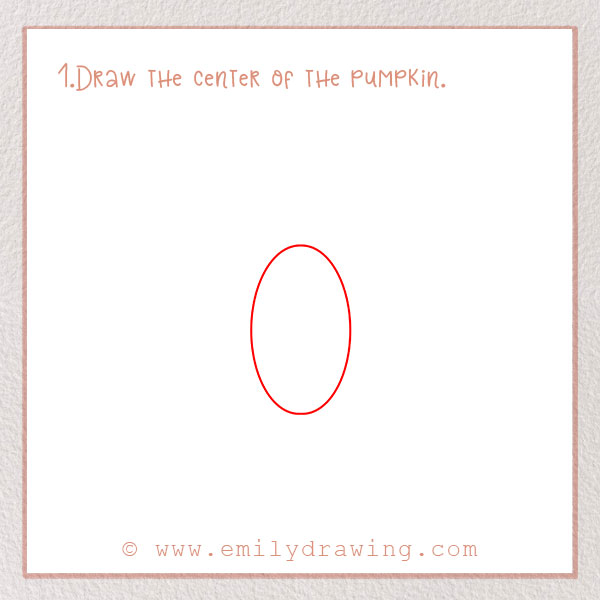
We’ll get started by drawing the pumpkin’s shape!
In the middle of the page, draw an oval. It should be in the middle of the page with a few inches above and below it.
Make it about twice as tall as it is wide.
Step 2 – Add more volume to the pumpkin.
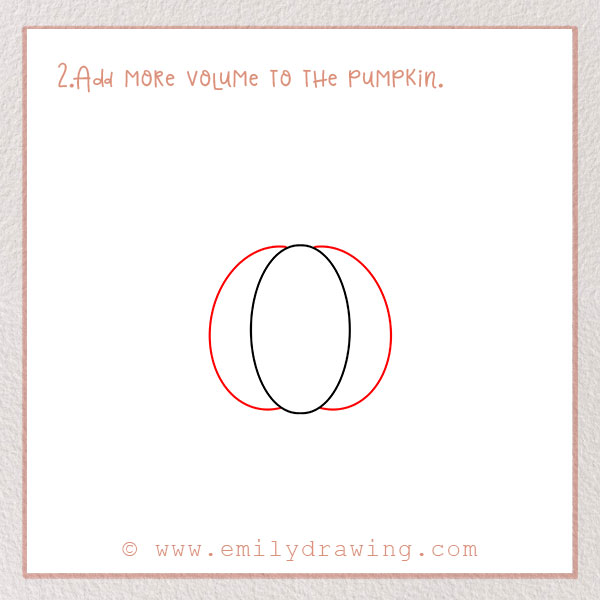
Like in real life, we need to make our pumpkin big and round.
Draw a long and curved line to both sides of the oval from Step 1. The drawing should be symmetrical right now.
Step 3 – Add the outer parts of the pumpkin.
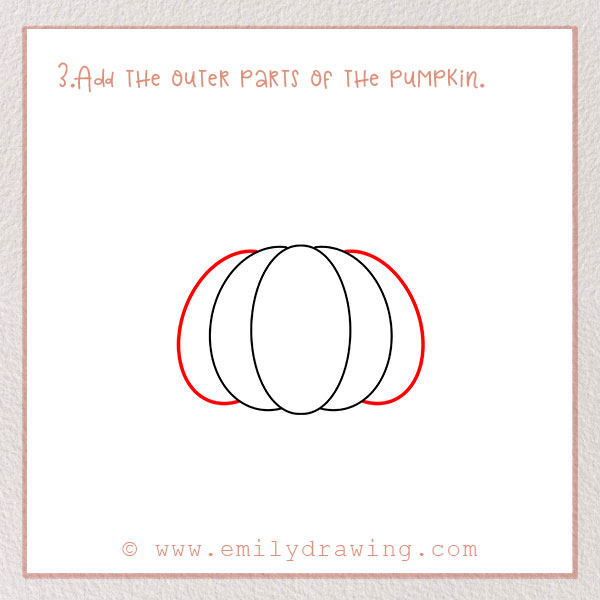
We still need to make the pumpkin bigger!
Similar to the last step, We will add two more large curves on the outside of the pumpkin. This will make it appear even bigger.
Flatten the curves a little bit on the bottom to show that it’s sitting on something.
Step 4 – Start drawing the hat!
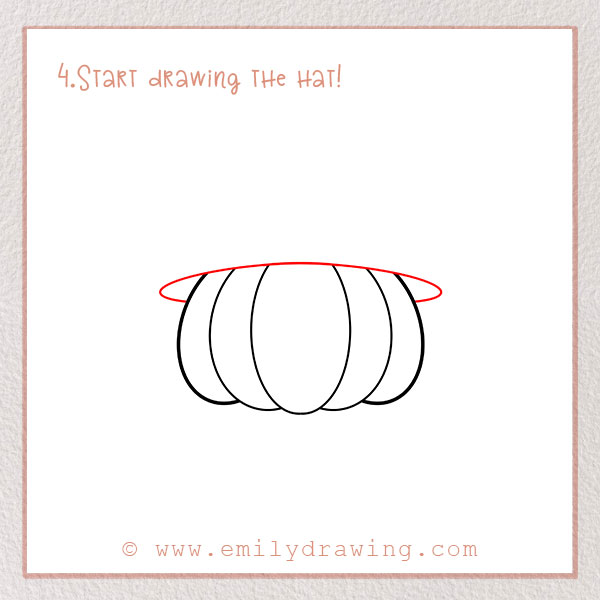
Our Halloween pumpkin is going to be wearing a hat! Like a witch’s hat, it will have a wide brim. Let’s add that now!
Draw a long, horizontal, and curved line going across the whole top of the pumpkin. On both ends, make it curve inwards back towards the pumpkin. This will show that it goes around the whole shape of the pumpkin.
To add more festive elements to your drawing, consider learning How to Draw a Bow to decorate your pumpkin.
Step 5 – Add the brim of the hat.
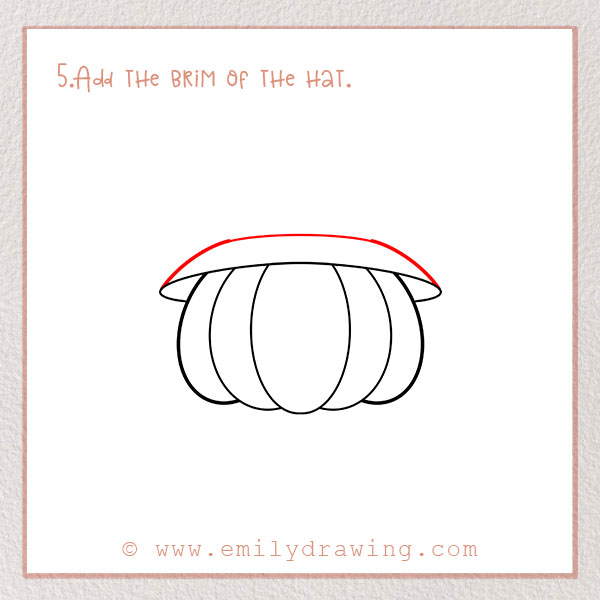
Above the line you just drew, add another similar horizontal line about an inch above. It should also be slightly curved.
Connect it to the line below—refer to the image. This completes the brim of the hat!
Step 6 – Add the top of the hat.
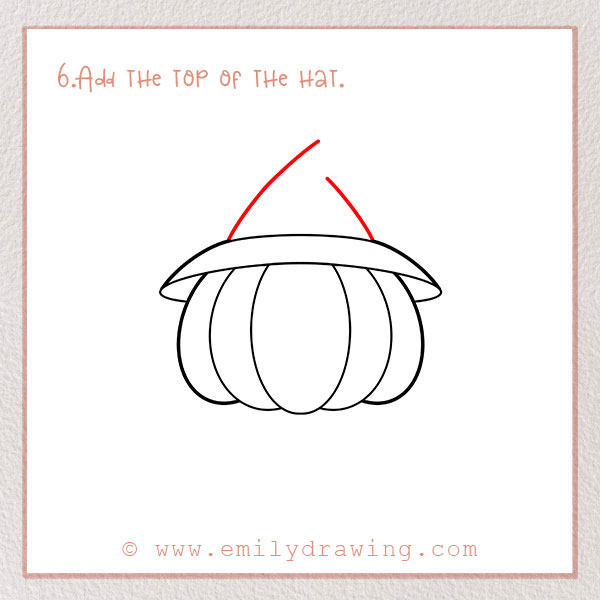
The most recognizable part of this hat is its triangular shape.
Form this by adding two diagonal lines going inwards from the brim. Don’t completely connect them into a point—leave about an inch of space in between. We’ll get to this in the next step!
Step 7 – Add the point to the hat.

Hats like this are so tall that they can be crooked. Let’s add some character to our hat, too.
In the space we left in the previous step, let’s complete the hat. Do this by forming a small point. Draw two short lines converging into a point.
Now, the hat should look like it is bent over at the tip.
Step 8 – Draw a star on the hat.
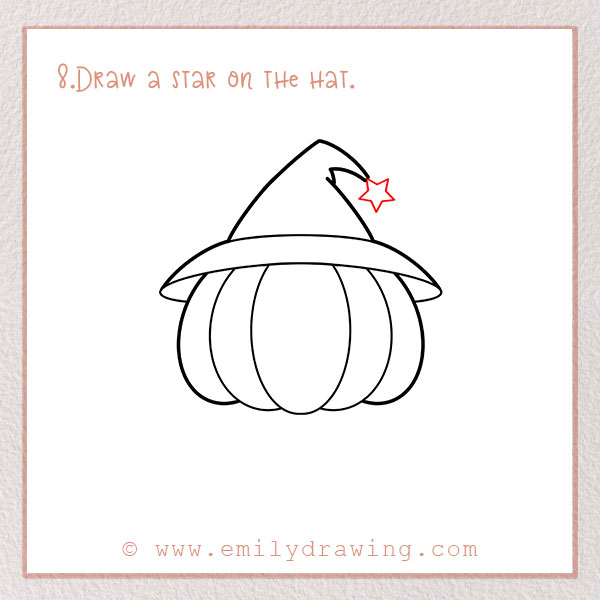
At the point of the hat, add a small star. You’ve completed the hat now!
Step 9 – Draw the pumpkin’s eyes!
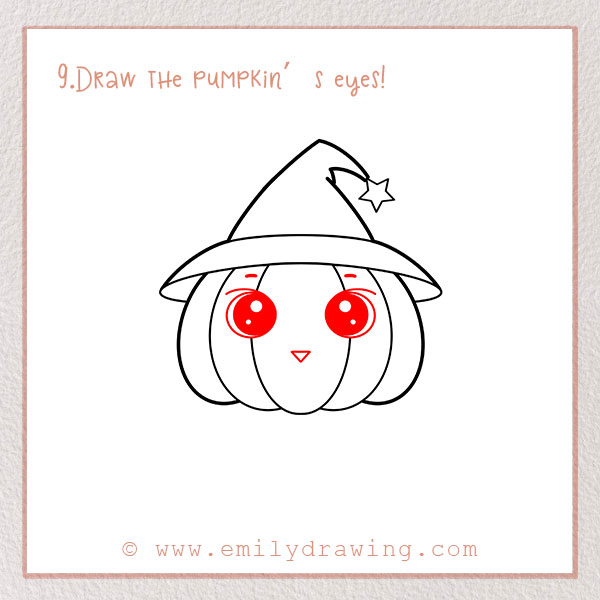
We have to make this a Halloween pumpkin, like a classic jack-o’-lantern, so it has to have a face!
Draw two circles just below the brim of the hat. Color them in almost all the way, but leave a small circle in each eye to symbolize a pupil. Add small lines going outward from the top of the eye for eyelashes. Refer to the image above for this step.
Next, add two short lines above each eye to show eyebrow-like shapes.
Lastly, add a small, upside-down triangle below for a nose! It should be in the middle of the eyes, down a few inches.
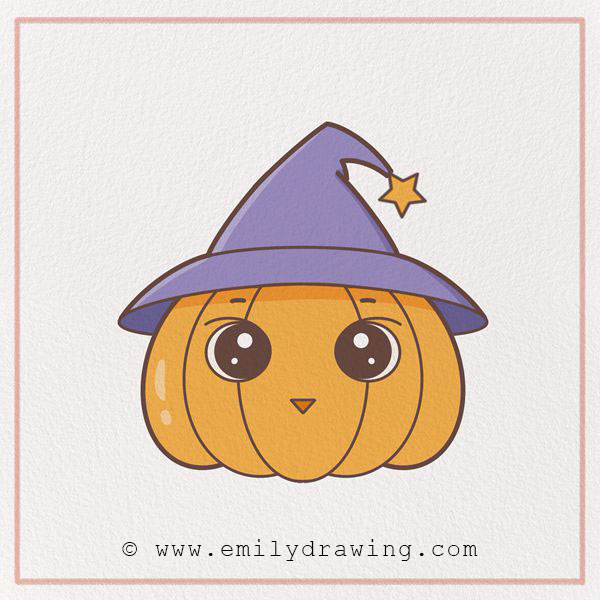
Step 10 – Color in your creation!
Finally, let’s color! Color your masterpiece however you want—if you want it to resemble a pumpkin in real life, use oranges, reds, browns, and greens. Color in the background too!
Maybe you can make this pumpkin come to life this fall with fun pumpkin art for kids!
Now that you’ve drawn your Halloween pumpkin, you might enjoy our Pumpkin Coloring Page to add more festive cheer to your art collection.
You’re all done! We hope you have had a lot of fun and are getting excited about all the great things about fall! Thank you for following along with our Halloween drawing tutorial on how to draw a Halloween pumpkin.
If you’re excited about Halloween-themed drawings, you might also enjoy our tutorials on How to Draw a Halloween Ghost and How to Draw Halloween Sweets.
Pin it now, Draw later!
Get the FREE Printable Drawing Guide
FREE Download Printable Halloween Pumpkin Drawings Tutorials