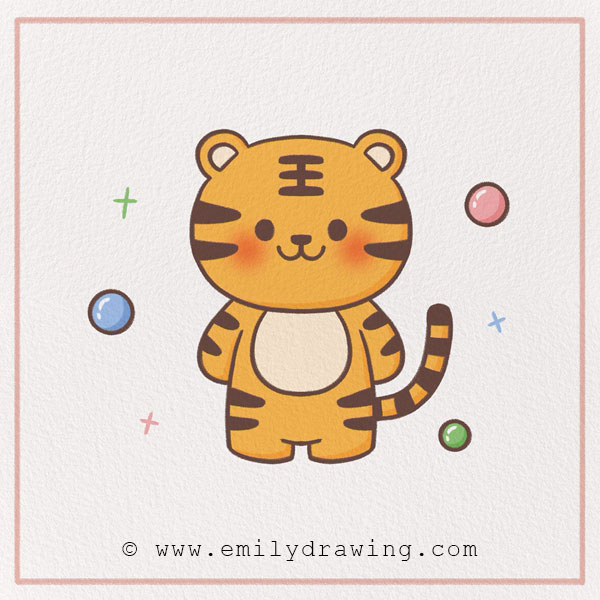
Today, we are going to learn how to draw a tiger illustration together! Like all of our drawings at emilydrawing.com, you’ll just follow ten simple steps to create your artwork.
Tigers are beautiful animals that can be found in South and Southeast Asia and Russia, as well as in captivity in other areas of the world. They are incredibly efficient runners and can reach speeds of up to 40 miles per hour for short distances. Tigers are also excellent swimmers and are one of the few large cats that enjoy being in the water. They’re great at hunting in rivers and lakes.
Because of their impressive traits, tigers are symbols of power, strength, and bravery in many cultures and are often associated with royalty and courage. It’s easy to imagine why so many people throughout history have been awed by these beautiful and intelligent mammals. Now, many organizations and people are working together to protect tigers and their natural habitats so that they can thrive in the future.
Let’s move on to making art! Grab some art materials and keep reading for Step 1.
If you’re interested in drawing other wild animals, take a look at our tutorials on How to Draw a Lion or How to Draw a Giraffe.
Materials:
- a piece of paper
- a pencil for the guiding lines and sketching
- an eraser
- a black sharpie or a pen for the outlines
- markers or colored pencils for coloring
- our printable drawing guide (Join my Email List below to get this Tutorial)
Here are my RECOMMENDED Art Supplies!
- Crayola Coloring Set (140 Pieces – Mega Value!)
- 24 Colored Crayon Set
- A4 Printer Paper
- Crayola Coloring Pencils
- HP Home Printer with Instant Ink!
Time needed:
13 minutes.
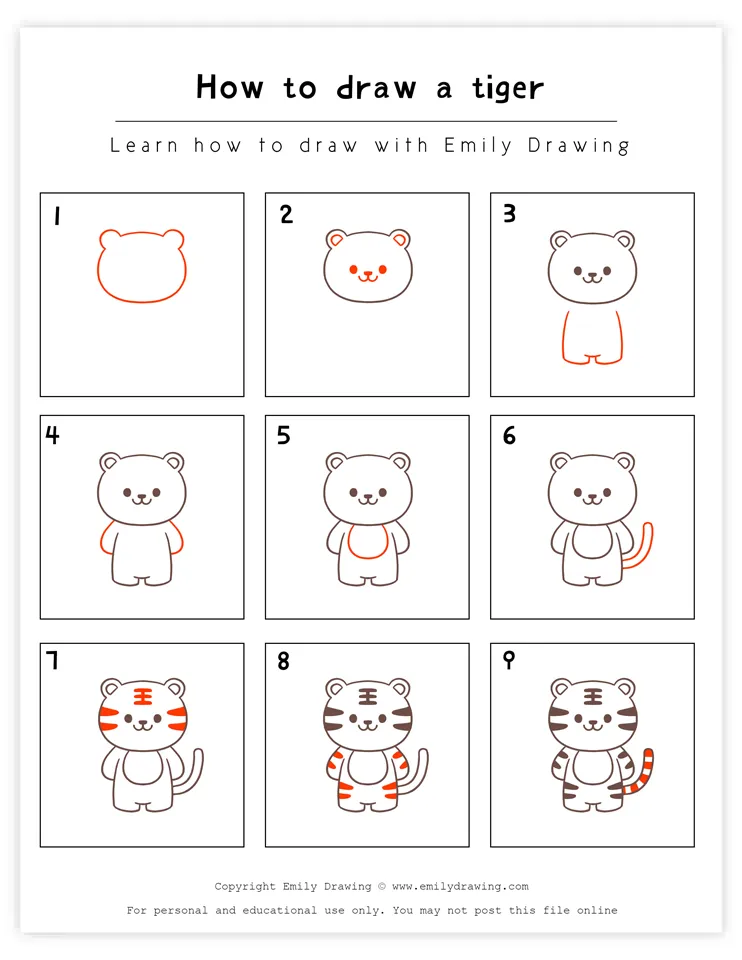
How to Draw a Tiger — Let’s get started!
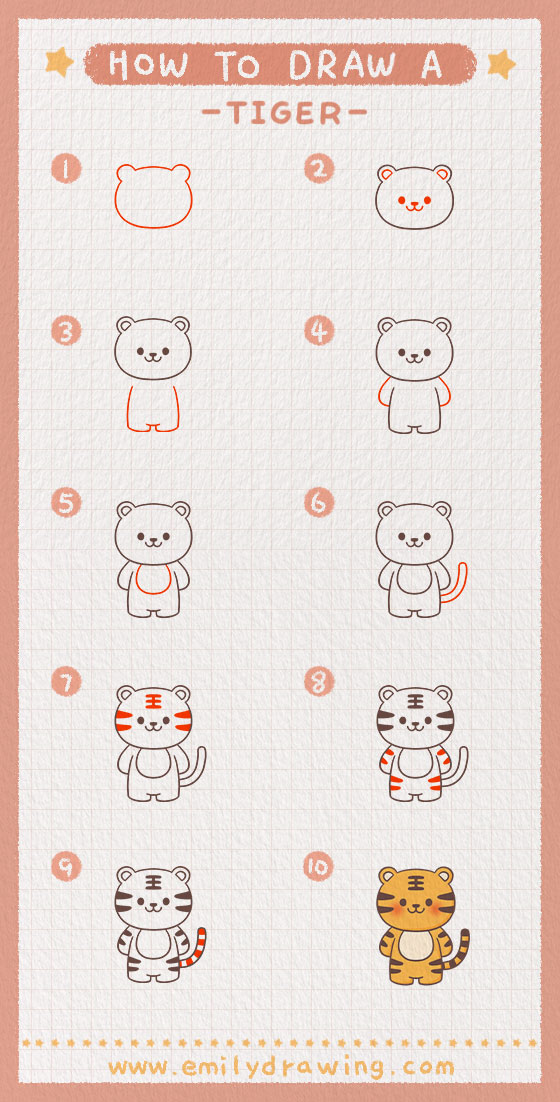
Step 1 – Draw the outline of the head.
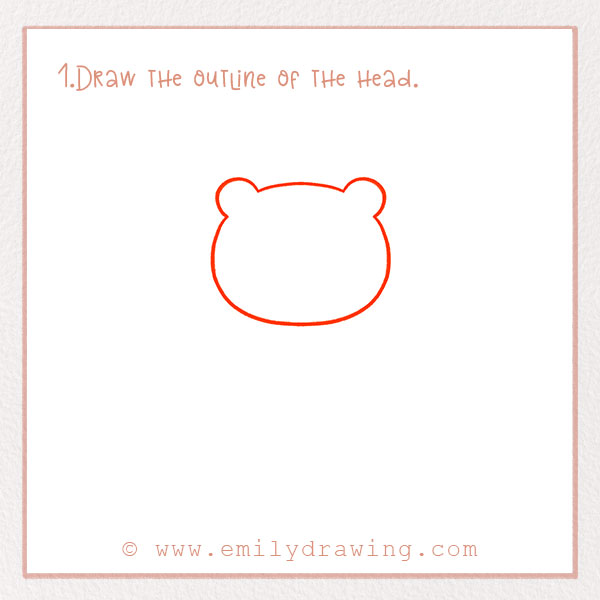
Let’s start with the head. Near the top of the page, draw a wide oval. On the top left and right, draw two semicircles for ears. The head should take up about two-thirds of the page.
Step 2 – Draw the face.
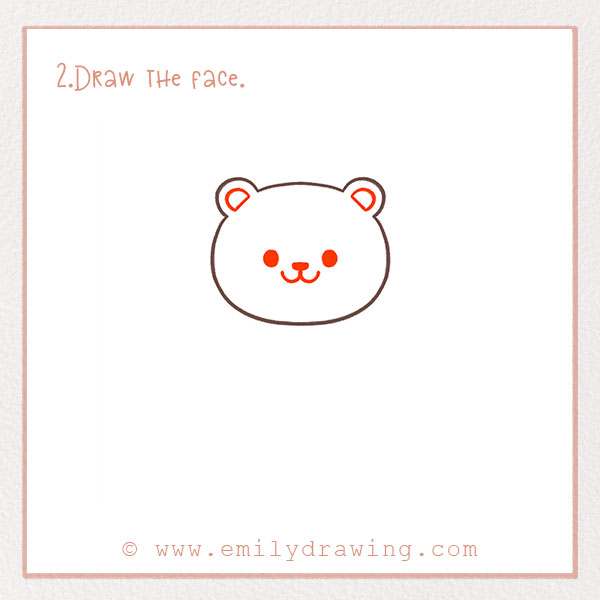
Tigers are famous for their powerful roars, which can be heard from up to 2 miles away and are used to communicate with their fellow tigers. However, our tiger is just going to be smiling because we want it to look really friendly.
So, let’s draw the tiger’s mouth and eyes. Draw two filled dots for the eyes. Centered below the eyes, draw an upside-down triangle for the nose. Draw two curves for the mouth, making it appear like it is smiling. Great job!
Step 3 – Draw the tiger’s torso and legs.
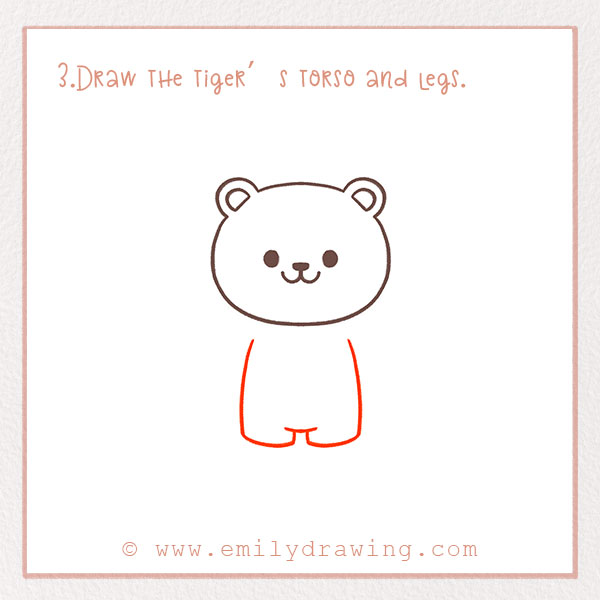
Did you know that tigers can jump horizontal distances of up to 33 feet in a single leap? That’s like jumping over three cars! To be able to jump, our tiger needs to have legs. Let’s draw them now.
Starting just below the chin, draw two long, slightly curved lines for the torso and legs. Add flat lines at the bottom for the tiger’s paws. Check out the photo!
For more animal-themed tutorials, check out How to Draw a Kangaroo.
Step 4 – Add the tiger’s arms.
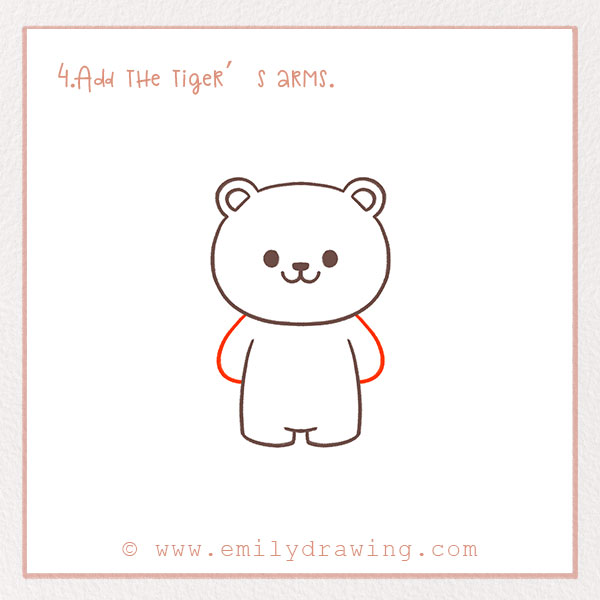
Let’s keep going and add the arms. On either side of the lines you just drew, draw two curves for the arms. They should go about halfway down the leg. Great job!
Step 5 – Add the tiger’s belly!
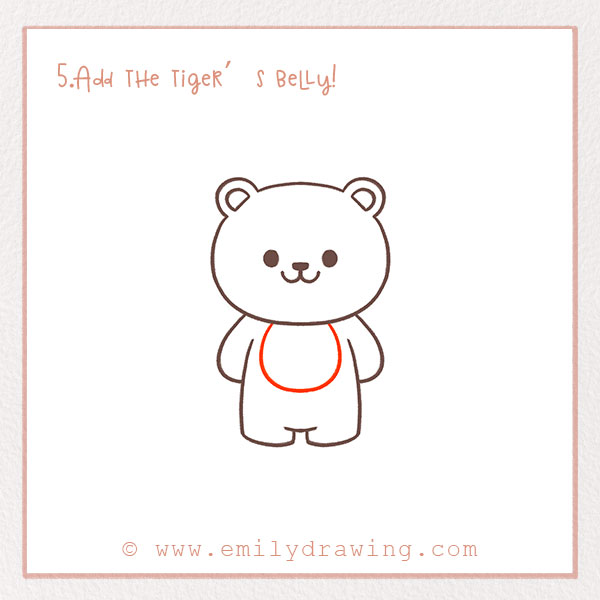
In the tiger’s torso, draw a large oval that is slightly cut off by the chin. This indicates the tiger’s belly.
Step 6 – Add the tiger’s tail!
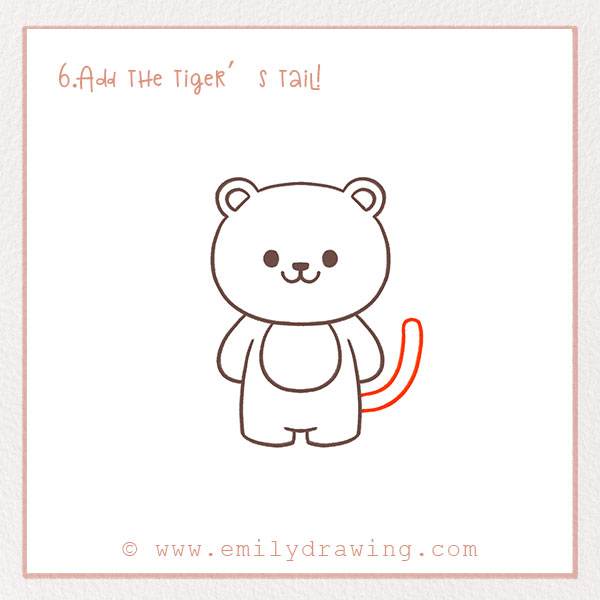
Let’s finish the shape of the body. We just need to add the tail. On the right side of the tiger, draw a long squiggly line for the tail. We will add more detail later!
Step 7 – Add the stripes on the head.
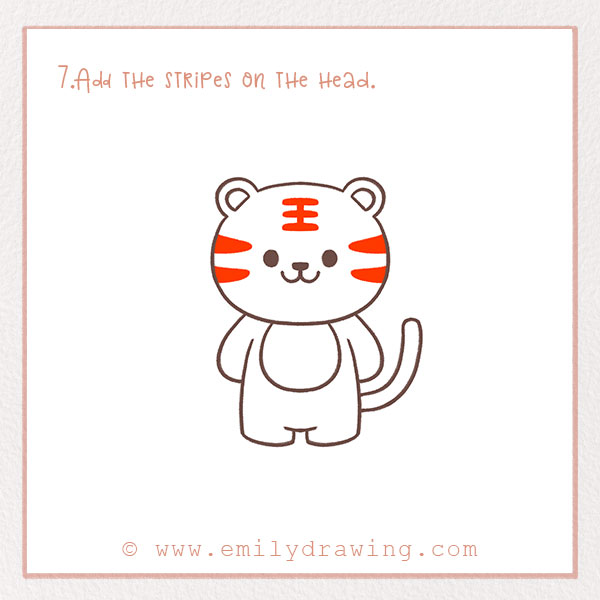
We are going to add the tiger’s pattern now. Of course, tigers are known for their distinctive orange coat with black stripes. No two tigers have the same stripe pattern—it’s like a fingerprint!
On the head, draw two stripes on either cheek. Let’s do some markings above the eyes, too—draw three very narrow and wide ovals connected by a vertical line. Make sure you fill in all of the stripes. Check out the photo!
Step 8 – Add the stripes on the body.
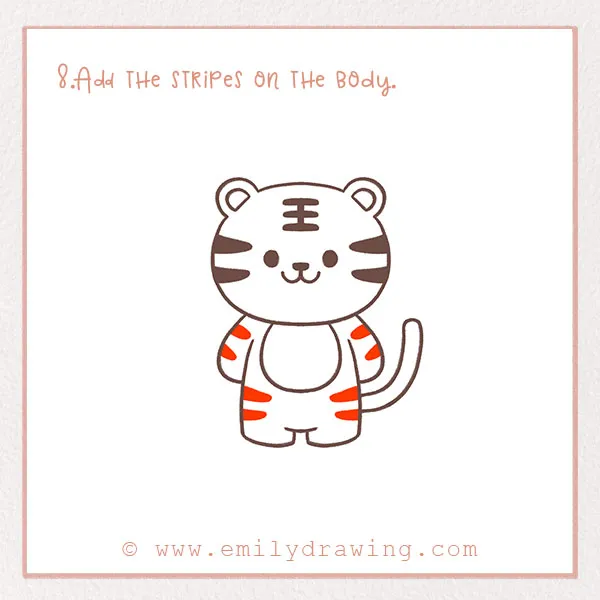
Let’s keep adding more stripes! Add two stripes on each arm and leg. Make some of them a bit longer for some interesting visual variation.
Step 9 – Add stripes to the tail.
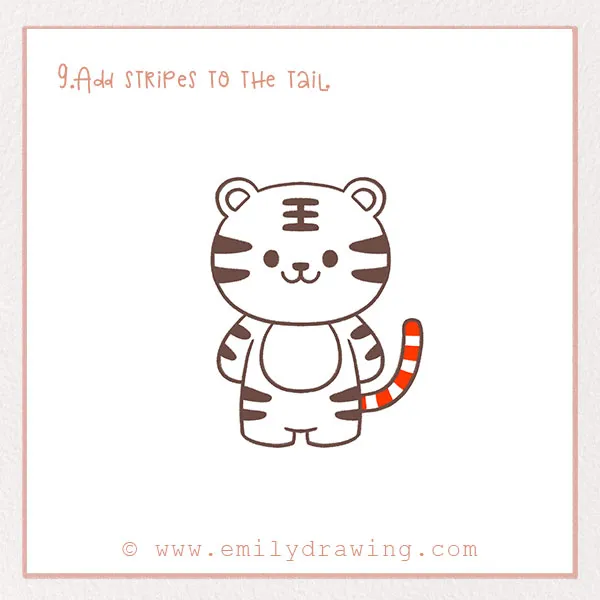
Finally, let’s add the stripes to the tail! Fill in the entire tail with stripes that are roughly the same size. Again, fill them in solid to make them stand out.
Step 10 – Color in your tiger!
We are almost done! Fill in your drawing with whatever colors you like. Tigers are known for their intense orange color—have fun with your cartoon tiger drawing, and don’t forget about the background!
Awesome job! Thanks for following along with us. We hope you enjoyed this tiger drawing tutorial and learned some fun facts about tigers along the way. Be sure to browse the site for more easy and fun ten-step tutorials! We have plants, foods, animals, and people that you can all learn how to draw.
Great job on your tiger! Why not explore more with How to Draw a Bear or How to Draw a Fox?
Pin it now, Draw later!
Get the FREE Printable Drawing Guide