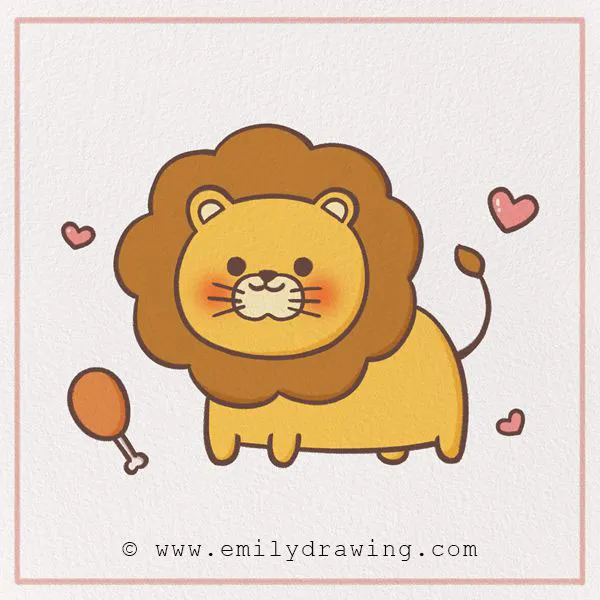
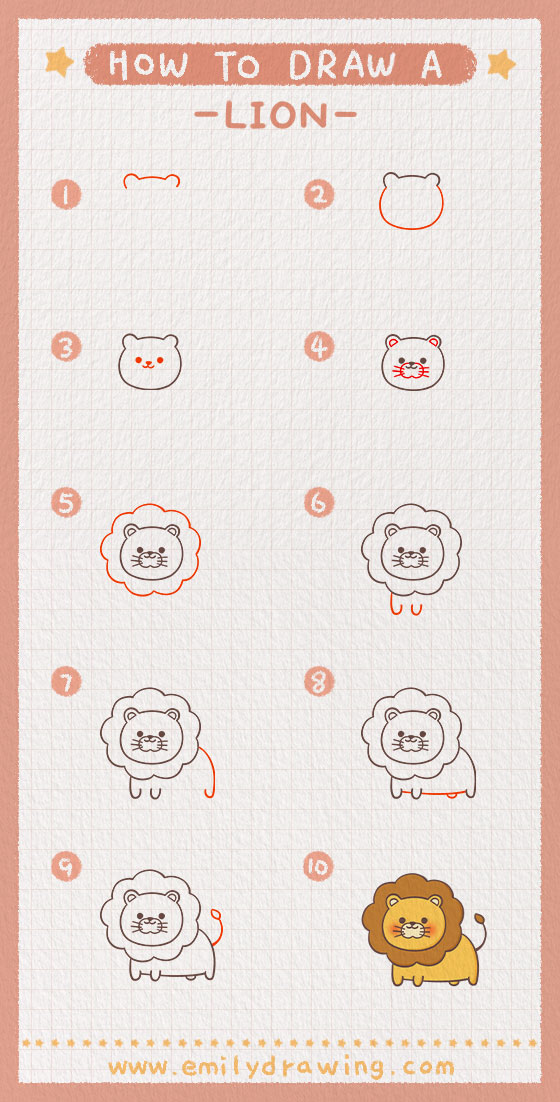
Roar! You’ve found our fun ten-step lion drawing tutorial—today, we’re going to learn how to draw a lion!
Lions are amazing animals—perfect if you want to draw a cartoon lion or a realistic one! Did you know that a lion’s roar can be heard up to eight kilometers away?
Most lions today live in Africa, although a few live in India. Many of these lions live in protected areas because lions are endangered animals at risk of going extinct. The most common habitats for lions are grasslands and plains, and they can survive for quite a while without water.
Interestingly, lions are the only type of cat that are known to live in groups. Groups of lions are called prides.
So, find some drawing materials, and have fun with this easy lion drawing art project! Keep reading to get started. Let’s go!
Materials:
- a piece of paper
- a pencil for the guiding lines and sketching
- an eraser
- a black sharpie or a pen for the outlines
- markers or colored pencils for coloring
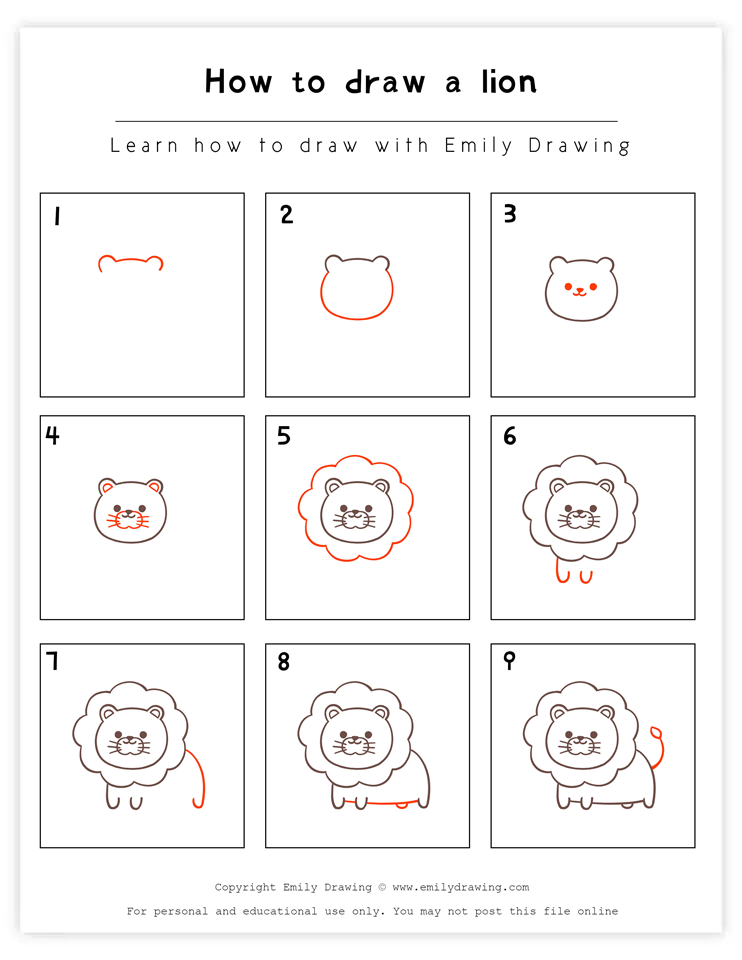
- our printable drawing guide (Join my Email List below to get this Tutorial)
Here are my RECOMMENDED Art Supplies!
- Crayola Coloring Set (140 Pieces – Mega Value!)
- 24 Colored Crayon Set
- A4 Printer Paper
- Crayola Coloring Pencils
- HP Home Printer with Instant Ink!
Time needed:
10 minutes.
How to Draw a Lion — Let’s get started!
Step 1 – Draw the lion’s ears.
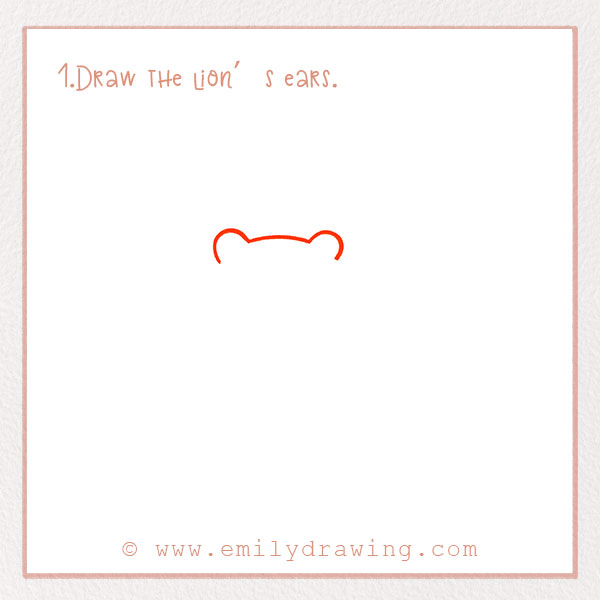
Lions have very good hearing; they can hear prey from over a mile away!
So, let’s start with the top of the lion’s head. About two-thirds of the way up the page, draw a curve with two raised curves for the ears. Check out the photo!
Step 2 – Draw the lion’s head.
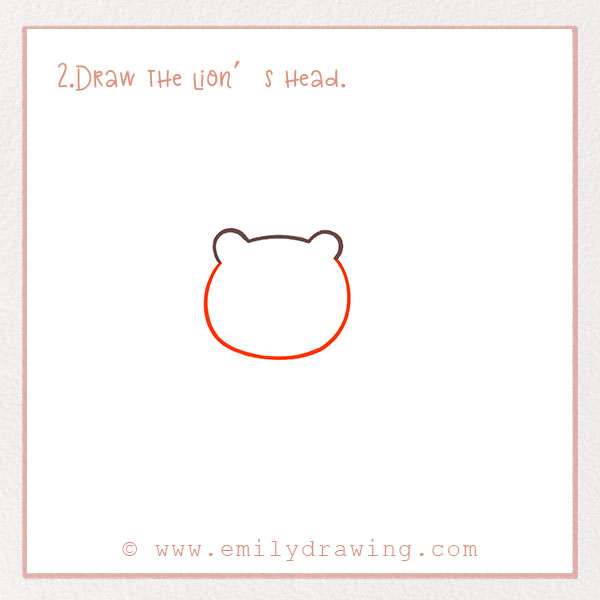
Let’s finish drawing the shape of the lion’s head. Underneath the ears, draw a large curve. It should extend about halfway down the page.
Step 3 – Add the lion’s face.
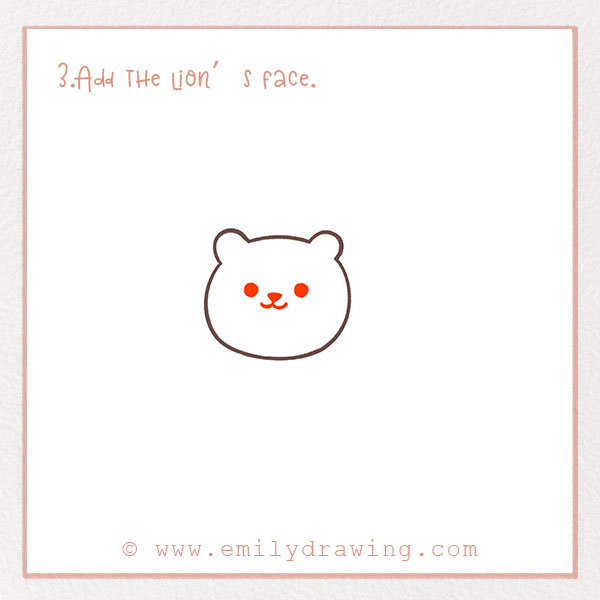
Next, we’re going to add the lion’s face. Draw two dots for the eyes. Then, in between the eyes, draw a very small upside-down triangle. Lastly, add a mouth by drawing two curves going outwards from the nose.
Step 4 – Finish drawing the lion’s face.
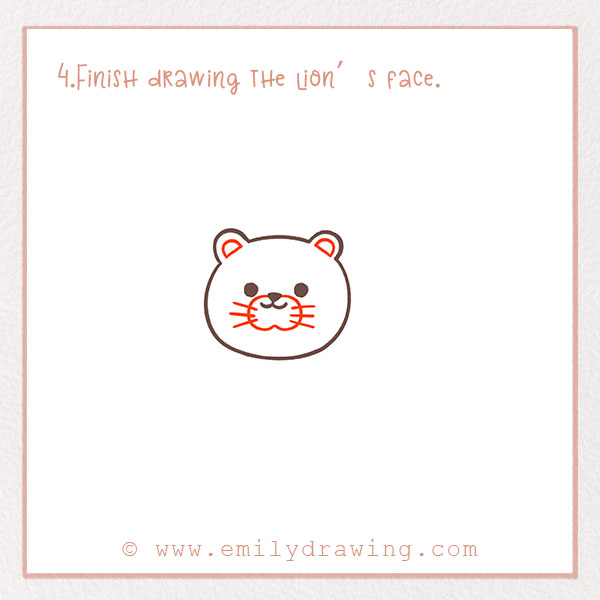
We’ve still got more to do to the lion’s face. You’ll want to check out the photo for this step!
Draw a round shape towards the bottom of the face. The top of it should intersect with the nose. Then, on each side of the shape, draw three short lines extending from each side. These are the whiskers!
Lastly, draw details on the ears by adding two semi-circles inside the ear shapes.
Awesome! You’re all done with the face.
Step 5 – Add the lion’s mane!
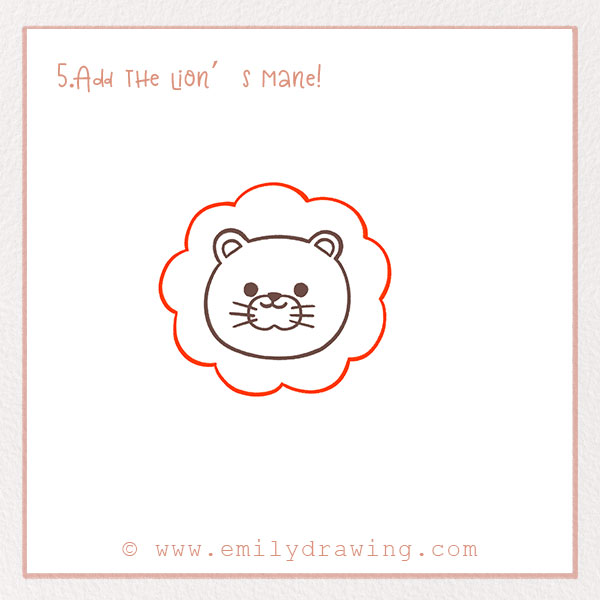
One of the most unique and recognizable features of lions are their manes. Manes are only on male lions, and they actually darken as they grow older. Manes serve several different purposes.
So, let’s add that now. Around the whole head of the lion, let’s add a larger shape to symbolize the mane. It should be a round scalloped line, similar to a cloud-shape.
Step 6 – Add the front legs.
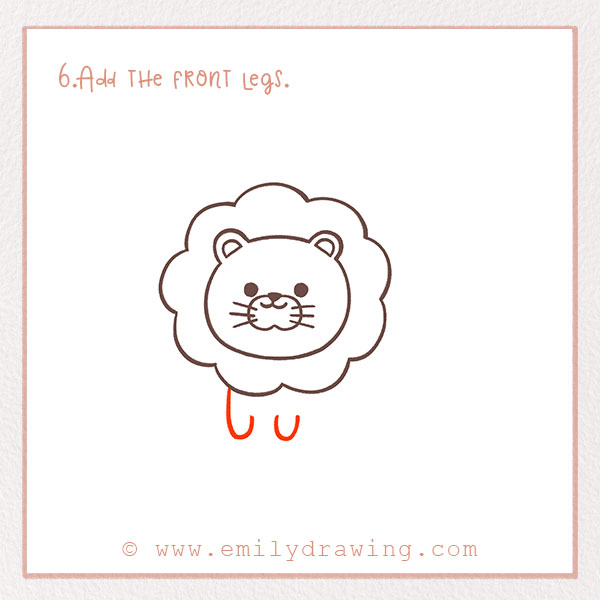
Of course, our lion has to have legs. Let’s start with the front legs. Since the lion is looking to the left, the front legs are also on the left.
On the left side of the body, add two legs. They should each be small U shapes. Look at the photo!
Step 7 – Draw the back legs.
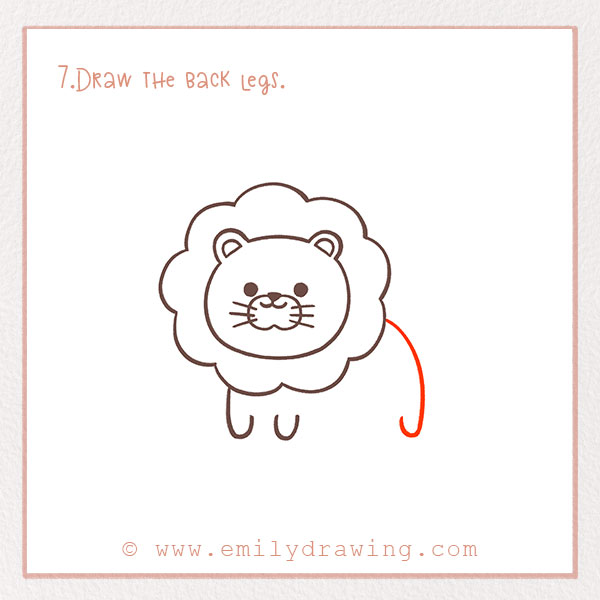
Let’s keep working on the legs. From about halfway up on the right side of the mane, draw a large curve. This is the back leg. It should also have a U shape for the foot.
Step 8 – Draw the belly!
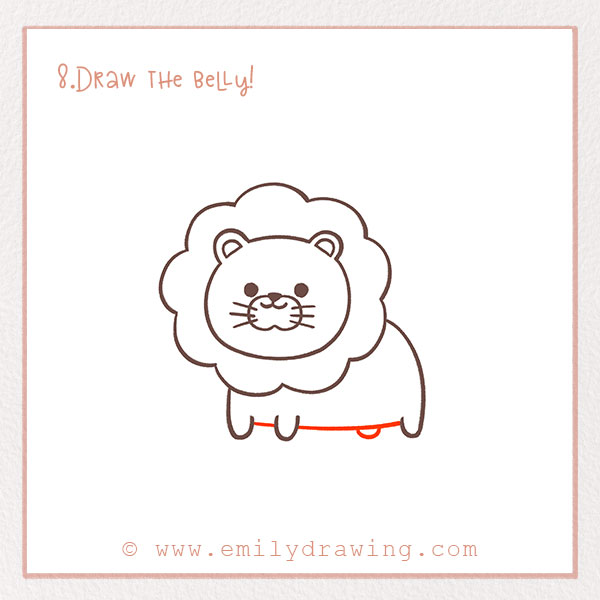
Let’s connect the legs by drawing the belly. Connect the front and back legs with a slightly curved horizontal line. Then, draw one more leg in the back—again, it is just a very small U shape. Check out the photo.
Step 9 – Draw the lion’s tail.
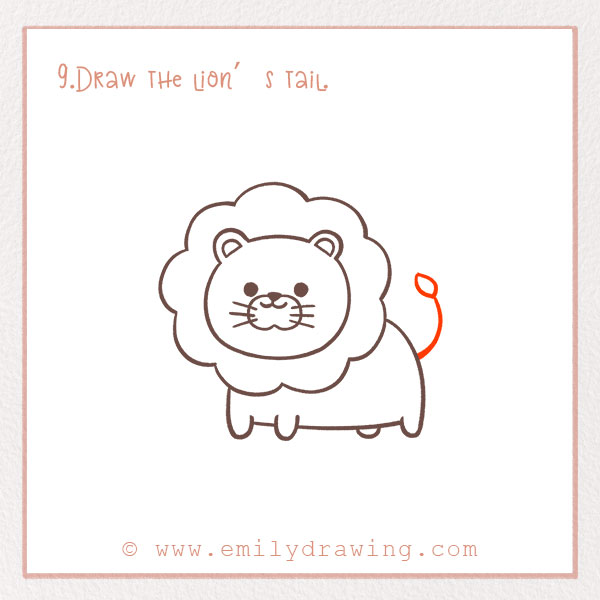
We are almost done with drawing the lion! We’ve just got to add the tail.
On the right side of the lion, draw a curved line extending outwards and upwards. It should be a few inches long. At the end of the line, draw a small shape to show the tuft at the end of the lion’s tail.
Almost done—good job!
Step 10 – Color in the lion!
Let’s add some personality to the lion by adding some color. Lions are normally gold or tan, but have fun coloring yours in! Take some time to fill in the background, too, and have fun with this last step. Give it a name while you’re at it.
Are you done with your drawing? Good job—we hope you had fun! Share this tutorial with other animal lovers in your life so they can learn how to draw this amazing animal, too.
Look around the site for tons of more how to draw animals step by step tutorials! Just click on the “animal” tab up above. There is a cat, dog, horse, and so many more animal tutorials! We also have a bunch of other themes to pick from.
If you’re interested in drawing more wild animals, you might also enjoy our tutorials on How to Draw a Tiger and How to Draw a Fox.
Pin it now, Draw later!
Get the FREE Printable Drawing Guide

so cute I loved it