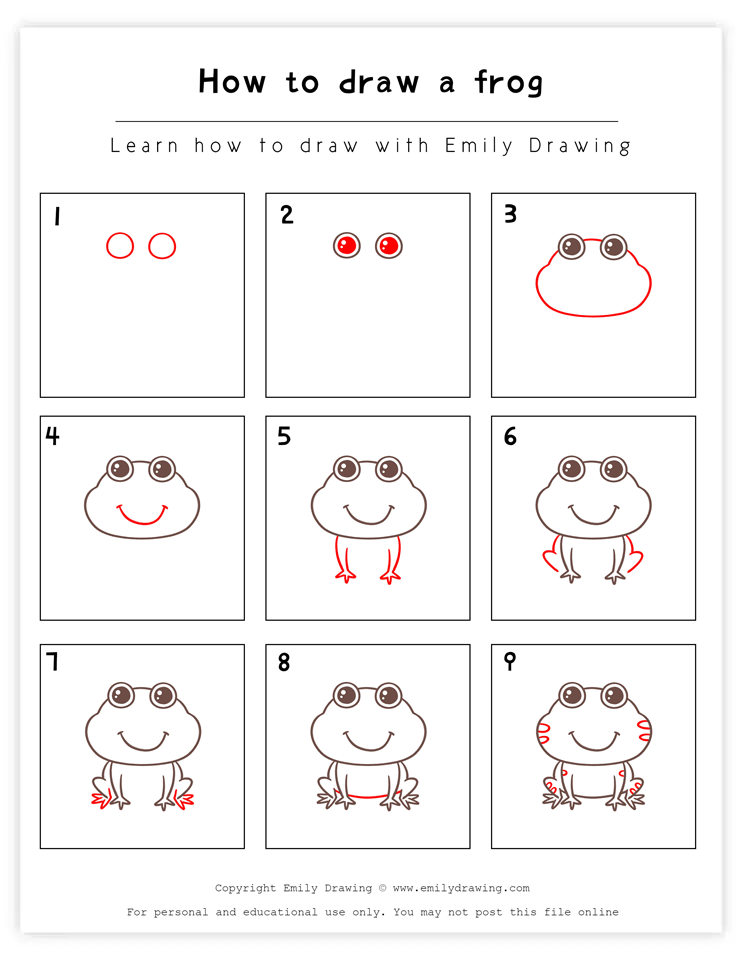
Ribbit! Welcome to our fun 10-step tutorial on how to draw a frog—this is a perfect and easy frog drawing for kids!
Frogs are found all over the world, except for Antarctica. There are over 4,700 species of frogs globally! Frogs can vary in size from species to species—the smallest frog is less than half an inch long, while others can be over a foot long. They can also be many different colors.
Frogs are a type of amphibian, which are small vertebrates that need a moist environment to survive. Amphibians actually “drink” through their skin by absorbing water.
Alright, with all that said—gather some art supplies, find a comfy spot, and let’s start this tutorial. Are you ready? Let’s go!
Materials:
- a piece of paper
- a pencil for the guiding lines and sketching
- an eraser
- a black sharpie or a pen for the outlines
- markers or colored pencils for coloring
- our printable drawing guide (Join my Email List below to get this Tutorial)
Here are my RECOMMENDED Art Supplies!
- Crayola Coloring Set (140 Pieces – Mega Value!)
- 24 Colored Crayon Set
- A4 Printer Paper
- Crayola Coloring Pencils
- HP Home Printer with Instant Ink!
Time needed:
12 minutes.
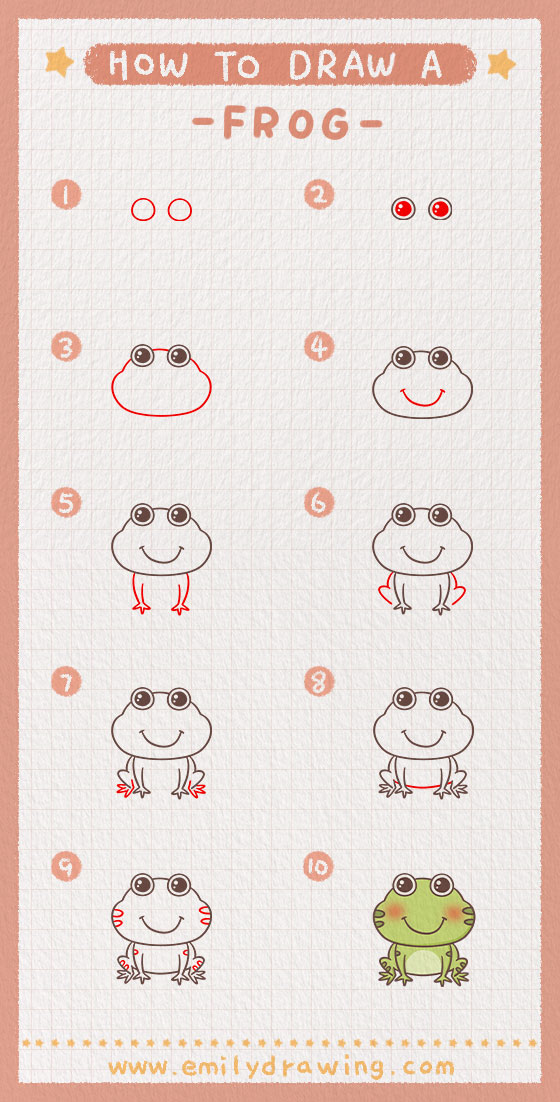
How to Draw a Frog — Let’s get started!
Step 1 – Draw the eyes of the frog.
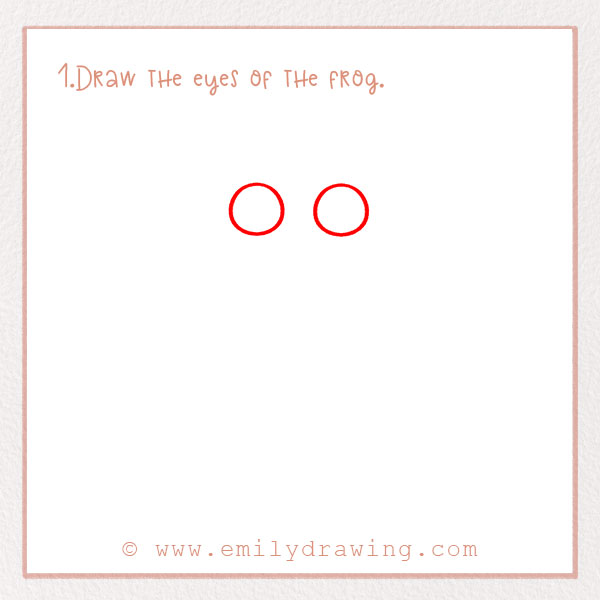
The eyes of a frog are very unique—they are on the top of their head! Frogs also can see better at a distance and have very good night vision.
So, let’s start our frog drawing with the eyes. Near the top of the page, draw two circles. They should be about an inch wide each. Leave a small gap in between them.
Step 2 – Add detail to the eyes.
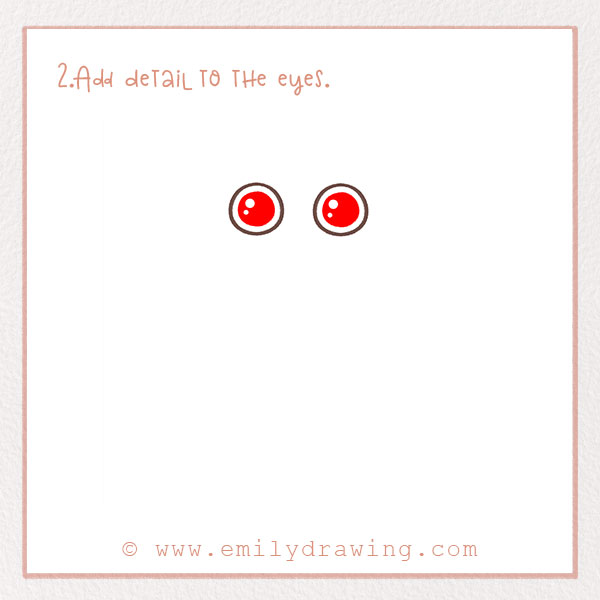
Inside the two circles of the eyes, draw two smaller circles. Color them in, but leave a few spots white to show dimension. Check out the photo! Now the frog has pupils. They look a bit like the eyes of an owl!
Step 3 – Draw the outline of the frog’s head.

We’re going to draw the outline of the frog’s head. Add a short curved line between the eyes. Continue it on either side of the eyes and make a wide oval for the shape of the face! Make the lower part of the head a bit wider.
The head should be pretty large, with just a few inches on either side of empty space.
For other tutorials featuring rounded shapes, check out How to Draw a Ladybug or How to Draw a Penguin.
Step 4 – Add a smile!

We want our frog to look happy! On the lower section of the frog’s face, draw a wide curved line to show a smile. Add two smaller lines on the edges to show dimples.
Good job!
Step 5 – Add the legs of the frog!
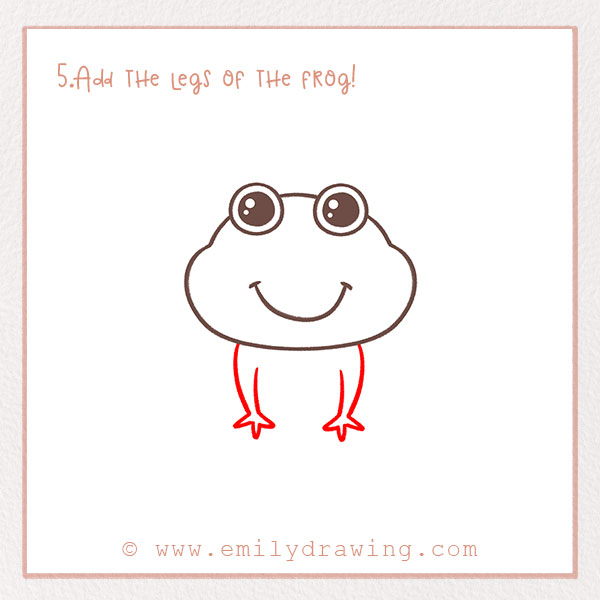
Legs are some of the most unique features of frogs! A lot of frogs can leap up to 20 times their body height thanks to their legs.
Let’s draw the two front legs now. Each leg is going to be made of two curves. At the bottom of the legs, draw three points for the toes of the frog. Some species of frogs, like tree frogs, use their toes to help them cling to branches. Some of them even jump from tree to tree.
Check out the photo!
If you enjoy drawing detailed limbs, try How to Draw a Squirrel or How to Draw a Kangaroo.
Step 6 – Draw the back legs.

We’ve got to add the back legs now. Draw two curved lines on each side of the body. Draw a short scalloped line to represent each back leg. Look at the photo! The legs should appear behind the ones from Step 5. Good job.
Step 7 – Draw the back toes.
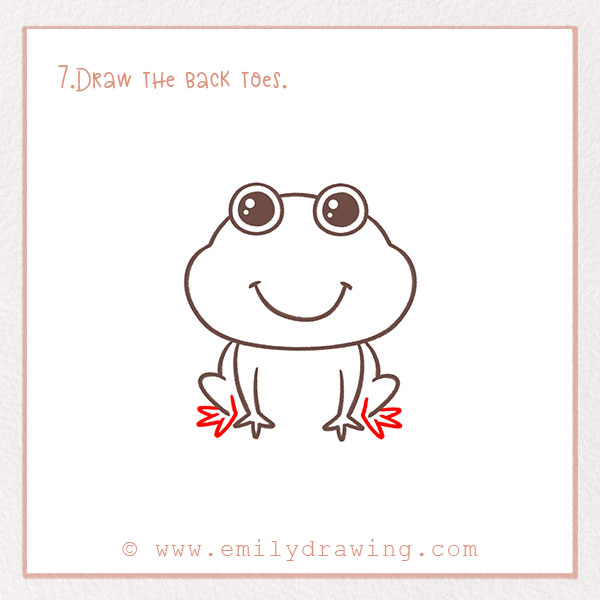
At the bottom of the curves you just drew, draw three points for the toes just like the front legs. They should be pointed outwards and look very similar to the toes from Step 5.
Step 8 – Draw the frog’s belly.
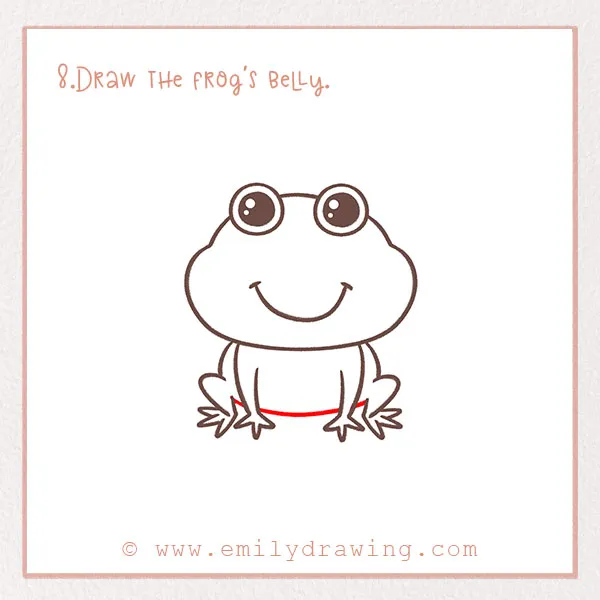
In the gap between the legs, draw a curved horizontal line for the belly. It should be right above the toes. Good job!
Step 9 – Add detail to the frog’s skin.
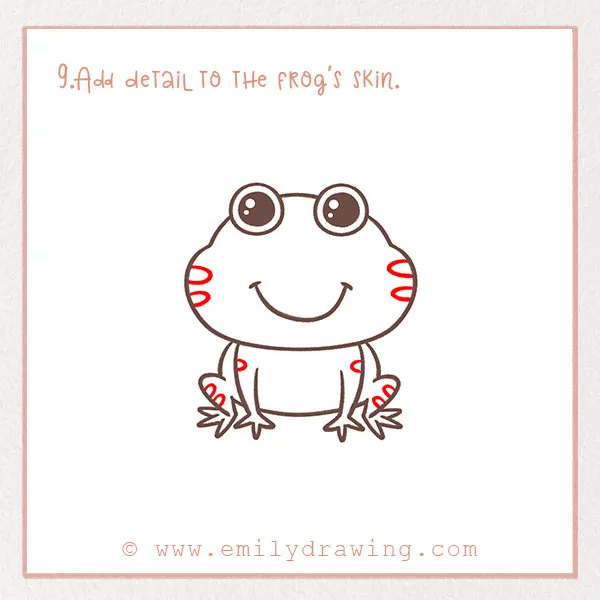
Frogs can have a bunch of different kinds of appearances. We’re going to add little spots to our frog! Check out the photo. Along the edges of the frog, draw little curves. They should look like spots on its skin.
We’re almost done—we’ve just got one fun step left.
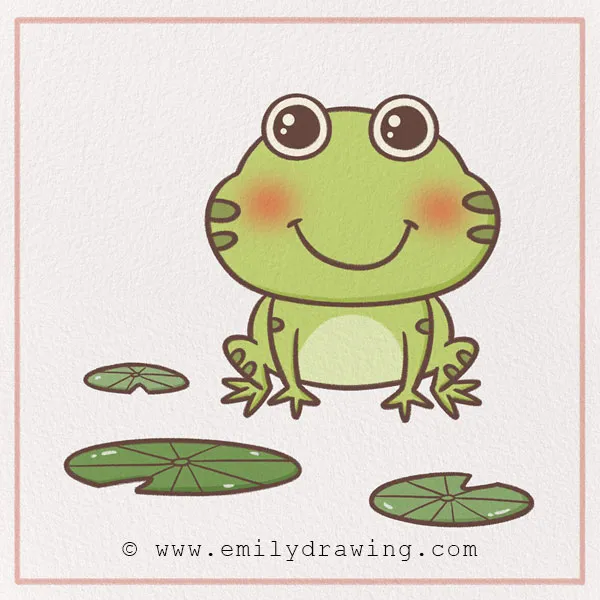
Step 10 – Color in your frog!
Frogs can be a bunch of different colors—many of them are really bright, too! They can be brown, green, yellow, red, black, as well as beautifully multi-colored!
So, pick out any colors you want and have fun completing your step-by-step frog sketch! Fill in the background, too!
Great job! You’ve completed your frog drawing tutorial—now give your frog a name!
We hope you had fun following this tutorial and learned some interesting facts about frogs. You might enjoy following along with other animal drawing tutorials, too. For other aquatic-themed ones, check out the starfish, shark, dolphin, and whale!
If you love drawing animals, you might also enjoy How to Draw a Turtle or How to Draw a Snail.
Pin it now, Draw later!
Get the FREE Printable Drawing Guide