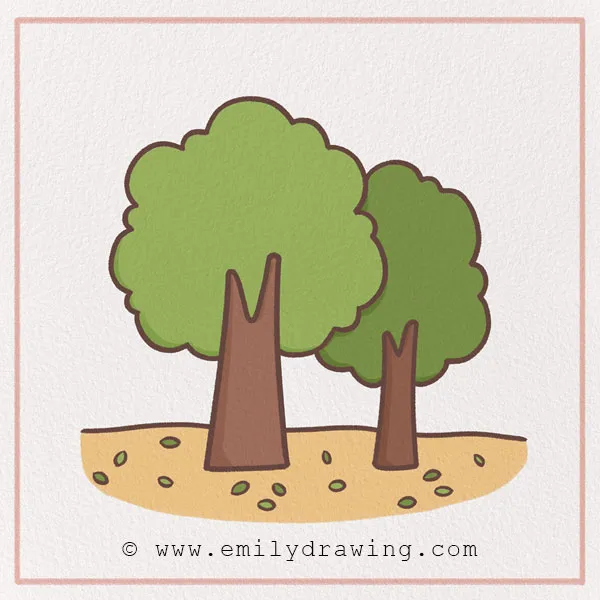
Hello and welcome to our ten-step tree sketch tutorial on how to draw a tree! Just like all of our tutorials, we have images to follow along with each step, so it is a simple yet fun process.
Trees are amazing organisms. From fruit trees to amazingly tall oak trees, trees encompass so many varieties that it’s hard to believe they are all related! However, all trees are made up of the same basic parts: roots, trunk, leaves, and branches.
Additionally, trees can live for a very long time. The oldest tree that we know of is 5,000 years old! There are many more awesome and fascinating facts about trees, which we will learn about as we do this ten-step tutorial!
Get some of your favorite art materials and let’s go. Happy drawing!
If you enjoy drawing nature scenes and nature-inspired subjects, you might also like How to Draw a Sunflower or How to Draw a Pine Cone.
Materials:
- a piece of paper
- a pencil for the guiding lines and sketching
- an eraser
- a black sharpie or a pen for the outlines
- markers or colored pencils for coloring
- our printable drawing guide (Join my Email List below to get this Tutorial)
Here are my RECOMMENDED Art Supplies!
- Crayola Coloring Set (140 Pieces – Mega Value!)
- 24 Colored Crayon Set
- A4 Printer Paper
- Crayola Coloring Pencils
- HP Home Printer with Instant Ink!
Time needed:
11 minutes.
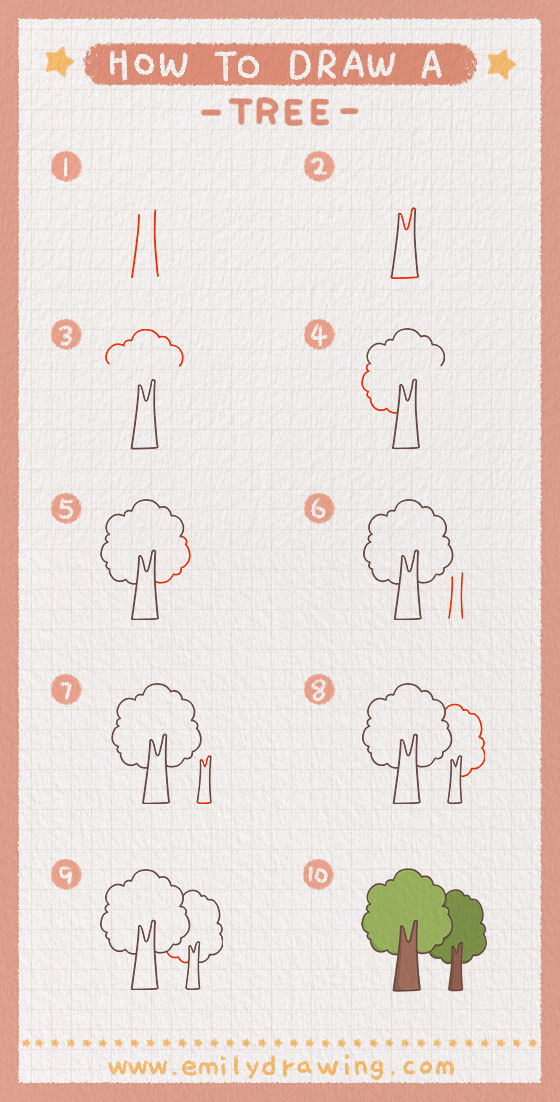
How to Draw a Tree — Let’s get started!
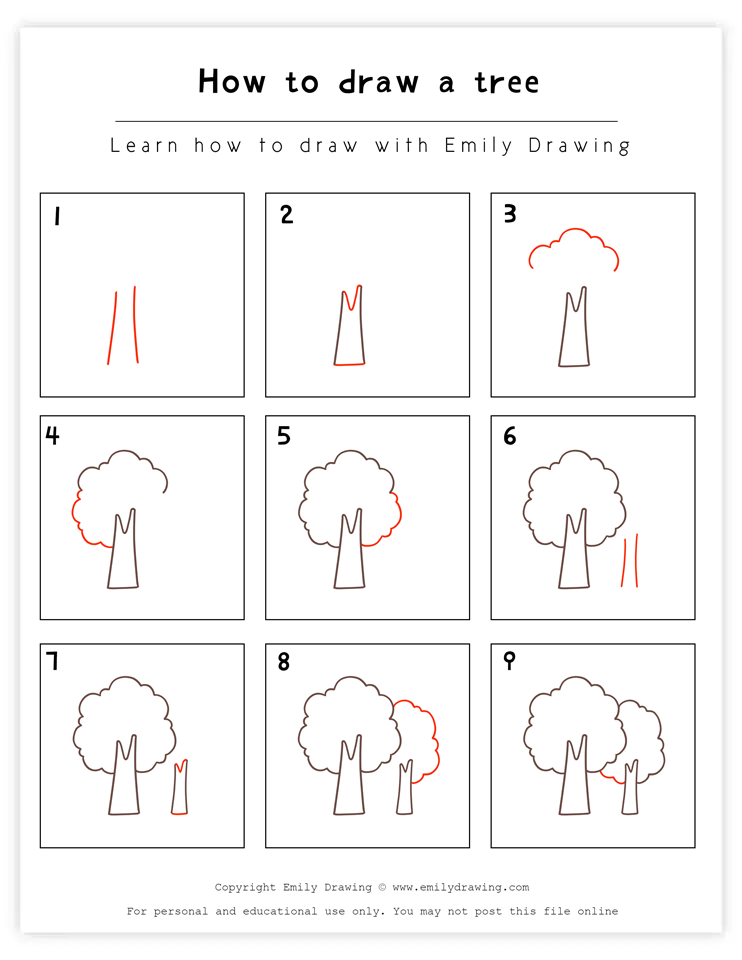
Step 1 – Draw the tree’s trunk.
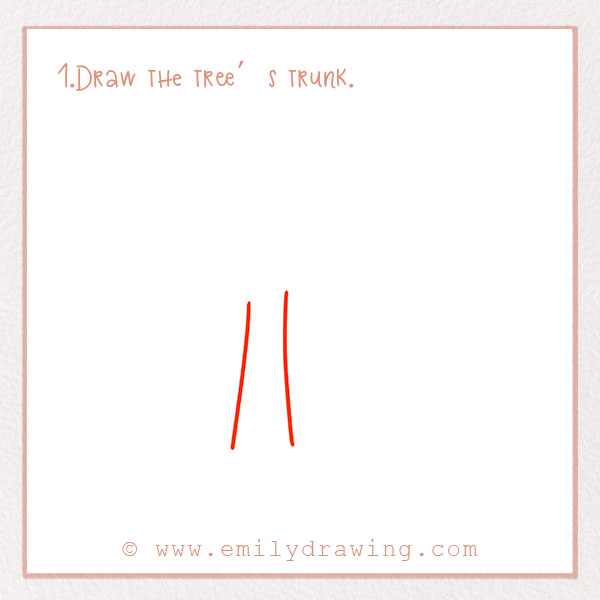
We’re going to start off this drawing with a major part of any tree—the trunk!
The trunk is a vital part of tree anatomy that provides robust support to it. It carries the water from the roots to the tree’s top, so of course it is super important for the tree’s survival!
To draw the trunk, simply draw two parallel lines next to each other that slightly slant towards each other. They should be about an inch apart and towards the bottom of the page. Check out the photo!
Step 2 – Complete the tree trunk.
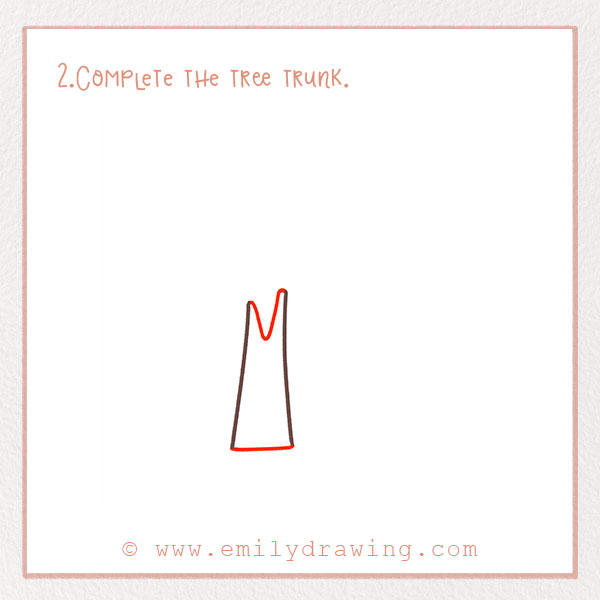
Let’s finish off the shape of the trunk. At the top of the two lines, connect them with a V-shape.
Next, connect the bottom of the lines from Step 1 with a short horizontal line. Good job!
Step 3 – Start drawing the crown of the tree.
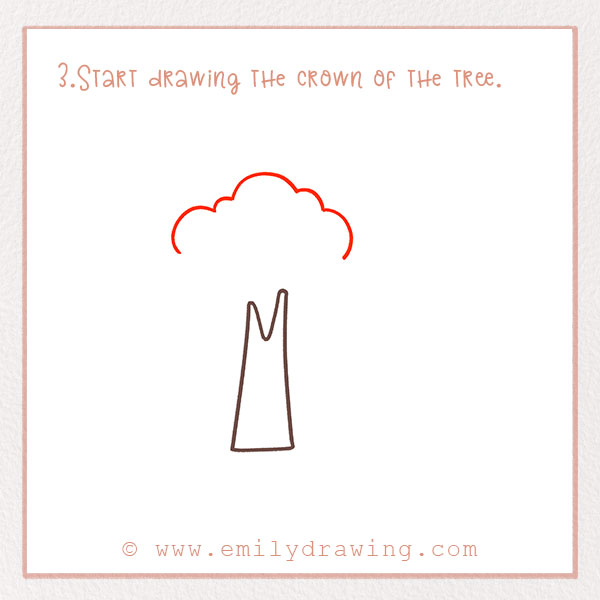
Next, we are going to form the crown of the tree, which refers to all of the foliage created by leaves. Our tree in this tutorial is going to have a big crown, as if it is thriving in the middle of summer!
To draw the crown, move a few inches up from the top of the trunk. Then, draw a scalloped line that forms an arc. It should look kind of like the top of a cloud.
For more practice with organic and flowing shapes, consider How to Draw Mushrooms or How to Draw a Snail.
Step 4 – Keep adding foliage.
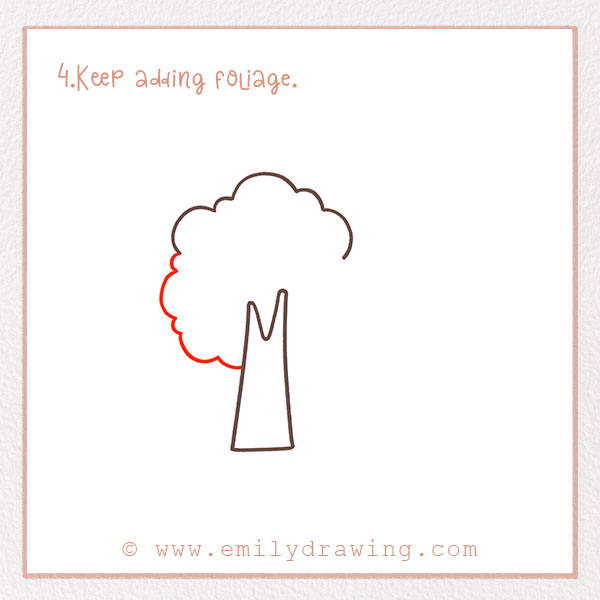
Let’s keep adding to the crown of the tree now. On the left of the line from Step 3, continue the scalloped line. Make each curve of the line a little bit different to make it look realistic, as if all the leaves are different sizes.
Check out the photo for help!
Step 5 – Complete the crown of the tree.
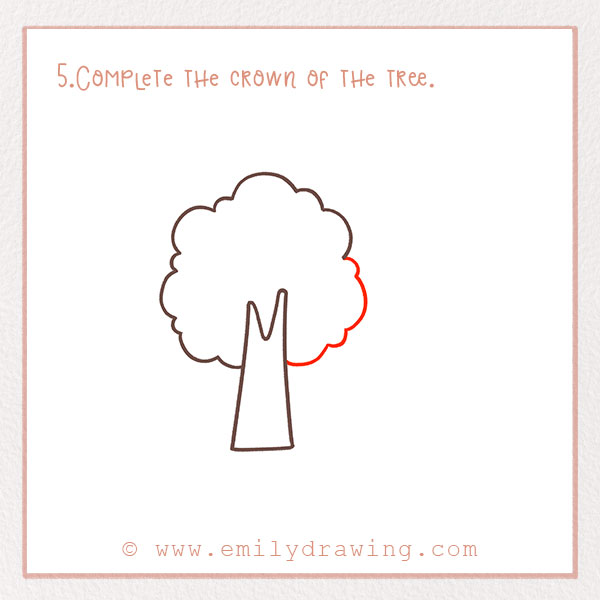
For this step, simply repeat the last step on the right side. This forms the entirety of the crown of the first tree.
For more tutorials with intricate details, check out How to Draw a Butterfly or How to Draw a Ladybug.
Step 6 – Draw the trunk of the second tree.
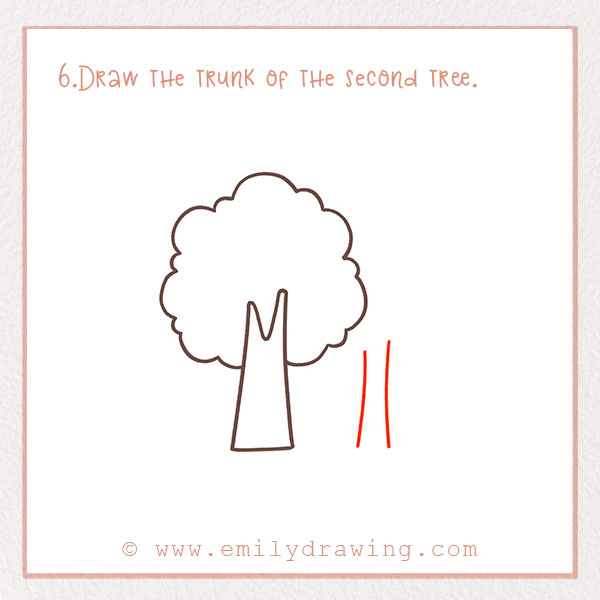
In this drawing, we are actually going to create two trees. In this step, we’ll start drawing the second tree.
To the right of the first tree, form a trunk by drawing two lines. Make it a little bit shorter than the first tree. Good job!
Step 7 – Finish the second trunk.
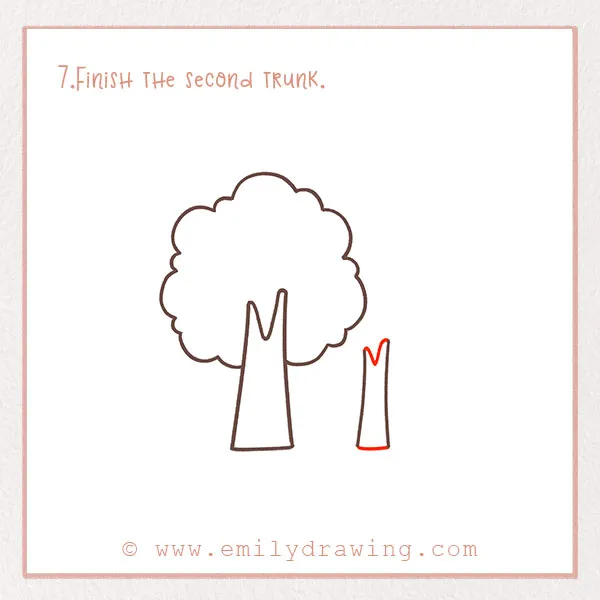
This step is very similar to Step 2. Connect the bottom of the trunk with a short horizontal line. Create the same V-shape at the top of the trunk. This V-shape resembles branches.
Step 8 – Start drawing the second crown.
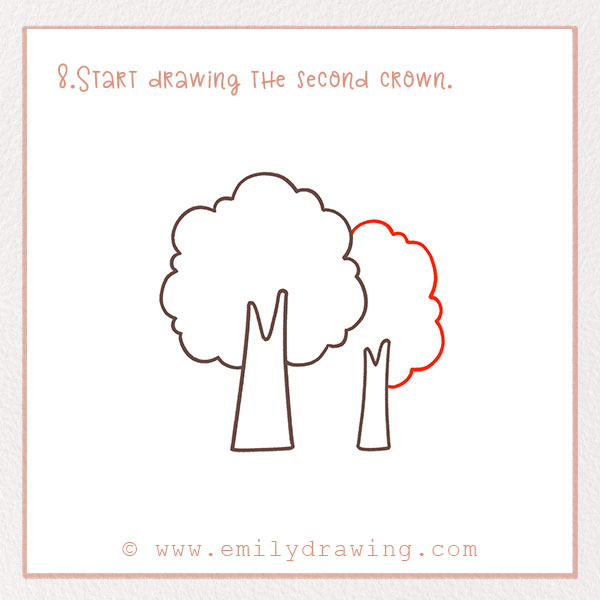
Let’s form the crown of the second tree now. To the right of the trunk you just draw, start drawing a curved scalloped line. Bring it all the way up until it meets the other tree. Check out the photo!
Step 9 – Finish the second tree.
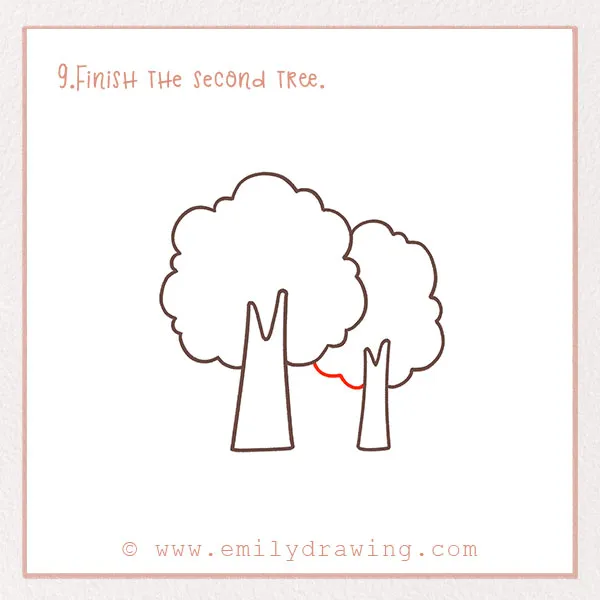
Finally, let’s complete the shape of the second tree. Draw a short scalloped line from the trunk of the second tree to the crown of the first tree. Refer to the reference image.
We are all done with the shapes of the tree! Just one super fun step left.
Step 10 – Color in your trees!
Time to color in your pretty trees! Oftentimes, oak trees can be orange in fall and green in spring and summer. However, trees can be so many colors, so don’t limit yourself—have fun with them. Maybe your trees even have fruits growing on them!
Awesome job! Are you happy with your tree drawing?
Once you’ve mastered the tree, try expanding your nature drawings with How to Draw a Cactus or How to Draw a Koi Fish.
We hope you absolutely loved this tutorial. For more plant-themed tutorials, check out our sunflower and cactus ones on our site! We also have animals, food, and people-themed ones too. Of course, be proud of your drawing and share it with your family!
Pin it now, Draw later!
Get the FREE Printable Drawing Guide