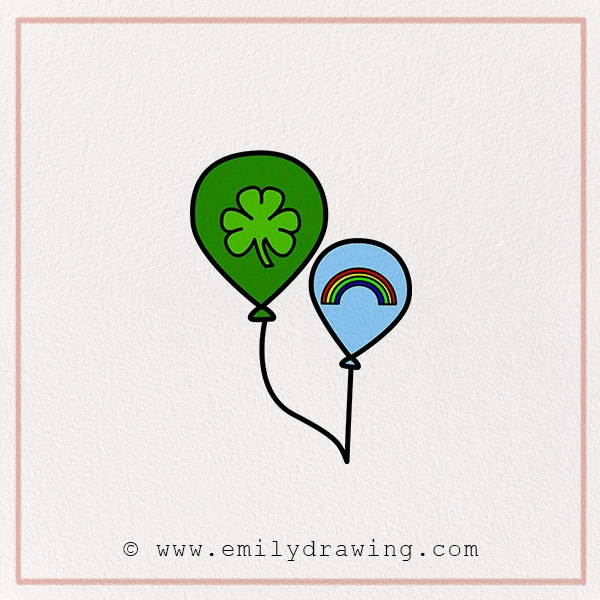
Grab your favorite pencil, find a cozy spot, and get ready to draw something lucky and bright! In this balloon drawing tutorial, We’ll show you how to create a lucky balloon design—one with a shamrock and one with a magical rainbow.
Perfect for kids aged 8–12 and their awesome grown-ups, This St. Patrick’s Day art project is great for cards, posters, classroom activities, or just having fun at home!
Did you know? Shamrocks are one of Ireland’s most famous symbols—decorate your drawings with our shamrock coloring page for extra green cheer! and some people say a pot of gold hides at the end of every rainbow—why not draw one with our rainbow drawing tutorial too? So let’s draw a little magic of our own!
We’ve broken this into 9 easy steps. Take your time and remember—there’s no “perfect” drawing. Every artist has a unique style, and that’s what makes your art special!
Materials:
- a piece of paper
- a pencil for the guiding lines and sketching
- an eraser
- a black sharpie or a pen for the outlines
- markers or colored pencils for coloring
- our printable drawing guide (Join my Email List below to get this Tutorial)
Here are my RECOMMENDED Art Supplies!
- Crayola Coloring Set (140 Pieces – Mega Value!)
- 24 Colored Crayon Set
- A4 Printer Paper
- Crayola Coloring Pencils
- HP Home Printer with Instant Ink!
Time needed:
15 minutes.
How to Draw St. Patrick’s Day Balloons — Let’s get started!
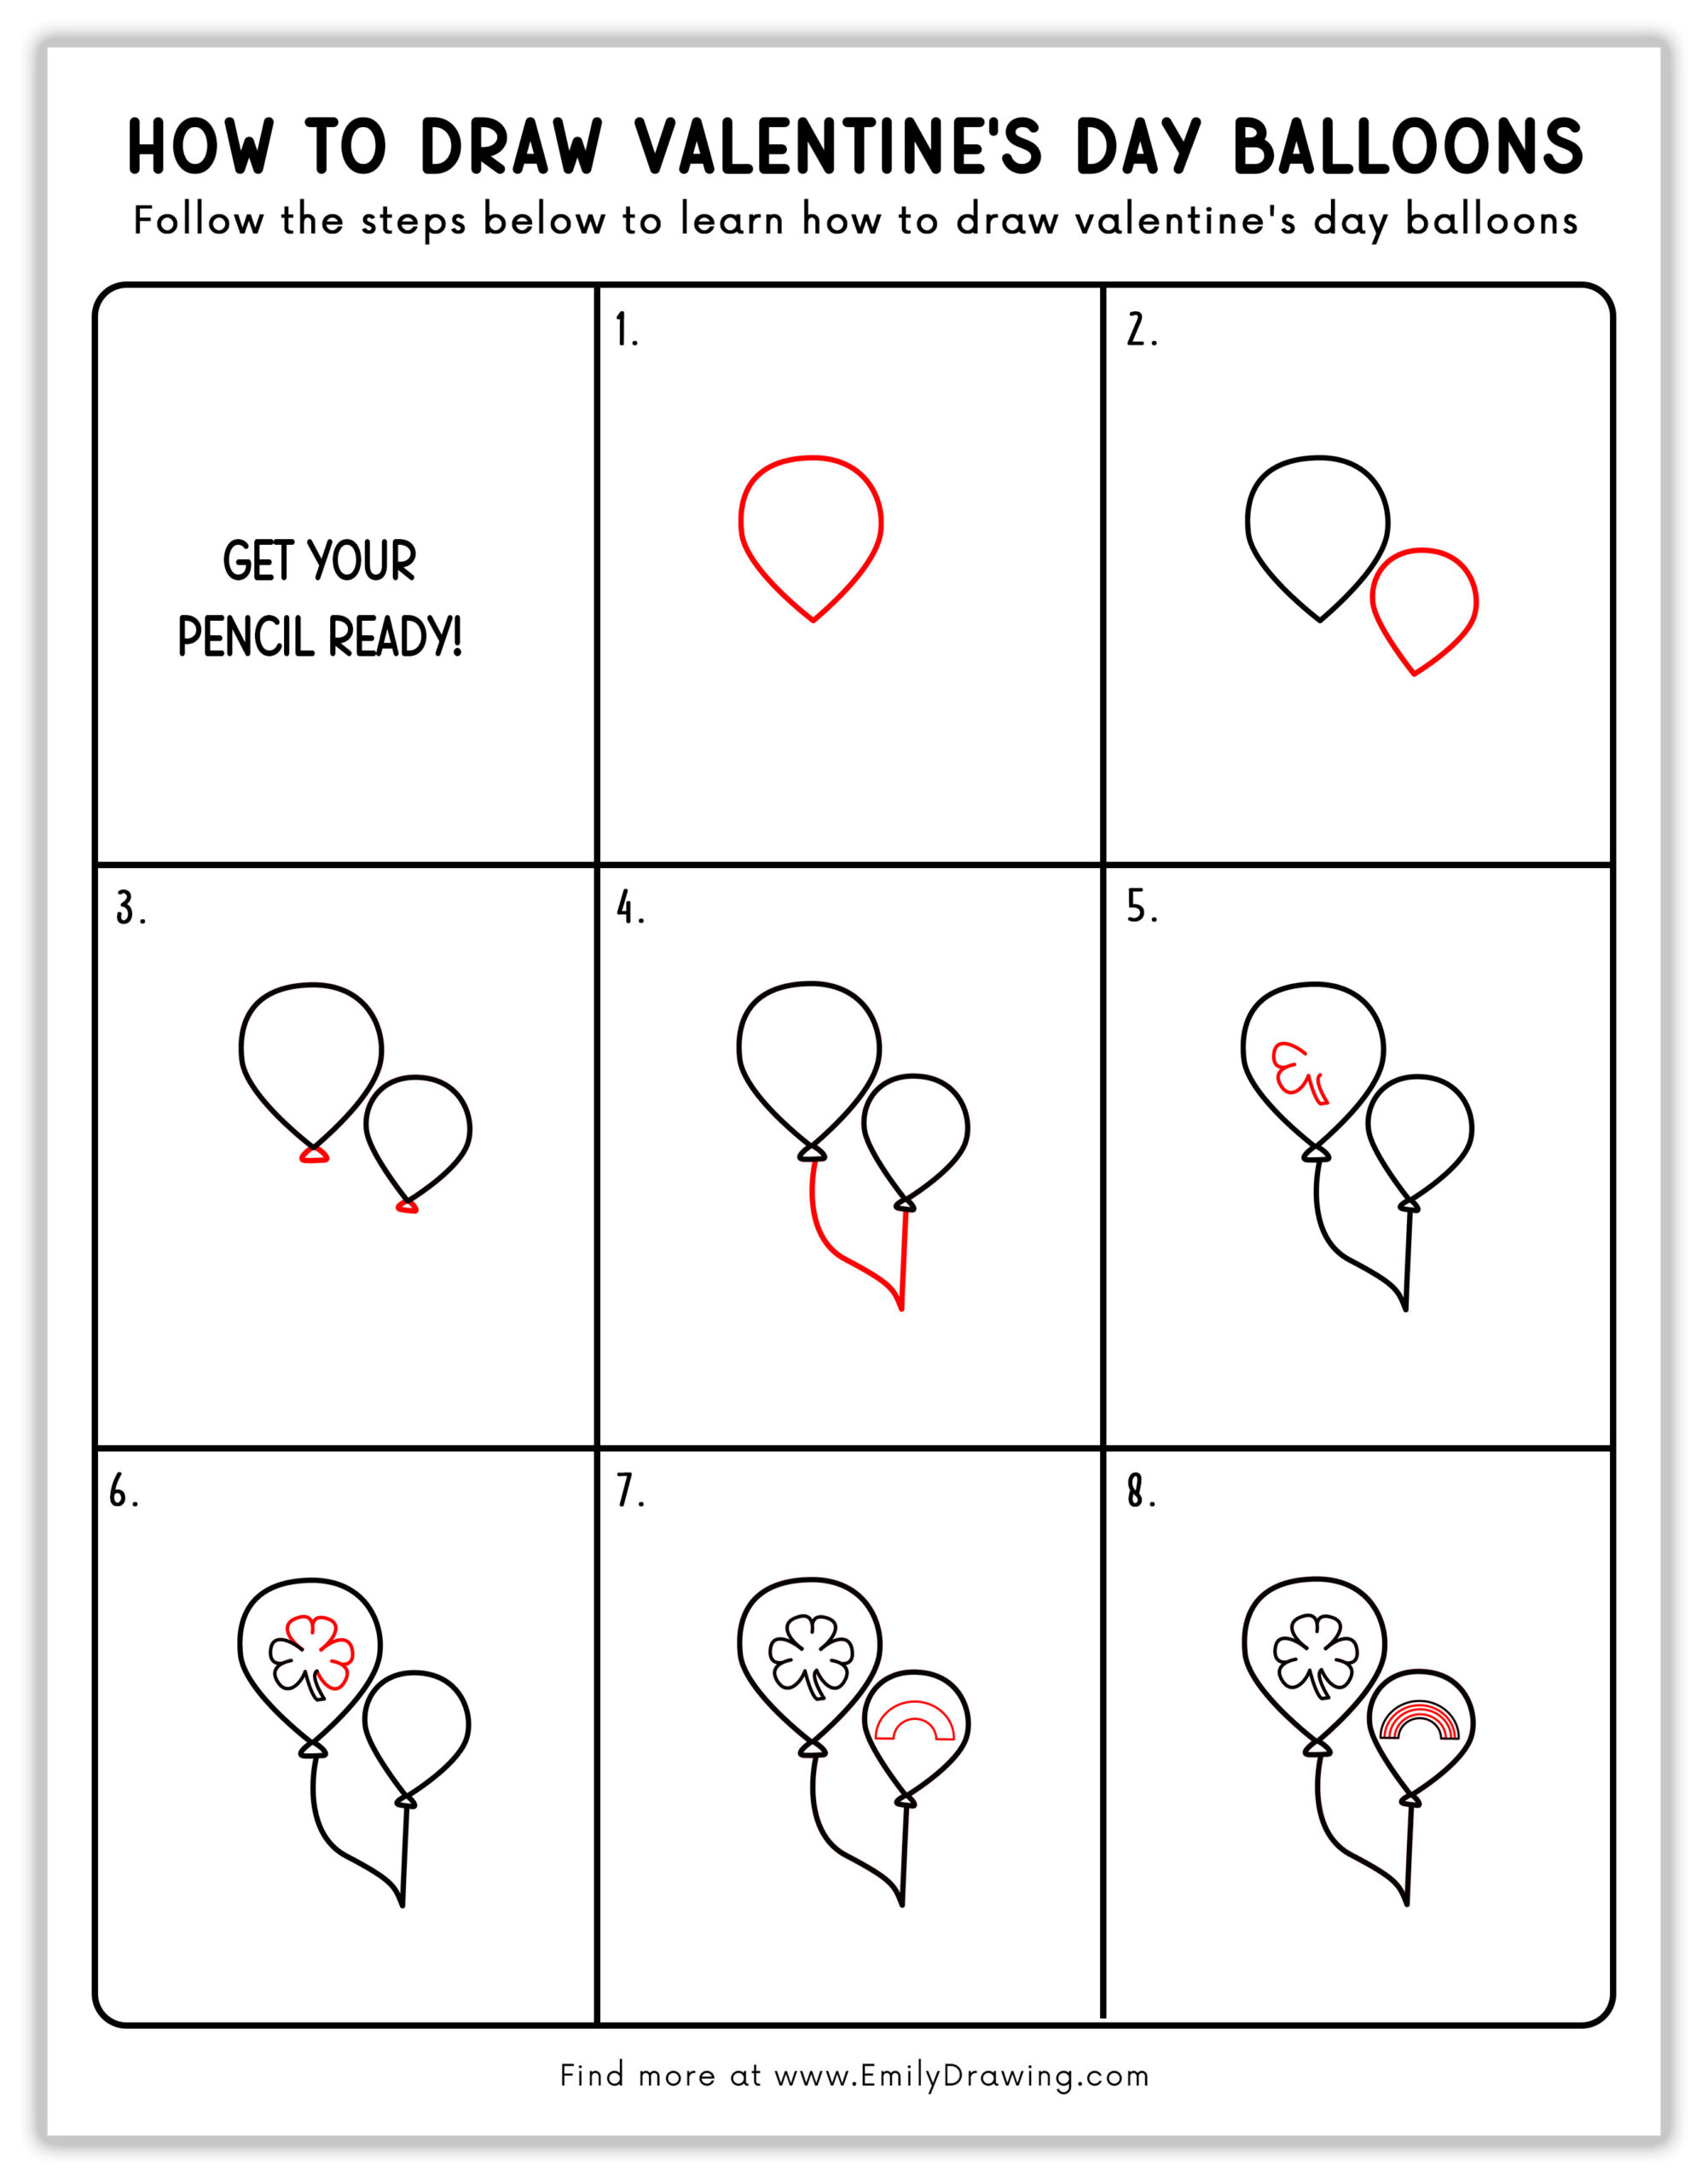
Step 1 – Draw the First Balloon.
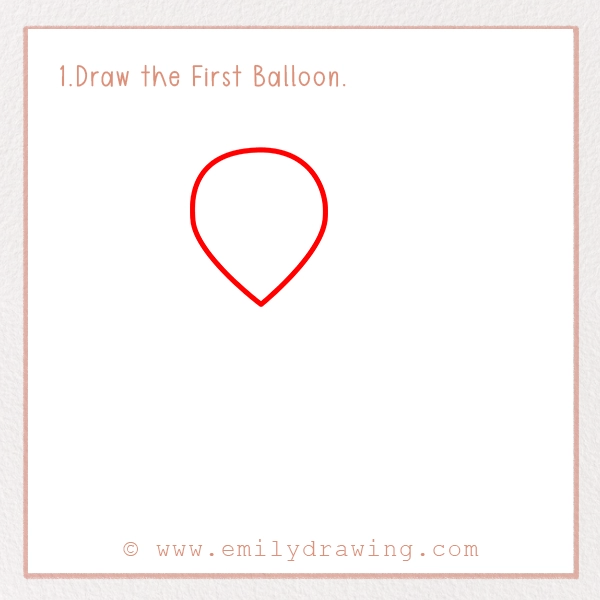
Start by drawing a big upside-down teardrop shape near the center of your paper. This is the body of your first balloon.
It’s okay if it’s a little uneven—real balloons wiggle, too!
Tip: Sketch lightly first so it’s easy to erase and tweak.
Step 2 – Add the Second Balloon.
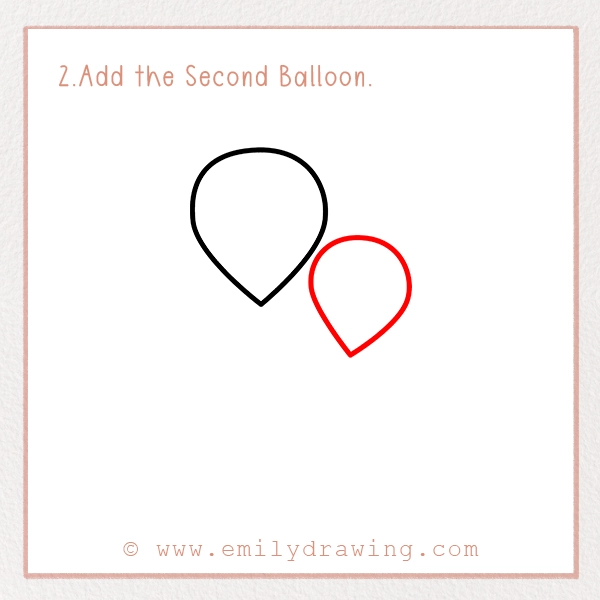
Next to the first balloon, draw a smaller teardrop shape, placed a bit lower and to the side.
Now you have two balloons floating together—one big, one small!
Step 3 – Balloon Knots and Bottoms.
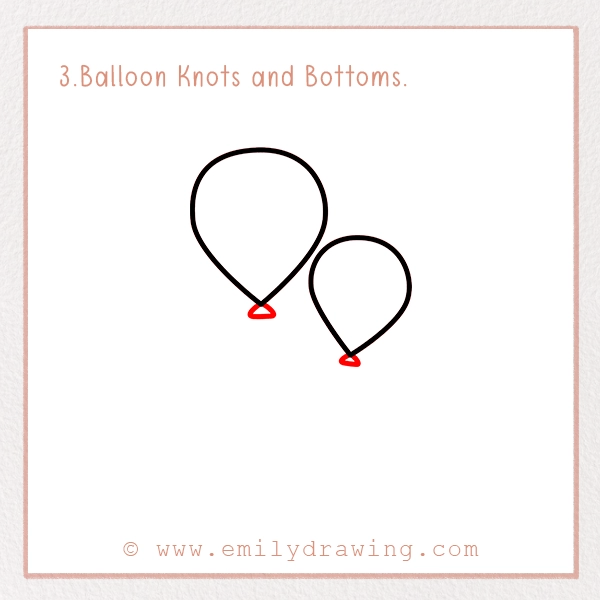
Let’s tie those balloons!
At the pointy bottom of each balloon, draw a small oval (that’s the knot), and then add a tiny downward-pointing triangle underneath each one to show the tied end.
Fun Fact: Balloon knots help keep the air (or helium!) inside so they don’t fly away.
Step 4- Add the Strings.
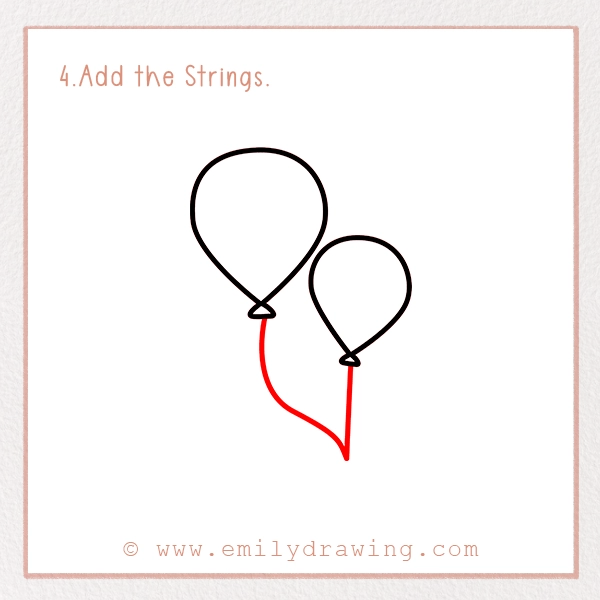
From each triangle, draw a long, curvy line that swoops downward. These are the strings you’d hold if the balloons were in your hand.
Creative Tip: Let your strings wiggle or spiral for a fun, floating look!
Step 5 – Draw the Shamrock Inside the First Balloon.
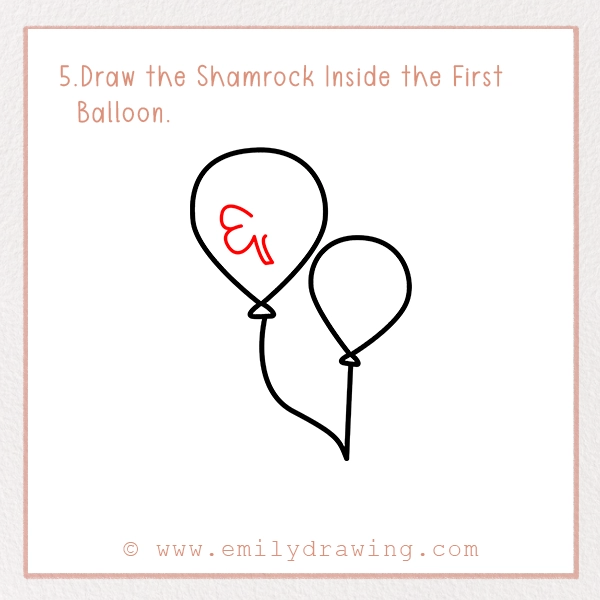
Inside the larger balloon, draw a four-leaf clover:
Start with one heart shape near the top
Add three more heart shapes, spaced evenly around it, all pointing toward the center
Draw a small stem extending down from the middle
Lucky Fact: A four-leaf clover is rare and is said to bring extra good luck!
Step 6 – Outline and Detail the Shamrock.
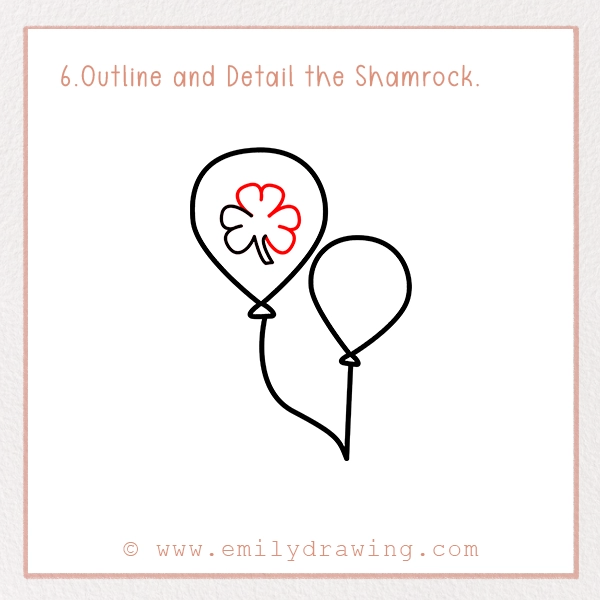
Go over your shamrock lines to make them bold and clean.
Want to add texture? Try drawing a little line inside each leaf to give it a leafy look.
Step 7 – Draw the Rainbow Inside the Second Balloon.
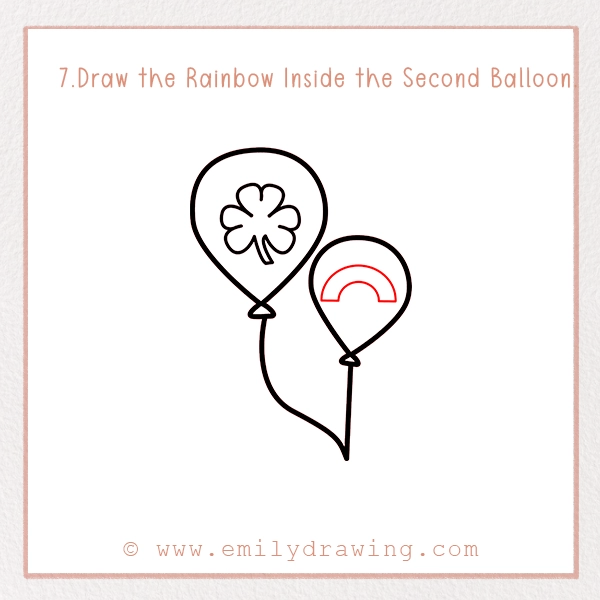
Now let’s work on the smaller balloon!
Start with a small upside-down “U” near the bottom of the balloon.
Above it, draw five more curved lines, getting larger each time. These make the six rainbow arches.
Rainbow Order: Red, orange, yellow, green, blue, purple! If you’d like to draw a full rainbow on its own, check out our rainbow drawing tutorial.
Step 8 – Final Rainbow Touches.
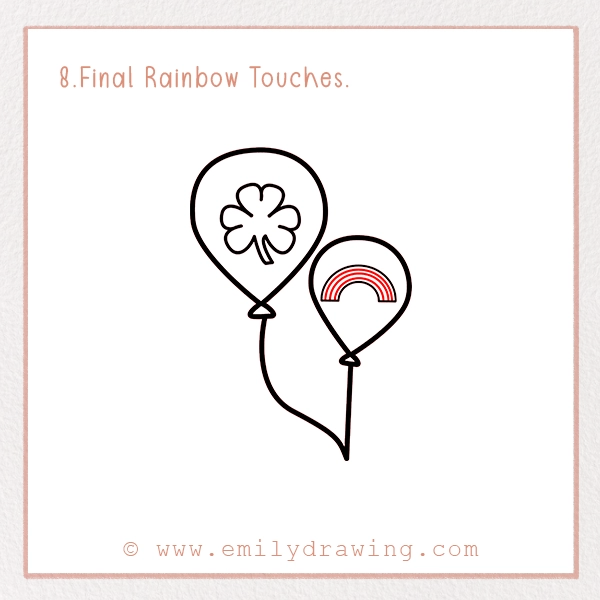
Go over your rainbow lines to make them stand out.
You can leave space between the arches for cleaner coloring, or let the colors blend for a dreamy, magical effect.
Fun Fact: Rainbows happen when light shines through raindrops and bends—nature’s magic show!
Step 9 – Color Your Drawing!
Now the fun part—coloring your balloons!
Shamrock Balloon:
- Balloon: Bright green or emerald green
- Clover: Dark green outline, light green fill
- String: Black, green, or even gold
Rainbow Balloon:
- Balloon: Light or sky blue
- Rainbow: Red, orange, yellow, green, blue, purple
- String: Any color you love!
Bonus Touches:
- Add stars, sparkles, gold coins, or even a shamrock or two using our shamrock coloring page.
- Draw a tiny leprechaun peeking out—or follow our leprechaun drawing guide to create a full magical character!
- Use glitter pens for a magical finish!
Pin it now, Draw later!

Fun Facts About St. Patrick’s Day Balloons
- 🎈 St. Patrick’s Day balloons can be shaped like clovers, leprechauns, and even golden horseshoes!
- 🍀 Each leaf of a four-leaf clover represents hope, faith, love, and luck
- 🎉 Parades sometimes use giant rainbow balloons that need 20+ people to hold!
Tips and Tricks for Better Drawing
Want to improve your balloon masterpiece? Try these tips:
- Start with shapes – Lightly sketch circles or ovals to plan your drawing
- Make it your own – Add smiley faces, silly hats, or even wings to your balloons
- Go slow – Drawing is about fun, not speed!
- Try again – Each time you draw, you learn and improve
- Challenge yourself – Try balloons with other themes: gold coins, hats, dancing shamrocks, or leprechaun pets. And don’t miss our leprechaun drawing guide for more inspiration!
🎉 Woohoo! You just finished drawing two lucky and magical St. Patrick’s Day balloons—one with a shamrock and one with a rainbow!
Whether you turn it into a greeting card, poster, or art for the fridge, your drawing is full of festive cheer and creativity. You brought your imagination to life—and that’s something to be proud of!
Share Your Art!
We’d love to see your awesome balloon drawings! Ask a grown-up to help you share it online using the hashtag #EmilyDrawing.
Your art could inspire someone else to start drawing, too!
Keep creating, keep dreaming, and may your day be filled with color, luck, and joy! 🍀🎈🌈
Get the FREE Printable Drawing Guide
FREE Download Printable Patrick’s Day Balloons Drawings Tutorials