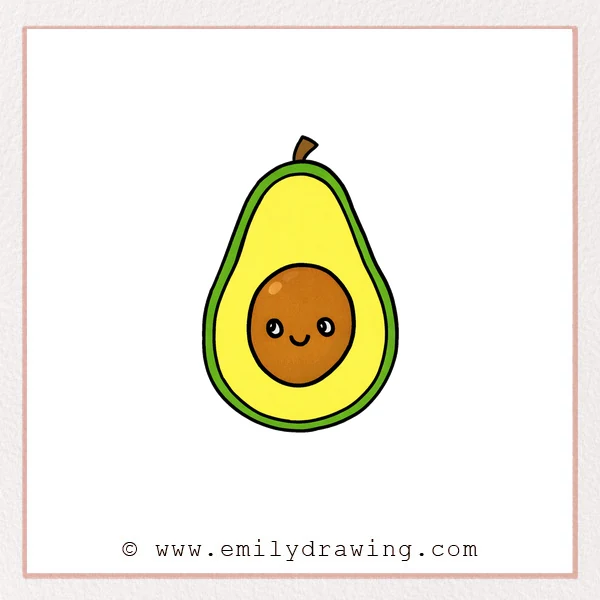
This easy drawing tutorial shows how to draw an avocado step by step. You will build a cute avocado using simple shapes and clean lines. Take your time, and enjoy this drawing for beginners.
What You Will Need
- Pencil
- Eraser
- Black marker or pen (optional)
- Coloring tools (colored pencils, crayons, or markers)
Here are my RECOMMENDED Art Supplies!
- Crayola Coloring Set (140 Pieces – Mega Value!)
- 24 Colored Crayon Set
- A4 Printer Paper
- Crayola Coloring Pencils
- HP Home Printer with Instant Ink!
Time needed:
18 minutes.
Step-by-Step Drawing Guide
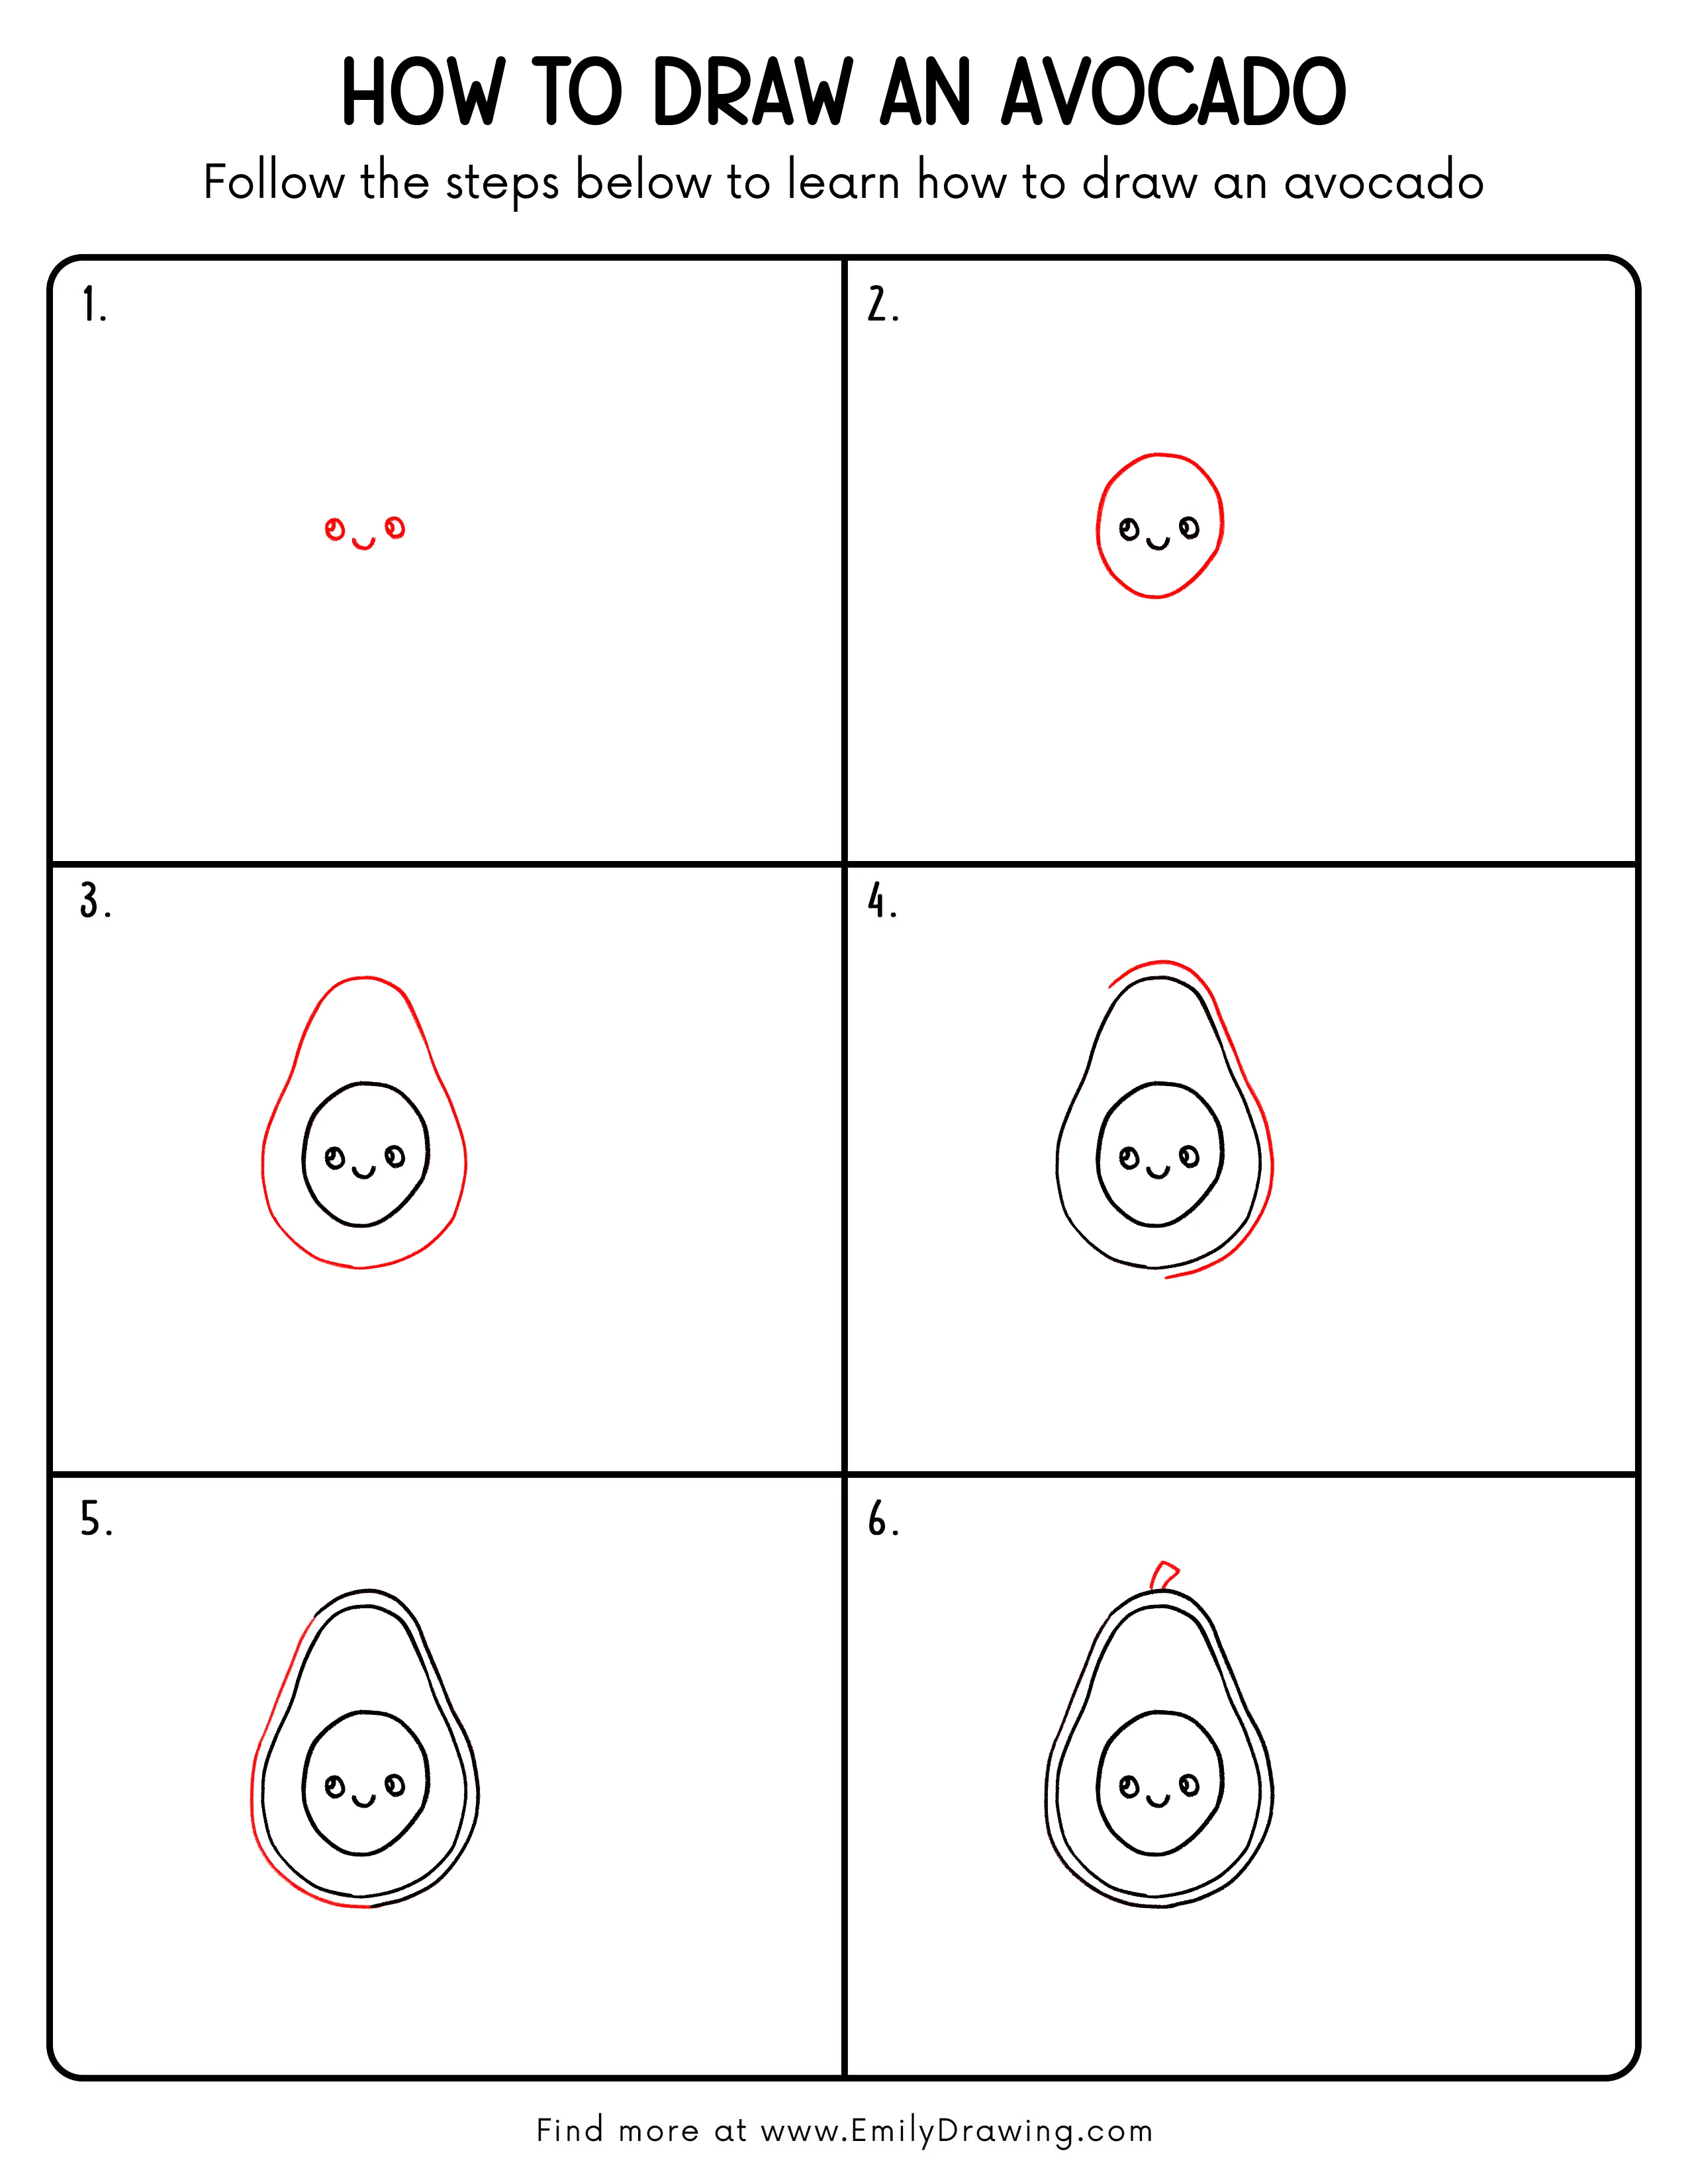
Step 1: Draw a Cute Face
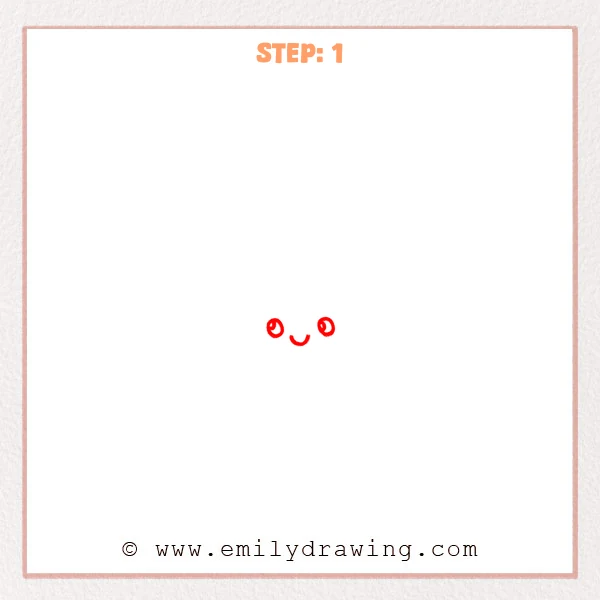
Start with two small round eyes near the lower middle of your page. Add a tiny curved smile between them to keep the avocado friendly.
Pro Tip: Keep the space between the eyes about one eye-width.
Step 2: Add the Round Pit Area
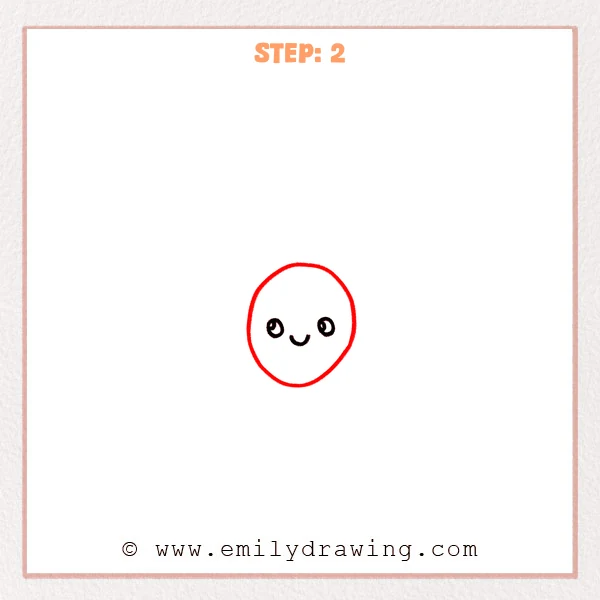
Sketch a larger oval around the face to form the avocado pit area. Let the oval stay smooth, with a gentle curve at the bottom.
Pro Tip: Make the oval slightly taller than wide for a soft look.
Step 3: Draw the Avocado Outer Shape
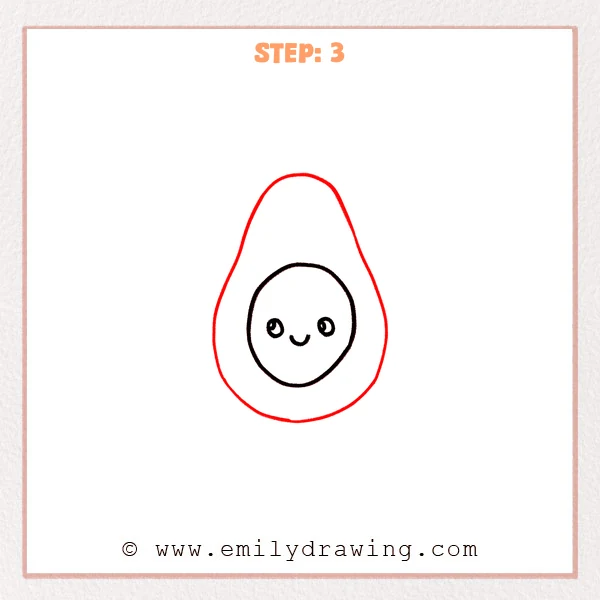
Add a big pear-like outline around the pit area, narrow at the top and wider at the bottom. Keep the bottom curve round so the avocado feels sturdy.
Pro Tip: Widen the shape slowly as you move downward.
Step 4: Add One Side of the Flesh Border
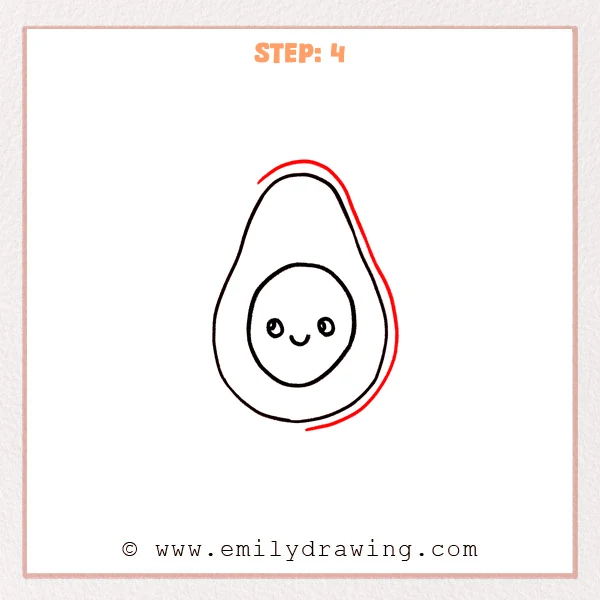
Draw a curved line just inside the outer outline on one side, starting near the top and moving down toward the bottom. Keep the gap even so it reads as the inner edge of the avocado flesh.
Pro Tip: Place light guide marks first to keep the spacing steady.
Step 5: Add the Other Side of the Flesh Border
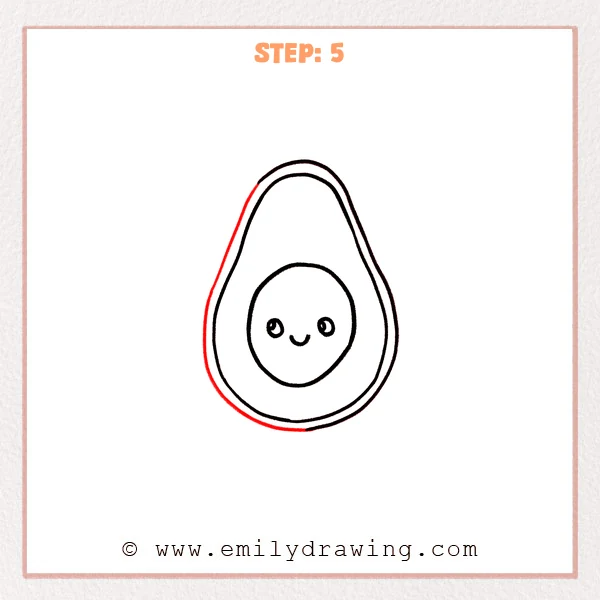
Draw a matching inner curved line on the opposite side to balance the shape. Let both lines end softly near the top and bottom so the flesh border feels complete.
Pro Tip: The two sides do not need to match perfectly; slight variation looks natural.
Step 6: Add the Little Stem
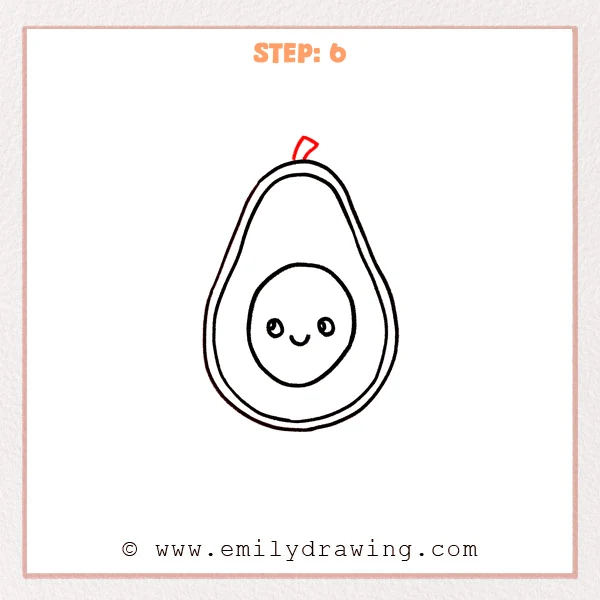
Sketch a small stem at the top using a short trapezoid or curved shape. Tilt it slightly so the avocado looks lively and finished.
Pro Tip: Keep the stem small, like a tiny cap on top.
Step 7: Color in your drawing!
Fun Facts
- Avocados are fruits, even though many people use them like vegetables.
- The large “pit” in the middle is a seed that can grow into a new avocado tree.
- Avocados often have bumpy skin, which can be fun to texture with tiny dots.
Pin it now, Draw later!
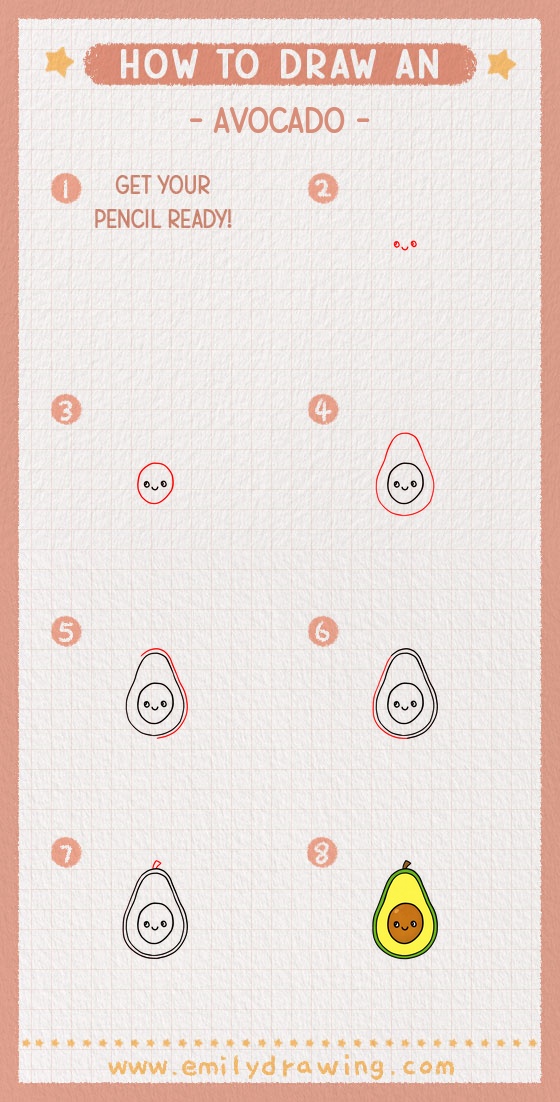
You now have a cute avocado with a simple face, a pit, and a clean flesh border. For coloring, try light green for the flesh, a darker green for the skin, and warm brown for the pit. Add gentle shading along the inner border and under the pit to make the avocado look round.
A common beginner mistake is making the inner border too close on one side and too far on the other. If that happens, lightly erase and redraw the line with a steadier gap.
Keep practicing how to draw an avocado step by step, and try drawing a few with different faces. When you are ready, explore more easy drawing tutorial ideas and build a whole page of cute foods.
Get the FREE Printable Drawing Guide
FREE Download Printable Avocado Drawing Tutorial
Frequently Asked Questions
How do I keep my avocado shape symmetrical?
Start with a light center guideline, then check that both sides widen at a similar pace. Small differences are fine and can look natural.
What if my pit looks too big or too small?
Erase lightly and redraw the oval with more space around it for the flesh. A good pit usually sits slightly below the center of the avocado.
Can I draw the avocado with texture?
Yes, add tiny dots or short curved lines on the outer skin area. Keep them light so the drawing stays clean and cute.