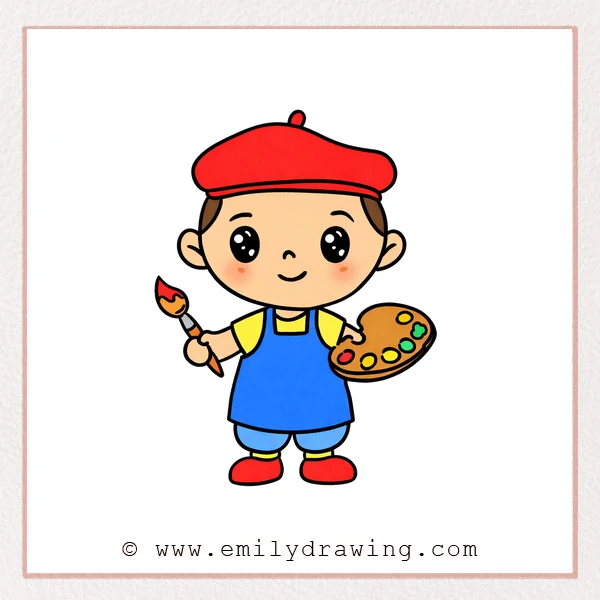
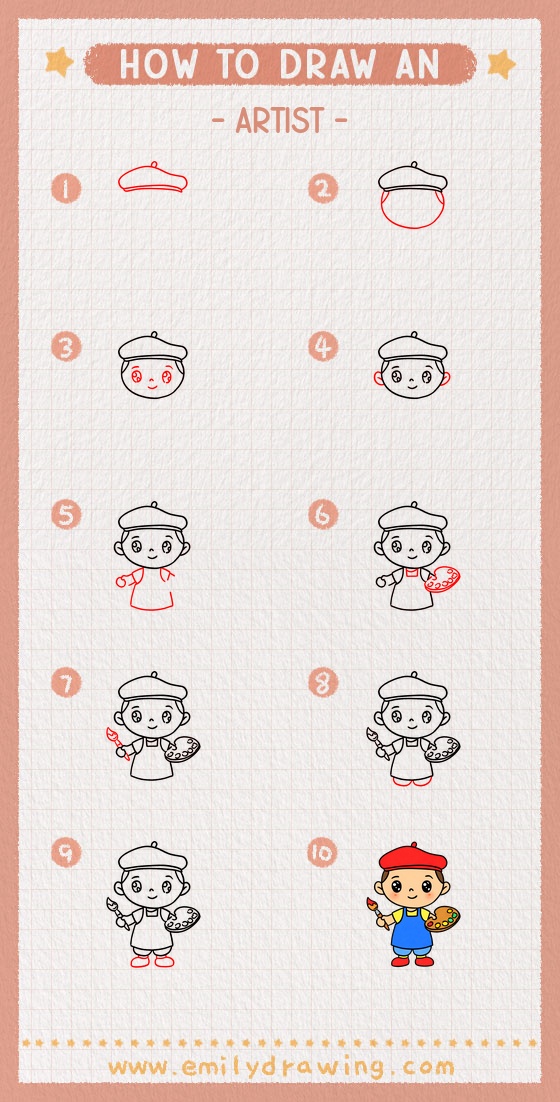
This easy drawing tutorial shows how to draw a cute artist step by step.
You will sketch a simple character with a beret, apron, palette, and brush.
Follow each step slowly for a friendly drawing for beginners.
What You Will Need
- Pencil
- Eraser
- Black pen or fine liner
- Paper
- Colored pencils or markers (optional)
Here are my RECOMMENDED Art Supplies!
- Crayola Coloring Set (140 Pieces – Mega Value!)
- 24 Colored Crayon Set
- A4 Printer Paper
- Crayola Coloring Pencils
- HP Home Printer with Instant Ink!
Time needed:
18 minutes.
Step-by-Step Drawing Guide
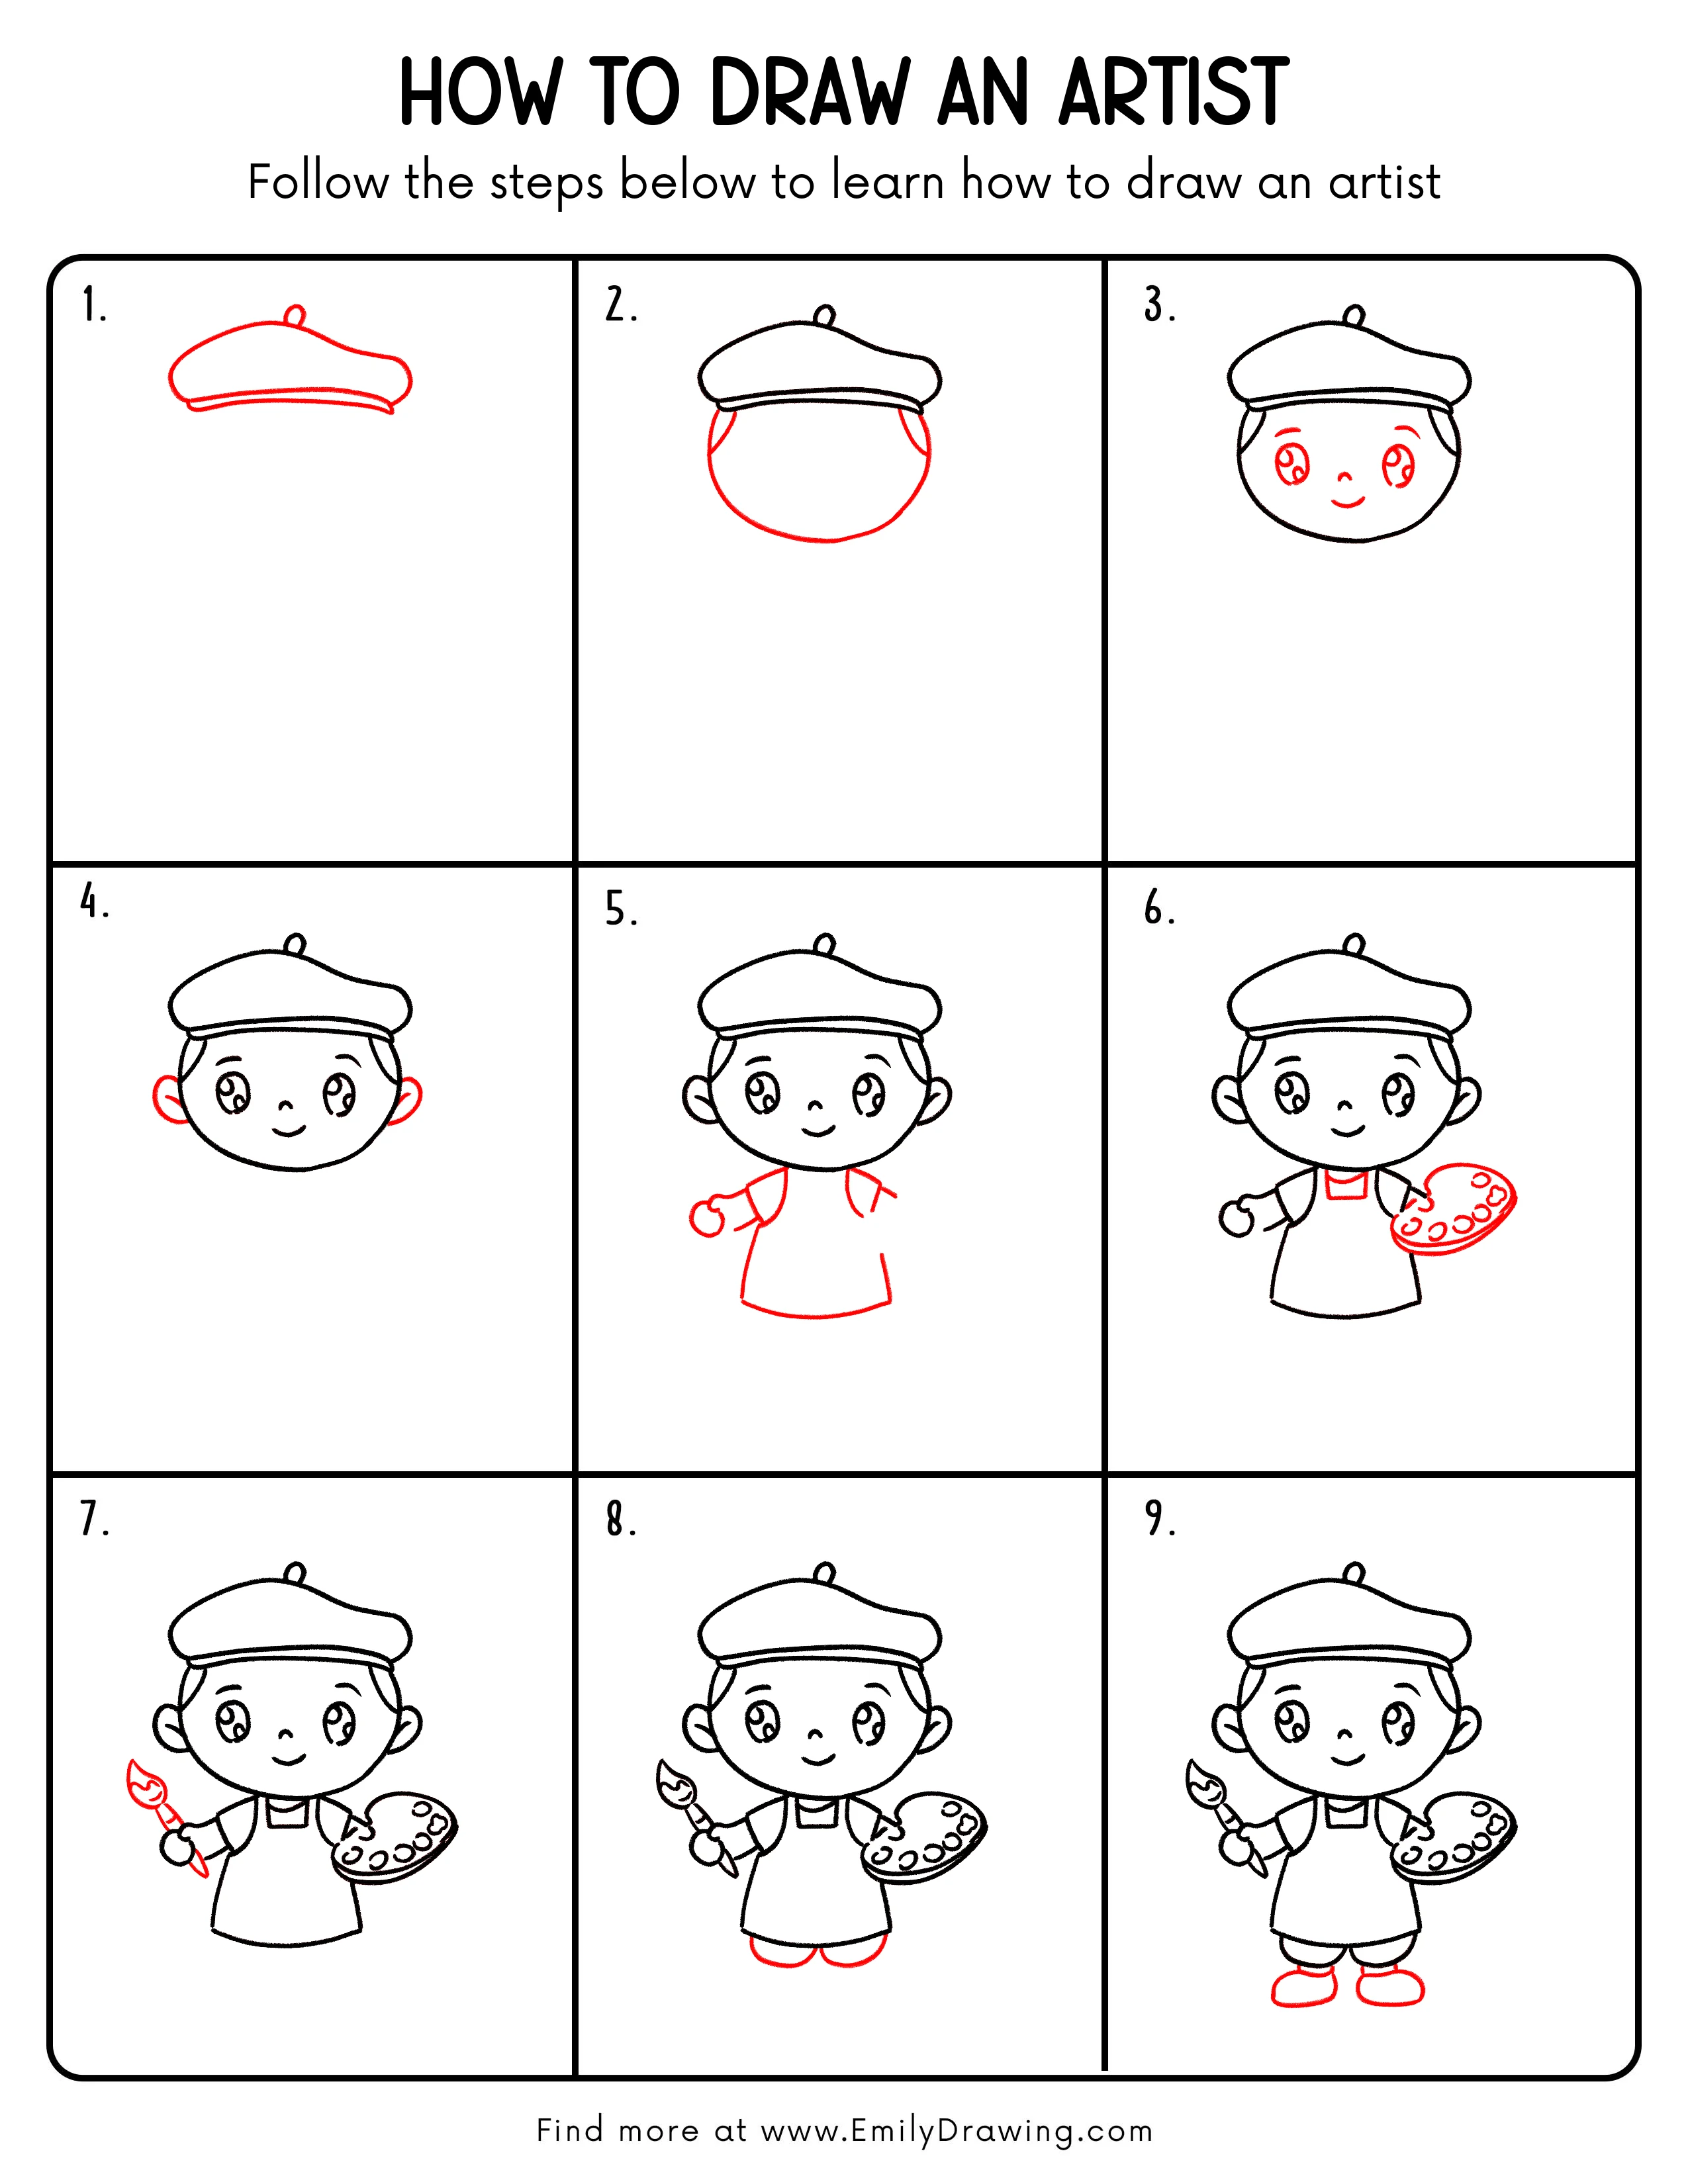
Step 1: Sketch the Beret Outline
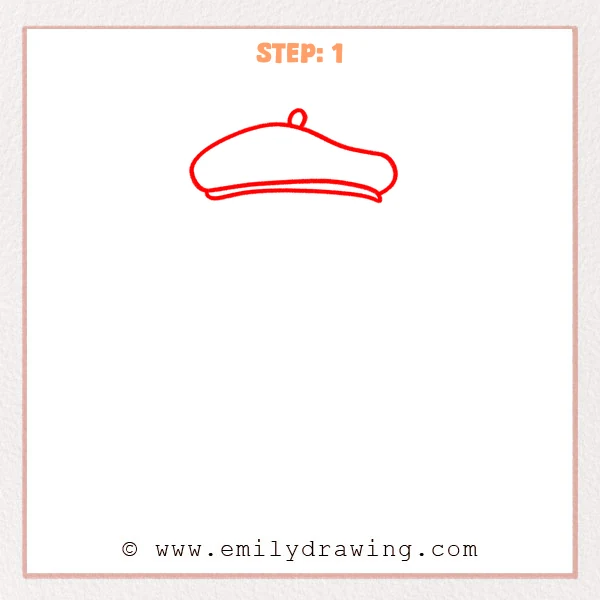
Start with a wide, puffy beret shape that sits near the top of the page.
Add a long curved band under the hat, then draw a small knob on top.
Keep the hat slightly fuller on one side for a soft look.
Pro Tip: Make the beret band curve smooth so the hat feels soft.
Step 2: Add the Head Shape and Side Hair
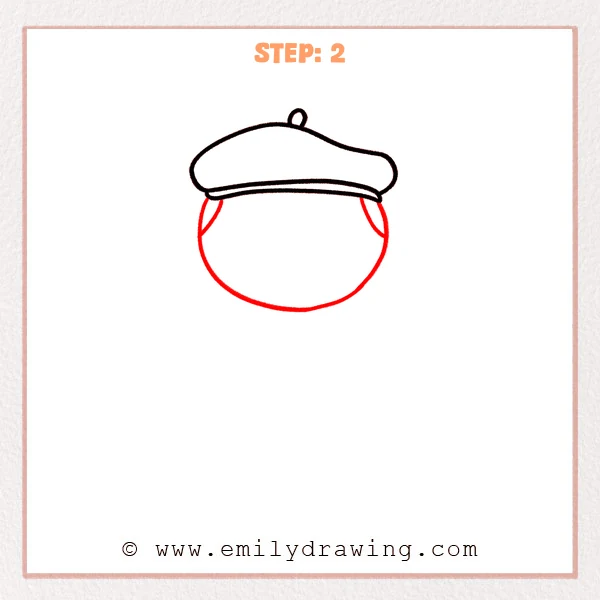
Draw a rounded face under the beret band, with a gently rounded chin.
Add two simple hair sections peeking out on both sides under the hat.
Keep the head large to match the cute style.
Pro Tip: Avoid a pointed chin by rounding the bottom of the face.
Step 3: Draw the Eyes, Nose, and Smile
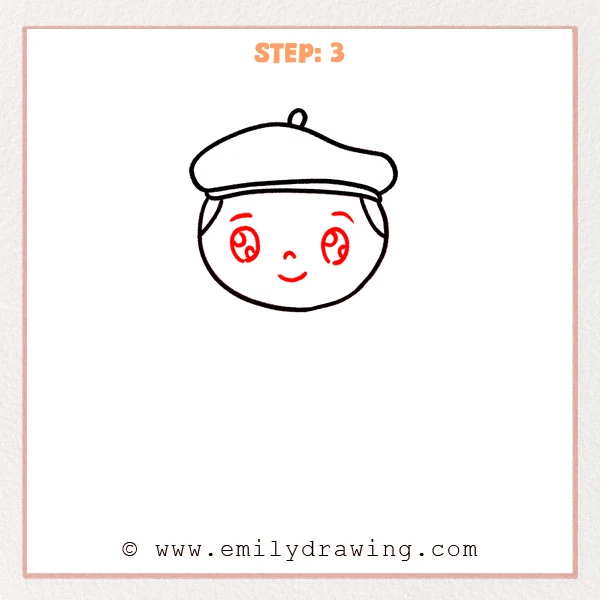
Place two large eyes in the middle of the face, one on each side.
Add pupils and small highlights, then draw a tiny nose and a small smile.
Keep the features centered so the face feels calm and friendly.
Pro Tip: Line up both eyes first, then add pupils for better symmetry.
Step 4: Add the Ears

Draw small rounded ears on both sides of the head near eye level.
Add a short inner curve in each ear to show simple detail.
Keep both ears the same size so the face stays balanced.
Pro Tip: Check the ear height by comparing both sides to the eyes.
Step 5: Draw the Shirt and Apron Base
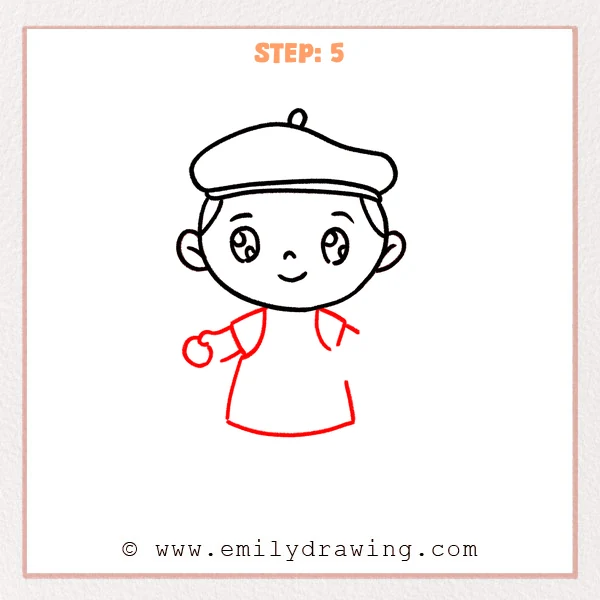
Sketch a short neck and curved shoulders, then add simple short sleeves.
Draw the apron bib in the center with two straps, then add a slightly flared apron bottom.
Let the apron hem curve gently for a soft, simple shape.
Pro Tip: Keep the apron hem even on both sides for a neat look.
Step 6: Add the Paint Palette in the Right Hand
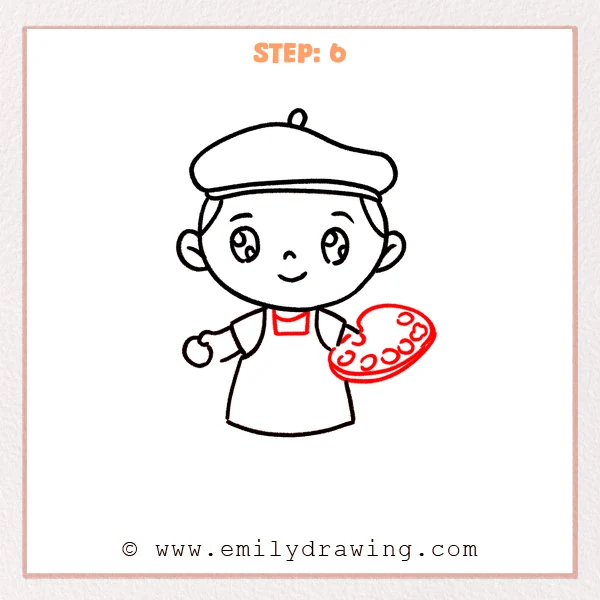
Draw a tilted oval palette on the right side, then add a second line for thickness.
Place several small oval paint wells on the palette surface.
Angle the palette slightly upward so it looks easy to hold.
Pro Tip: Draw the big oval first, then add the paint wells afterward.
Step 7: Draw the Paintbrush in the Left Hand
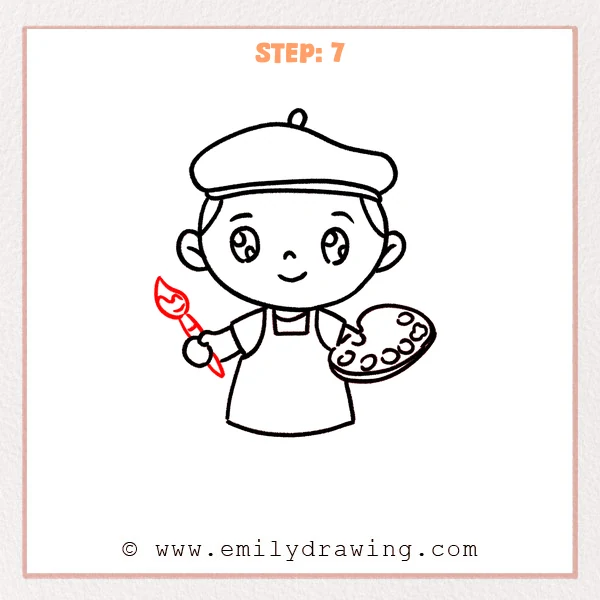
Sketch a slim brush handle near the left hand and add a short ferrule band.
Draw a teardrop-shaped brush tip and a few short curved lines for bristles.
Tilt the brush slightly to make the pose feel natural.
Pro Tip: Keep the brush handle straight by using one confident long line.
Step 8: Add the Legs and Simple Cuffs
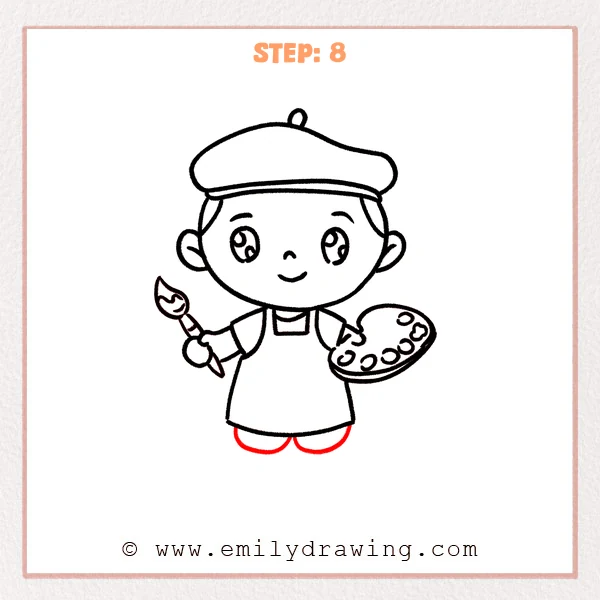
Draw two short rounded legs under the apron, leaving a small gap between them.
Add a simple cuff line on each leg to separate clothing from shoes.
Keep the legs short so the character stays cute and sturdy.
Pro Tip: Make both legs the same width so the stance looks steady.
Step 9: Draw the Shoes and Clean Up the Lines
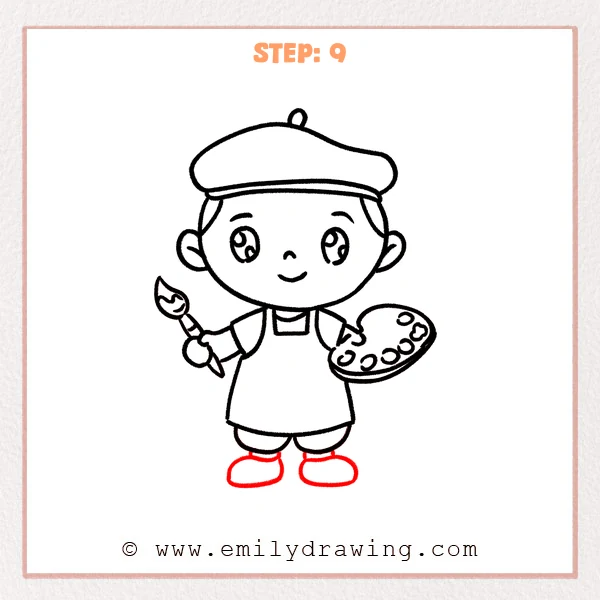
Add two rounded-toe shoes under the legs with a soft curved sole line.
Darken the main outline, keeping palette and brush details a little lighter.
Erase extra sketch marks so the final drawing looks clean.
Pro Tip: Use short strokes on curves to keep the shoes smooth and even.
Step 10: Color in your drawing!
Fun Facts
- Many artists wear aprons to protect their clothes while painting.
- A palette helps keep colors organized and easy to mix.
- Simple rounded shapes can make characters look friendly and calm.
Pin it now, Draw later!
You now know how to draw a cute artist in a simple, step by step drawing.
Try coloring the beret red or blue, and make the apron a warm neutral tone.
Add gentle shading under the hat band, beneath the chin, and under the palette.
A common beginner mistake is placing the eyes at different heights.
If that happens, lightly adjust one eye before you ink the lines.
Keep practicing this easy drawing tutorial, and try drawing another art character next.
Get the FREE Printable Drawing Guide
FREE Download Printable Artist Drawing Tutorial
Frequently Asked Questions
How do I make the artist look cuter?
Make the head slightly bigger and keep the mouth small and centered.
What if my palette looks uneven?
Draw the oval lightly first, then correct the curve before darkening it.
How can I make the brush look more real?
Add a small ferrule band and a few short bristle lines at the tip.