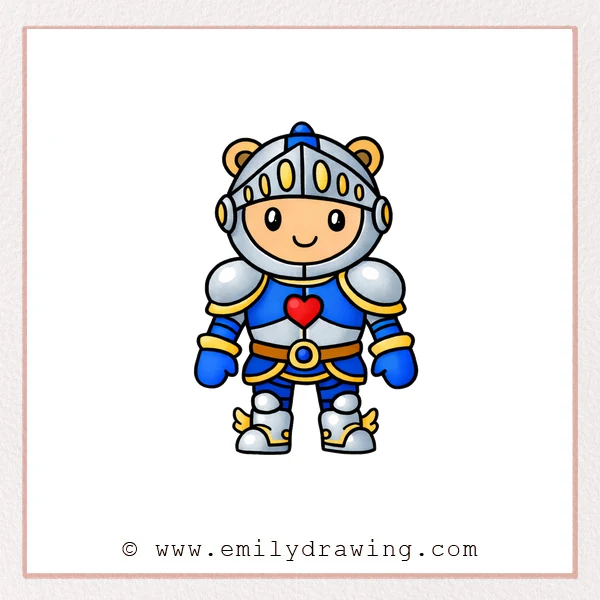
This easy drawing tutorial shows how to draw armor step by step in a cute, beginner-friendly style. We will build a small armored character using smooth shapes and clear lines. Take your time, and you will finish a clean drawing for beginners.
What You Will Need
- Pencil
- Eraser
- Black pen or marker
- Paper
- Optional: colored pencils or markers
Here are my RECOMMENDED Art Supplies!
- Crayola Coloring Set (140 Pieces – Mega Value!)
- 24 Colored Crayon Set
- A4 Printer Paper
- Crayola Coloring Pencils
- HP Home Printer with Instant Ink!
Time needed:
21 minutes.
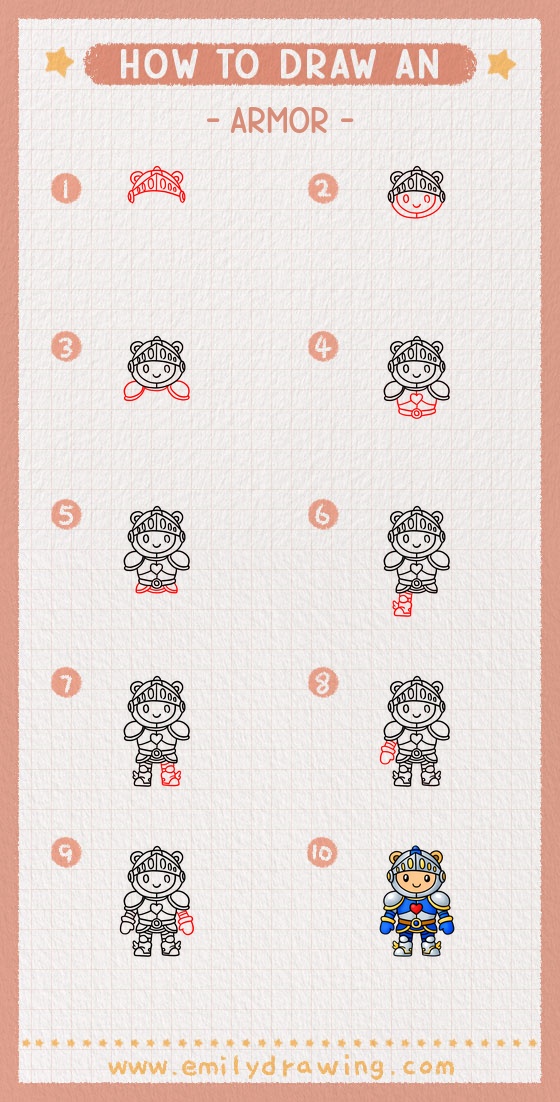
Step-by-Step Drawing Guide
Step 1: Draw the Helmet Top Band
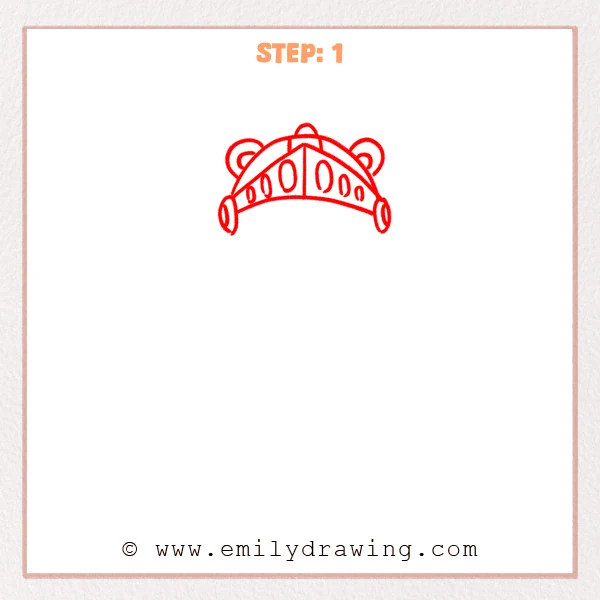
Start with a curved helmet band like an upside-down arch. Add a small top ornament in the center and divide the band with simple section lines. Keep the curve smooth and even.
Pro Tip: Mark the center first so both helmet sides stay symmetrical.
Step 2: Add the Round Face and Helmet Rim
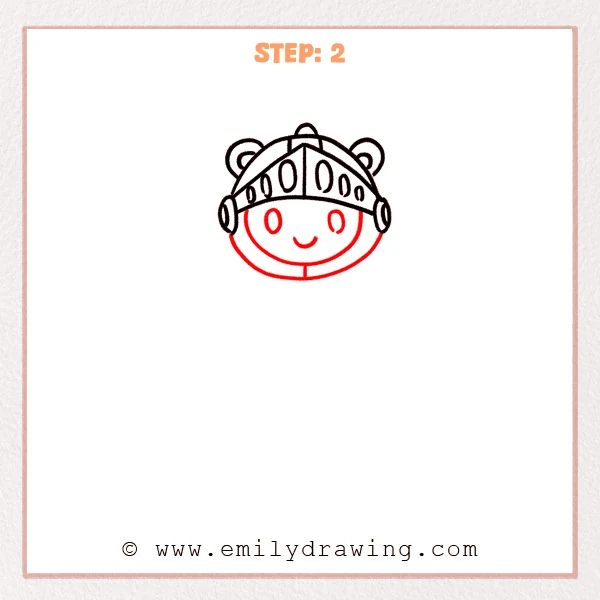
Draw a big round face under the helmet band. Add an inner rim line around the face to show helmet padding. Place two simple eyes and a small smile in the center.
Pro Tip: Keep the face round and soft so the character looks friendly.
Step 3: Draw Two Oval Shoulder Plates
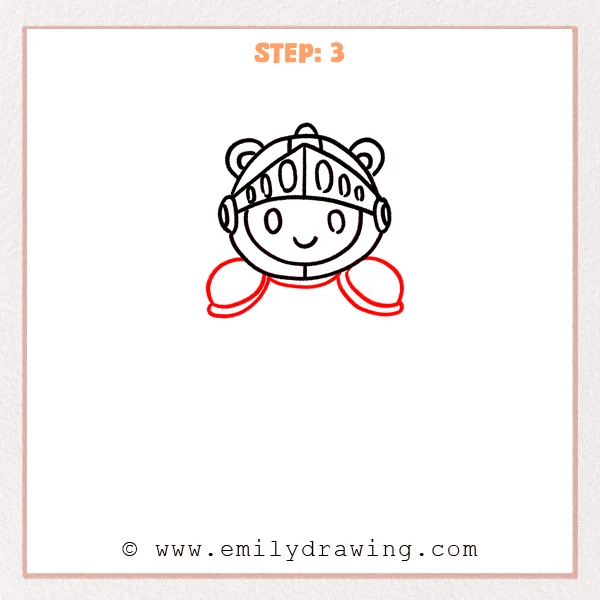
Add a large oval shoulder plate on each side below the head. Draw a thin outer rim line on each plate to show layered armor. Keep the plates at the same height.
Pro Tip: Compare both shoulder plates often so they match in size.
Step 4: Add the Heart Chest Plate and Belt Buckle
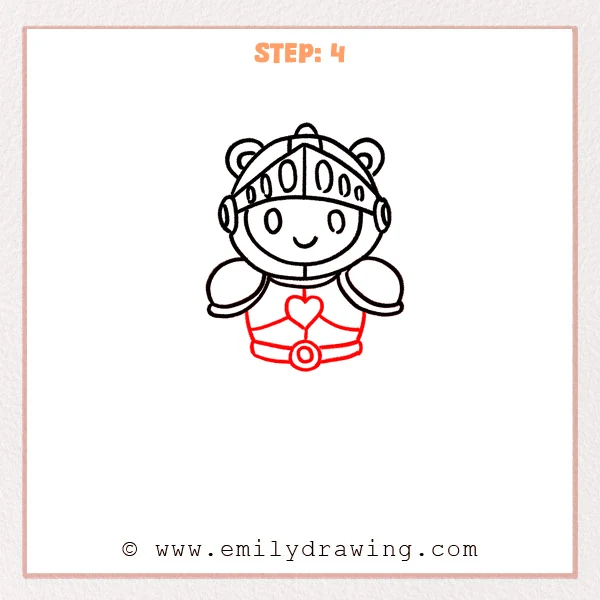
Draw a heart emblem in the center of the chest. Add curved armor lines across the torso to show sections. Then draw a belt across the waist with a round buckle in the middle.
Pro Tip: Keep both heart bumps equal so the emblem stays centered.
Step 5: Add Lower Armor Flaps
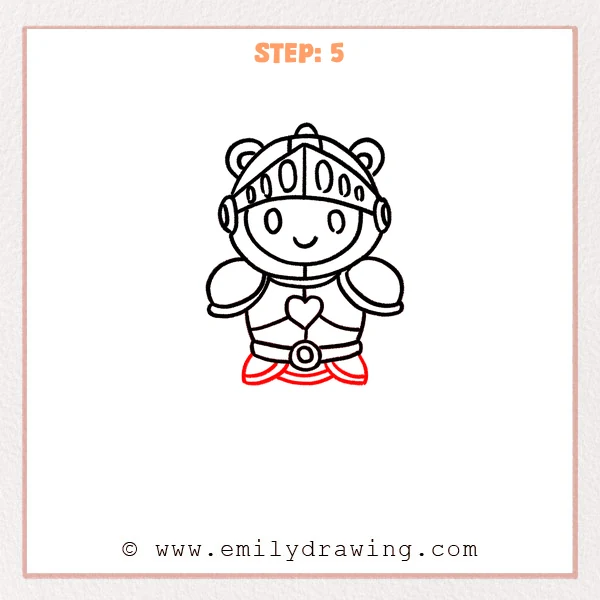
Under the belt, draw two skirt-like armor flaps that curve outward. Keep their edges rounded and leave space below for legs. Add a small curved lower edge line to suggest layering.
Pro Tip: Keep the flaps short so the legs are easy to place.
Step 6: Draw the Left Leg and Boot
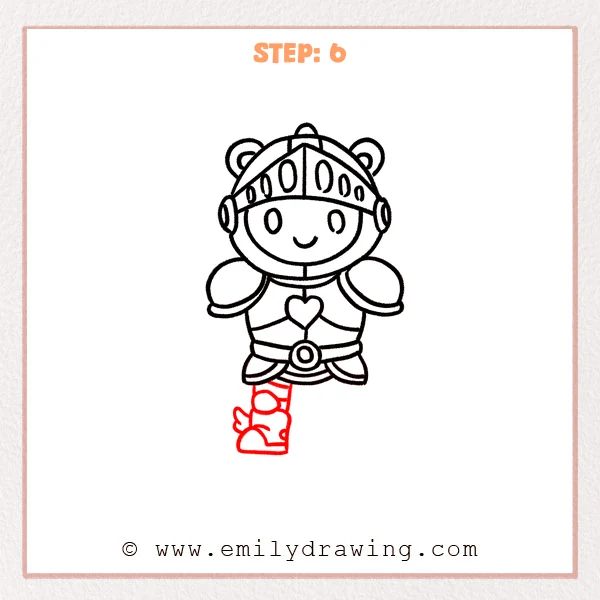
Draw one short leg under the armor and add a boot with a flat sole and rounded toe. Add a small wing-like decoration on the side of the boot. Keep the boot shape simple and sturdy.
Pro Tip: Keep the sole line flat so the character looks grounded.
Step 7: Add the Second Leg and Greave Lines
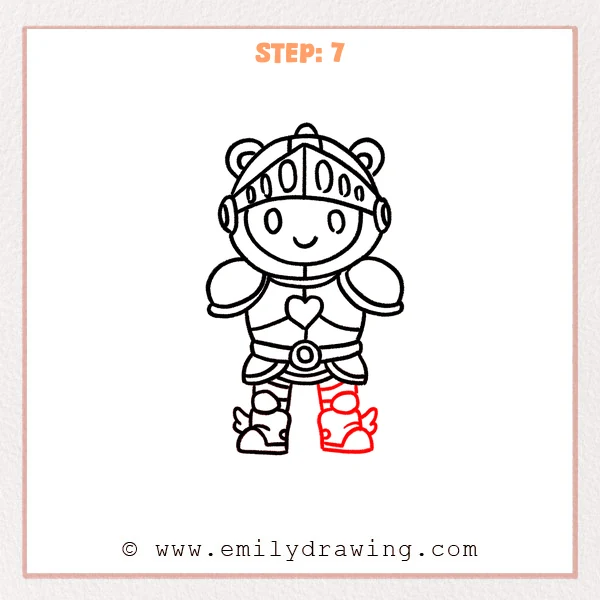
Draw the other leg and boot, keeping both feet aligned at the bottom. Add a few horizontal bands on the legs to suggest simple greaves. Leave a small gap between the feet for a natural stance.
Pro Tip: Check that both boots sit on the same baseline before you darken lines.
Step 8: Draw the Left Arm, Bracer, and Glove
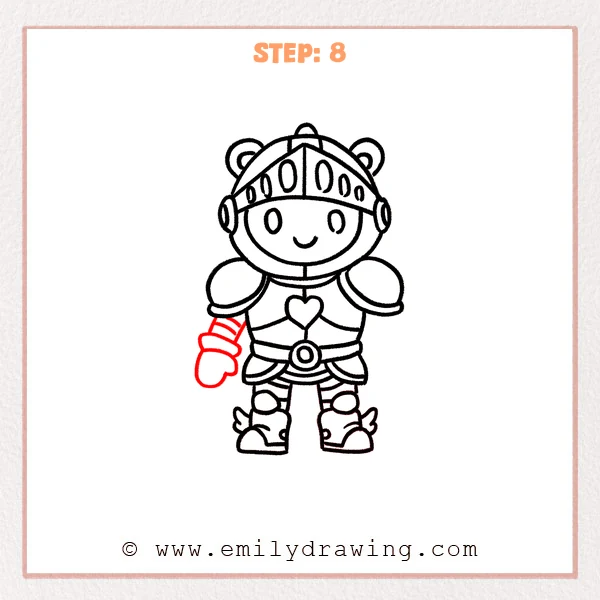
Under the left shoulder plate, draw an arm ending in a rounded glove shape. Add a bracer cuff near the wrist and draw a few short stripes for detail. Keep the glove like a smooth bean shape.
Pro Tip: Make the glove rounder than the arm for a cute proportion.
Step 9: Finish the Right Arm and Finalize the Lines
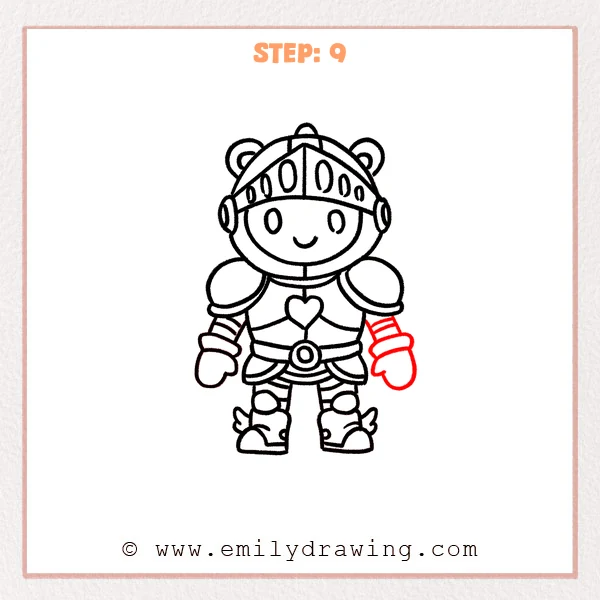
Draw the right arm, bracer, and glove to match the left side. Thicken the outer outline of the helmet, shoulders, and body slightly, then keep inner details a bit thinner. Clean stray marks so the armor looks crisp.
Pro Tip: Thicken outer outlines first and leave detail lines lighter for clarity.
Step 10: Color in your drawing!
Fun Facts
- Armor designs often use big simple shapes so they read clearly at a glance.
- Shoulder plates help a character look strong, even in a cute style.
- A single emblem, like a heart, can make armor feel unique and memorable.
Pin it now, Draw later!
You have completed a step by step drawing of armor by building the helmet, shoulder plates, chest emblem, belt, and boots. For coloring, try silver or light gray for the metal, and add one bright accent color for the heart and belt. Shade lightly under the helmet rim, beneath the shoulder plates, and along one side of the boots to show form.
One common beginner mistake is making the shoulders uneven, which can tilt the whole character. Compare left and right shapes before inking to keep the armor balanced. Practice this easy drawing tutorial again, and try changing the emblem shape or adding a small shield next time.
Get the FREE Printable Drawing Guide
FREE Download Printable Armor Drawing Tutorial
Frequently Asked Questions
How do I make the armor look more shiny?
Add small white highlight gaps and shade one side darker.
What if my helmet looks crooked?
Redraw the center line lightly and adjust both sides to match.
Can I simplify the armor even more?
Yes, remove extra stripes and keep only the main helmet, chest, and boots.