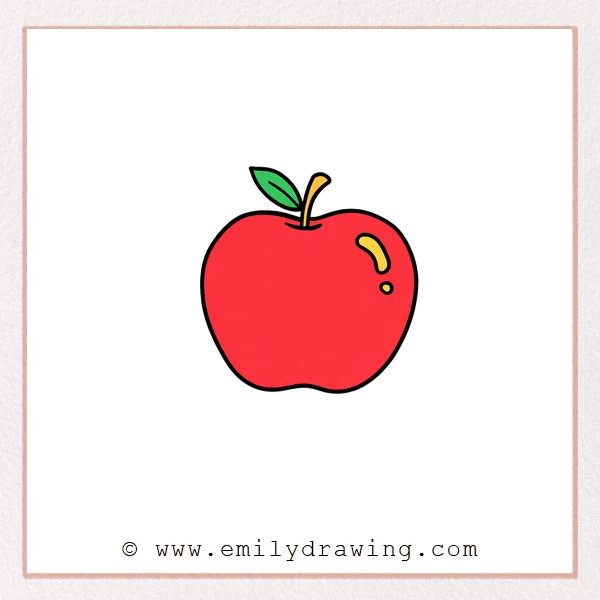
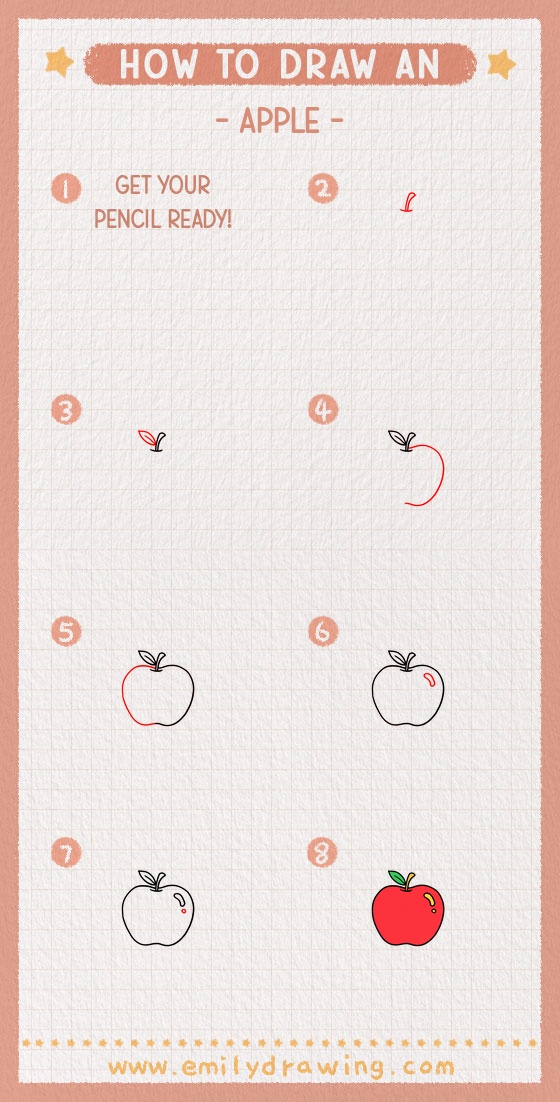
This easy drawing tutorial shows how to draw an apple step by step using simple shapes. It is a calm, clear drawing for beginners, with a stem, leaf, and shiny highlights. Take your time and enjoy building the apple one line at a time.
What You Will Need
- Pencil
- Eraser
- Black pen or marker
- Paper
- Optional: colored pencils or markers
Here are my RECOMMENDED Art Supplies!
- Crayola Coloring Set (140 Pieces – Mega Value!)
- 24 Colored Crayon Set
- A4 Printer Paper
- Crayola Coloring Pencils
- HP Home Printer with Instant Ink!
Time needed:
17 minutes.
Step-by-Step Drawing Guide
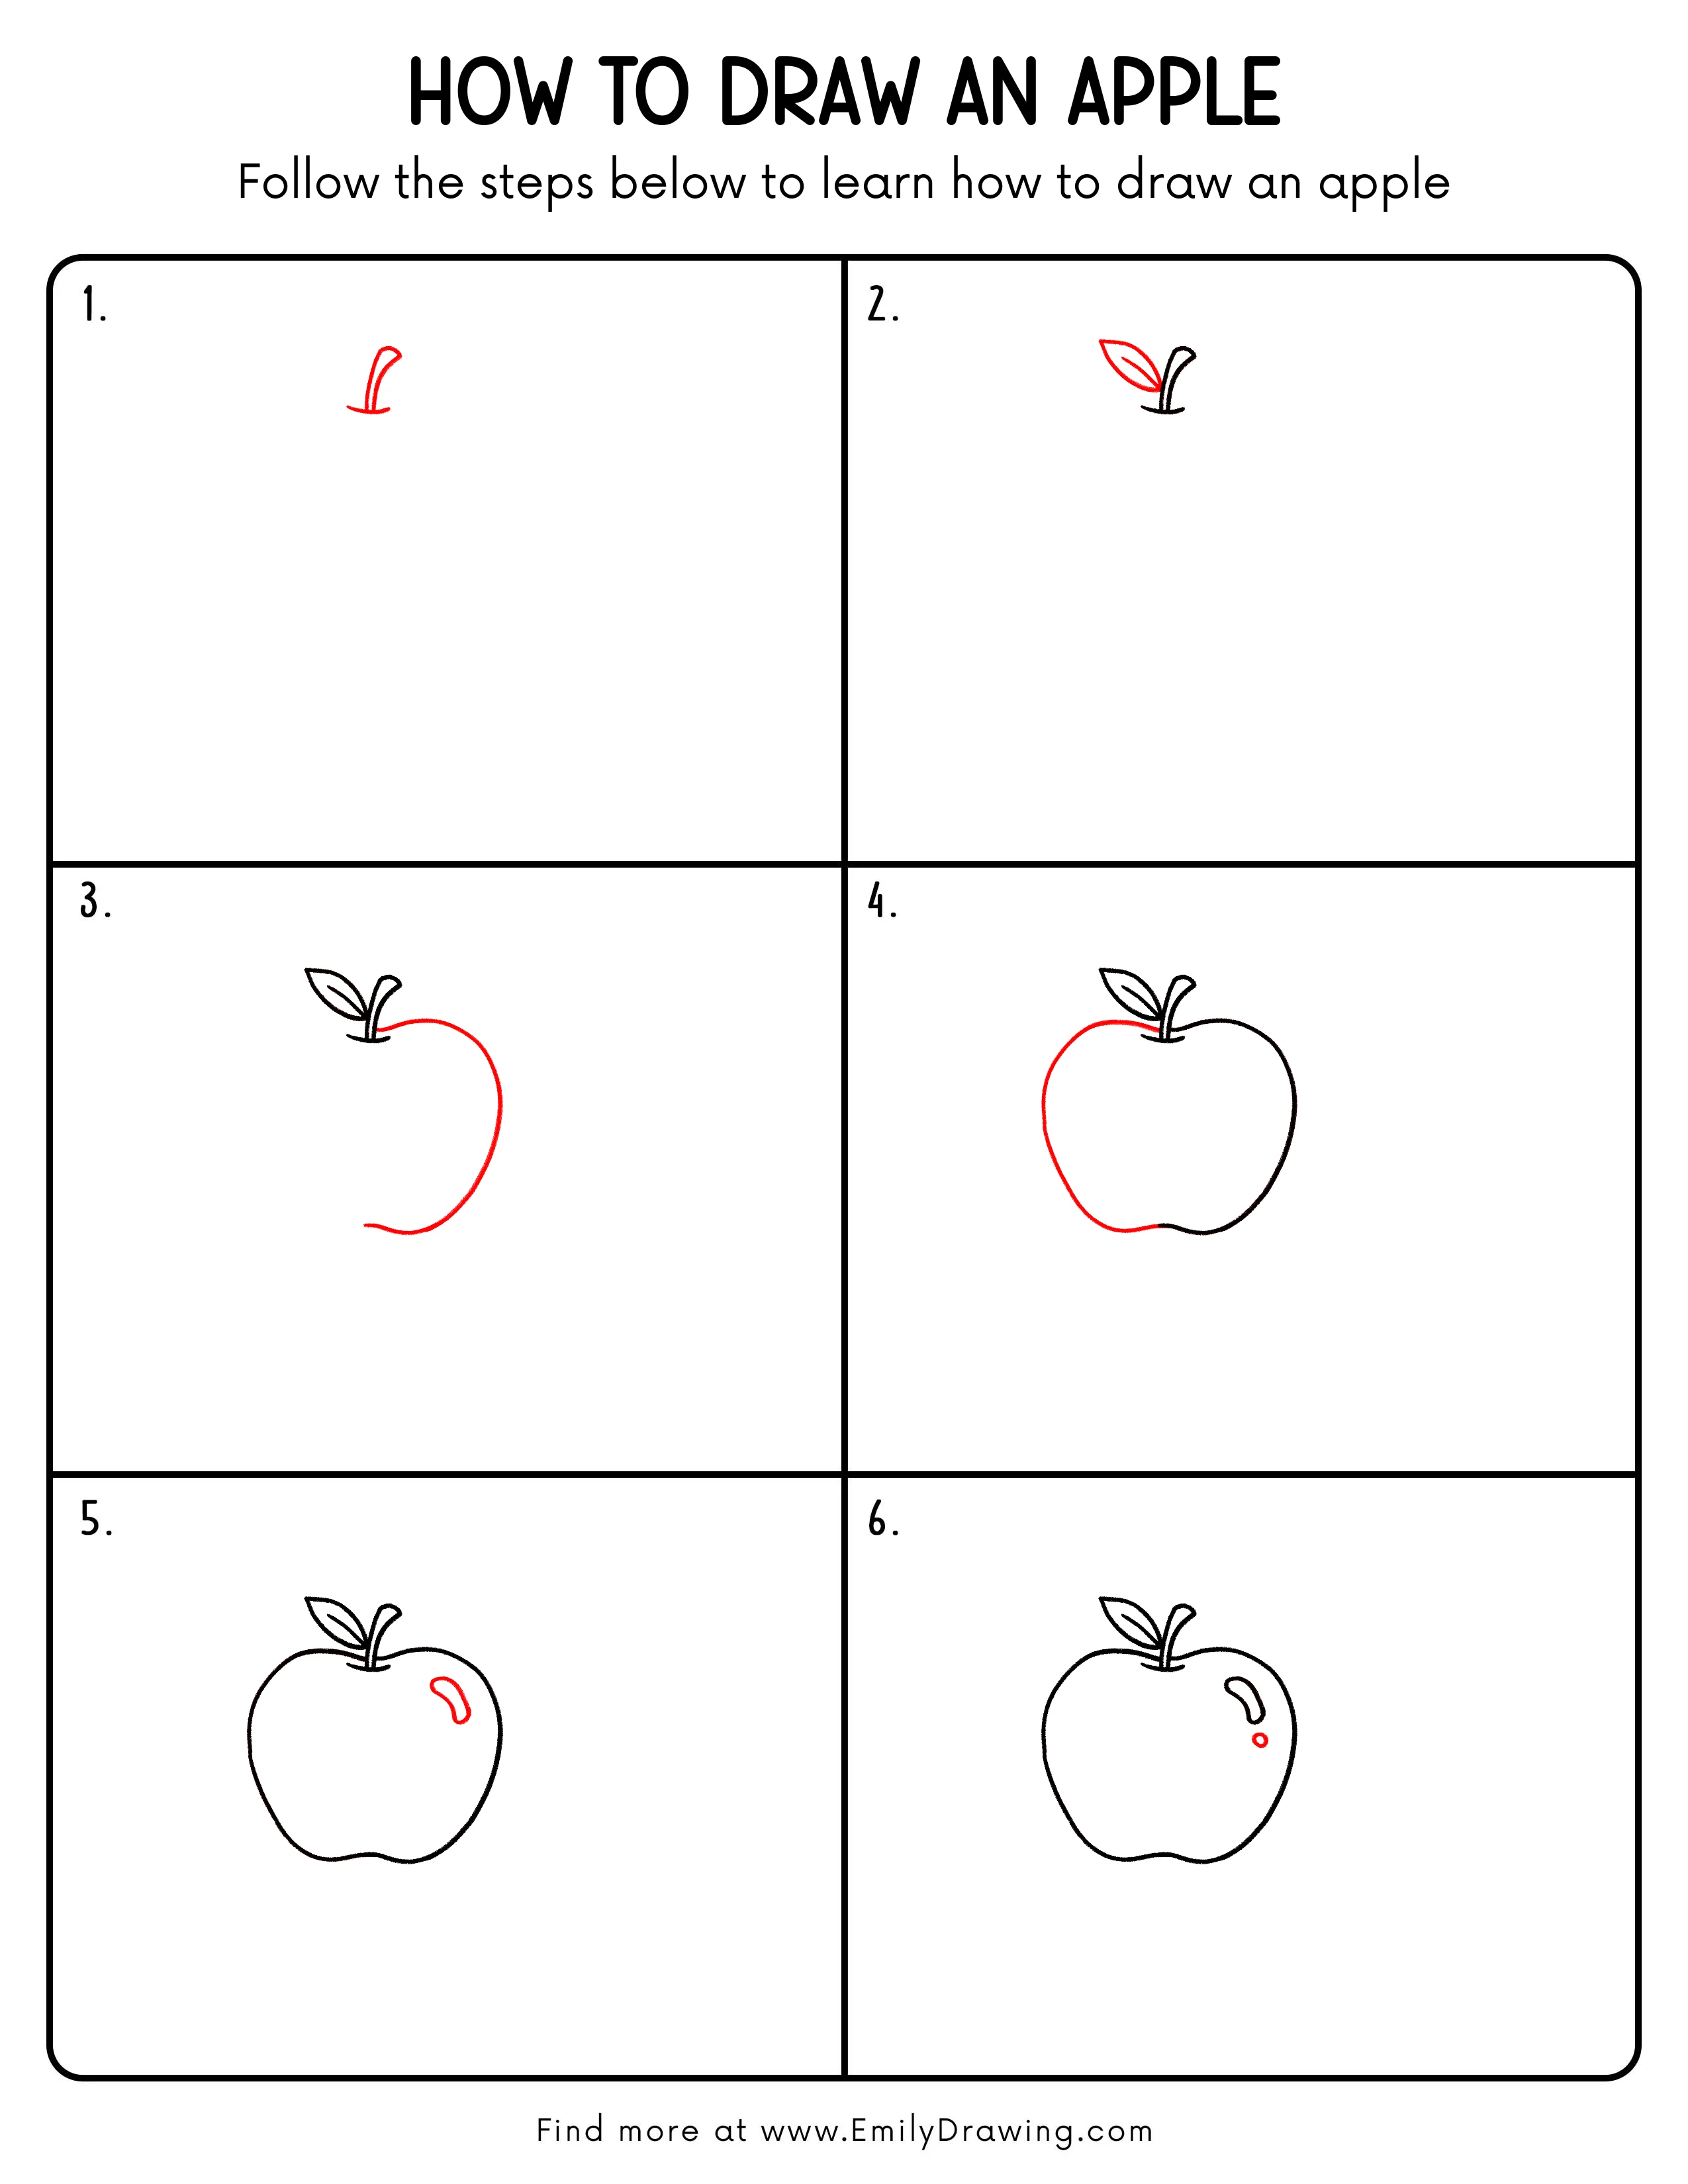
Step 1: Draw the Apple Stem
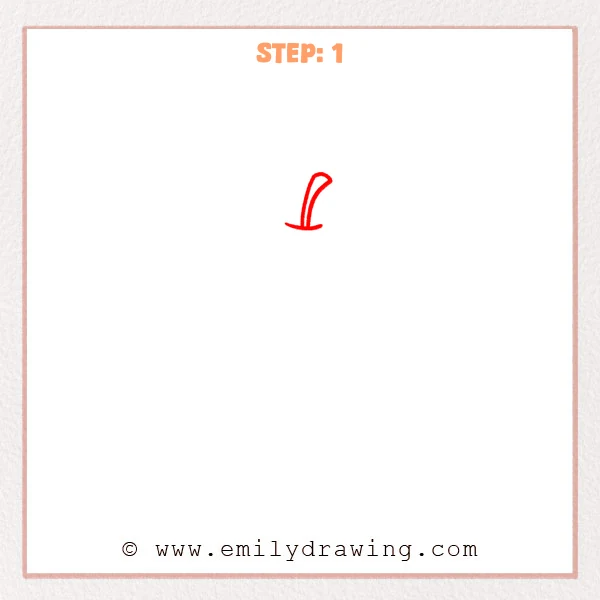
Start with a short, slightly curved vertical stem with a rounded tip. Add a small curved line at the base to suggest the top indentation. Keep the shapes simple and smooth.
Pro Tip: Keep the stem short so the apple looks cute and balanced.
Step 2: Add a Leaf
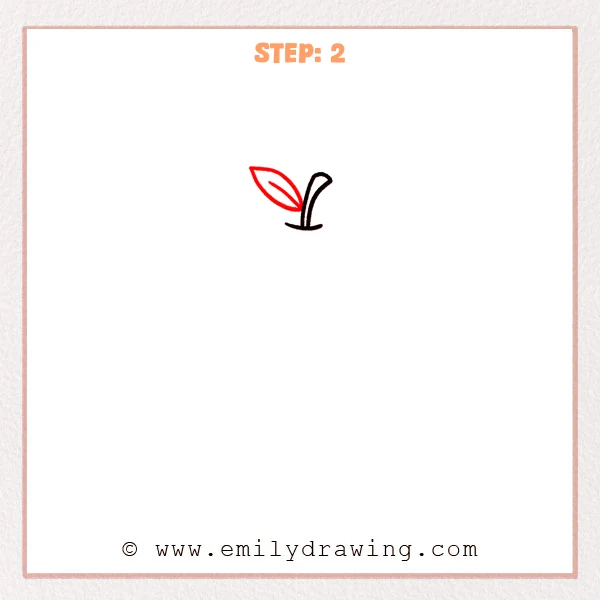
Draw one leaf on one side of the stem, shaped like a pointed oval. Add a curved vein line inside the leaf to show structure. Let the leaf tilt outward a little.
Pro Tip: Angle the leaf tip outward slightly to make the apple feel lively.
Step 3: Draw the Right Side Curve
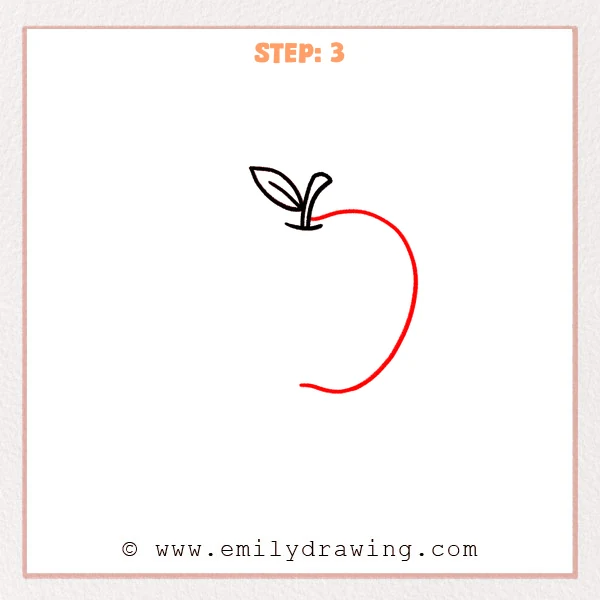
From under the stem, draw a large outward curve to form the right side of the apple. Let the curve travel downward and stop before the very bottom. Leave a small space for the bottom dip.
Pro Tip: Keep the right curve round and soft, not straight or sharp.
Step 4: Complete the Left Side and Close the Shape
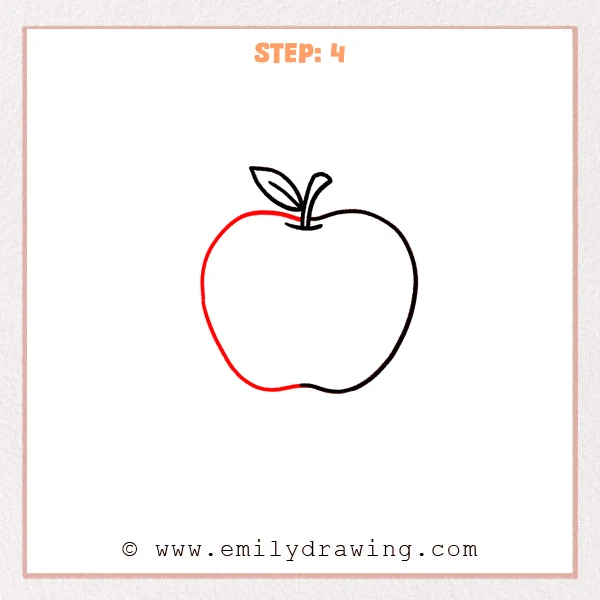
Draw the left outer curve from the top area down toward the bottom. Add a small wavy dip at the bottom center, then connect both sides to close the apple outline. The bottom dip should feel gentle, not deep.
Pro Tip: Center the bottom dip so the apple does not look tilted.
Step 5: Add the Main Highlight
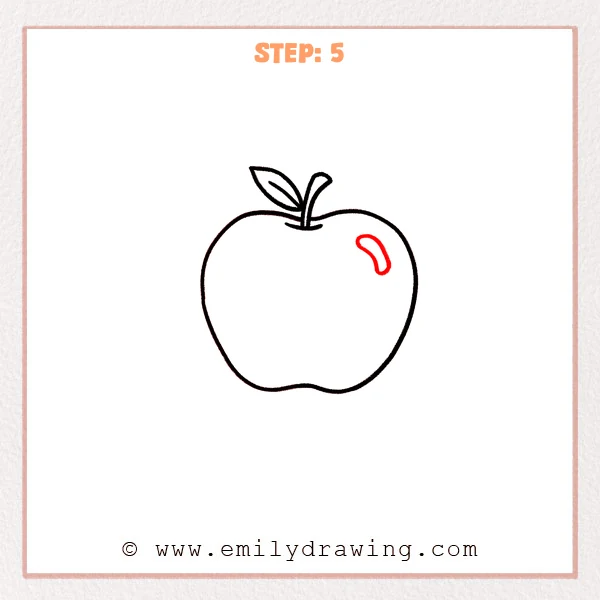
On the upper right side of the apple, draw a small curved highlight shape like a short bean. Keep it close to the outer edge without touching it. This gives the apple a shiny look.
Pro Tip: Make the highlight small and clean so it reads as a bright shine.
Step 6: Add a Shine Dot and Finalize Lines
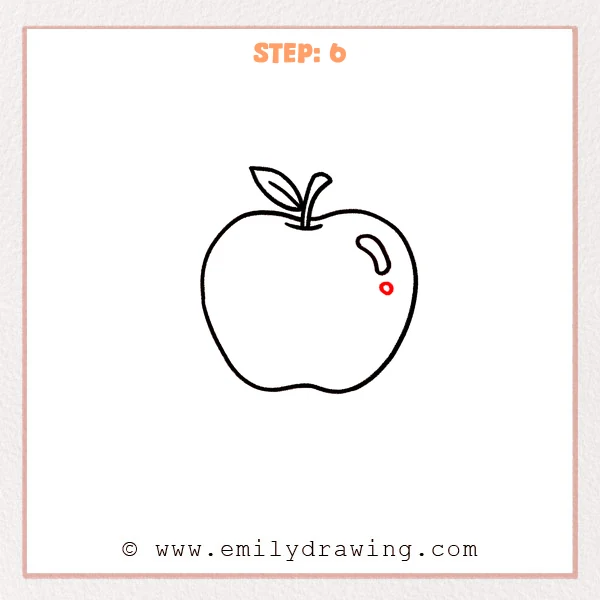
Add a small round shine dot below the main highlight. Trace the main apple outline slightly darker and erase extra sketch marks. Keep the final lines smooth so the apple looks neat.
Pro Tip: Trace slowly over your original line to keep the outline even and round.
Step 7: Color in your drawing!
Fun Facts
- Apples come in many colors, including red, green, and yellow.
- The shiny highlight helps show a smooth apple skin in drawings.
- A small bottom dip makes the apple shape feel more natural.
Pin it now, Draw later!
You have finished a step by step drawing of an apple by adding the stem, leaf, rounded body, and highlights. For coloring, try bright red with a darker red shadow on one side, or green with soft yellow shading near the top. Shade lightly under the leaf and along one edge to make the apple look round.
One common beginner mistake is making the apple outline too symmetrical and stiff. Let the sides be gently uneven so it feels organic. Practice this easy drawing tutorial again, and try changing the leaf angle or making a second apple beside it.
Get the FREE Printable Drawing Guide
FREE Download Printable Apple Drawing Tutorial
Frequently Asked Questions
How do I make my apple look more round?
Add a soft shadow on one side and keep the highlight on the opposite side.
What if my apple outline looks shaky?
Draw the curve lightly first, then trace it slowly with a smoother line.
Can I draw a bitten apple using this method?
Yes, replace part of the outline with a small bumpy bite shape on one side.