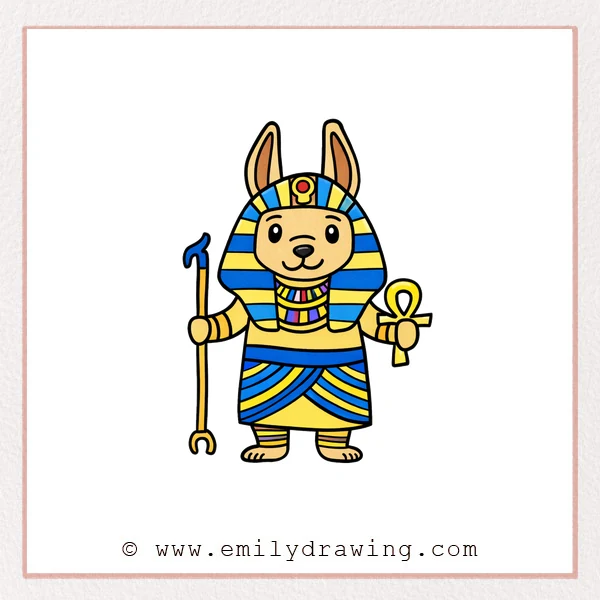
This easy drawing tutorial shows how to draw Anubis step by step in a cute, beginner-friendly style. We will use simple shapes to build the ears, striped headdress, and classic symbols. Follow along slowly, and you will have a clean drawing for beginners by the end.
What You Will Need
- Pencil
- Eraser
- Black marker or pen
- Paper
- Optional: colored pencils or markers
Here are my RECOMMENDED Art Supplies!
- Crayola Coloring Set (140 Pieces – Mega Value!)
- 24 Colored Crayon Set
- A4 Printer Paper
- Crayola Coloring Pencils
- HP Home Printer with Instant Ink!
Time needed:
25 minutes.
Step-by-Step Drawing Guide
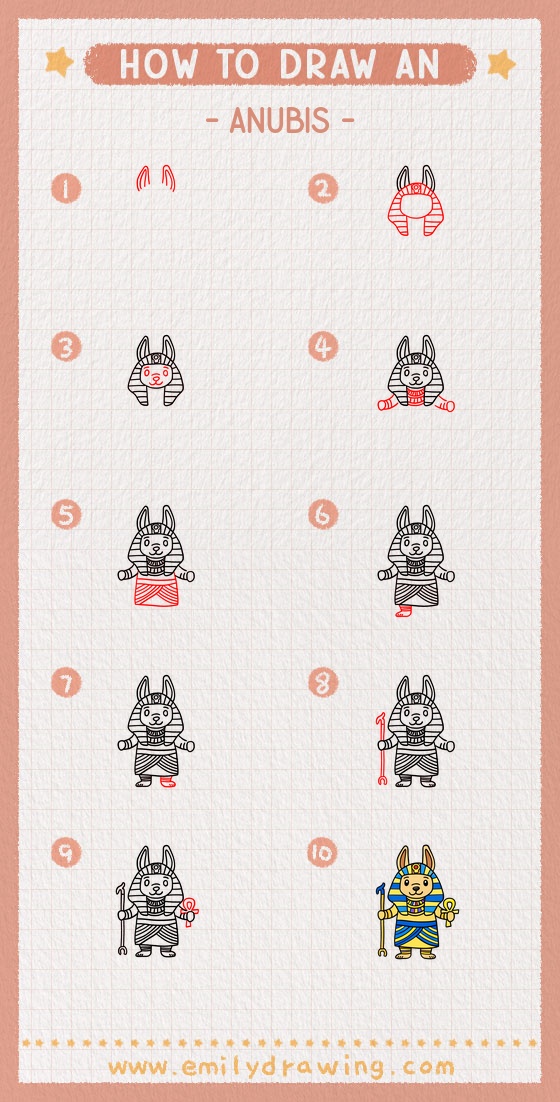
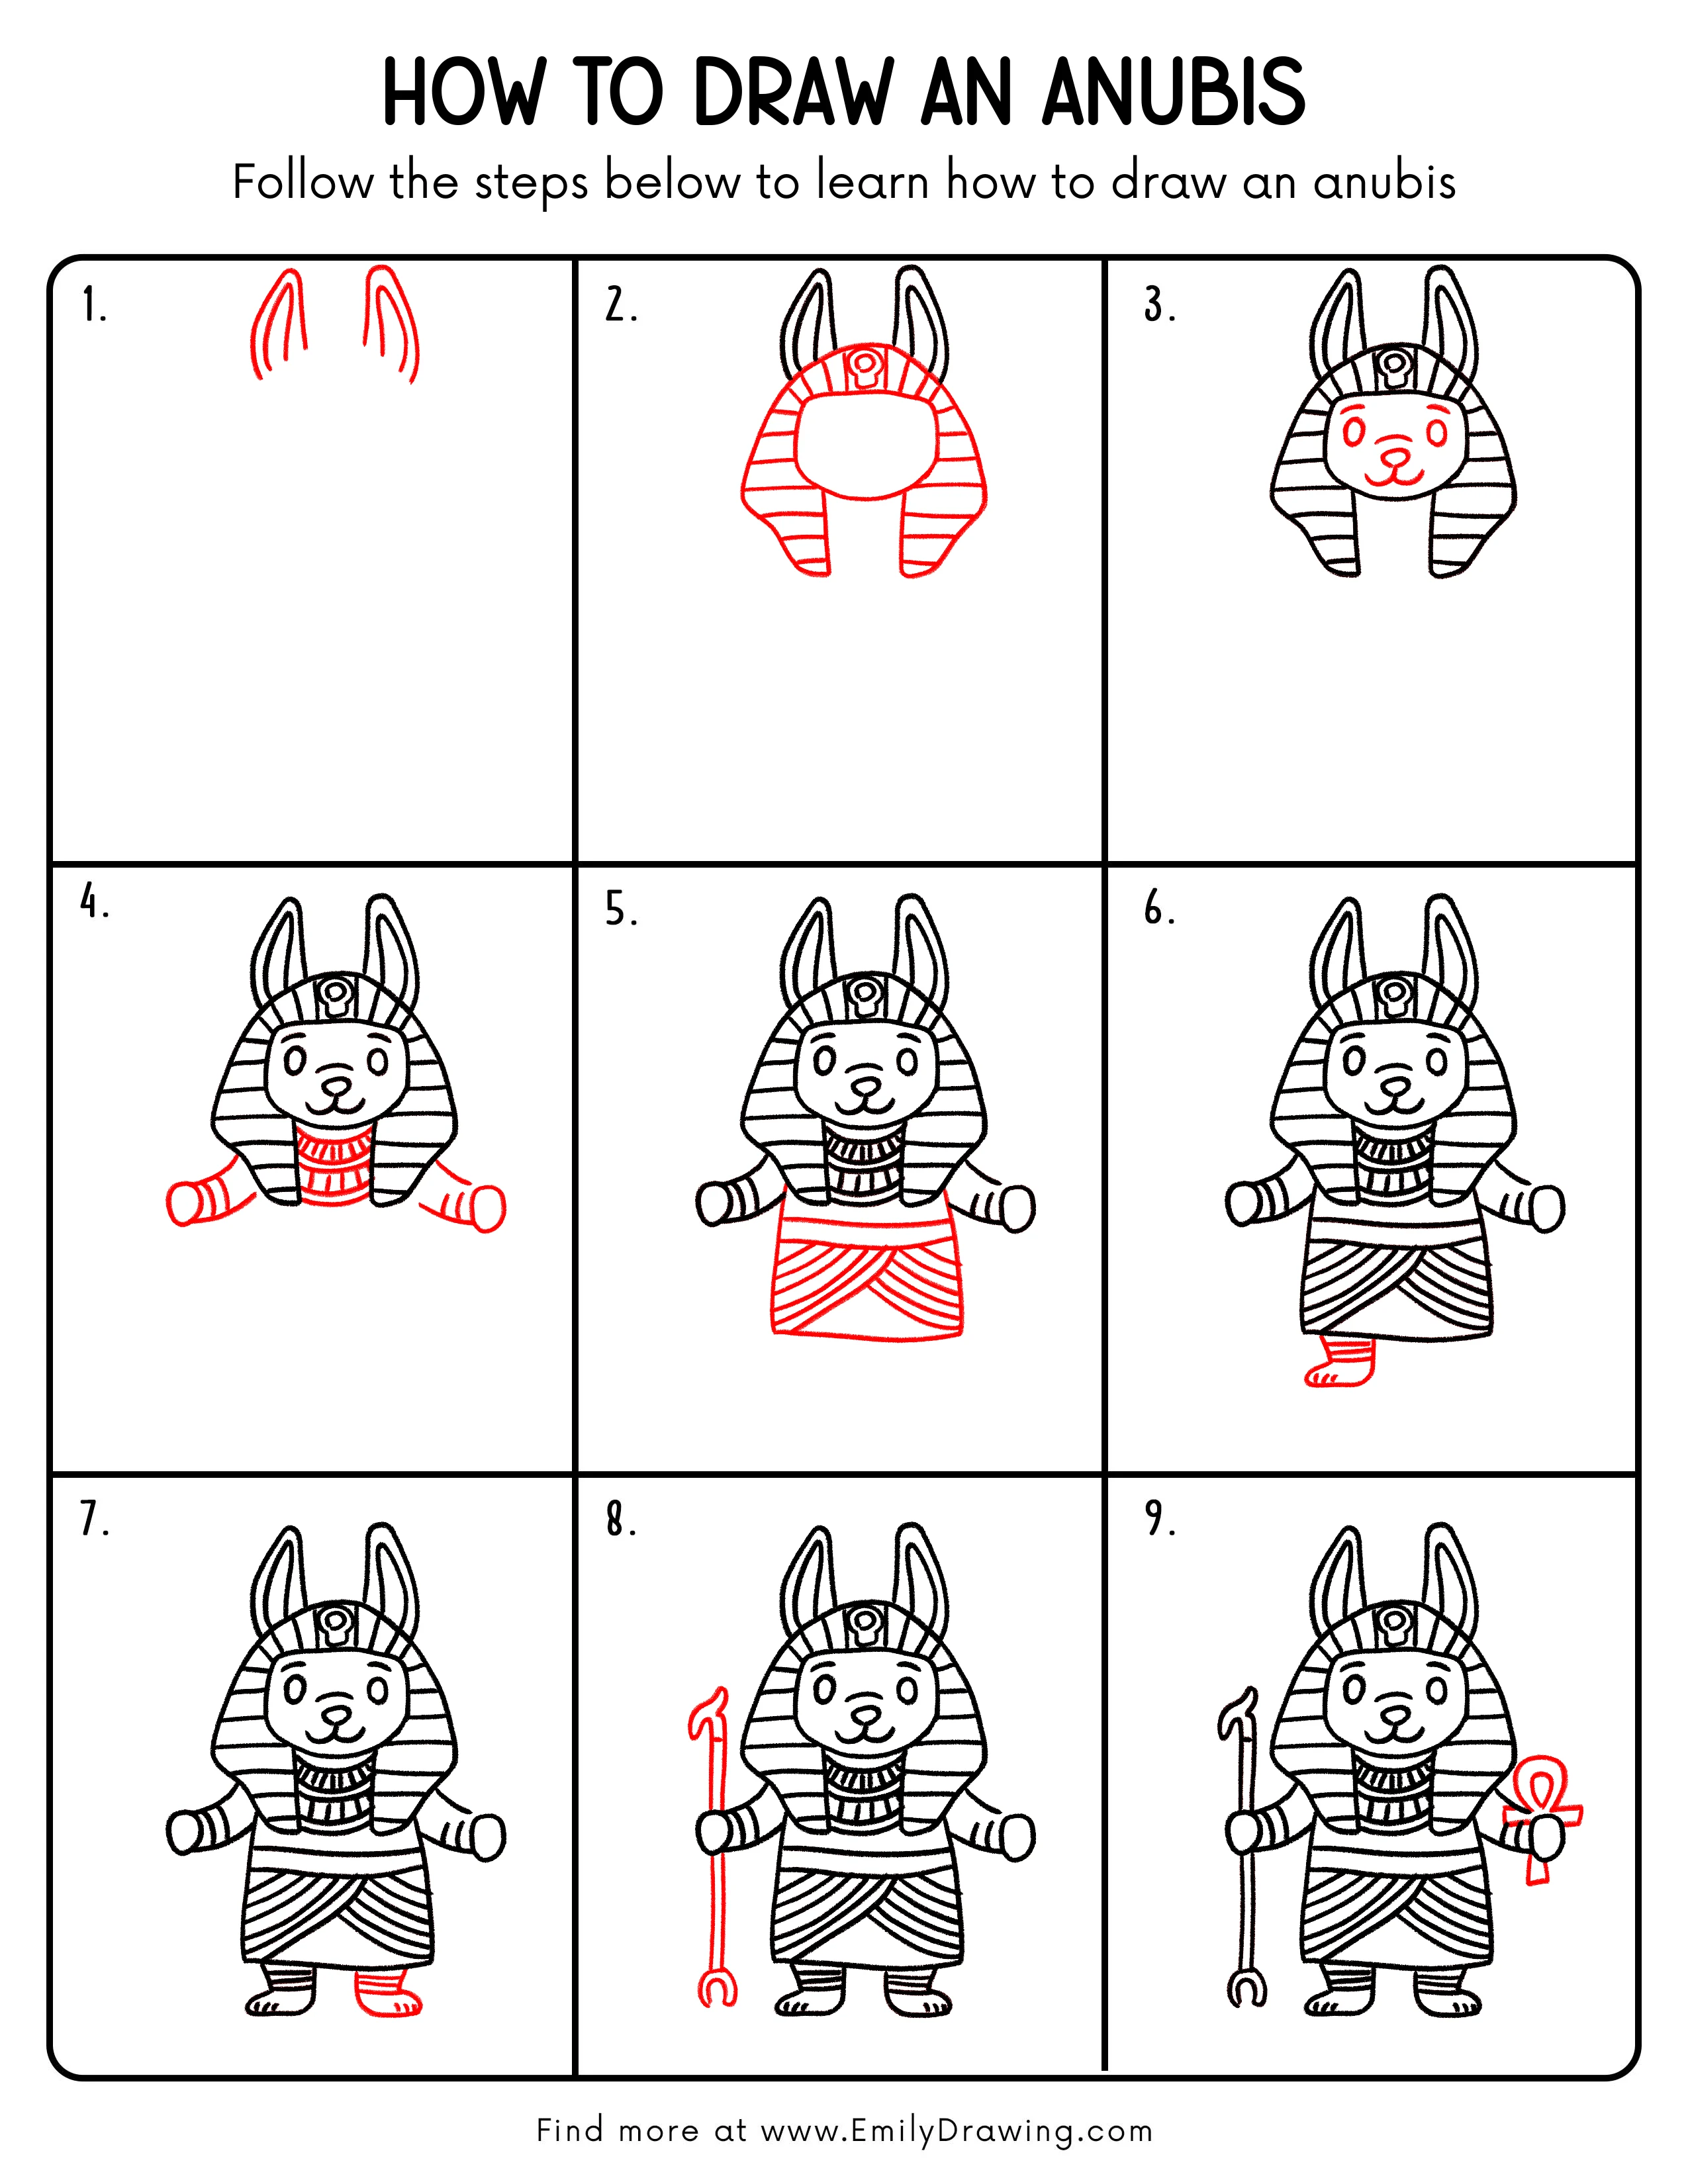
Step 1: Draw Anubis’s Tall Ears
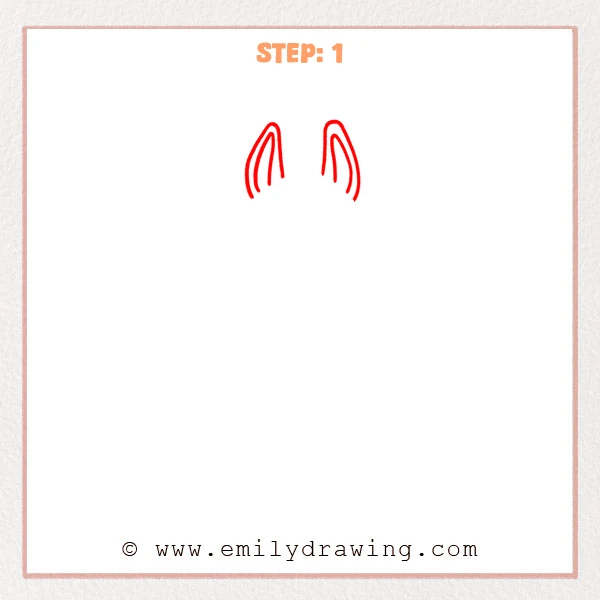
Start with two tall, narrow ears near the top of your page. Keep them like slim leaf shapes with rounded tips. Add one inner line in each ear to show thickness.
Pro Tip: Keep both ears close in height to avoid a tilted head.
Step 2: Add the Striped Headdress and Face Window
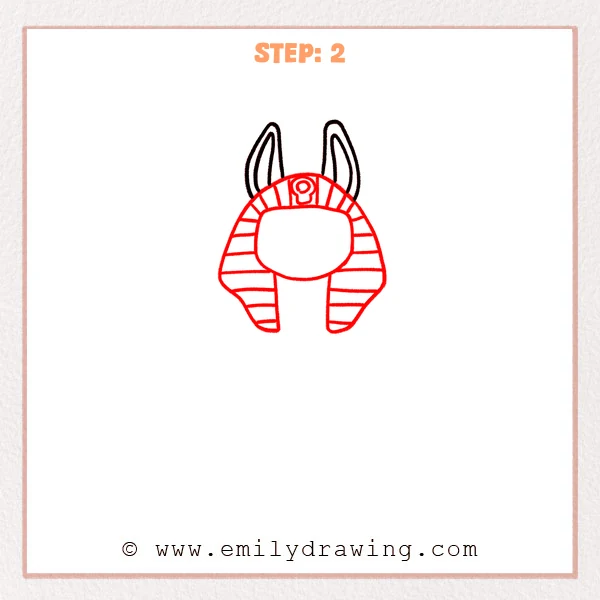
Draw the pharaoh headdress under the ears, with two sides that hang down like soft shields. Leave a rounded rectangle space in the center for the face. Add simple horizontal stripes across the headdress panels.
Pro Tip: Match the left and right hanging sides so the face stays centered.
Step 3: Draw the Face Features
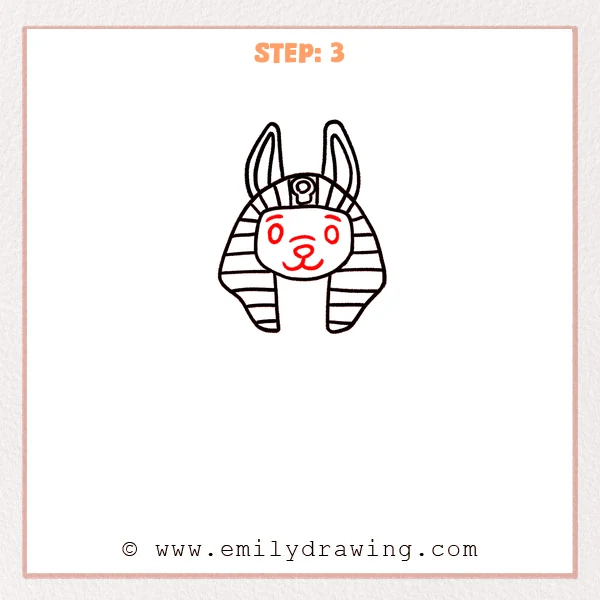
Inside the face window, add two small oval eyes and short eyebrow marks above them. Draw a small nose and a simple curved mouth for a calm expression. Keep everything centered and evenly spaced.
Pro Tip: Lightly place both eyes first, then darken them after they match.
Step 4: Add the Collar and Arm Placement
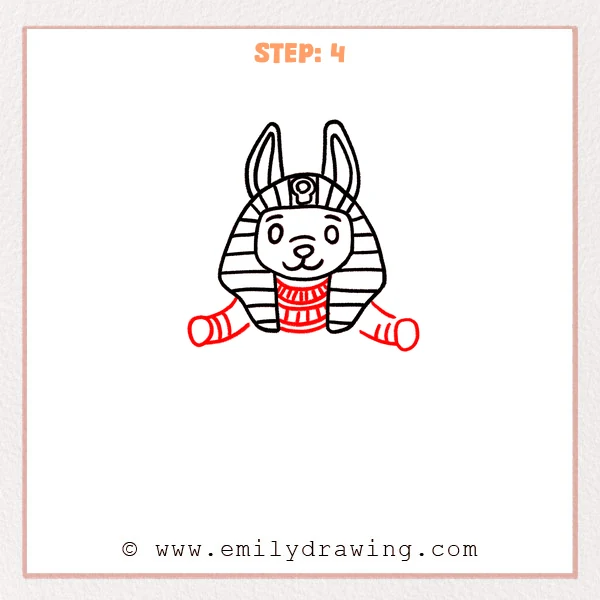
Under the chin, draw a layered collar using curved bands stacked like a necklace. Add short arms coming out from both sides of the body area. Finish each hand as a simple rounded shape.
Pro Tip: Make the collar curves follow the chin line for a tidy look.
Step 5: Draw the Upper Body and Clothing Stripes
Sketch the torso as a rounded rectangle under the headdress. Add horizontal stripes across the upper outfit to match the style of the headdress. Keep the body slightly wider than the face for stability.
Pro Tip: Use long, smooth stripe lines so the outfit looks calm and even.
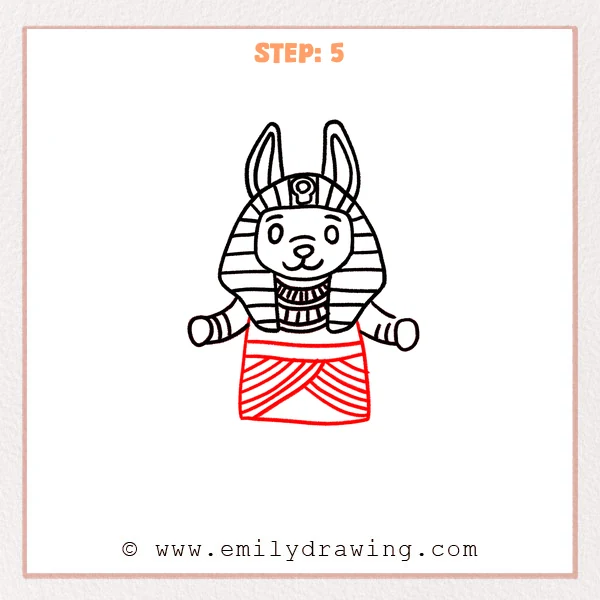
Step 6: Add the Skirt and Crossed Fabric Lines
Draw the skirt shape below the waist with a straight bottom edge. Inside the skirt, add curved crossed lines to show layered fabric wrapping across the front. Let the lines follow the skirt’s curve so the folds feel soft.
Pro Tip: Curve the fold lines gently instead of drawing them straight.
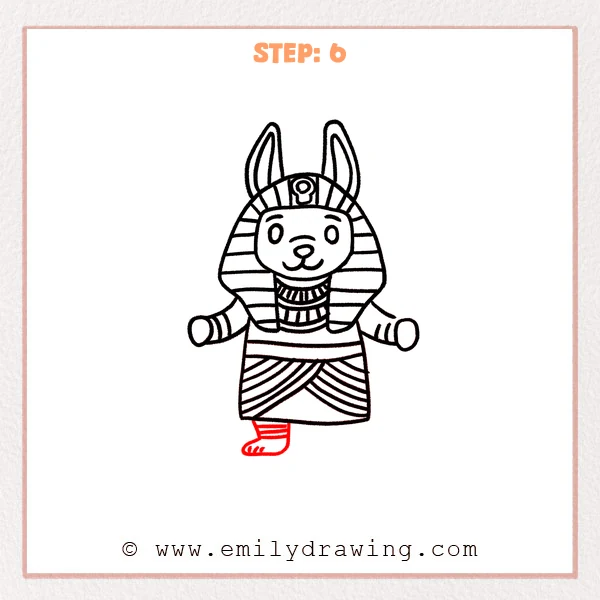
Step 7: Draw the Legs and Feet
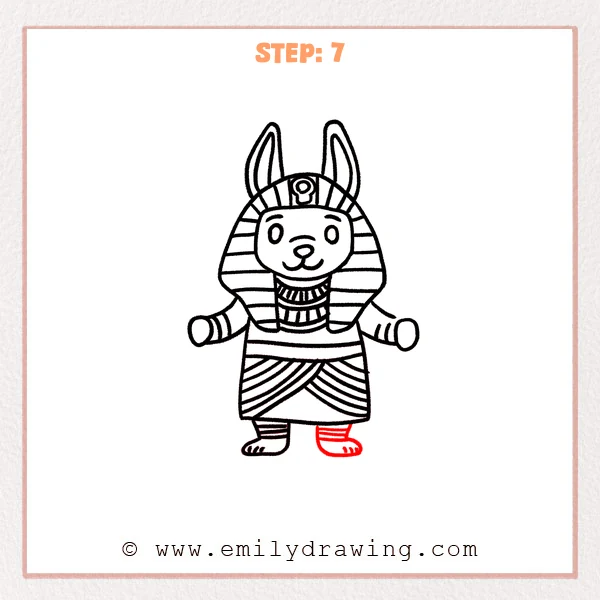
Add two short legs below the skirt and draw flat rounded feet. Use a few short toe marks on each foot. Add simple band lines on the lower legs to suggest wraps.
Pro Tip: Keep both feet on the same ground level so the character stands firmly.
Step 8: Add the Staff in the Left Hand
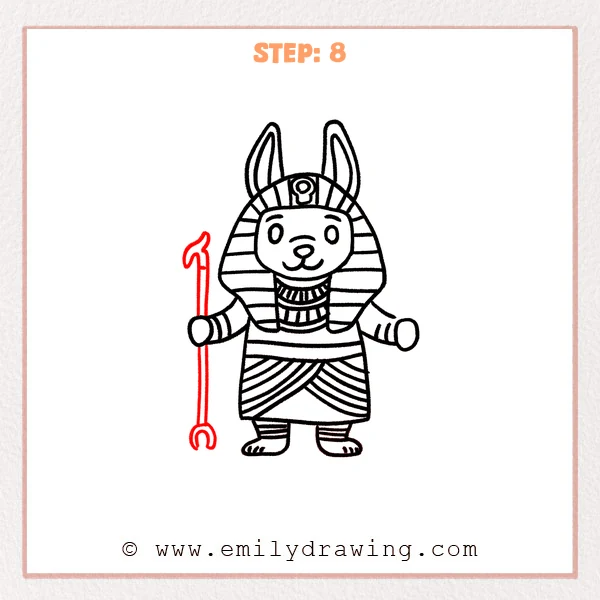
On the left side, draw a long straight staff beside the body. Add a hook-like curve at the top and a small curved end at the bottom. Place it so the left hand appears to grip the middle of the staff.
Pro Tip: Draw the staff with one confident straight line before adding the hooks.
Step 9: Add the Ankh and Finalize the Lines
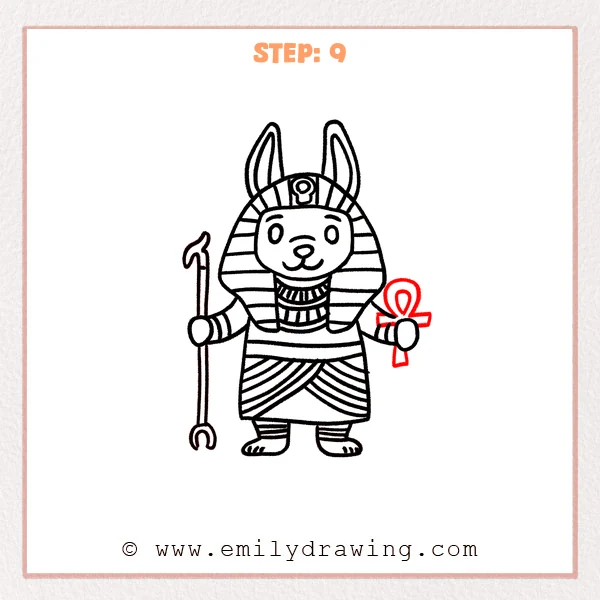
In the right hand, draw an ankh with a small loop on top, a vertical stem, and a crossbar. Thicken the main outlines of the ears, headdress, and body slightly. Clean stray marks so the stripes and symbols look sharp.
Pro Tip: Keep the ankh about the height of the hand for good proportion.
Step 10: Color in your drawing!
Fun Facts
- Anubis is often shown with a jackal head in ancient Egyptian art.
- Pharaoh-style headdresses are commonly drawn with bold, repeating stripes.
- Symbols like the ankh are used to make a character feel instantly recognizable.
Pin it now, Draw later!
You have finished a step by step drawing of Anubis by building the ears, headdress, face, outfit, and symbols. For coloring, try black or dark brown for the ears, gold for the headdress stripes, and blue accents for a classic look. Add light shading under the headdress edges and beneath the collar to create depth.
One common beginner mistake is making the headdress sides uneven, which can shift the face off-center. Take a moment to compare both sides before you darken your lines. Keep practicing this easy drawing tutorial, and try drawing Anubis in a different pose next time.
Get the FREE Printable Drawing Guide
FREE Download Printable Anubis Drawing Tutorial
Frequently Asked Questions
How do I keep the headdress stripes even?
Use light guide marks first, then connect them with smooth lines.
What if my ears look different sizes?
Adjust the shorter ear by extending the tip slightly before inking.
Can I draw Anubis without the staff and ankh?
Yes, you can skip the symbols and focus on the head and outfit first.