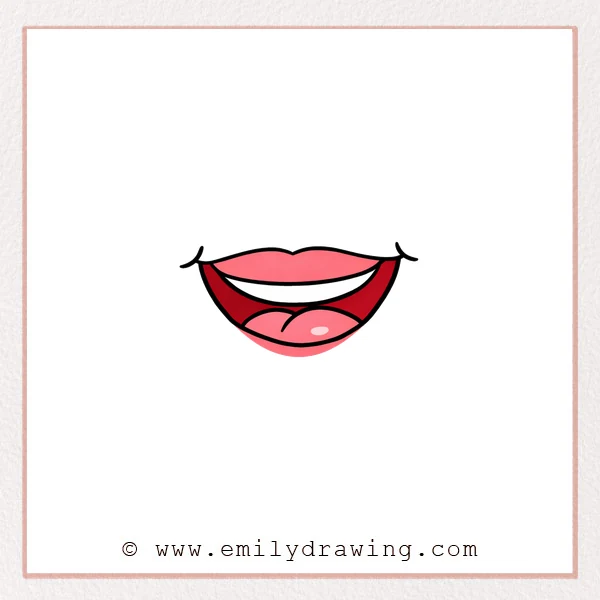
This easy drawing tutorial shows how to draw an anime mouth step by step. We will build a clean open-mouth smile using simple curves and a few small details. Take your time, and let each line stay smooth and controlled.
What You Will Need
- Pencil
- Eraser
- Black marker or pen
- Paper
- Optional: colored pencils or markers
Here are my RECOMMENDED Art Supplies!
- Crayola Coloring Set (140 Pieces – Mega Value!)
- 24 Colored Crayon Set
- A4 Printer Paper
- Crayola Coloring Pencils
- HP Home Printer with Instant Ink!
Time needed:
25 minutes.
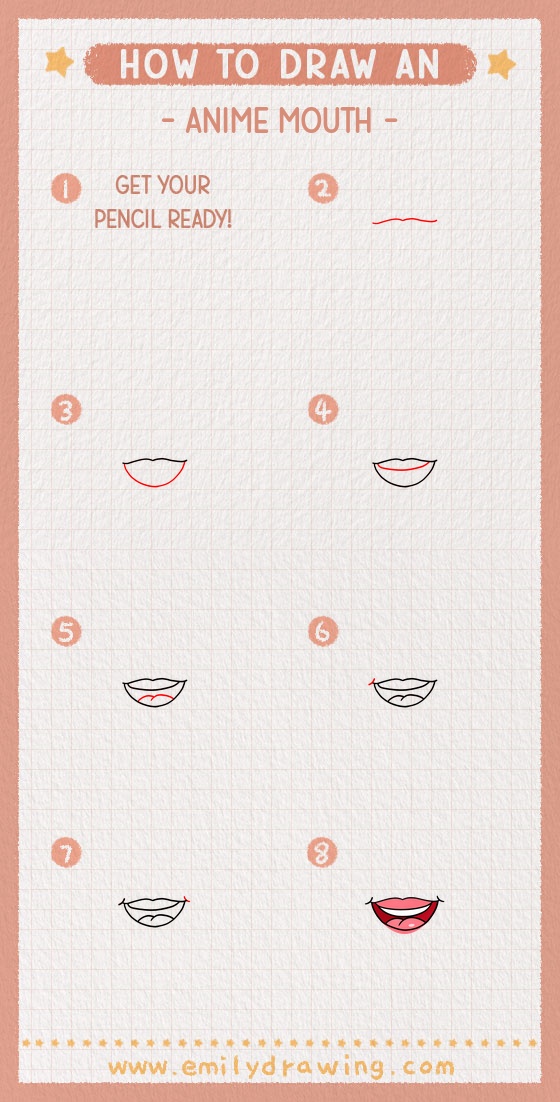
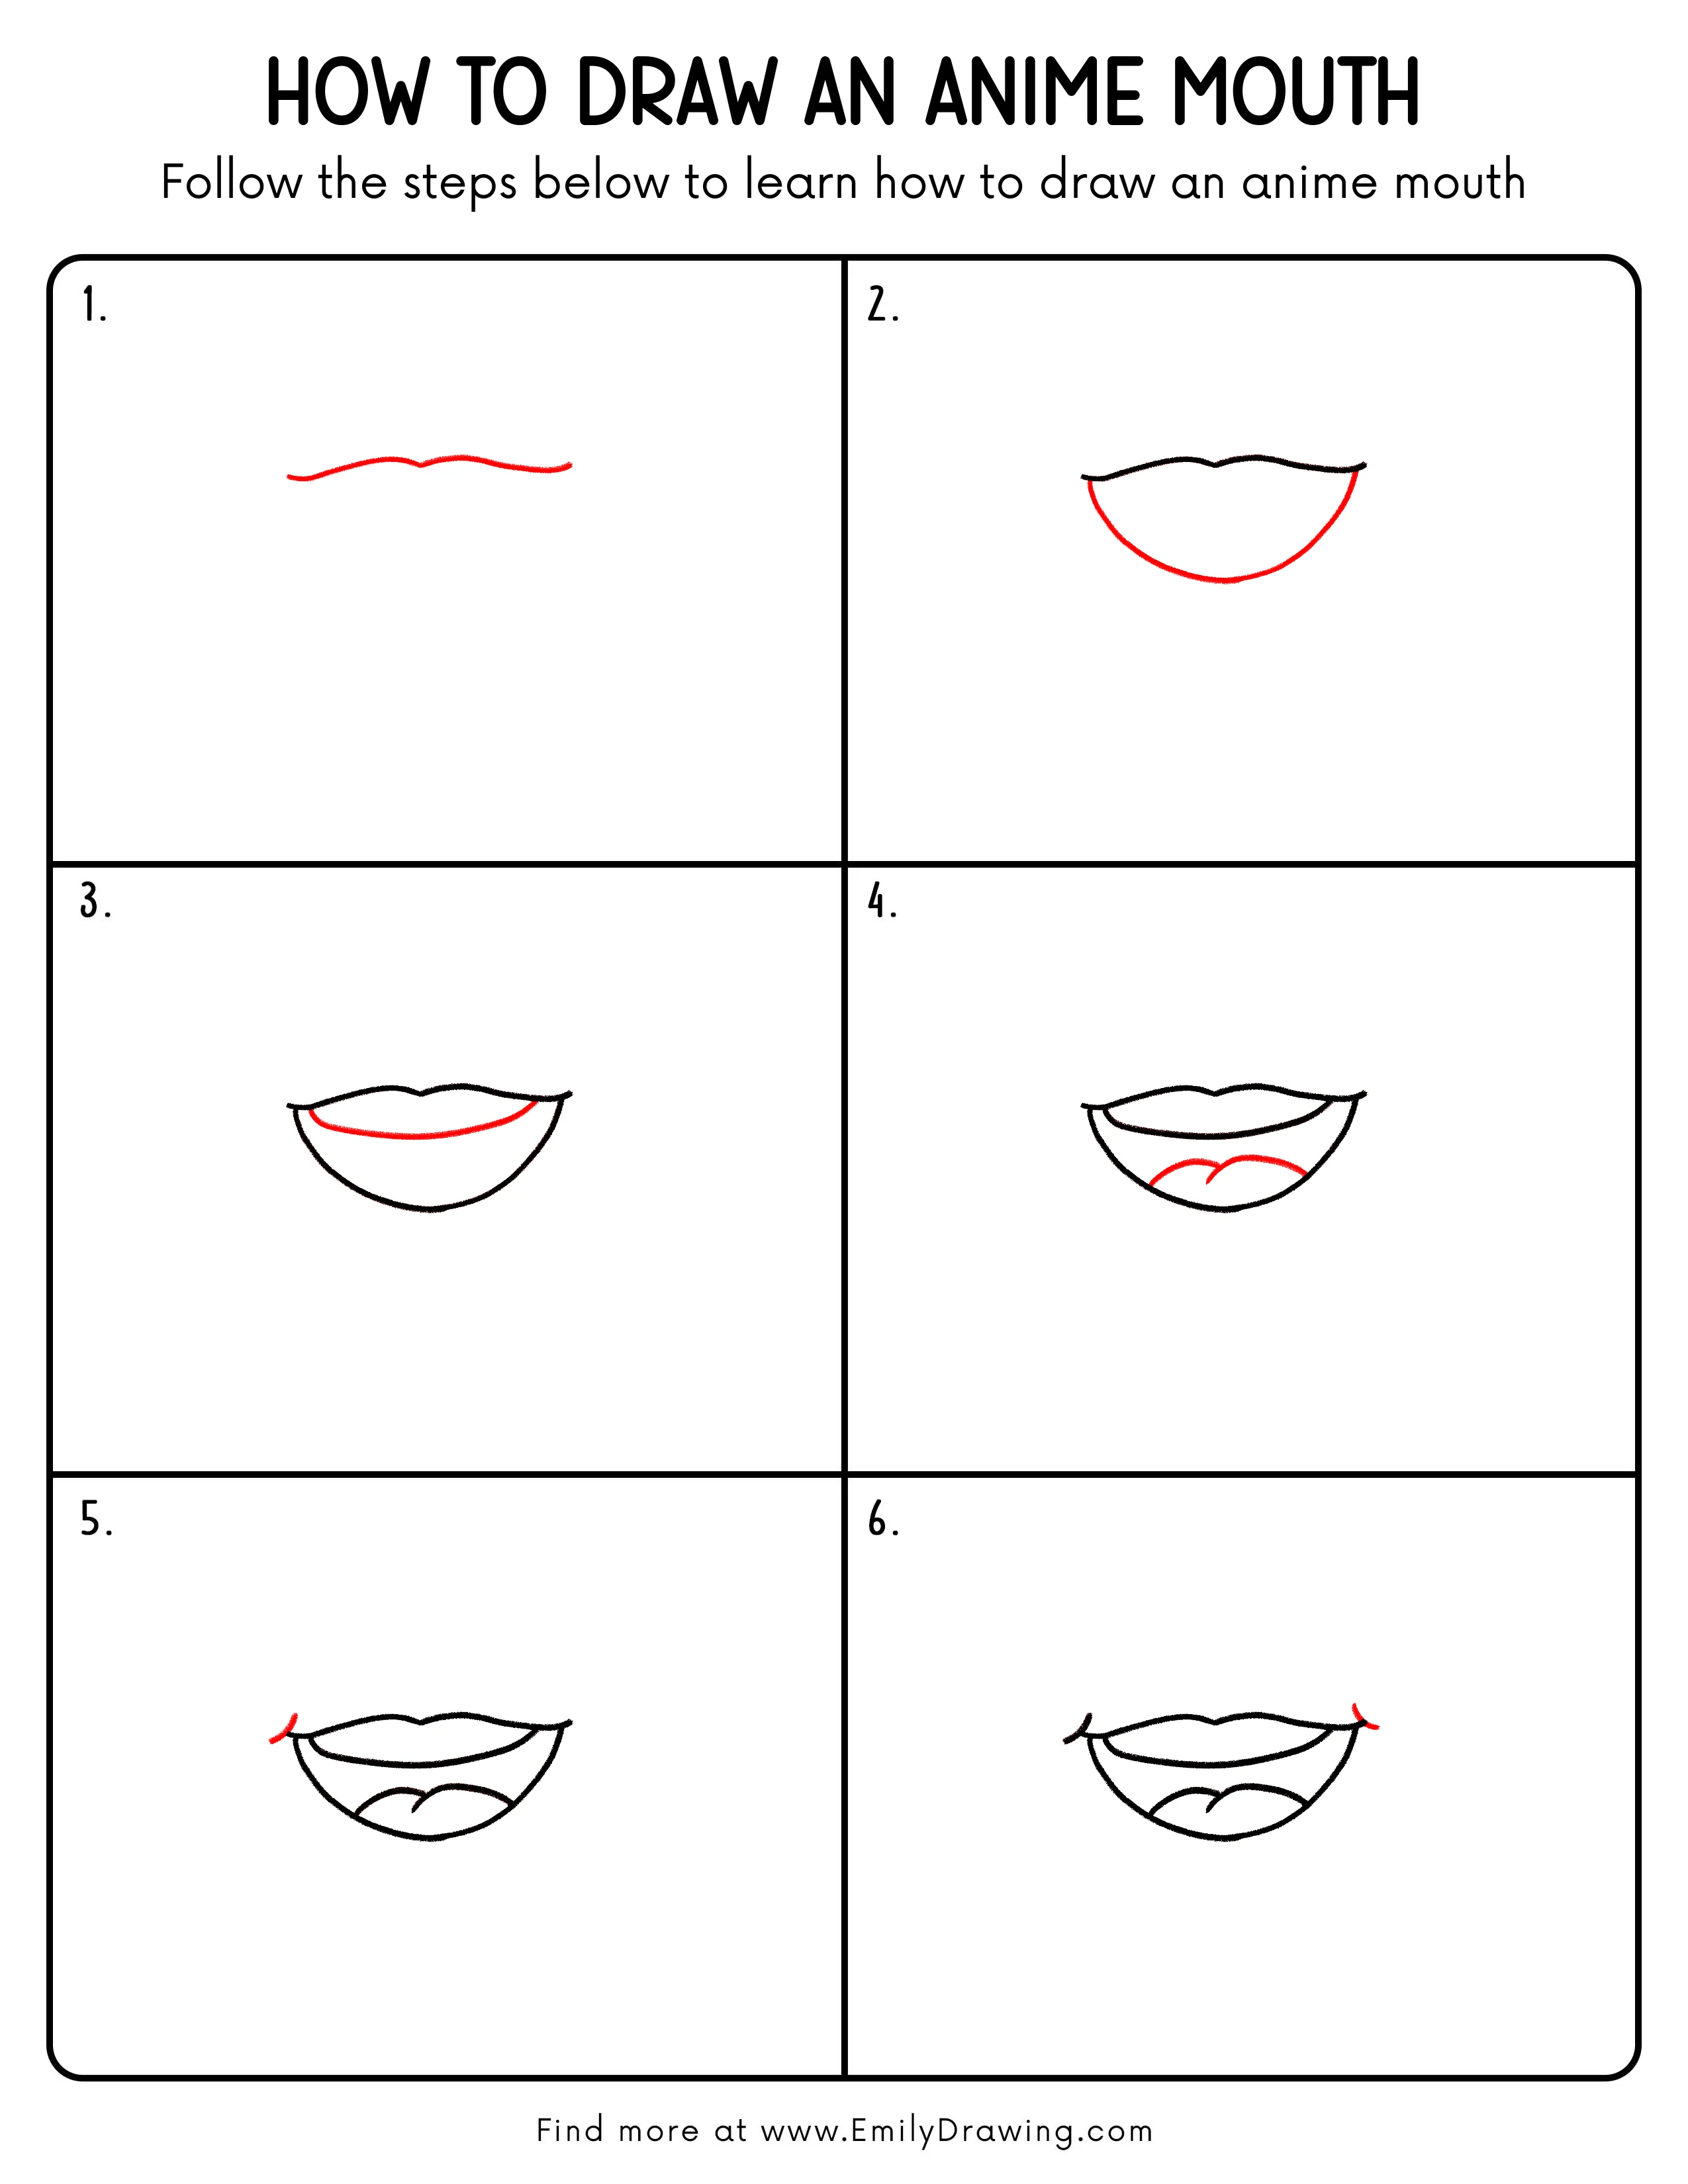
Step-by-Step Drawing Guide
Step 1: Draw the Upper Lip Wave
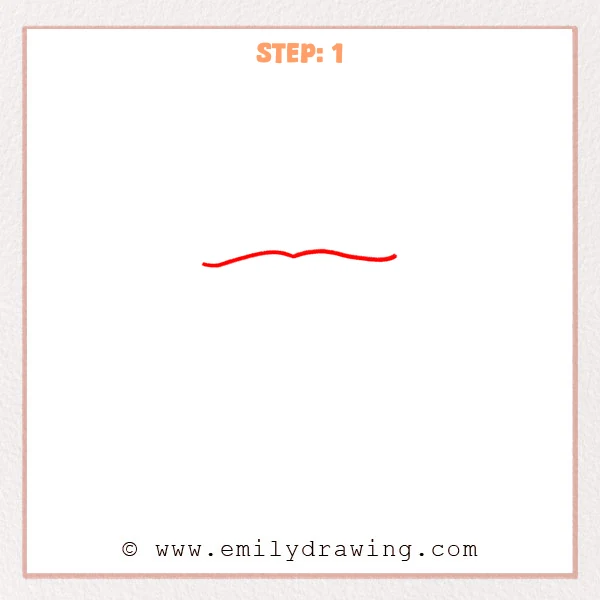
Start with a long curved line and add a gentle dip in the center, like a soft “M.” Lift both ends slightly so the mouth feels light and friendly. Keep the line smooth and even.
Pro Tip: Keep the center dip shallow so the mouth does not look sharp.
Step 2: Add the Lower Outer Curve
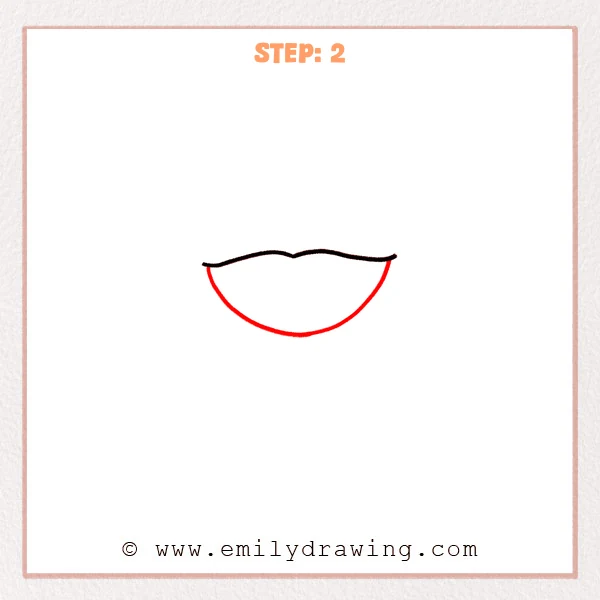
Connect both ends of the upper line with a large rounded curve underneath. This creates the open mouth outline and sets the mouth size. Leave a clear opening between the top and bottom lines.
Pro Tip: Leave enough space between top and bottom lines for an open mouth.
Step 3: Draw the Inner Upper Mouth Line
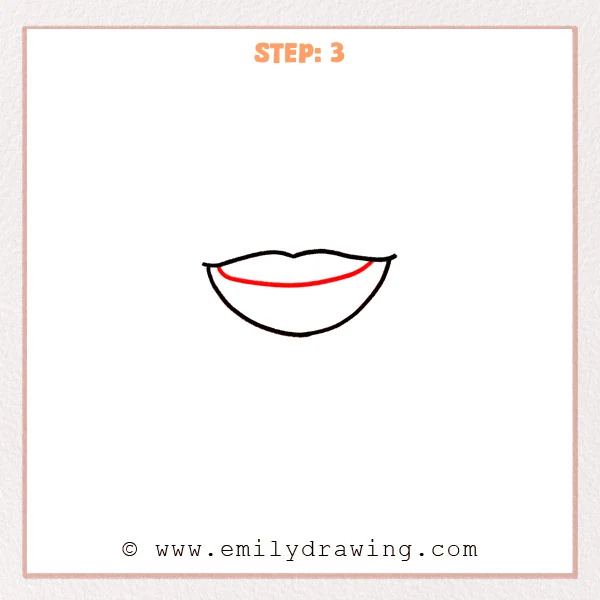
Inside the mouth, draw a shorter curved line near the top to show the inner edge. Keep it slightly parallel to the upper lip so it feels organized. Let the ends stop before they reach the corners.
Pro Tip: Let the inner line end softly without touching the outer outline.
Step 4: Add the Tongue Curve
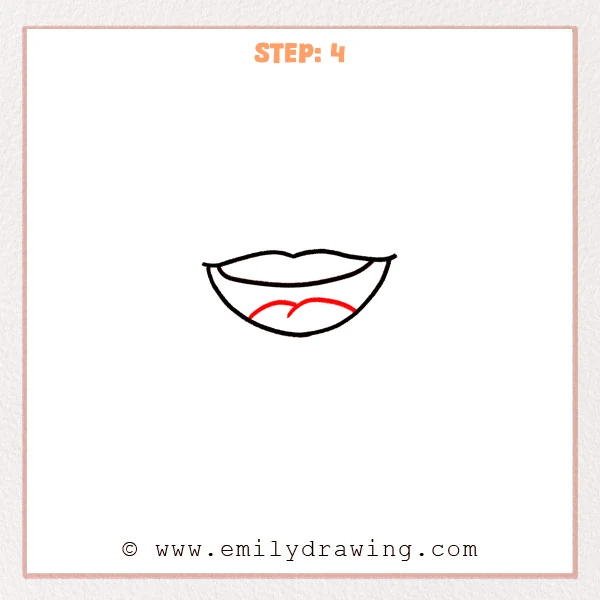
In the lower half of the mouth, draw two rounded bumps that meet in the center. This creates a soft tongue shape that looks friendly and simple. Keep the tongue inside the mouth outline.
Pro Tip: Make both tongue bumps similar in size for a clean look.
Step 5: Add a Corner Flick on One Side
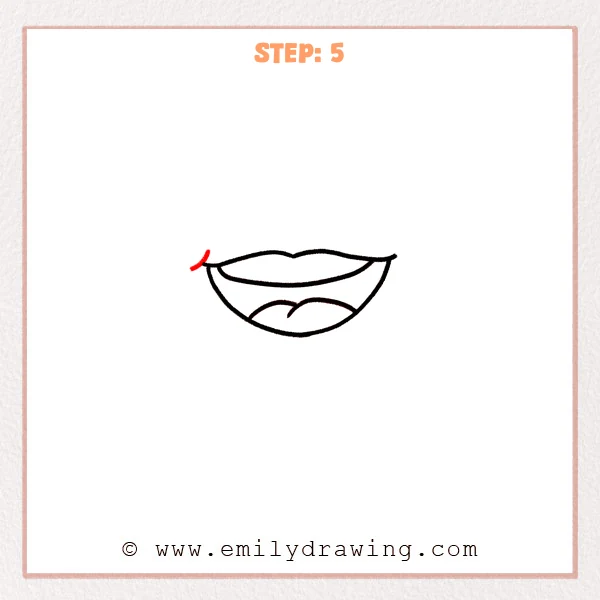
At one mouth corner, add a short upward flick line just outside the outline. This tiny mark helps the corners look folded and more expressive. Keep it short and light.
Pro Tip: Keep the flick short and subtle so it does not look like a whisker.
Step 6: Match the Other Corner and Clean Lines
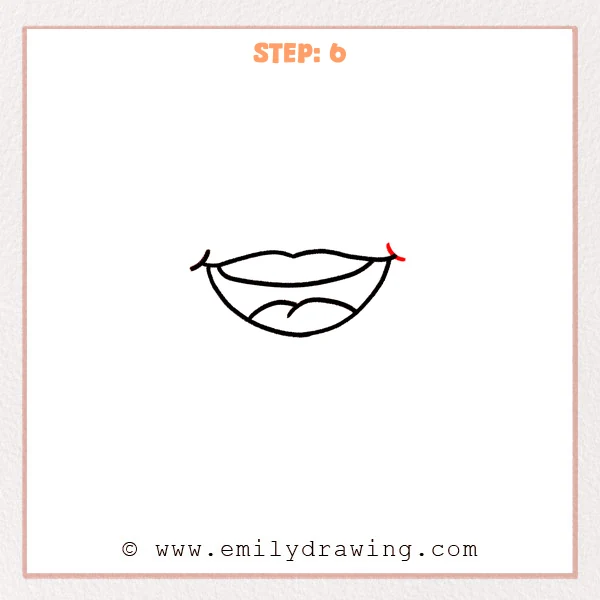
Add the same small flick at the other mouth corner so both sides match. Then trace the main outline slightly darker and erase extra overlaps. The anime mouth should look crisp and ready for a face.
Pro Tip: Trace slowly over your original line to keep the thickness even.
Step 7: Color in your drawing!
Fun Facts
- Anime mouths often use a few clean curves to stay easy to read.
- A simple tongue shape can make a smile look friendly and lively.
- Small corner lines help show a folded lip without heavy shading.
Pin it now, Draw later!
You have drawn an anime mouth by building the top lip, the open shape, and the tongue detail. For shading, add a light shadow under the upper lip and a slightly darker tone behind the tongue. If you color, try soft pink for the tongue and a gentle darker shade inside the mouth.
One common beginner mistake is making the center dip too deep, which can look pointy. Keep that dip shallow and smooth for a clean anime style. Practice this step by step drawing again, and try changing the mouth width to create new expressions.
Get the FREE Printable Drawing Guide
FREE Download Printable Anime Mouth Drawing Tutorial
Frequently Asked Questions
How do I draw a smaller anime mouth?
Keep the upper lip line shorter and make the lower curve less deep.
Why does my mouth look uneven?
Check both corners and adjust the curves so they mirror each other.
Can I turn this into a closed smile?
Yes, remove the lower outline and draw one gentle curved line instead.