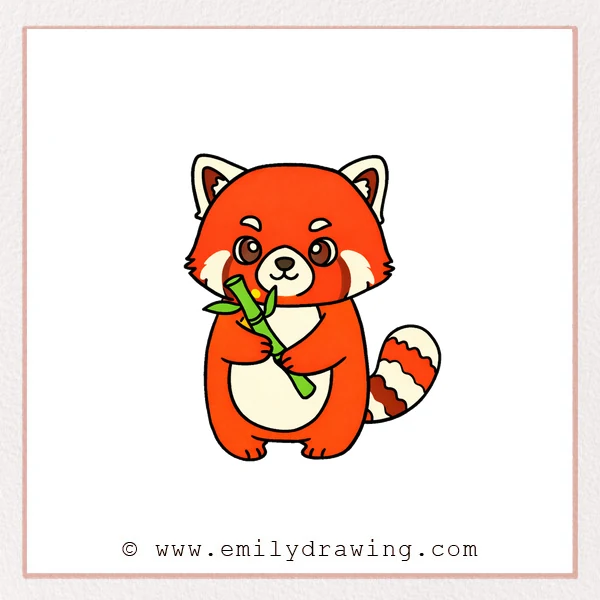
This step by step drawing lesson shows how to draw animals in a simple, cute style. We will build one friendly animal character using smooth shapes and clear details. Take your time, and let each step feel small and calm.
What You Will Need
- Pencil
- Eraser
- Black marker or pen
- Paper
- Optional: colored pencils or markers
Here are my RECOMMENDED Art Supplies!
- Crayola Coloring Set (140 Pieces – Mega Value!)
- 24 Colored Crayon Set
- A4 Printer Paper
- Crayola Coloring Pencils
- HP Home Printer with Instant Ink!
Time needed:
30 minutes.
Step-by-Step Drawing Guide
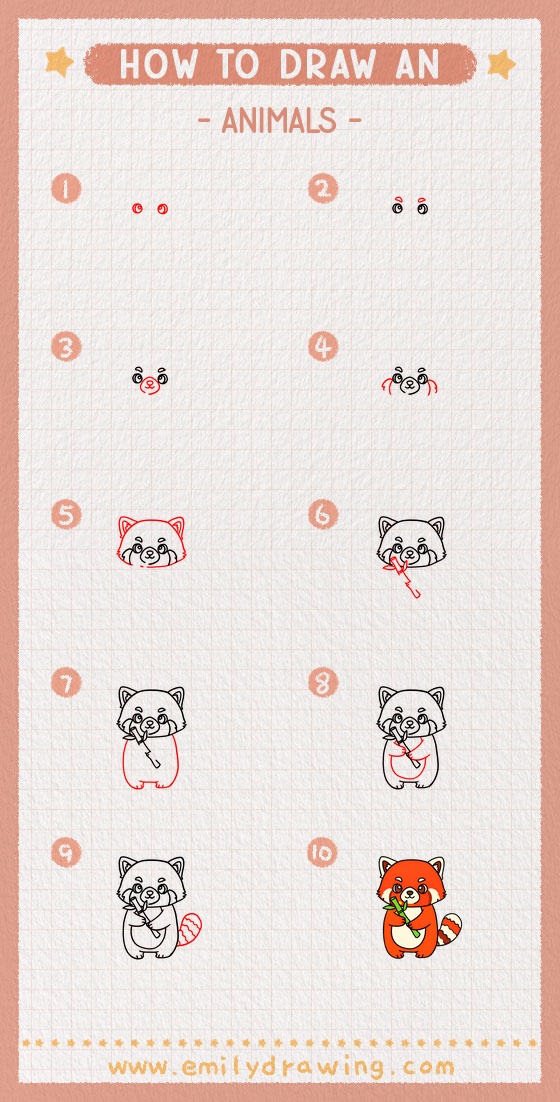
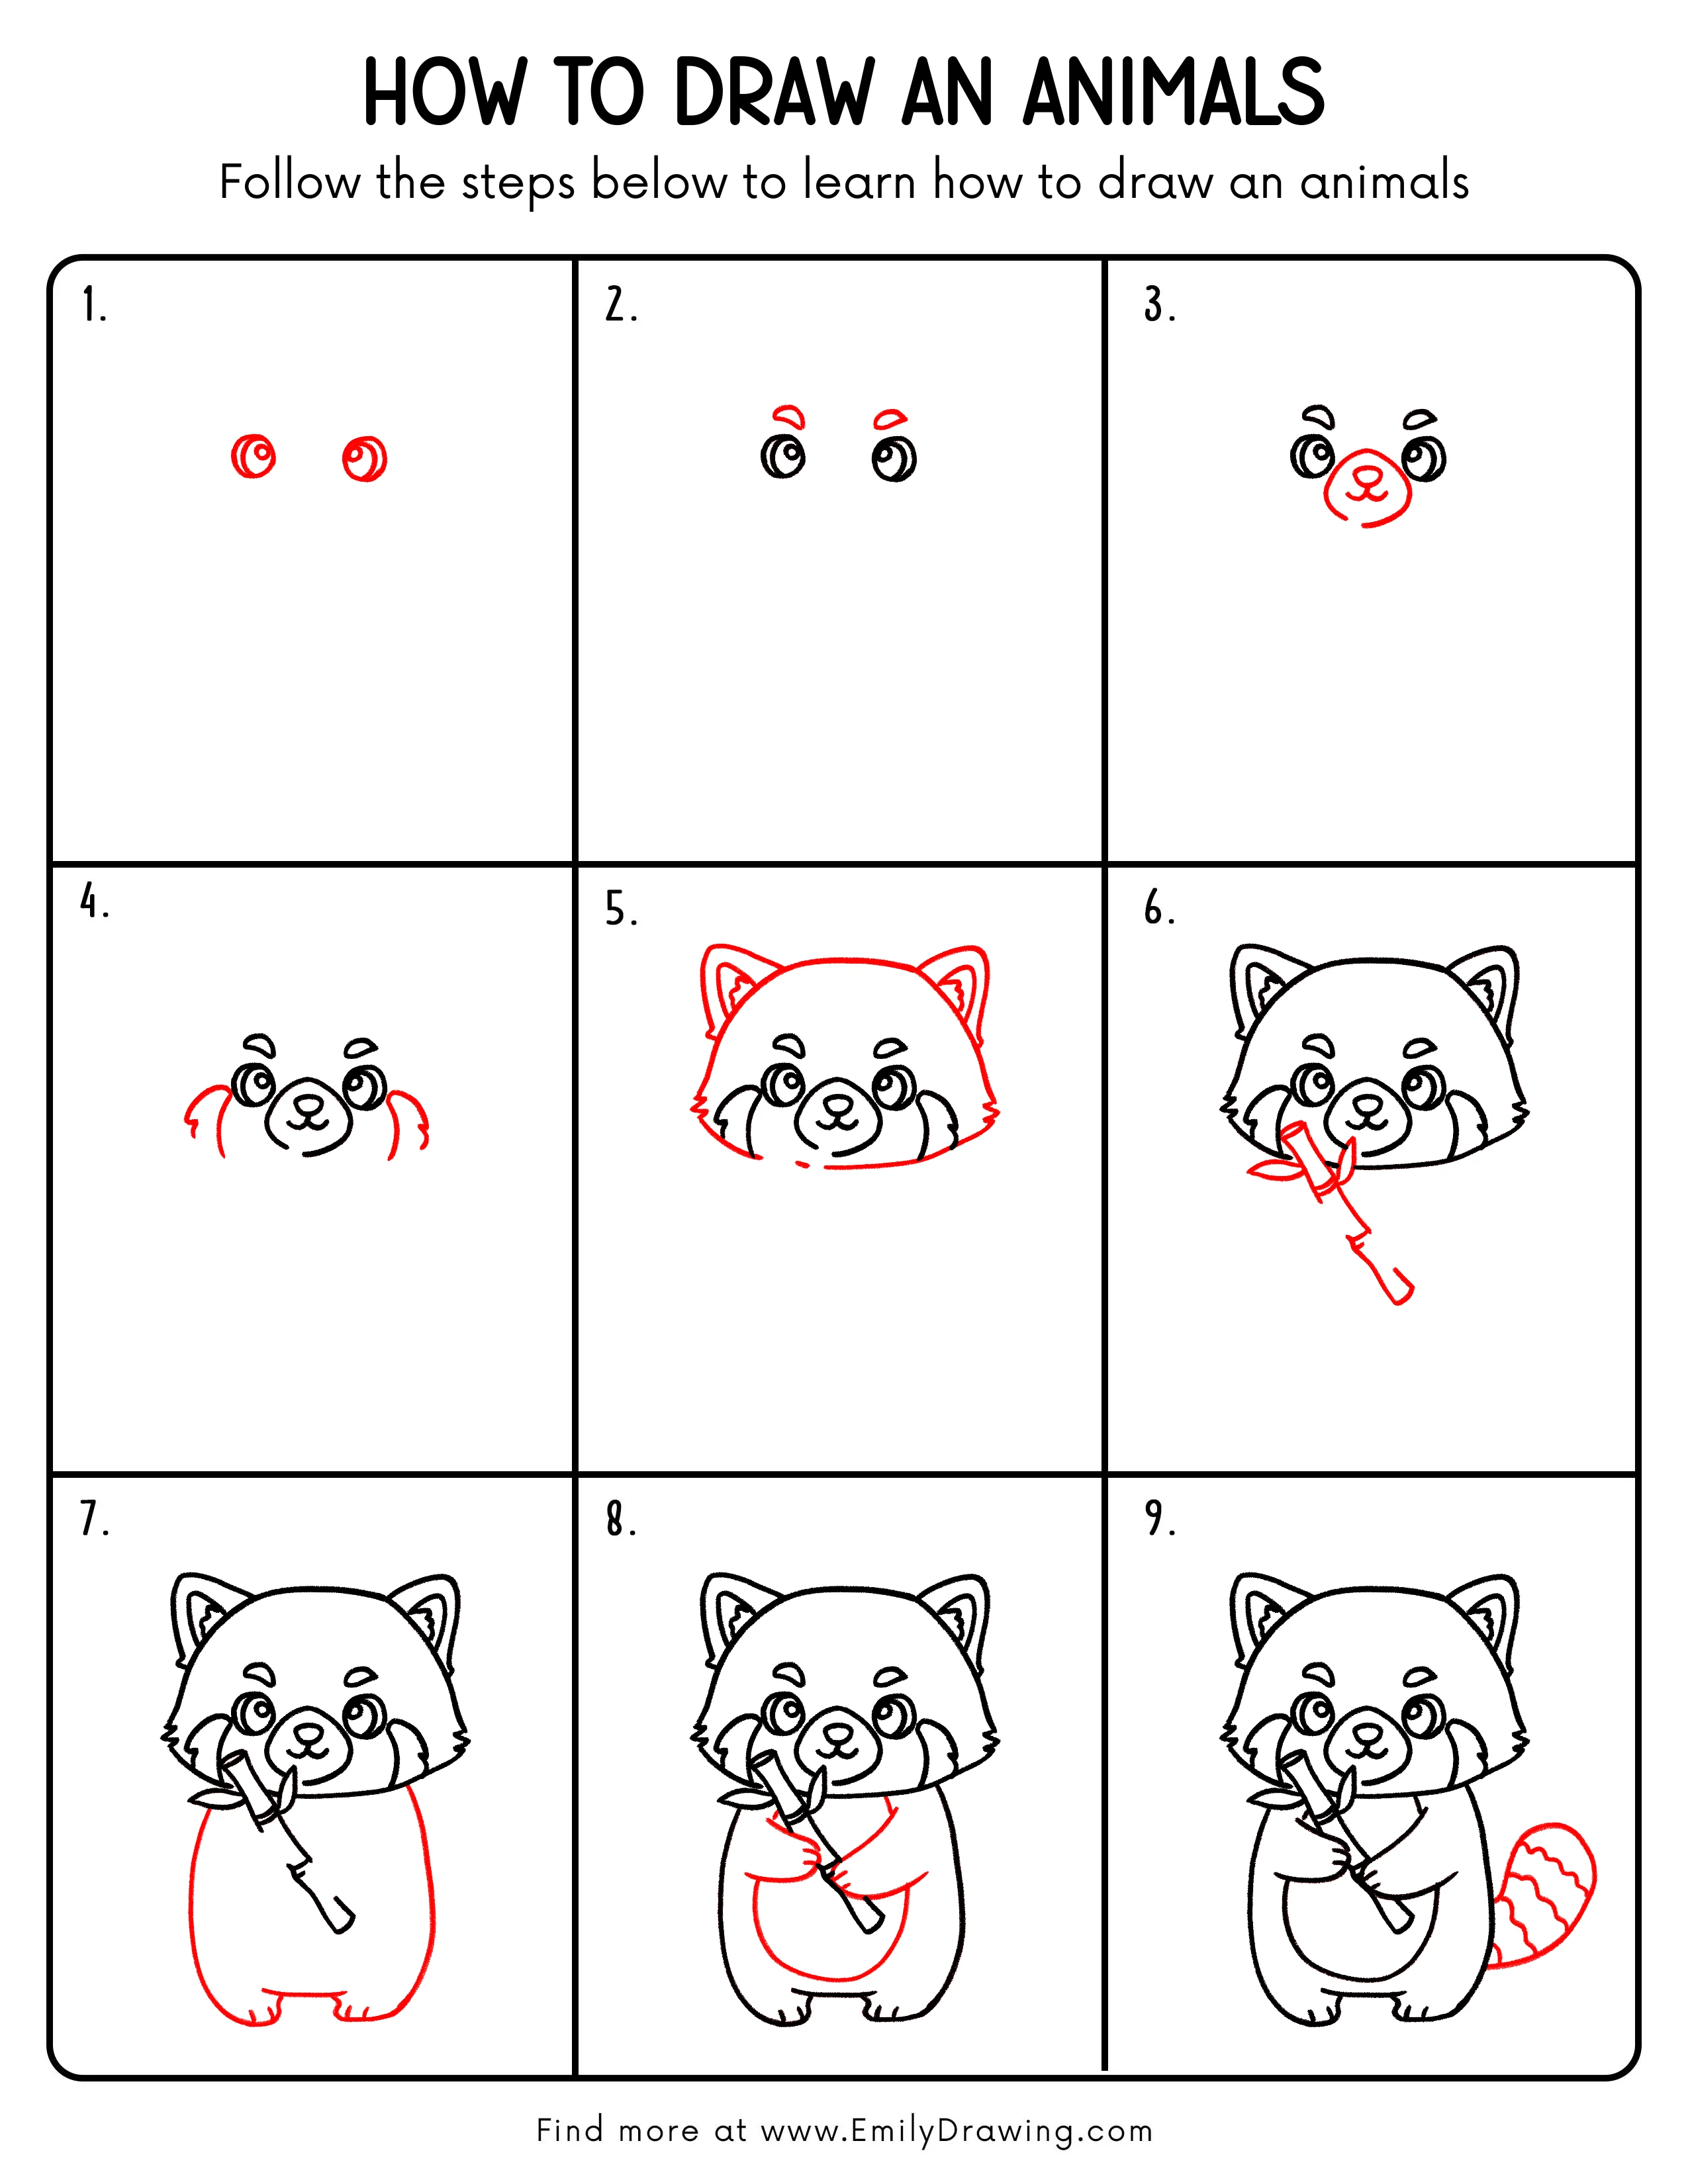
Step 1: Start with the Eyes
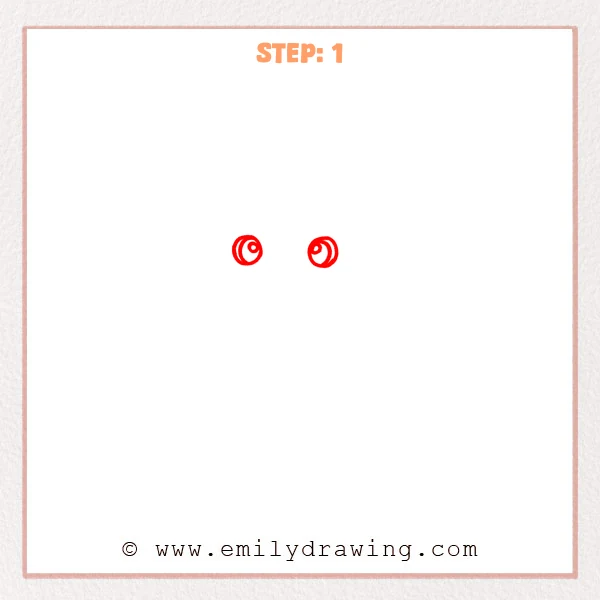
Sketch two large round eyes near the upper middle of the page. Add a smaller inner ring in each eye to place the gaze. Keep the spacing even so the animal face feels balanced.
Pro Tip: Lightly mark a center line to keep both eyes level.
Step 2: Add Simple Eyebrows
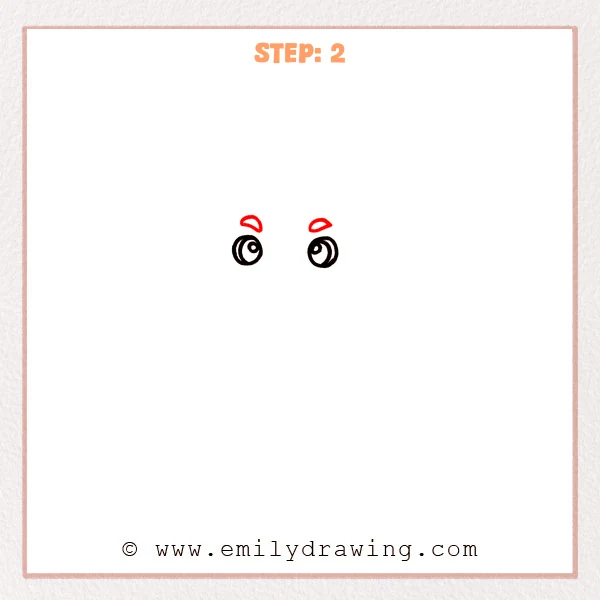
Draw two small curved eyebrow shapes above the eyes. Leave a little space so the forehead feels open and soft. Keep the eyebrows similar in size and angle.
Pro Tip: Match the eyebrow curves to keep the expression gentle.
Step 3: Draw the Nose and Muzzle
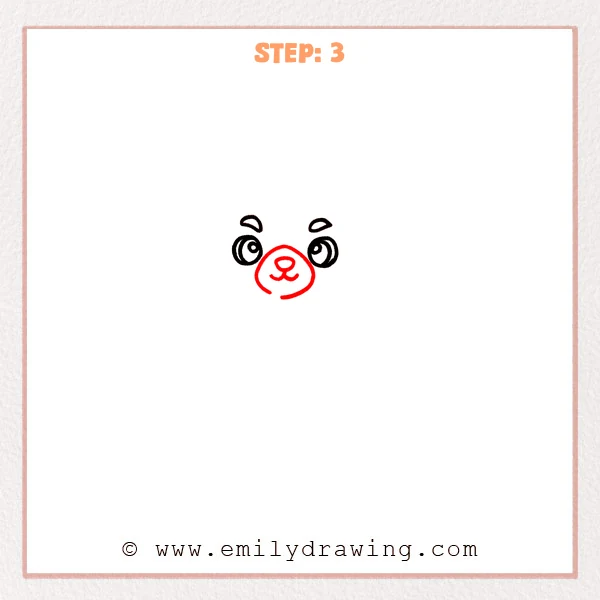
Add a rounded muzzle shape between the eyes and slightly lower. Place a small oval nose inside, then draw a short mouth line beneath it. Keep the muzzle centered to support the whole face.
Pro Tip: Make the muzzle wide enough to fit the nose without crowding.
Step 4: Build Fluffy Cheeks
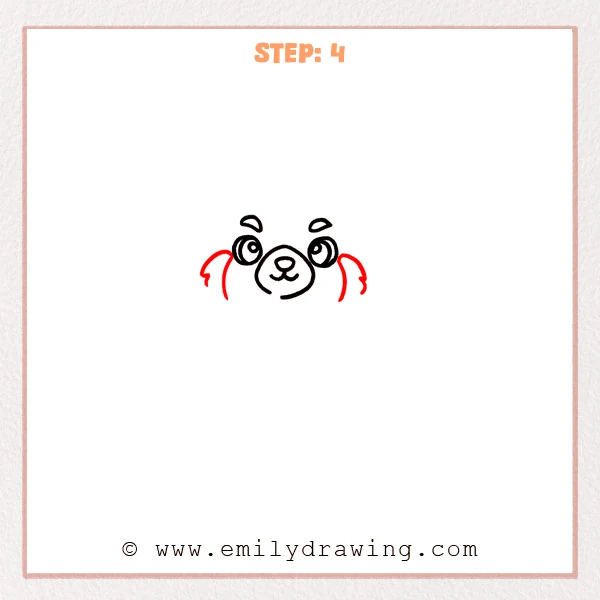
On both sides of the muzzle, sketch puffy cheek shapes using short curved bumps. Let the cheek fur extend outward a little for a cozy look. Keep the left and right sides similar in width.
Pro Tip: Use rounded bumps, not sharp points, for softer fur.
Step 5: Outline the Head and Ears
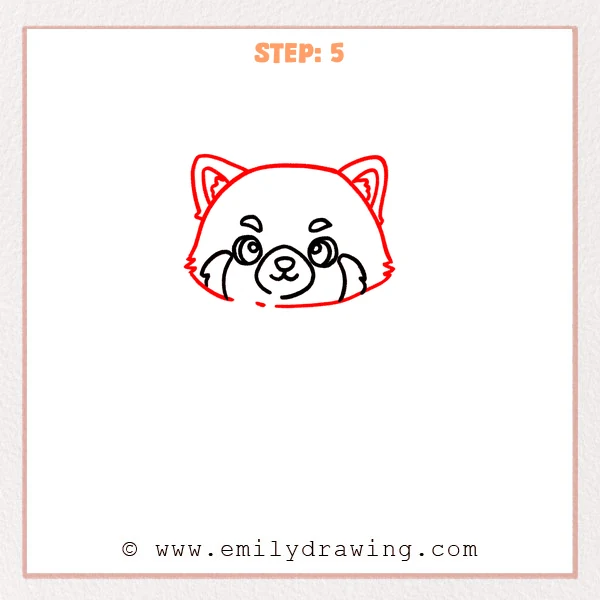
Draw a smooth head outline around the face, then add two triangle ears on top. Inside each ear, add a smaller inner ear line for depth. Keep the ears aligned so the head feels stable.
Pro Tip: Check ear height by comparing the tips to each other.
Step 6: Add a Simple Prop and Paw Guides
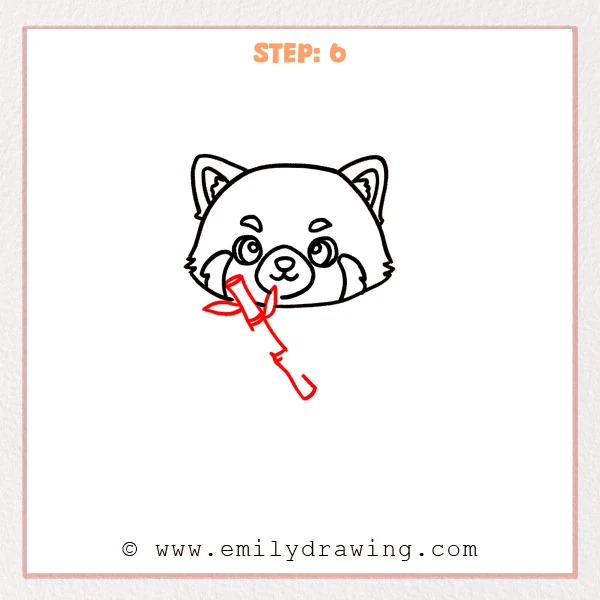
Sketch a slanted stick-like prop in front of the face using two parallel lines. Add a few short bands to suggest segments, then draw light curved guides where the paws will hold it. Keep the prop crossing the body area.
Pro Tip: Angle the prop diagonally so the pose looks active and clear.
Step 7: Draw the Body Shape
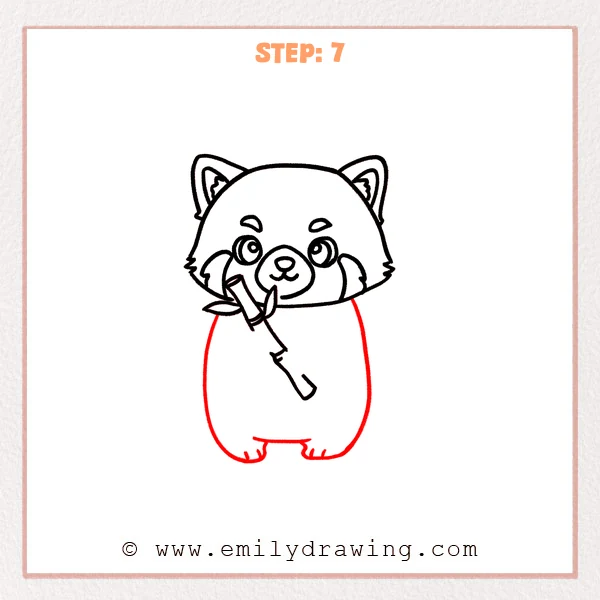
From under the head, draw a large rounded body that feels like a soft oval. Leave space at the bottom for two small feet. Keep the body wider than the head base for a sturdy animal shape.
Pro Tip: Round the body sides evenly so the character looks plush.
Step 8: Finish Arms, Paws, and Belly Patch
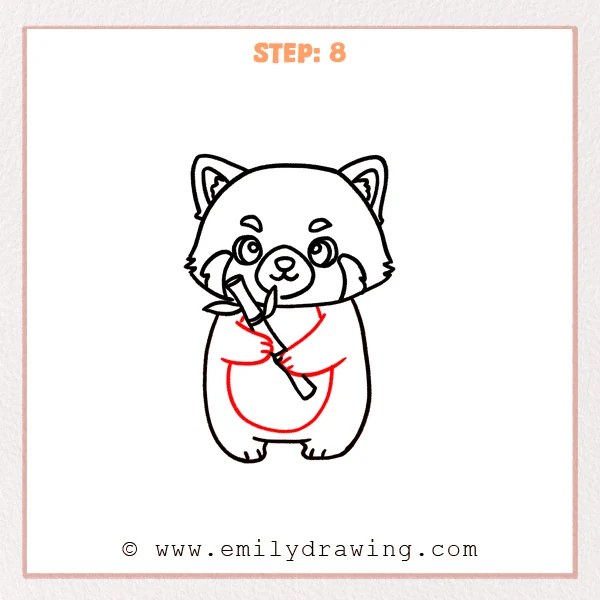
Draw the arms wrapping around the prop and refine the paws with small curved tips. Add a large curved belly patch line on the front of the body. Make the arms overlap the prop slightly to show a firm hold.
Pro Tip: Place both wrists at similar heights to make the grip look natural.
Step 9: Add a Tail Pattern and Final Line Work
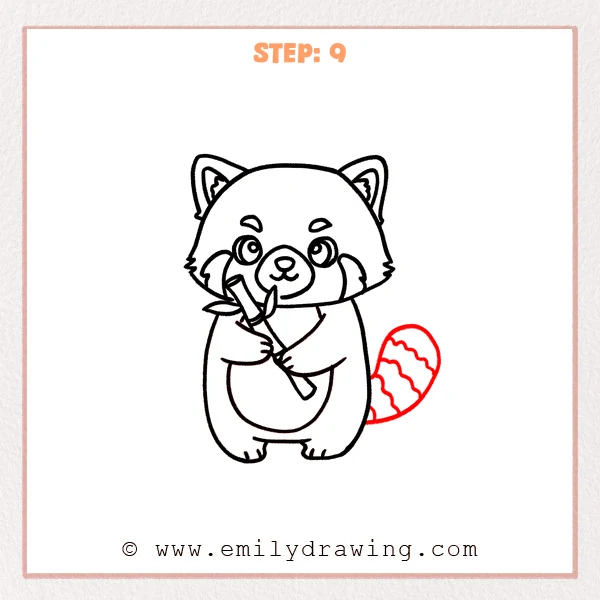
Draw a large tail on one side of the body. Add wavy stripe bands across the tail to create a simple pattern. Trace the main outlines darker and erase extra sketch marks for a clean finish.
Pro Tip: Keep the stripe spacing steady so the tail pattern looks tidy.
Step 10: Color in your drawing!
Fun Facts
- Many animals have big eyes in cartoons to look friendly and readable.
- Simple fur bumps can suggest fluff without drawing every hair.
- A prop, like a stick or branch, can add story to an animal pose.
Pin it now, Draw later!
You have completed a cute animals character by building the face first, then adding the body, paws, and tail. For coloring, try warm browns, soft oranges, or gentle grays, then shade lightly under the chin and along one side of the body. Add a small shadow under the feet to help the animal feel grounded.
One common beginner mistake is placing the eyes too close together. Keep a clear gap between them so the face stays calm and balanced. Practice this easy drawing tutorial again, and try changing the tail pattern or ear shape to create new animals.
Get the FREE Printable Drawing Guide
FREE Download Printable Animals Drawing Tutorial
Frequently Asked Questions
How can I make my animals drawing look cuter?
Use larger eyes, rounder cheeks, and softer curves in the outline.
What if my head looks uneven?
Redraw the head outline slowly, and compare both sides from the center.
How do I keep the pose clear when the paws hold something?
Let the arms overlap the object slightly, and keep the object lines straight and clean.