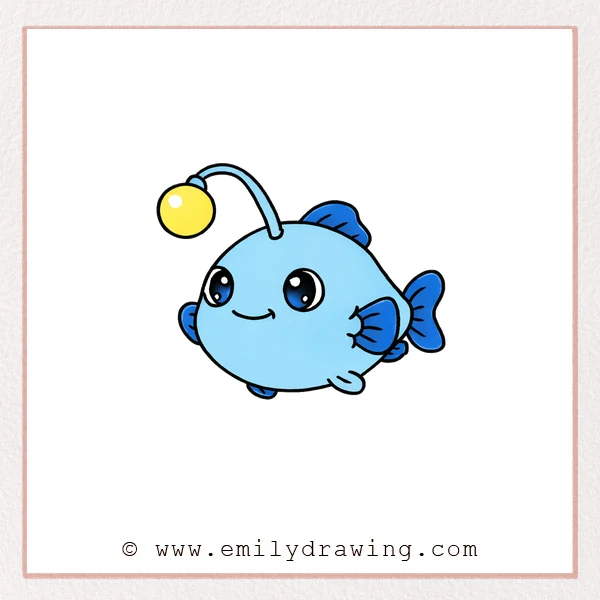
This how to draw an angler fish guide is calm and beginner-friendly.
Follow this step by step drawing to build a cute angler fish shape.
Take your time, and let each line stay simple and clear.
What You Will Need
- Pencil and eraser
- Black marker or pen
- Plain drawing paper
- Colored pencils or markers (optional)
Here are my RECOMMENDED Art Supplies!
- Crayola Coloring Set (140 Pieces – Mega Value!)
- 24 Colored Crayon Set
- A4 Printer Paper
- Crayola Coloring Pencils
- HP Home Printer with Instant Ink!
Time needed:
12 minutes.
Step-by-Step Drawing Guide
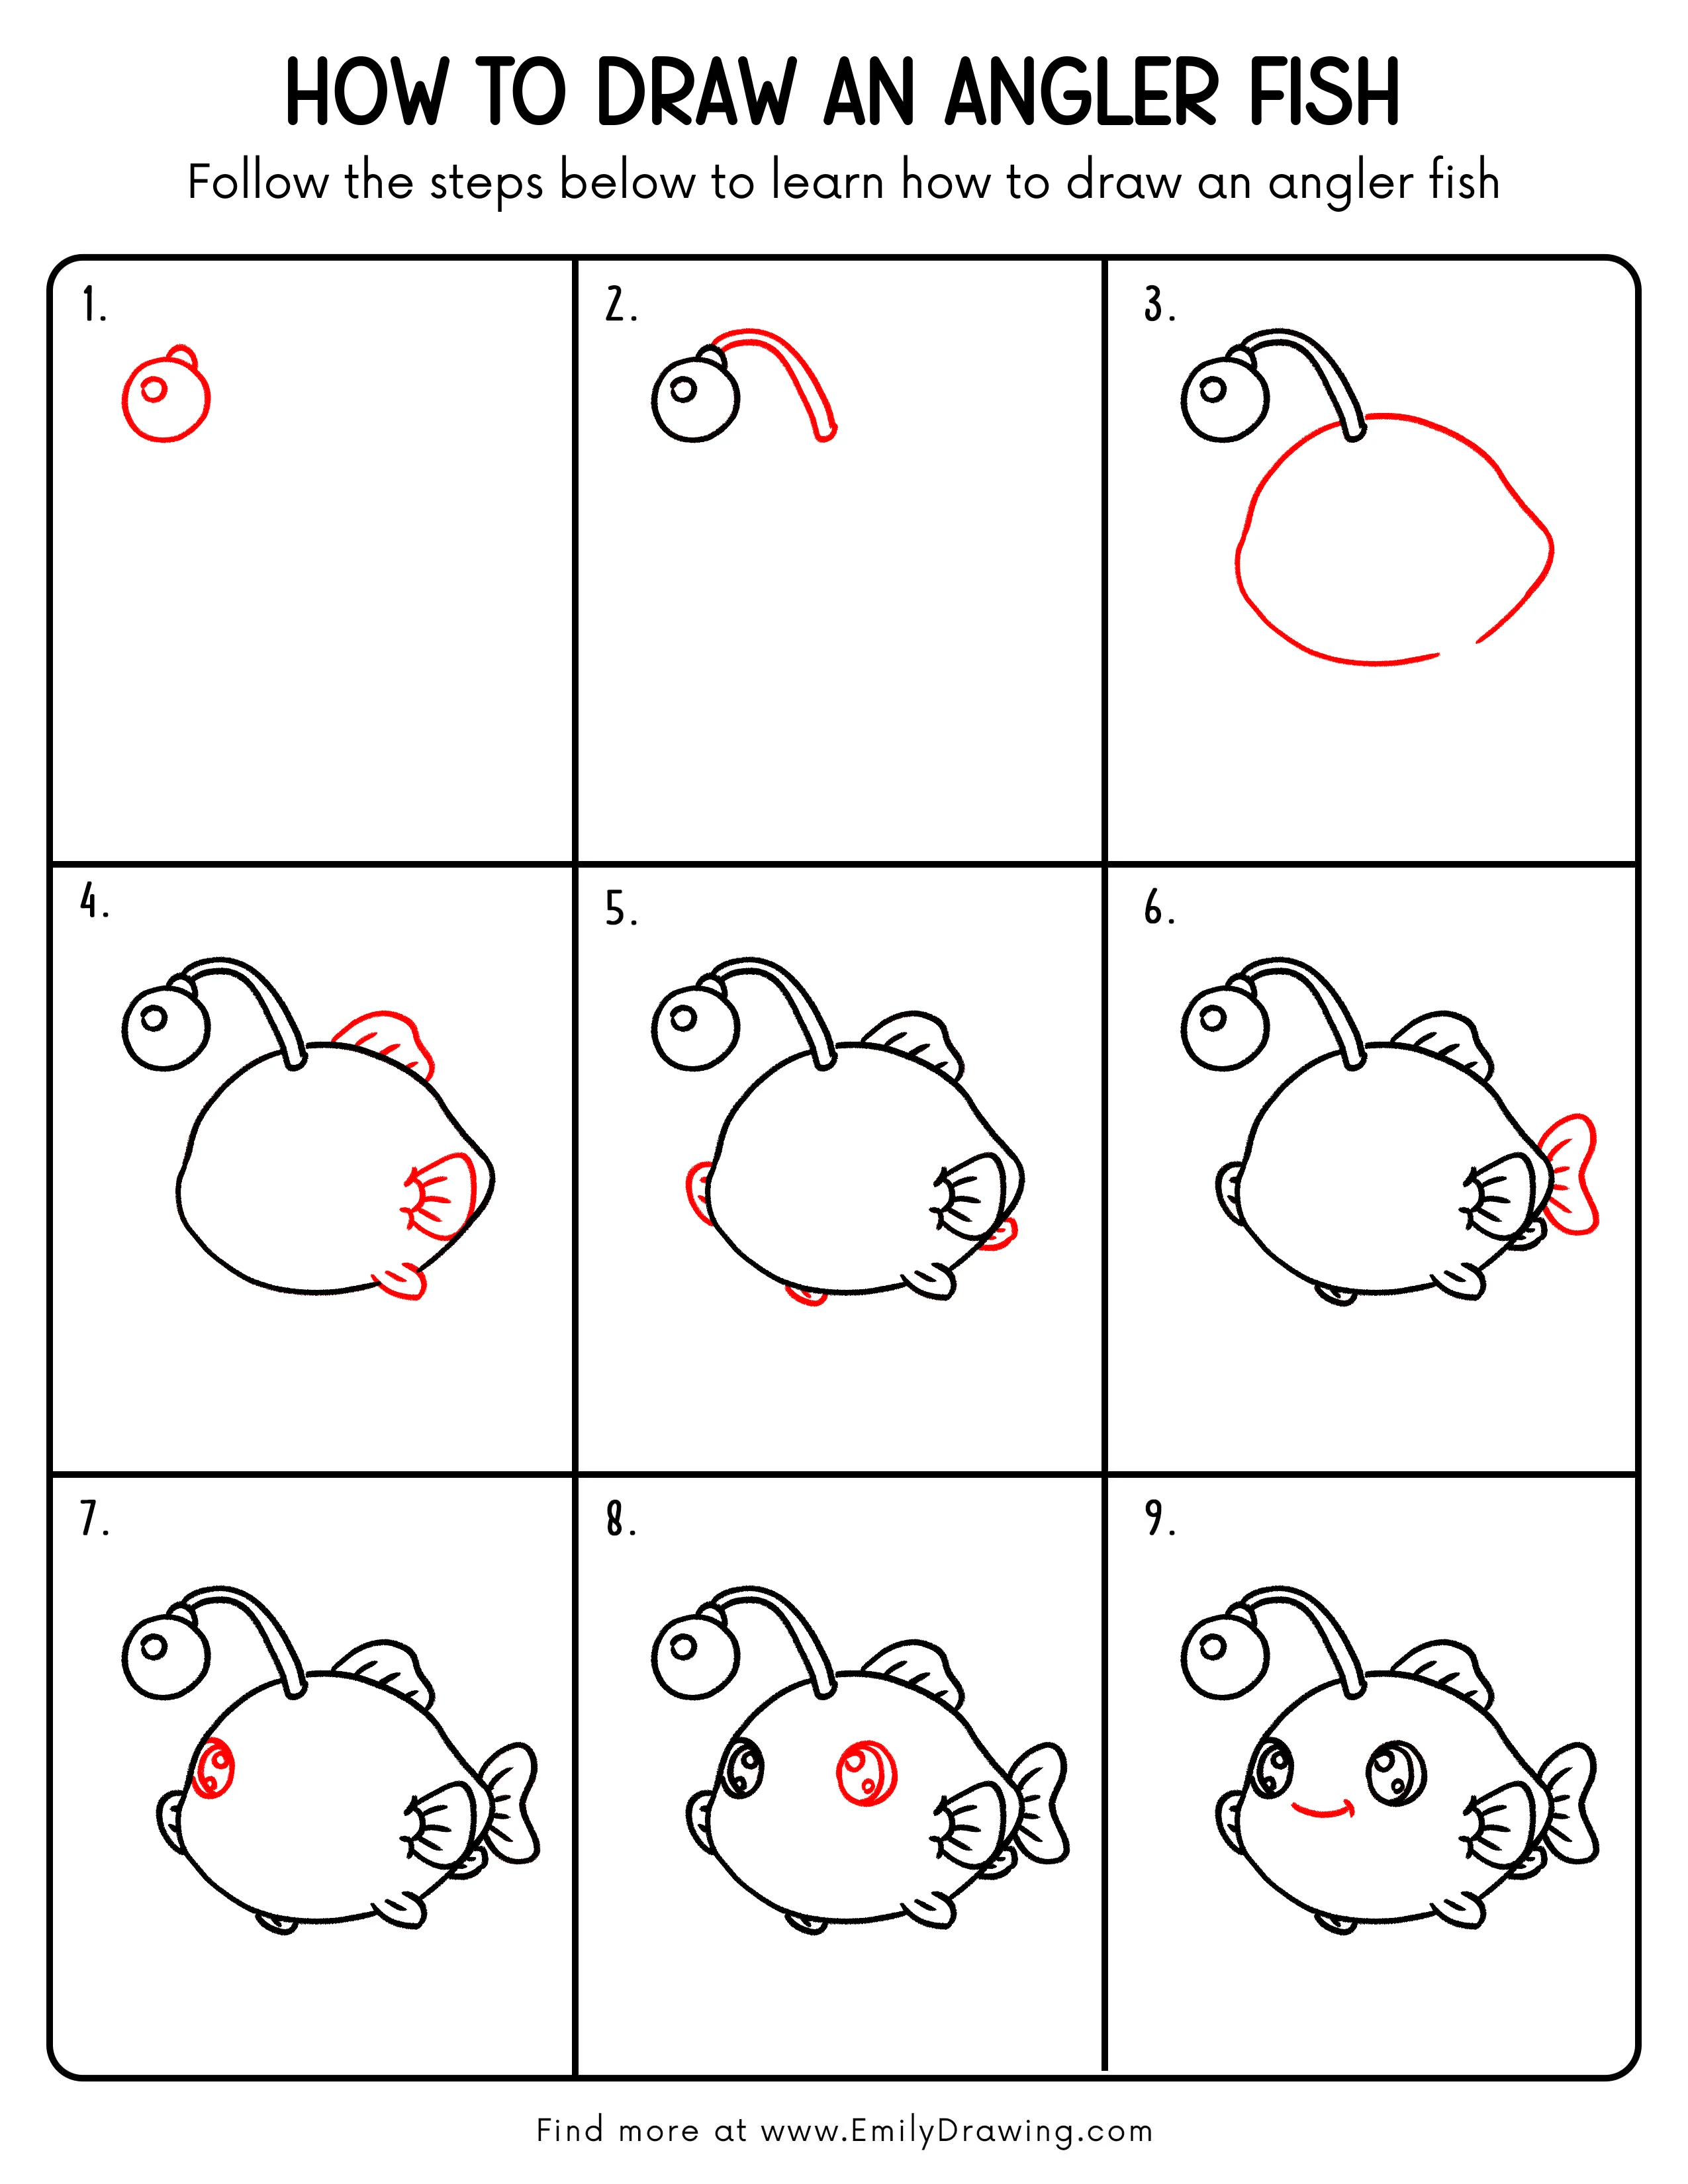
Step 1: Draw the Lure Light

Start with a large circle near the upper-left of your page.
Add a small circle inside to save a shiny highlight spot.
Pro Tip: Keep the circle smooth by turning your paper as you draw.
Step 2: Add the Curved Lure Stem
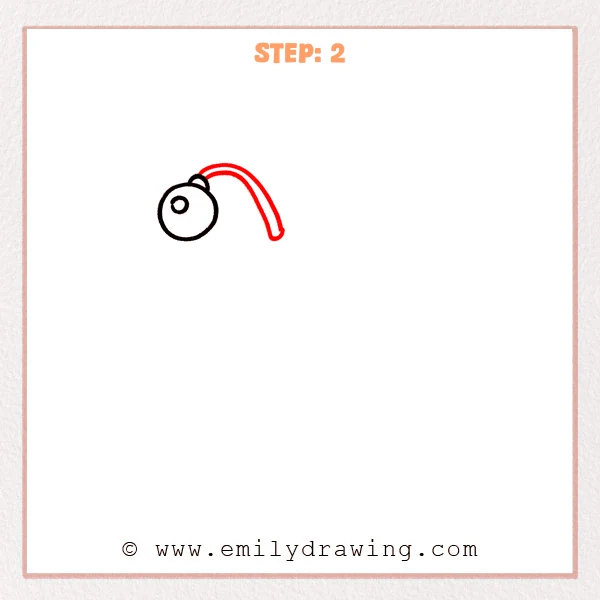
From the light, sketch a curved line bending down to the right.
Draw a second parallel curve to make the stem look thicker.
Pro Tip: Keep both stem lines evenly spaced for a neat look.
Step 3: Sketch the Round Body Shape

Under the stem, draw a big rounded body like a soft bean.
Let the bottom line stay slightly open if it feels easier.
Pro Tip: Make the body much bigger than the light for good balance.
Step 4: Add the Right Fin and Bottom Fin
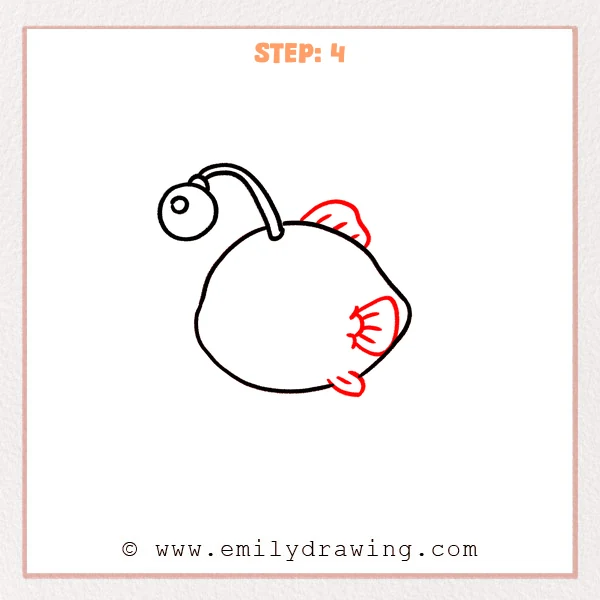
On the right side, add a rounded fan-shaped fin attached to the body.
Under the body, draw a small oval fin that peeks out gently.
Pro Tip: Press lightly so you can adjust the fin size easily.
Step 5: Add the Left Fin
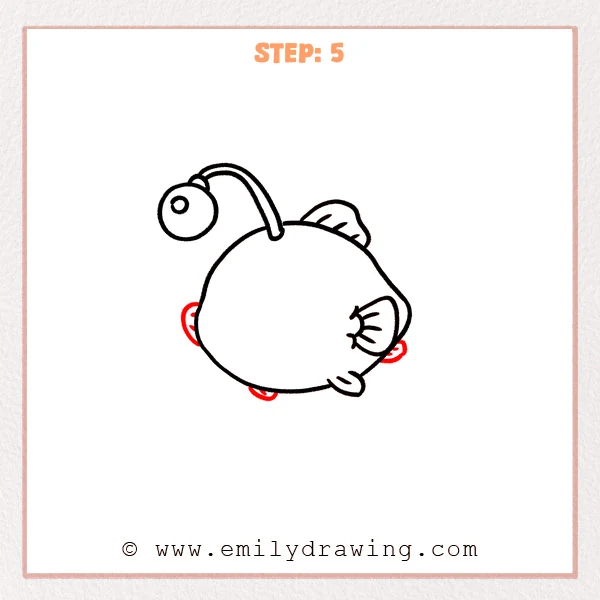
On the left side, draw a smaller fan-shaped fin coming from the edge.
Keep the curves simple, and let the fin overlap the body slightly.
Pro Tip: Angle both side fins in a similar direction for harmony.
Step 6: Draw the Tail and Top Fin
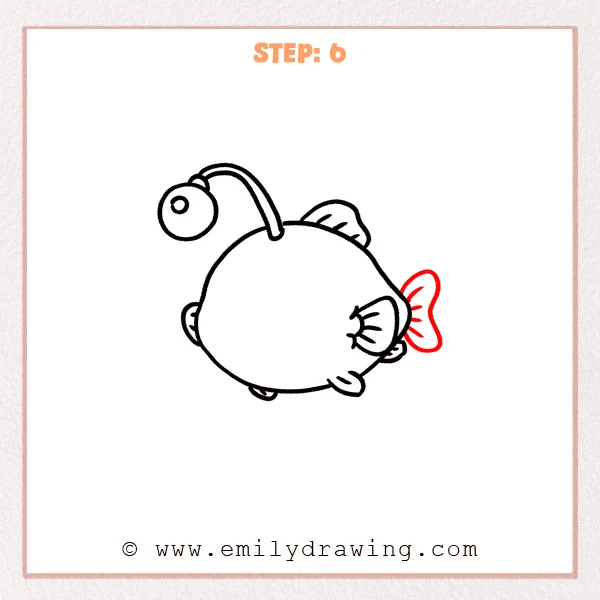
At the back, draw a bow-shaped tail fin with a pinched middle.
On the top of the body, add a small curved fin like a leaf.
Pro Tip: Round the tail edges to keep the character soft.
Step 7: Add the First Big Eye
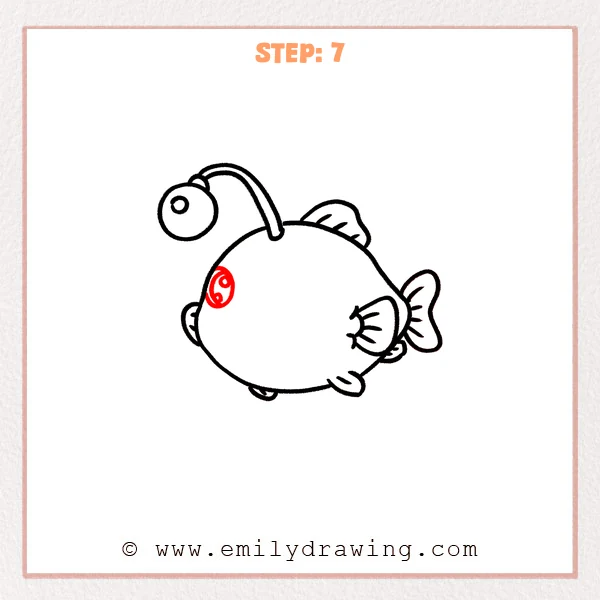
Place a large circular eye on the front-left area of the body.
Add a pupil and a couple of small highlight circles inside.
Pro Tip: Leave a thin white border around the eye for clarity.
Step 8: Add the Second Eye
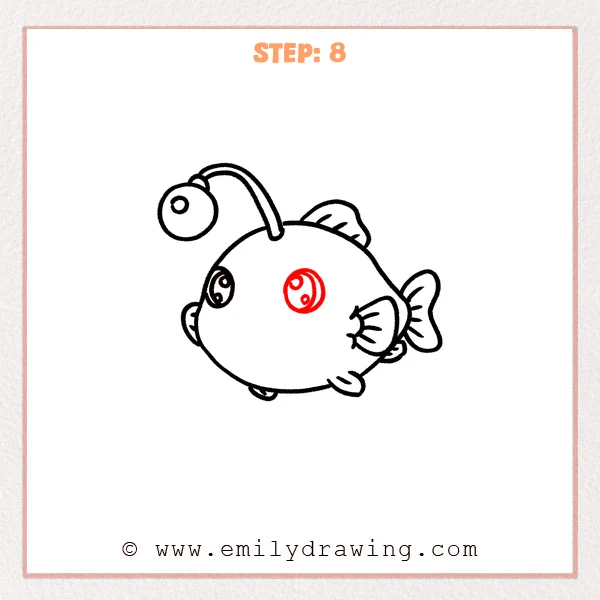
Draw a matching eye slightly right of the body’s center.
Repeat the same pupil and highlight style to match the first eye.
Pro Tip: Put both highlights on the same side to show one light source.
Step 9: Draw the Smile and Finish Details
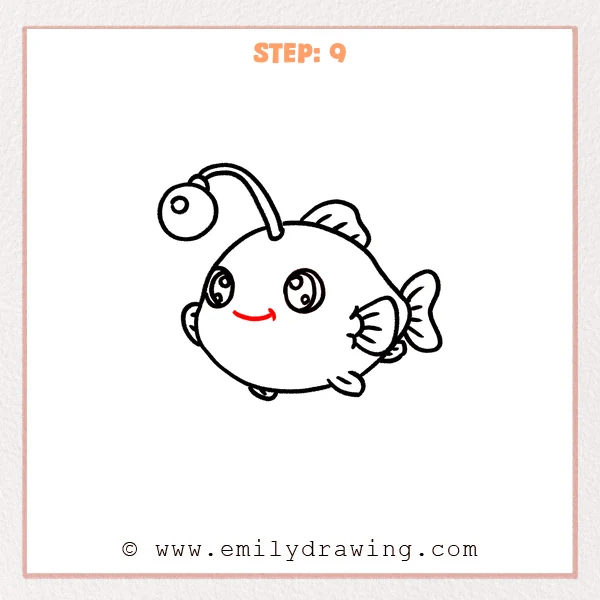
Under the eyes, add a short curved line for a gentle smile.
Draw a few simple fin rays, then trace key outlines a bit bolder.
Pro Tip: Trace slowly and smoothly to keep the final lines clean.
Step 10: Color in your drawing!
Fun Facts
- Angler fish use a glowing lure to attract prey in deep water.
- Many angler fish live where sunlight cannot reach at all.
- Their round bodies can look surprising and cute in cartoons.
Pin it now, Draw later!

You built the lure, body, fins, eyes, and a friendly smile.
For coloring, try a dark gray or brown body with a bright lure.
Add shading under the belly and behind fins for soft depth.
A common beginner mistake is making the lure stem too short.
Keep practicing this easy drawing tutorial, and try new fish poses next.
Get the FREE Printable Drawing Guide
FREE Download Printable Angler Fish Drawing Tutorial
Frequently Asked Questions
How do I make the angler fish look cuter?
Use larger eyes, a smaller smile, and rounder fin edges.
What if my body shape looks uneven?
Lightly erase and redraw the curve using slow, steady strokes.
Can I draw this angler fish with markers?
Yes, ink the outline first, then color with light marker layers.