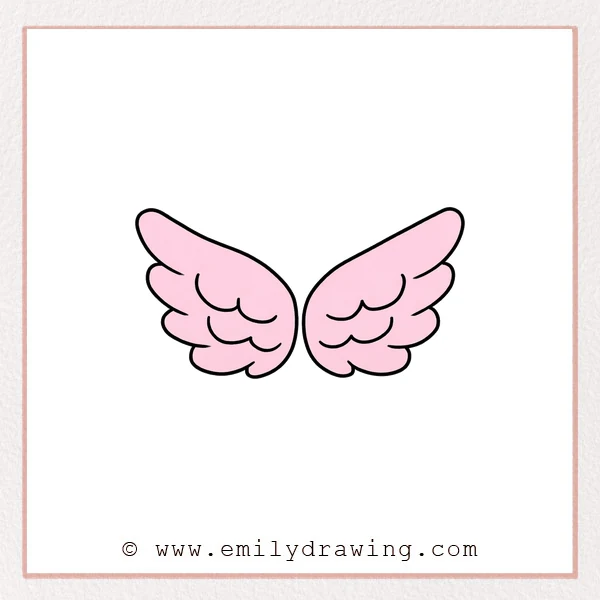
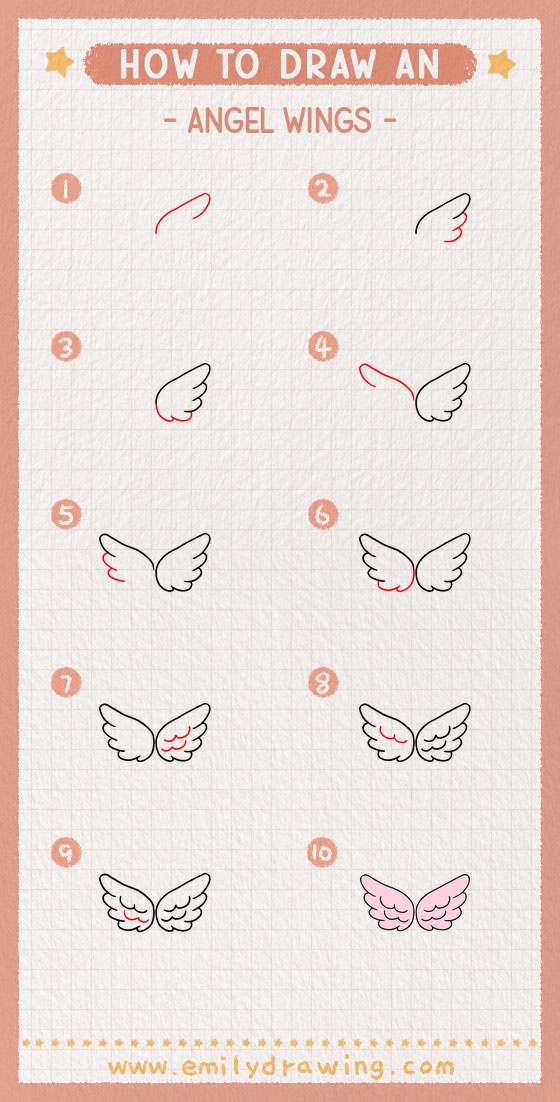
This easy drawing tutorial shows how to draw angel wings step by step with simple curves. If you are learning drawing for beginners, these wing shapes are calm and friendly to practice. Take your time, and let each line stay smooth and light.
What You Will Need
- Pencil
- Eraser
- Black pen or marker (optional)
- Paper
- Colored pencils or markers (optional)
Here are my RECOMMENDED Art Supplies!
- Crayola Coloring Set (140 Pieces – Mega Value!)
- 24 Colored Crayon Set
- A4 Printer Paper
- Crayola Coloring Pencils
- HP Home Printer with Instant Ink!
Time needed:
29 minutes.
Step-by-Step Drawing Guide
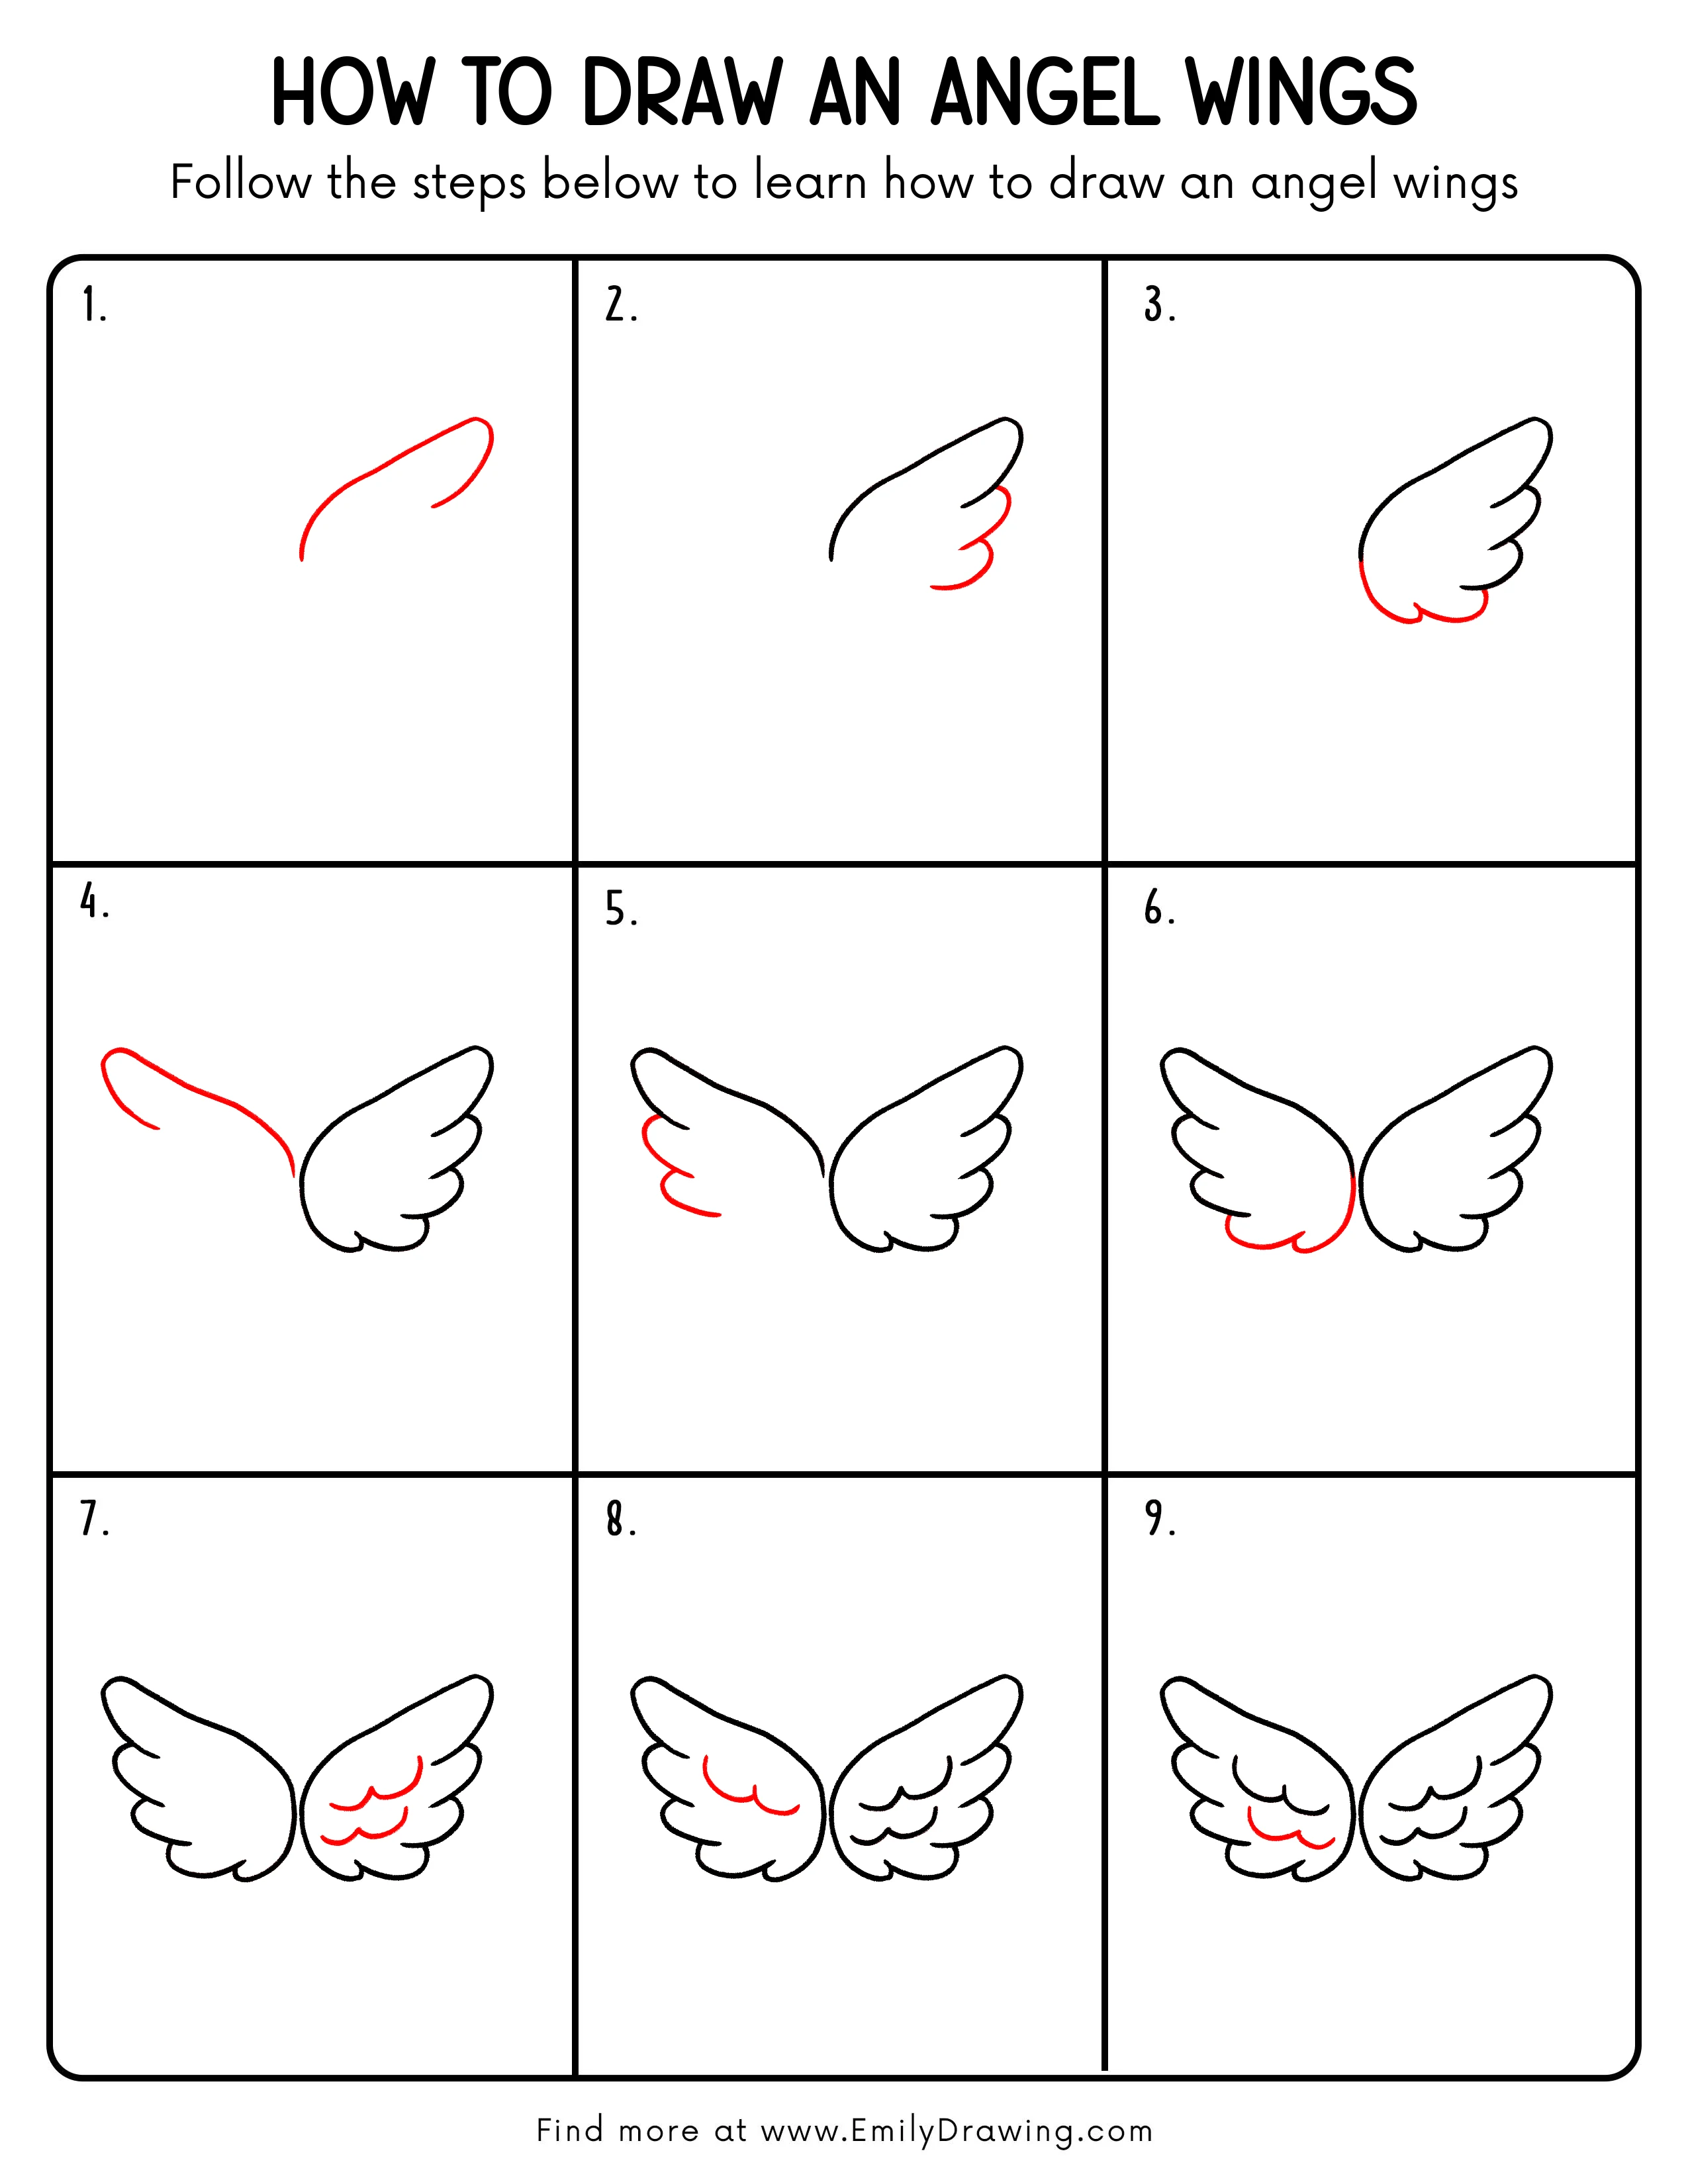
Step 1: Sketch the Top Curve of the Right Wing
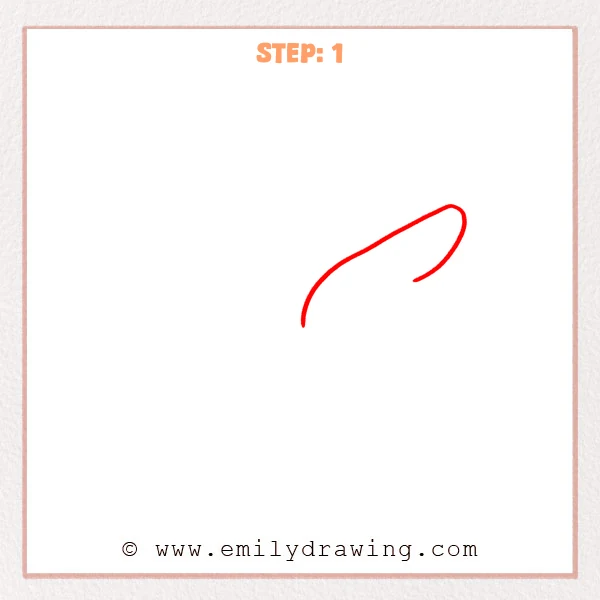
Start on the right side and sketch a long, smooth arc like a tilted leaf. Let the left end stop near the center, leaving room for the wing base.
Pro Tip: Draw this arc in one slow motion to keep it elegant.
Step 2: Add Three Outer Feather Bumps
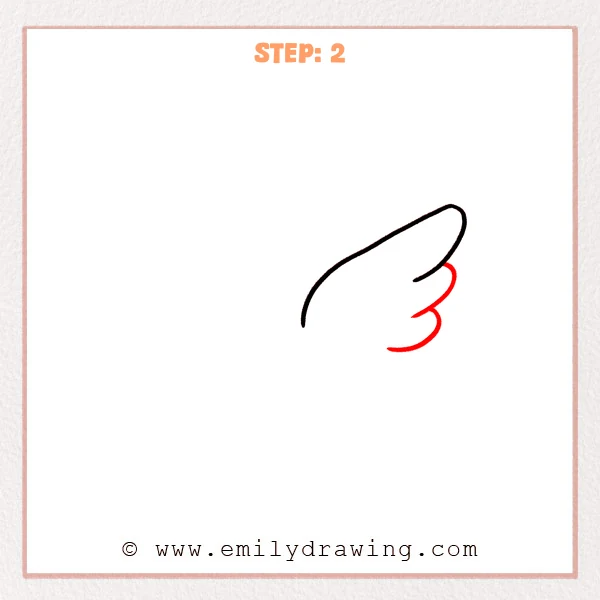
Under the top arc, add three rounded scallops along the lower outer edge. Keep each bump soft and slightly pointed at the ends.
Pro Tip: Make the lower bumps a little larger for a natural flow.
Step 3: Close the Bottom and Shape the Wing Base
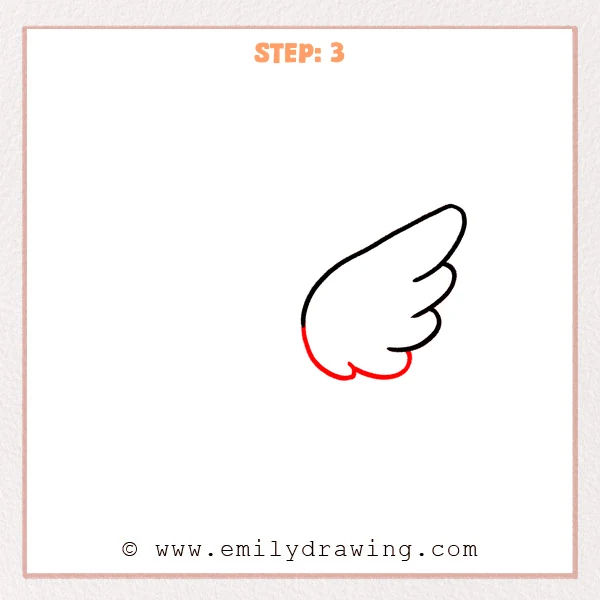
Connect the feather bumps with a bigger curve to form the rounded bottom of the wing. Add a short inward curve near the center to suggest the wing base.
Pro Tip: Keep the base curve rounded so the wing feels gentle, not sharp.
Step 4: Sketch the Top Curve of the Left Wing
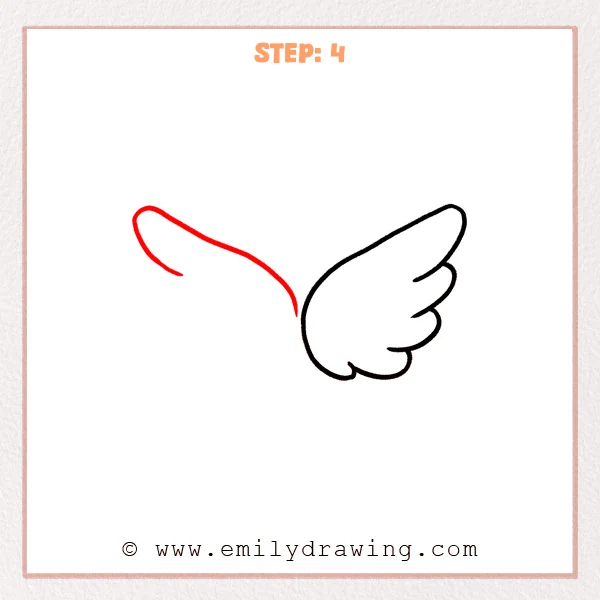
On the left side, sketch a matching long arc that spreads up and left. Aim to place the tip at a similar height as the right wing.
Pro Tip: Lightly compare both top tips before pressing harder with your pencil.
Step 5: Add Outer Feathers and Close the Left Wing

Add three rounded feather bumps along the lower outer edge of the left wing. Then connect them with a smooth bottom curve that returns toward the center.
Pro Tip: Keep the number and spacing of bumps similar on both wings.
Step 6: Refine the Center Connection
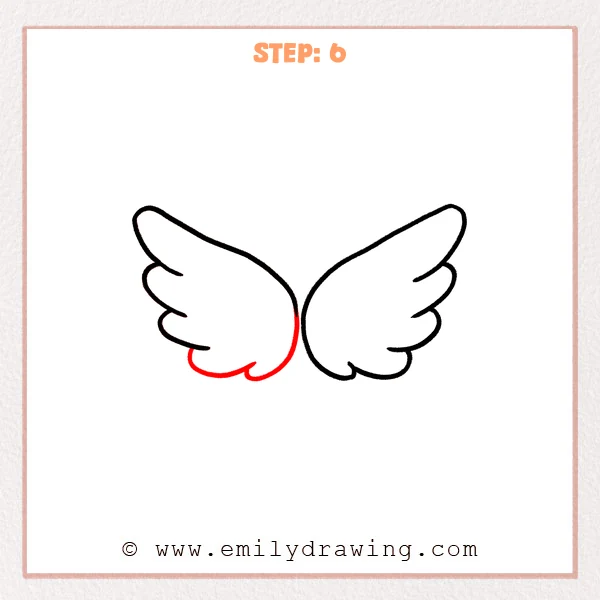
Draw two opposing inner curves where the wings meet in the middle. Let the gap stay narrow so the angel wings feel paired and balanced.
Pro Tip: Use a lighter line in the center so it does not look like a thick pillar.
Step 7: Add Inner Feather Layers on the Right Wing
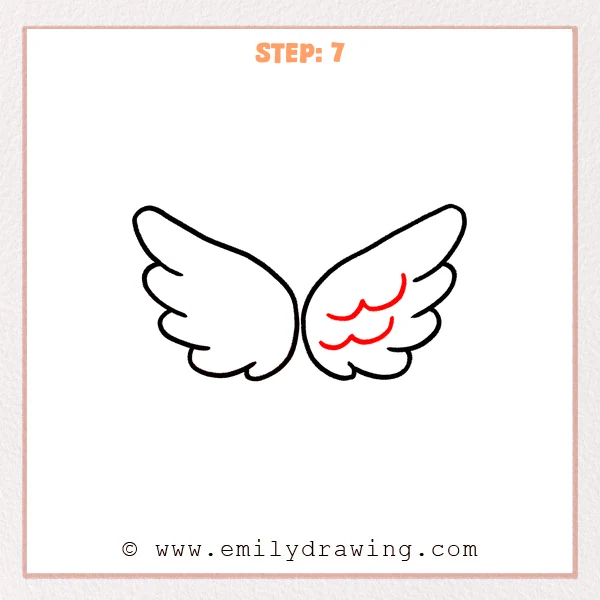
Inside the right wing, draw two to three short curved lines like soft cloud shapes. Follow the wing’s direction so the feather layers feel stacked.
Pro Tip: Leave a small gap between inner lines and the outer outline for a clean look.
Step 8: Add Inner Feather Layers on the Left Wing
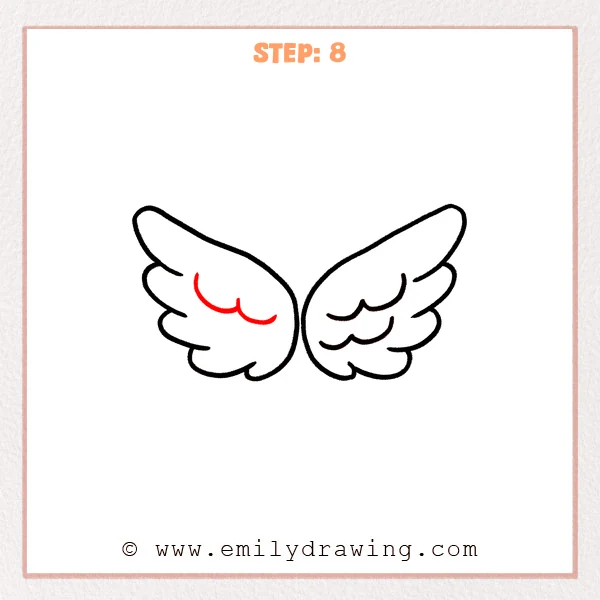
Inside the left wing, add two to three matching curved feather lines. Make the top inner curve slightly longer, then stack the shorter ones below.
Pro Tip: Start with the top inner curve to help the spacing stay even.
Step 9: Add One More Feather Curve and Clean the Line Weight
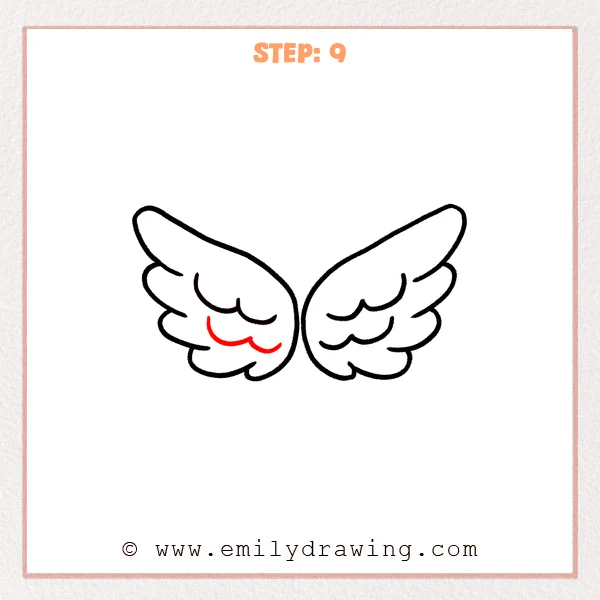
Add one extra inner feather curve on each wing to enrich the texture. Then tidy the outlines, gently thickening key edges to make the angel wings stand out.
Pro Tip: Thicken lines gradually so the wings stay soft and not too heavy.
Step 10: Color in your drawing!
Fun Facts
- Many artists draw angel wings using leaf-like curves because they feel light and airy.
- Feather layers are often shown with simple arcs, not full feather shapes, to keep drawings clear.
- Symmetry helps wings look calm, even when the lines are playful.
Pin it now, Draw later!
You now have a clear pair of angel wings with layered feather details. For coloring, try light gray shading near the center base and under each feather curve, then keep the outer edges brighter. A common beginner mistake is making one wing wider than the other, so compare both tips and bottoms before you ink. Practice this step by step drawing a few times, and try changing the wing size for new designs in your next easy drawing tutorial.
Get the FREE Printable Drawing Guide
FREE Download Printable Angel Wings Drawing Tutorial
Frequently Asked Questions
How do I make my angel wings look more symmetrical?
Lightly mark the center line and match the top tips first. Then compare the bottom curves before darkening your lines.
What if my feathers look uneven or messy?
Erase and redraw the feather bumps using slower, rounder arcs. Keep small gaps between inner feather lines and the outline.
Can I draw these angel wings in a different style?
Yes, you can add more feather layers for a realistic look. You can also simplify to two bumps for a very cute, minimal style.