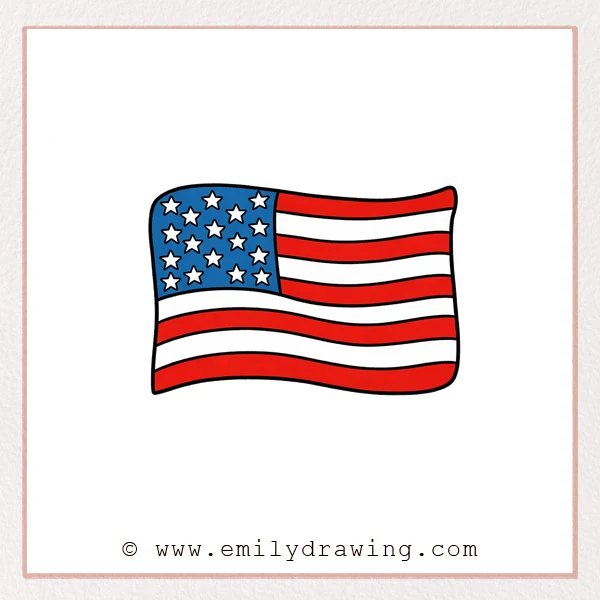
In this easy drawing tutorial, you will learn how to draw an American flag step by step. We will use simple, wavy lines to show the flag moving in the wind. This drawing for beginners focuses on clean shapes and steady spacing.
What You Will Need
- Pencil
- Eraser
- Black marker or pen
- Paper
- Coloring tools (colored pencils, crayons, or markers)
Here are my RECOMMENDED Art Supplies!
- Crayola Coloring Set (140 Pieces – Mega Value!)
- 24 Colored Crayon Set
- A4 Printer Paper
- Crayola Coloring Pencils
- HP Home Printer with Instant Ink!
Time needed:
18 minutes.
Step-by-Step Drawing Guide
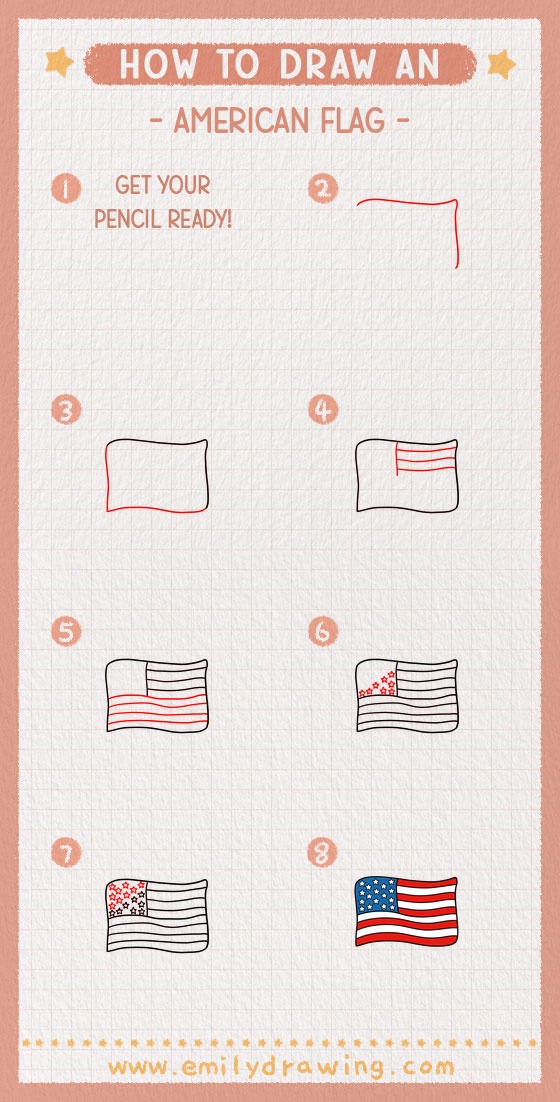
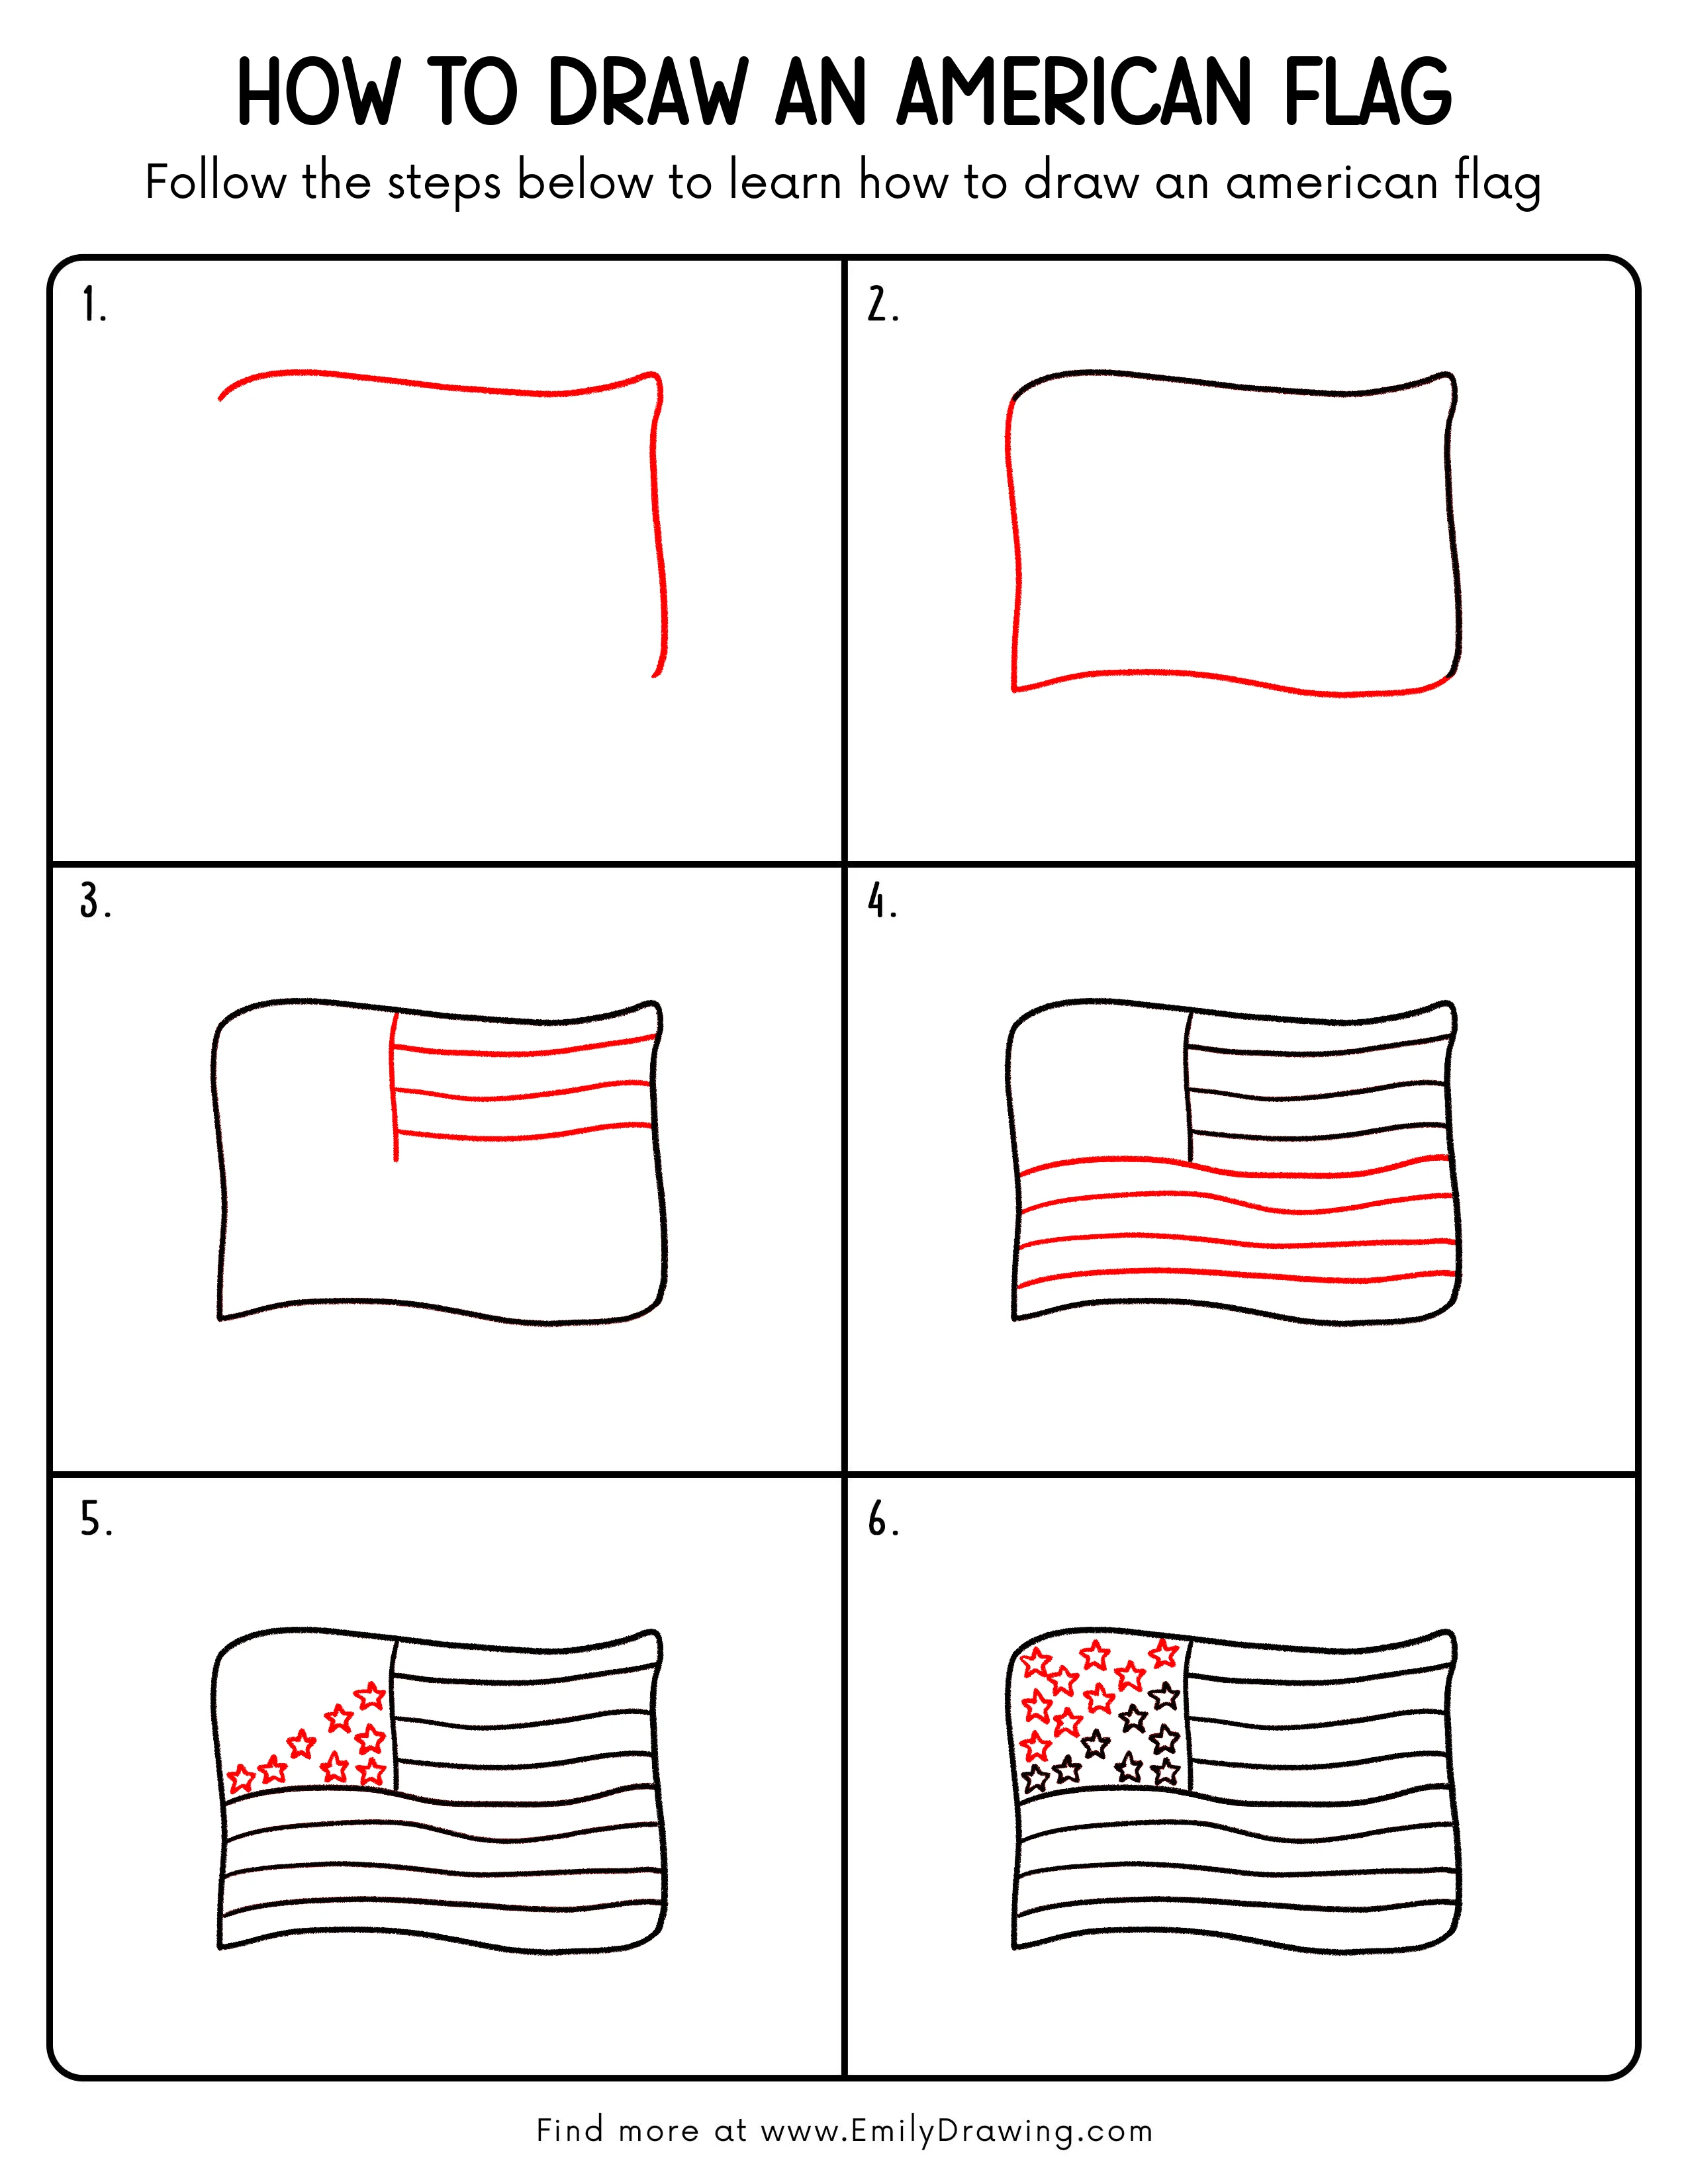
Step 1: Sketch the Wavy Top and Right Edge
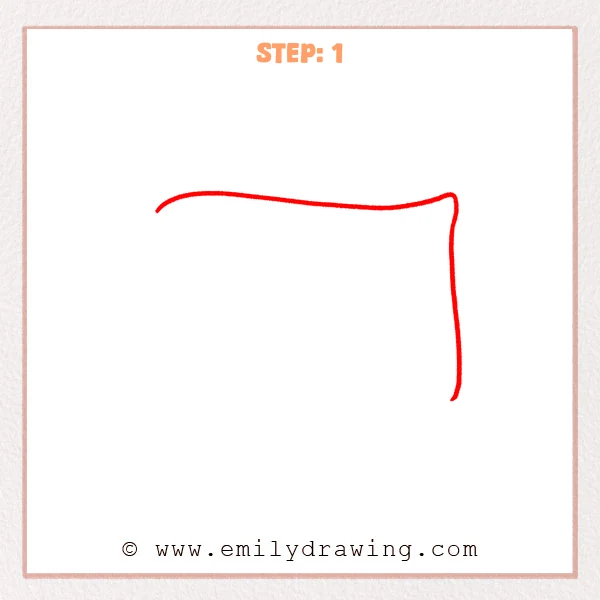
Start with a long, gently wavy line for the top of the American flag. At the right end, draw a slightly curved vertical line downward to begin the side.
Pro Tip: Keep the waves small so the flag looks softly wind-blown.
Step 2: Complete the Outer Flag Shape

Draw the left edge down from the top line, keeping it slightly curved. Add a gently wavy bottom line that connects back to the right edge to form the full flag shape.
Pro Tip: Make both side edges curve in a similar way for a consistent wave.
Step 3: Add the Canton and Top Stripes
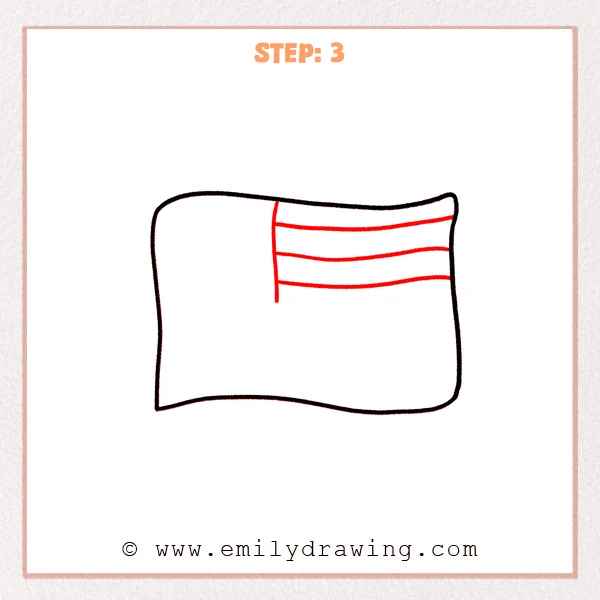
Draw a vertical line near the left side to mark the canton (the star area). On the right section, add several parallel wavy horizontal lines to begin the top stripes.
Pro Tip: Keep the spacing even so the stripes feel tidy.
Step 4: Extend the Stripes Across the Lower Flag
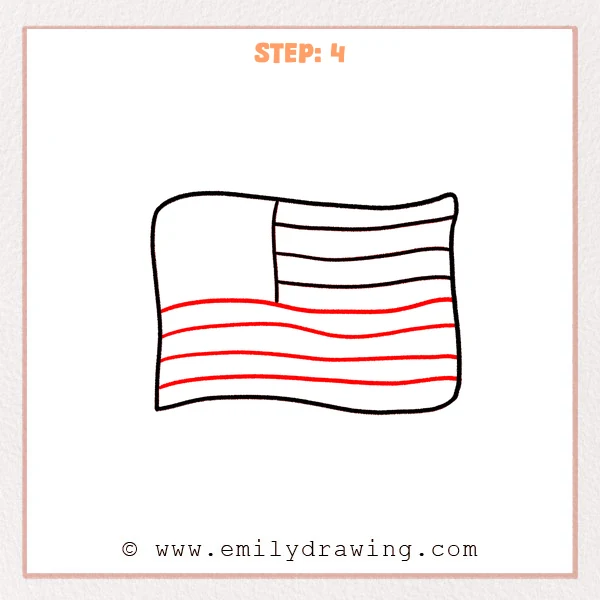
Continue adding wavy horizontal lines across the rest of the flag, including the lower left section under the canton. Let each stripe follow the same wave rhythm as the outline.
Pro Tip: Sketch lightly first, then darken once the spacing feels right.
Step 5: Draw the First Stars in the Canton
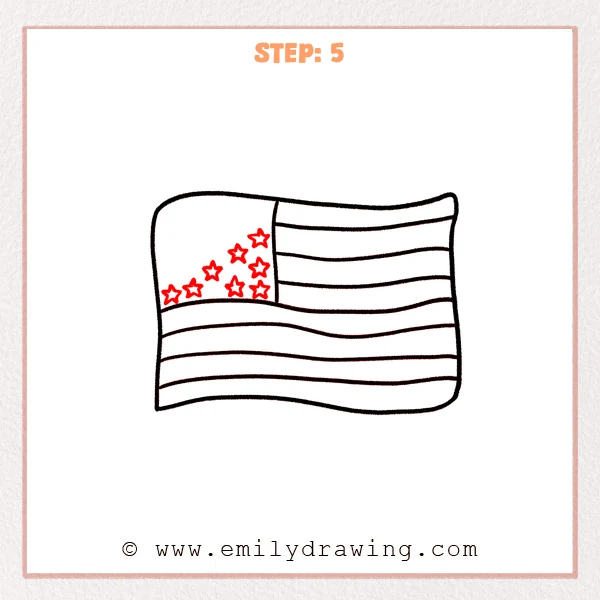
Inside the canton, draw a few small five-point stars, keeping them similar in size. Spread them out to start a balanced pattern without crowding.
Pro Tip: Draw the stars slightly small at first so you have room to arrange them.
Step 6: Fill the Canton and Refine the Lines
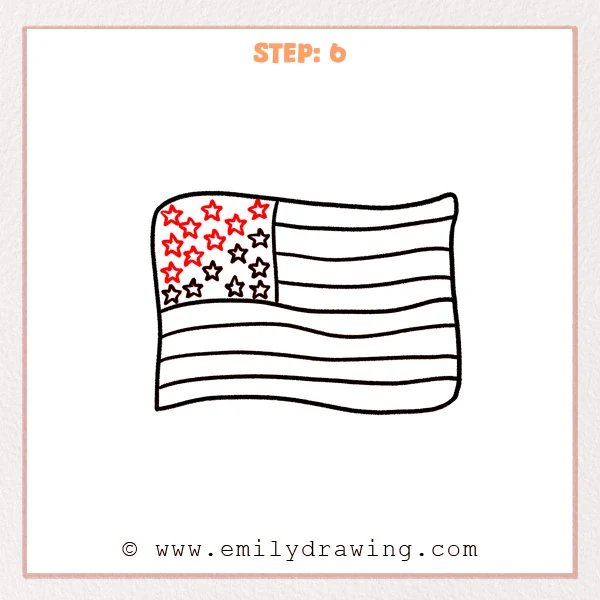
Add more stars until the canton looks evenly filled. Check that the stripes stay parallel, then slightly thicken the outer border for a clean finish.
Pro Tip: Leave consistent tiny gaps between stars for a cleaner pattern.
Step 7: Color in your drawing!
Fun Facts
- The American flag is often called the “Stars and Stripes.”
- The stars represent states, and the stripes represent the original colonies.
- A wavy outline helps your drawing look like a real flag in motion.
Pin it now, Draw later!
You have learned how to draw an American flag step by step by building the outline, adding stripes, and filling the canton with stars. For coloring, use red for the alternating stripes, blue for the canton, and keep the other stripes white. Add light shading under some wave curves to make the fabric look folded, and keep the darkest shading near the edges. A common beginner mistake is uneven stripe spacing, so take your time to keep the gaps consistent. Practice this step by step drawing again, and try drawing the flag with a bigger wave for a new look.
Get the FREE Printable Drawing Guide
FREE Download Printable American Flag Drawing Tutorial
Frequently Asked Questions
How do I keep the stripes evenly spaced?
Lightly mark small guide points down the side before drawing each stripe line. Then connect the guides with matching wavy lines.
My stars look messy—what can I do?
Draw each star as five short strokes and keep them small. If needed, place dots first to plan the rows.
How can I make the flag look more like fabric?
Add gentle shading on the underside of each wave curve. Keep the shading soft so the flag still looks clean and bright.