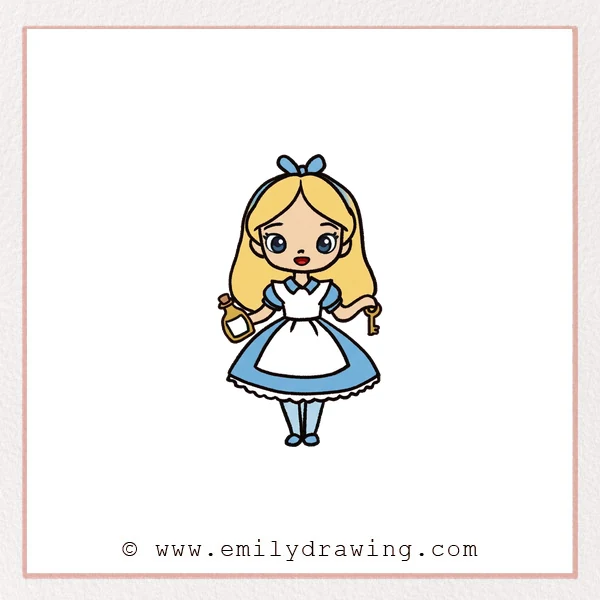
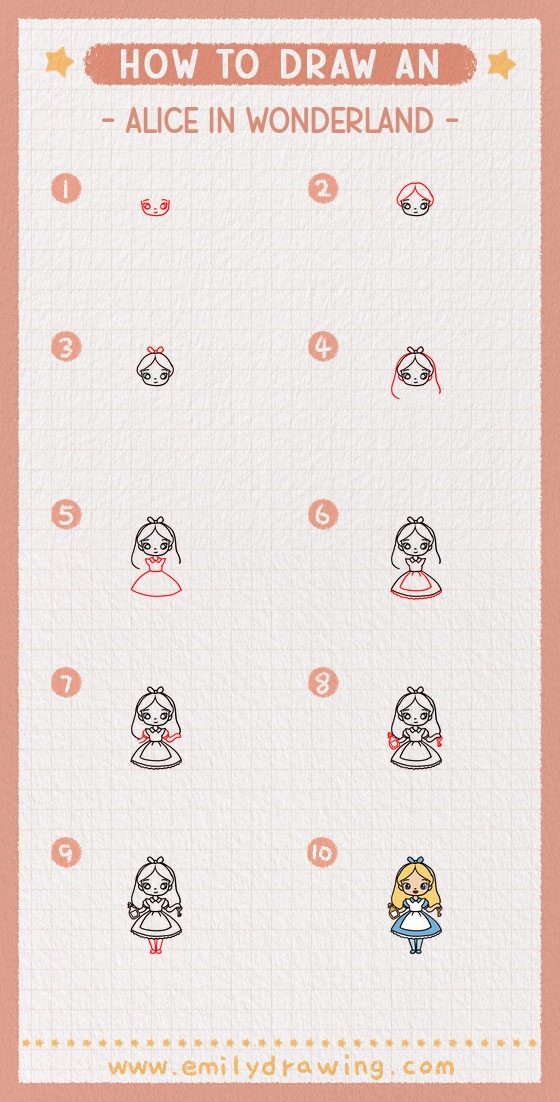
This step by step drawing guide shows how to draw Alice in Wonderland in a cute, simple style. You will build her face, hair, dress, and props using easy shapes. It is a calm, friendly drawing for beginners to practice line control and balance.
What You Will Need
- Pencil
- Eraser
- Black pen or marker
- Paper
- Colored pencils, crayons, or markers (optional)
Here are my RECOMMENDED Art Supplies!
- Crayola Coloring Set (140 Pieces – Mega Value!)
- 24 Colored Crayon Set
- A4 Printer Paper
- Crayola Coloring Pencils
- HP Home Printer with Instant Ink!
Time needed:
25 minutes.
Step-by-Step Drawing Guide
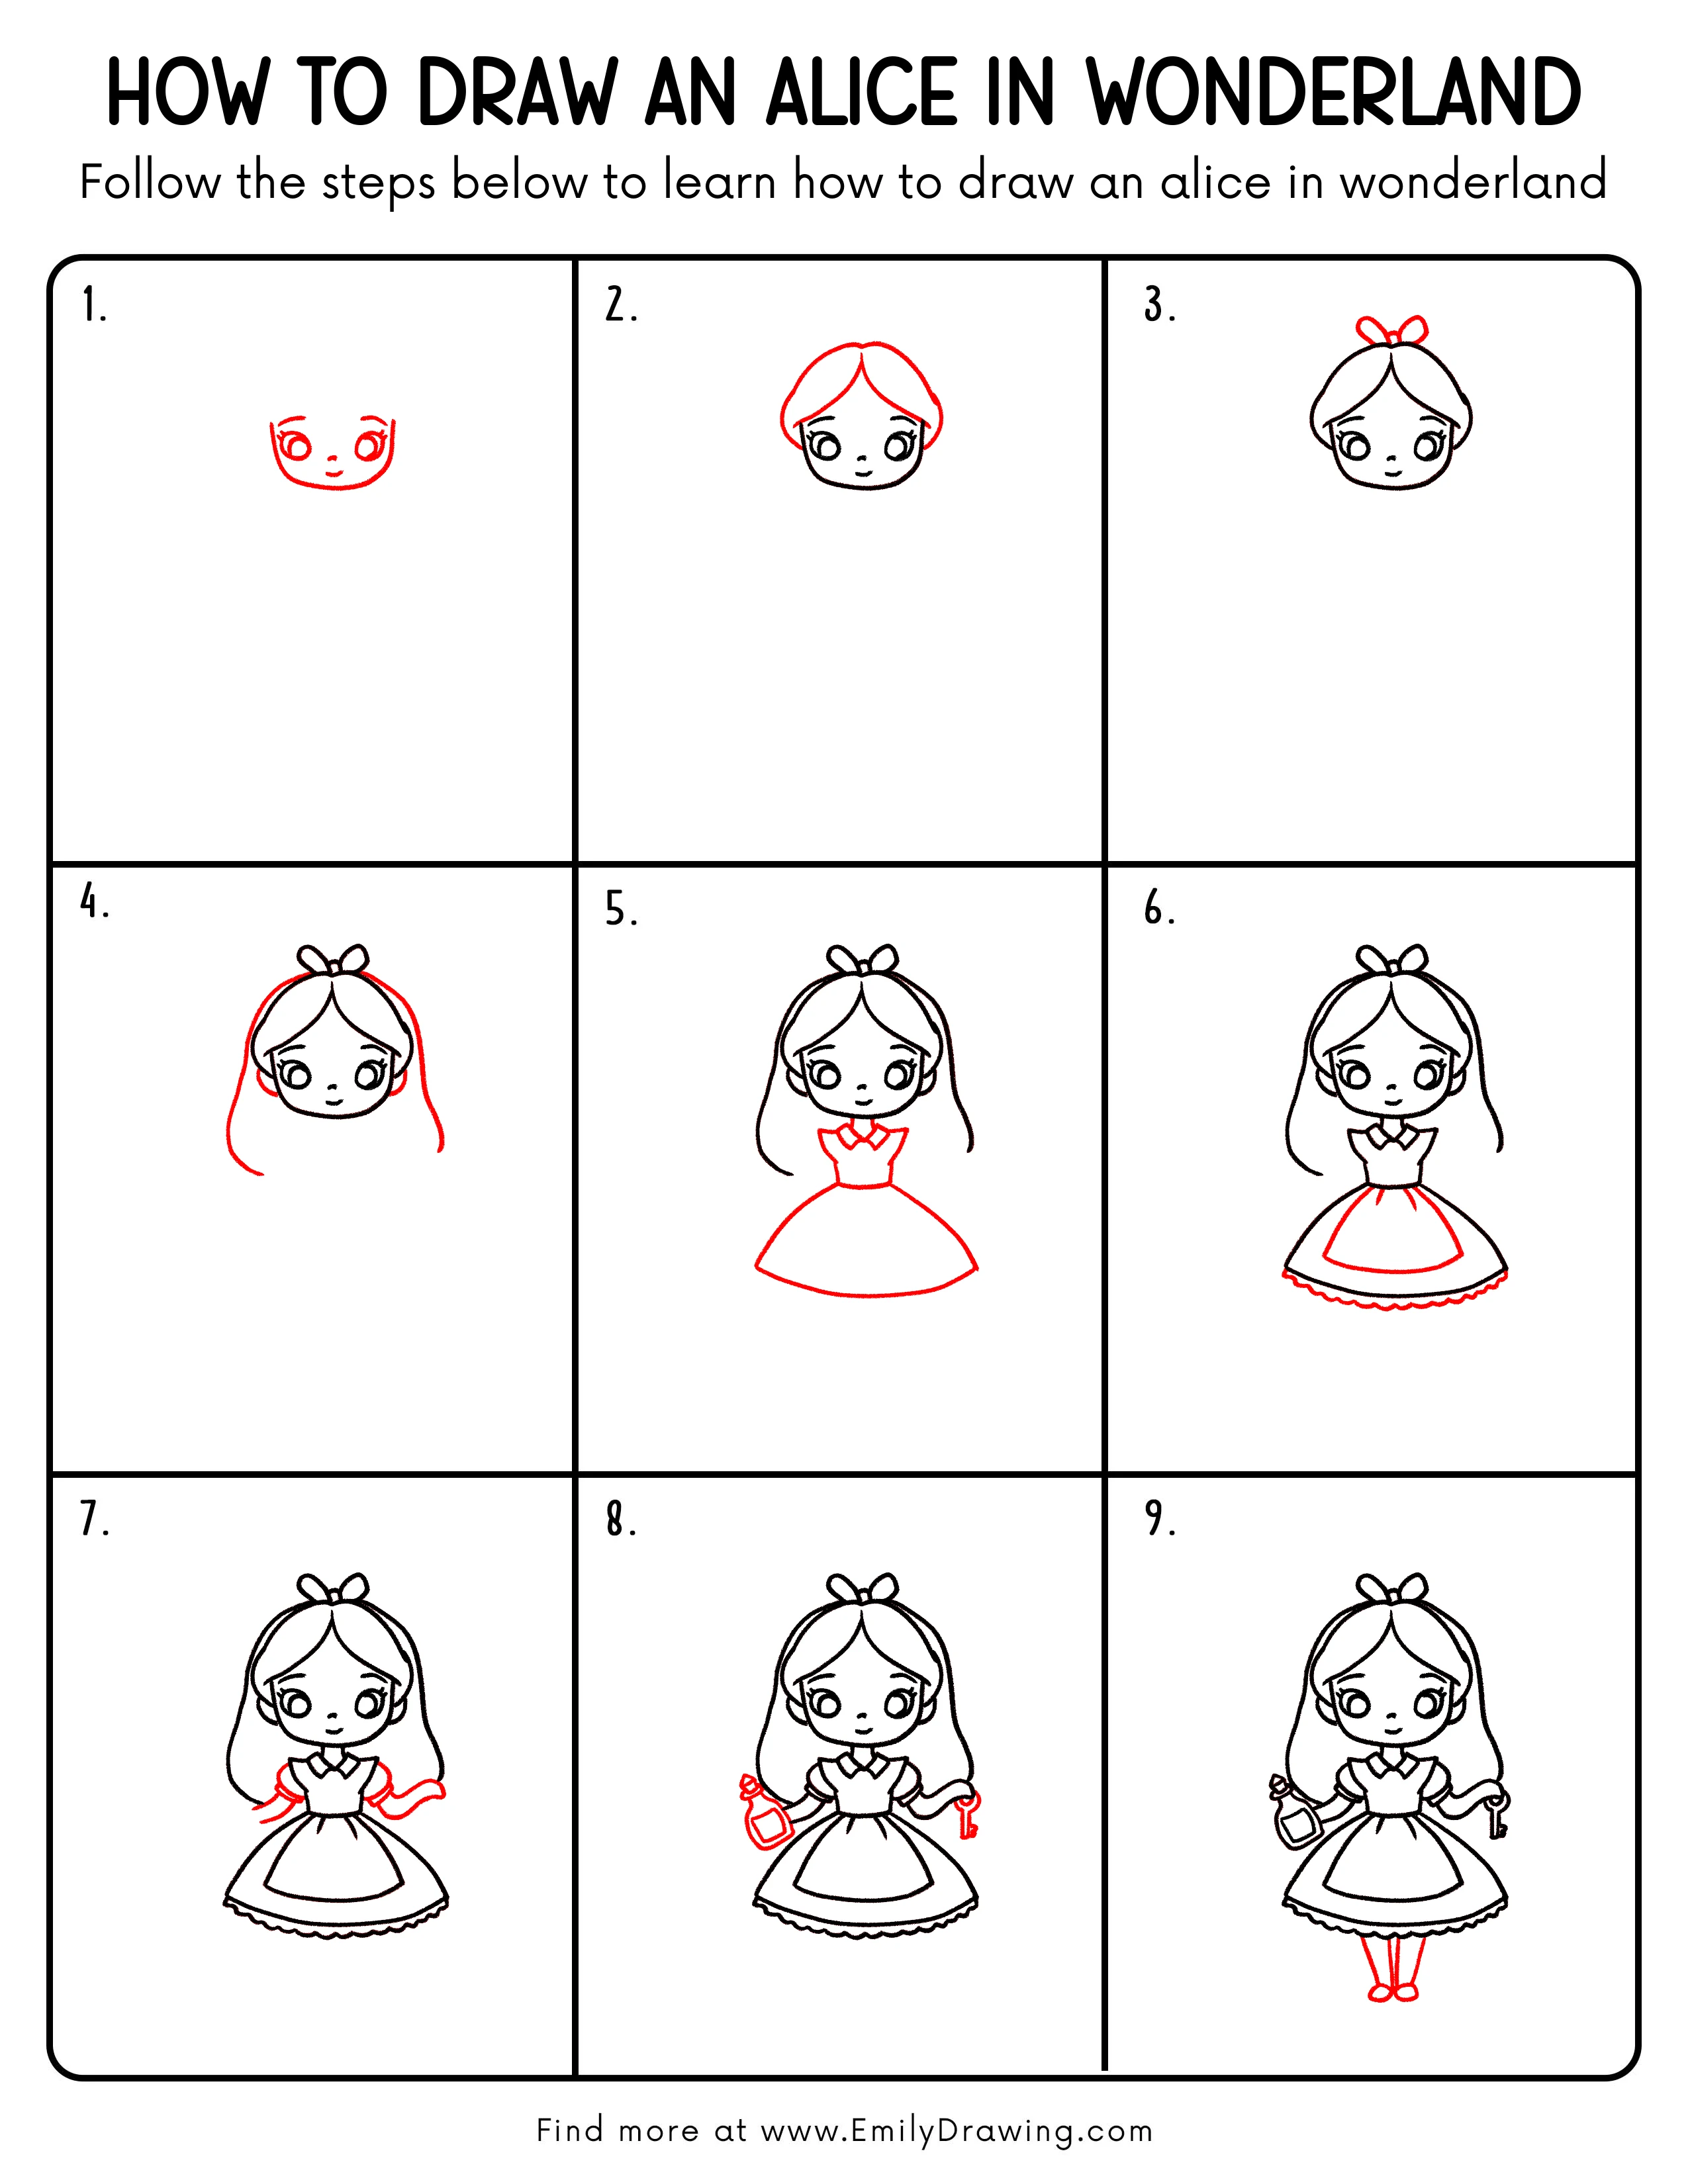
Step 1: Draw the Face Features
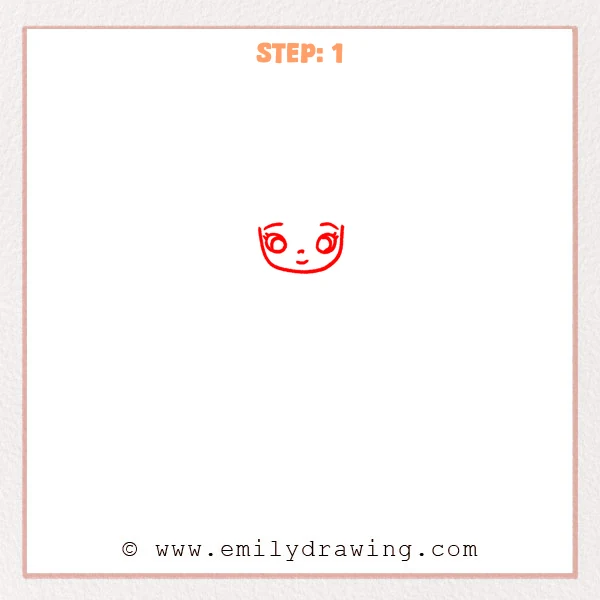
Start with a soft U-shaped chin line to form the face. Add two large round eyes, light curved eyebrows, a tiny nose dot, and a small smile. Keep the expression gentle and centered.
Pro Tip: Leave about one eye-width between the eyes for good balance.
Step 2: Add the Bangs and Top Hair Shape
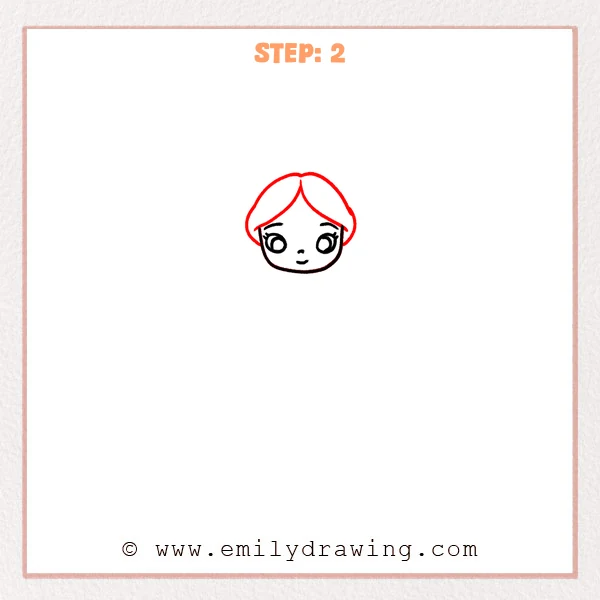
Sketch parted bangs using two smooth curved shapes that point toward the cheeks. Add a rounded arc over the head to guide the hair volume. Keep the lines simple and clean.
Pro Tip: Round the bang tips so the face stays soft and friendly.
Step 3: Draw the Headband and Bow
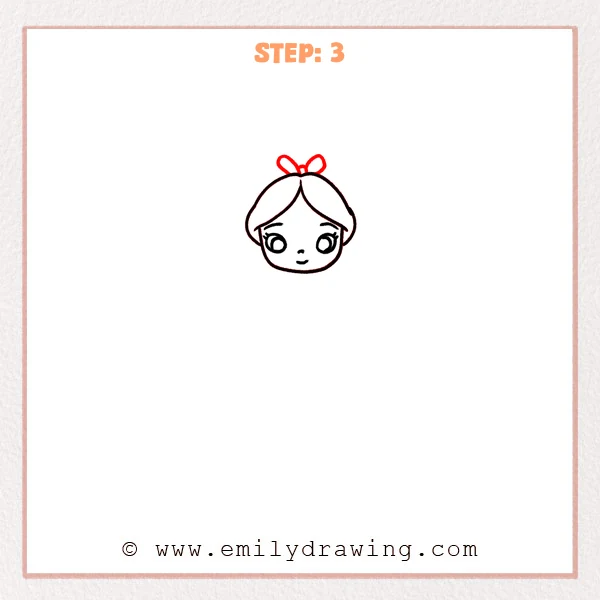
Draw a curved headband following the top of the hair. Add a small knot in the center, then draw two oval loops to form a bow. Place the bow neatly at the top.
Pro Tip: Make both bow loops similar in size for a tidy look.
Step 4: Complete the Long Hair Outline
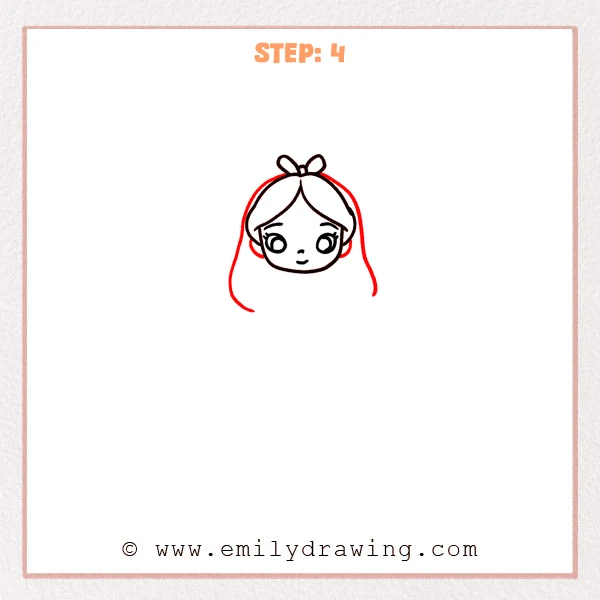
Extend long curved lines down both sides of the head to create flowing hair. Let the ends taper softly near the shoulders. Keep the hair wide enough to frame the face.
Pro Tip: Match the left and right hair lengths so the head looks centered.
Step 5: Draw the Collar and Dress Shape
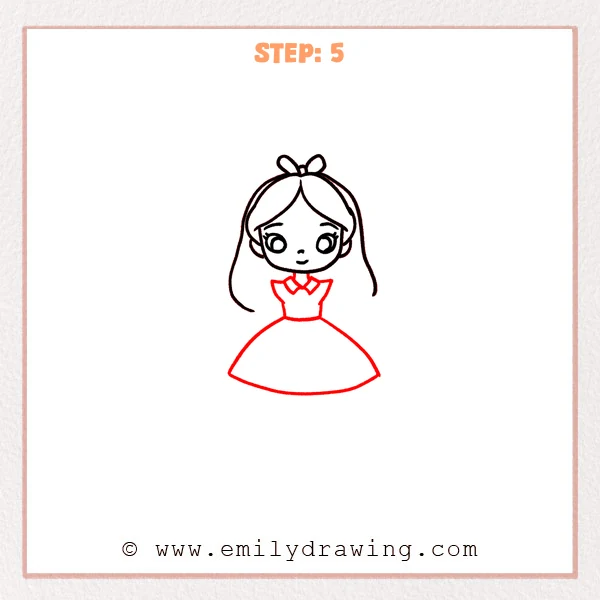
Add a small neck under the chin, then sketch a simple collar with two small points. Draw the bodice and a waistband, then create a wide curved skirt that spreads outward. Keep the skirt shape smooth and even.
Pro Tip: Aim for a symmetrical skirt curve so the dress feels steady.
Step 6: Add the Apron and Lace Trim
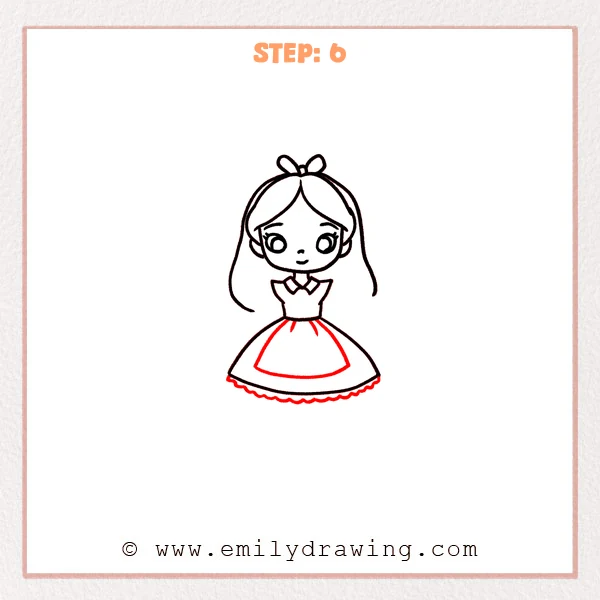
Draw a large U-shaped apron panel centered on the front of the skirt. Add a soft scalloped line along the bottom edge for lace trim. Keep the apron shape large but not too close to the hem.
Pro Tip: Repeat scallops with similar size to keep the lace looking neat.
Step 7: Draw the Puff Sleeves and Arms
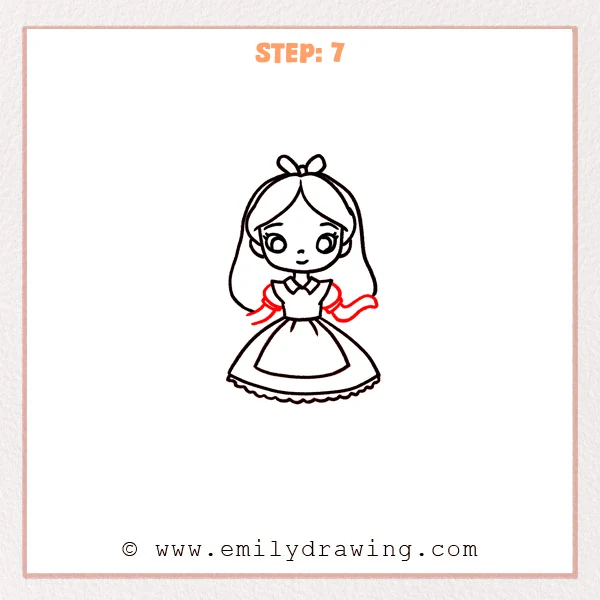
Add rounded puff sleeves on both shoulders, including a second curve to show the sleeve edge. Draw two arms extending outward with gentle curves, ready to hold objects. Keep the arms slim and smooth.
Pro Tip: Use lighter pressure on arm lines so they do not overpower the face.
Step 8: Add the Bottle and Key
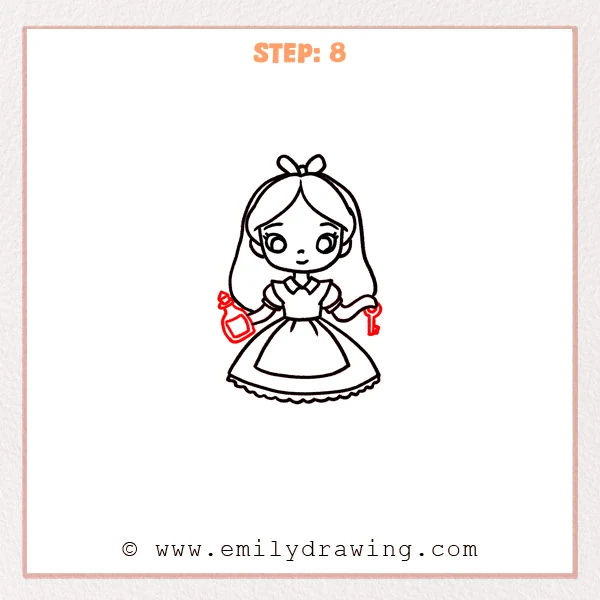
In one hand, draw a small bottle with a short neck, a cork, and a simple label shape. In the other hand, draw a key by starting with a ring, then adding a short shaft and one or two teeth. Keep both items small and clear.
Pro Tip: Leave a little space around the objects so the hands read clearly.
Step 9: Draw the Legs and Shoes

Draw two slim legs beneath the skirt, placed slightly apart for a stable stance. Add rounded shoes with small sole lines. Keep both shoes at the same height so she stands evenly.
Pro Tip: Check that both legs drop straight down from the skirt’s center area.
Step 10: Color in your drawing!
Fun Facts
- Alice is often shown with a headband and a bow as part of her classic look.
- An apron over a dress was a common clothing detail in older storybook illustrations.
- Props like a key and a bottle are popular symbols in Alice in Wonderland scenes.
Pin it now, Draw later!
You learned how to draw Alice in Wonderland step by step by building the face first, then adding hair, a dress, and story props. For coloring, try light blue for the dress, white for the apron, and a soft yellow for the hair. Add gentle shading under the bangs, under the collar, and beneath the skirt to give the drawing depth.
One common beginner mistake is drawing arms too thick or too long, which can pull attention away from the face. Take your time, and redraw the arm curves lightly if they feel uneven. Keep practicing this easy drawing tutorial, and then try drawing Alice in Wonderland in a new pose or holding a different object.
Get the FREE Printable Drawing Guide
FREE Download Printable Alice In Wonderland Drawing Tutorial
Frequently Asked Questions
How do I make the eyes look even?
Draw the two eye circles first, then add the inner details after both sides match.
What if my hair looks lopsided?
Erase one side and redraw it using the face as the center guide.
Can I change the outfit and still keep it as Alice in Wonderland?
Yes, keep the headband and apron shape, then adjust the skirt or sleeves gently.