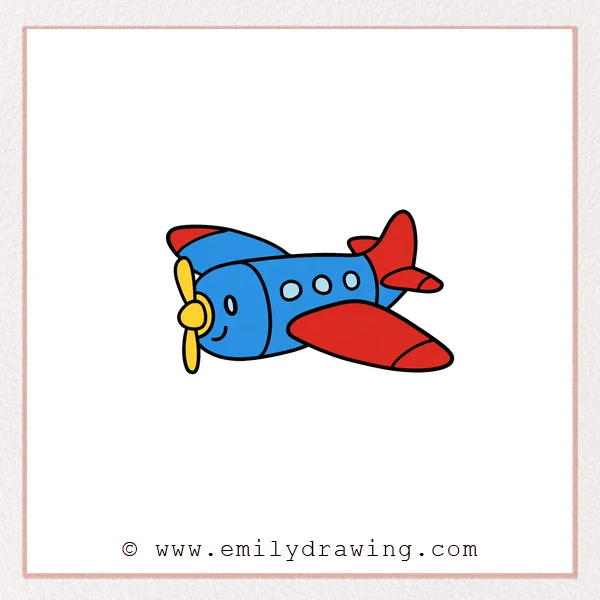
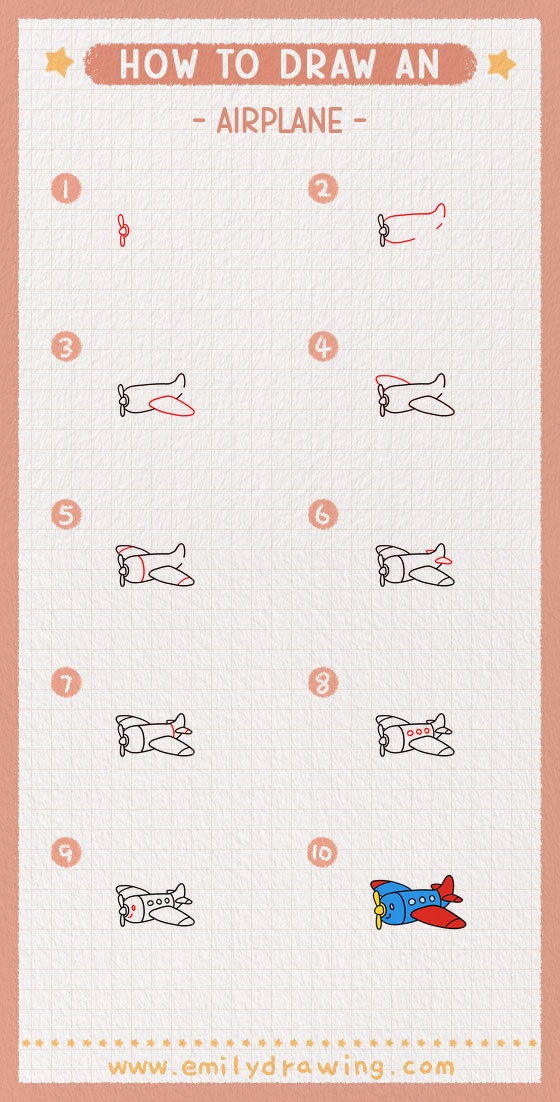
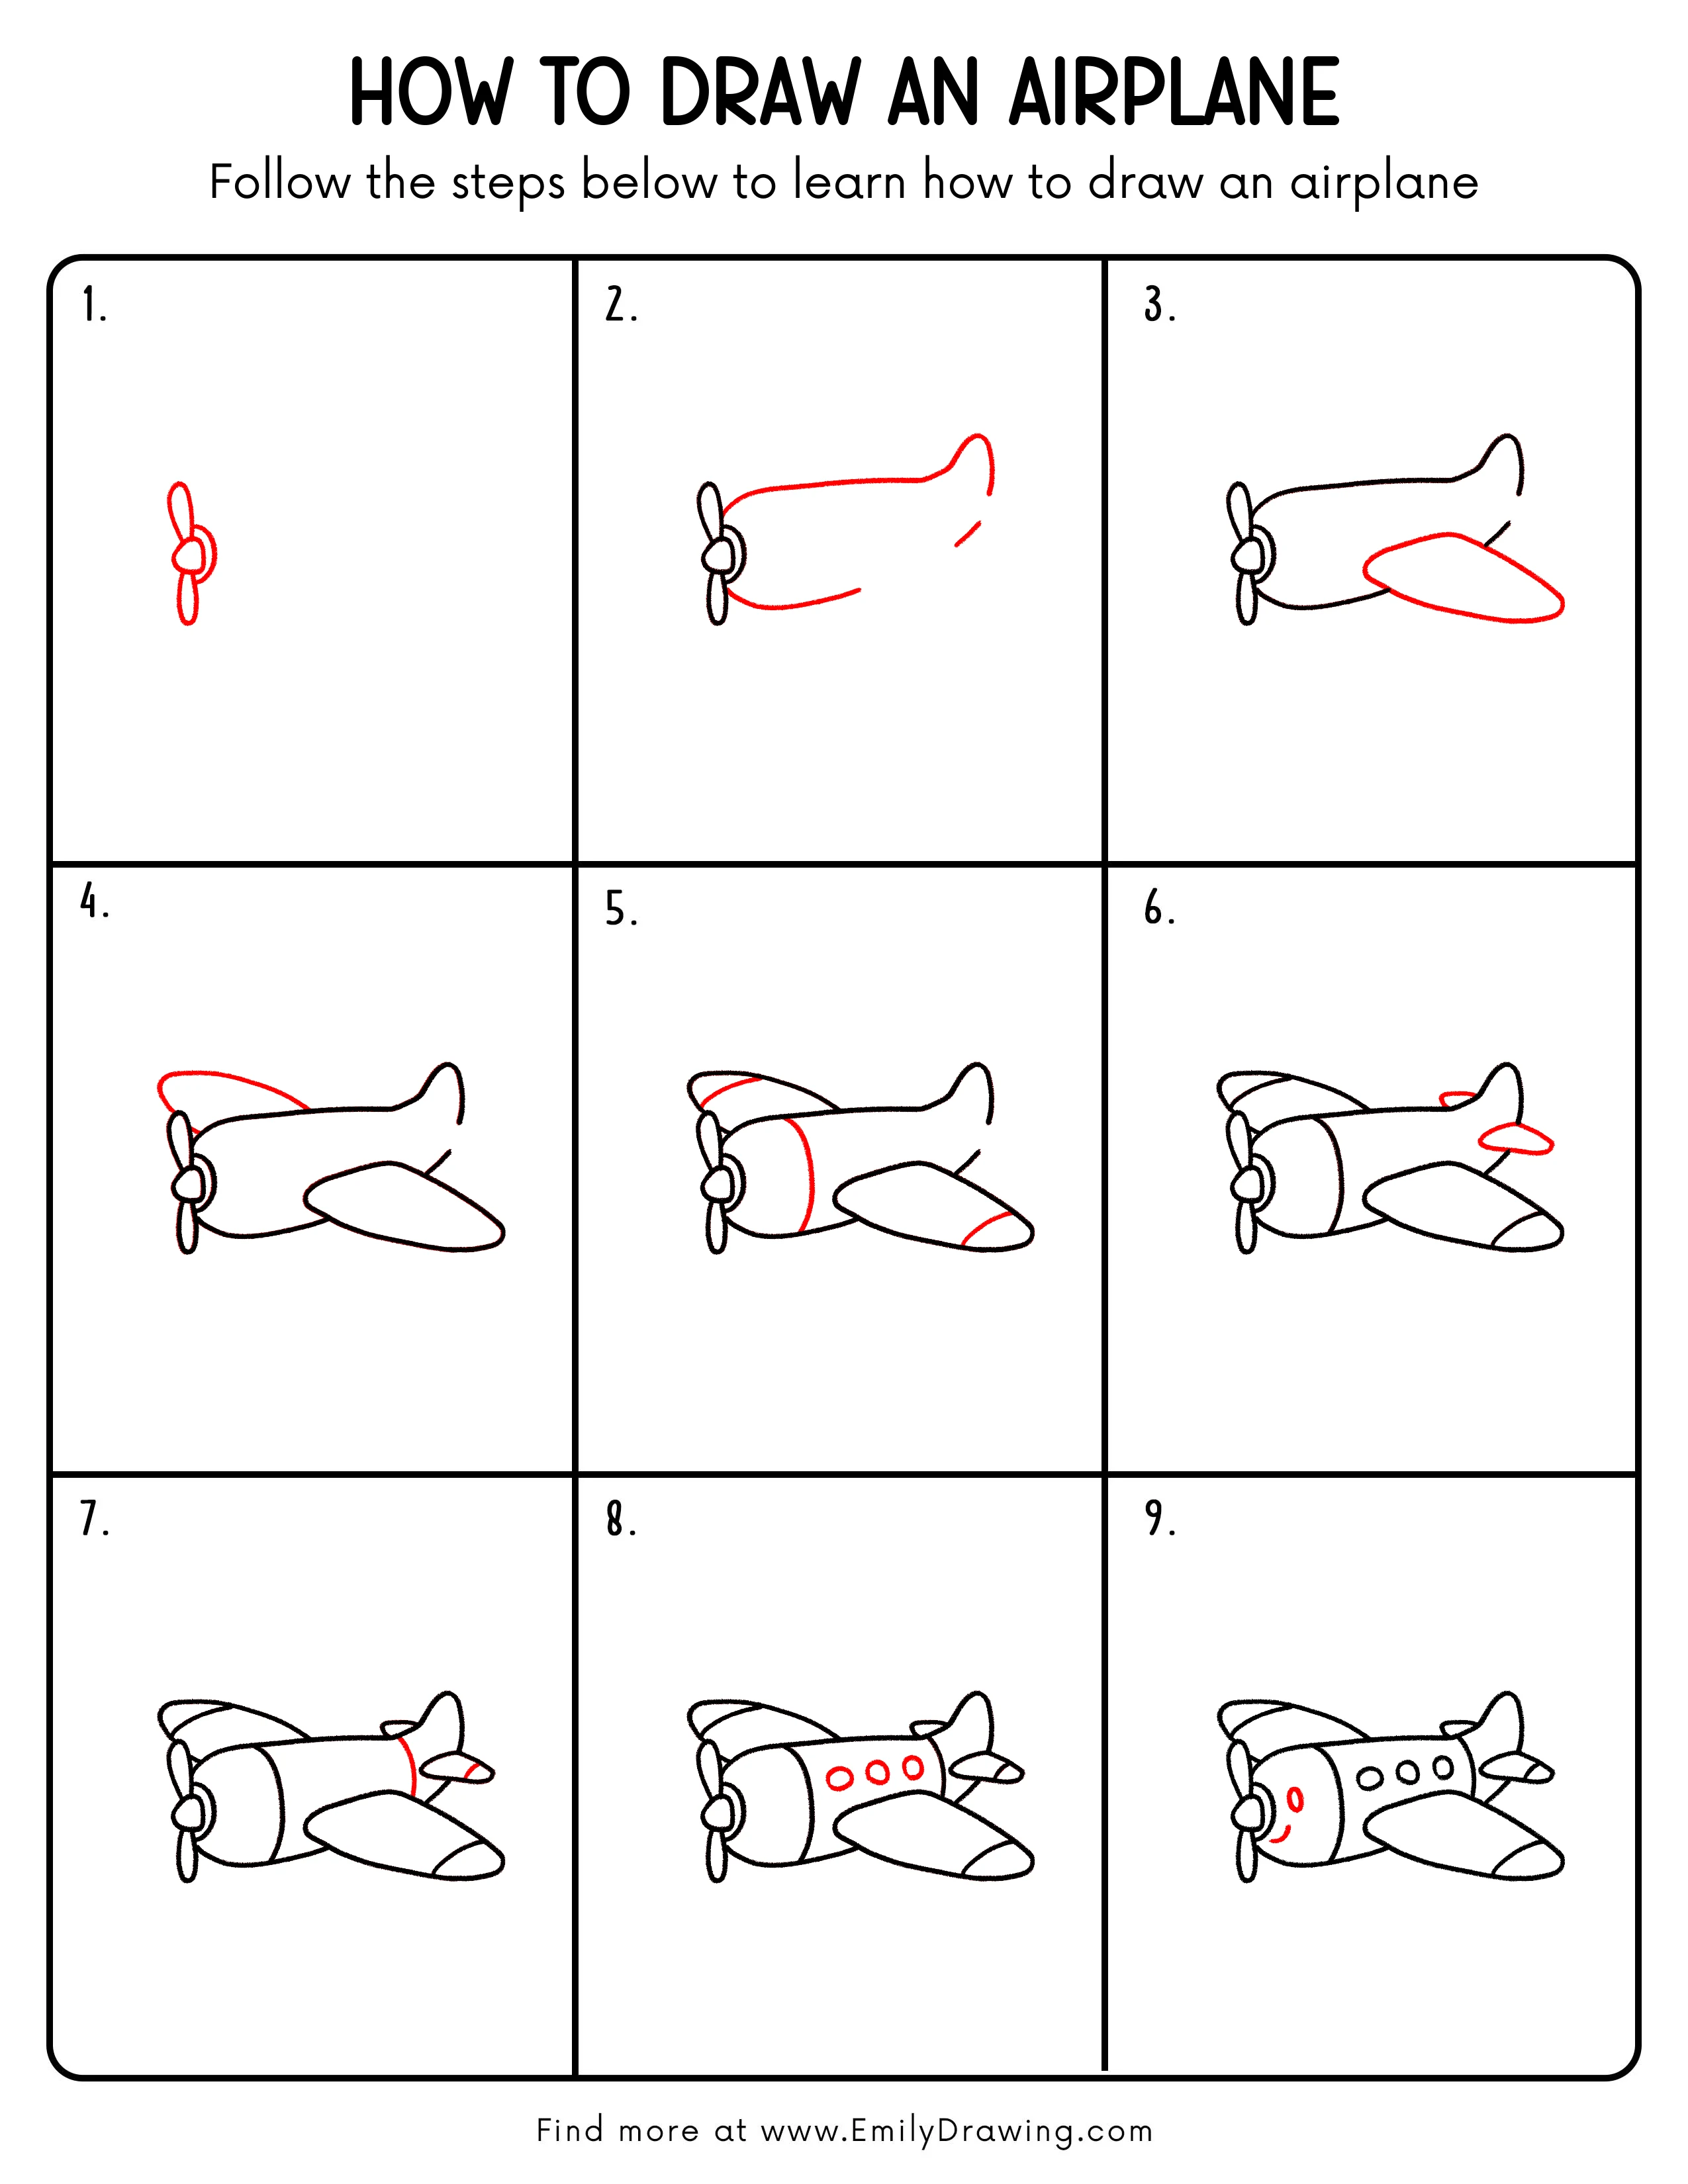
This easy drawing tutorial shows how to draw an airplane with simple shapes. Follow this step by step drawing guide to build a friendly propeller airplane. It is a calm, clear way to practice drawing for beginners.
What You Will Need
- Pencil
- Eraser
- Black marker or pen
- Paper
- Colored pencils or crayons (optional)
Here are my RECOMMENDED Art Supplies!
- Crayola Coloring Set (140 Pieces – Mega Value!)
- 24 Colored Crayon Set
- A4 Printer Paper
- Crayola Coloring Pencils
- HP Home Printer with Instant Ink!
Time needed:
24 minutes.
Step-by-Step Drawing Guide
Step 1: Draw the Propeller
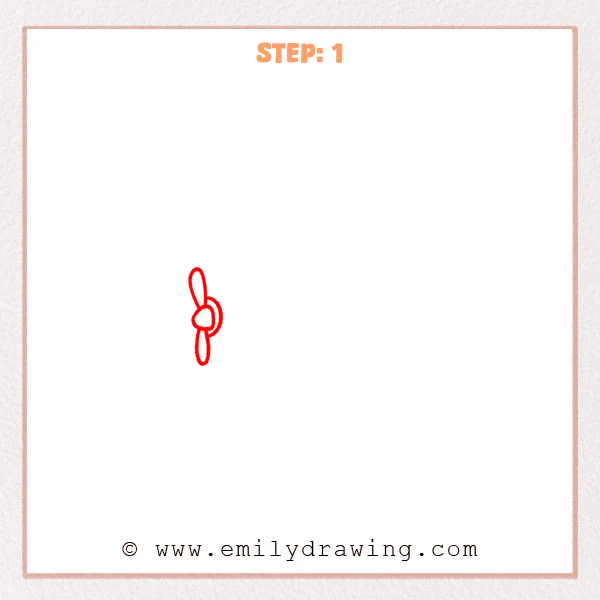
Start with a small circle on the left for the propeller hub. Add two long oval blades, one above and one below the hub. Keep the blades narrow and evenly sized.
Pro Tip: Match the blade lengths so the propeller looks balanced.
Step 2: Sketch the Fuselage Outline
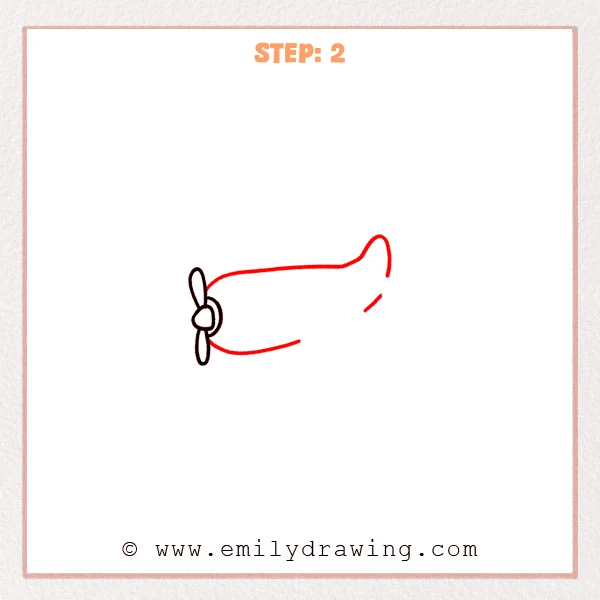
From behind the propeller, sketch a long curved line to the right for the top of the body. Add a rounder bottom curve to make a chunky fuselage shape. Leave the far right end slightly open for the tail.
Pro Tip: Keep the top curve smoother than the bottom for a friendly airplane shape.
Step 3: Add the Right Main Wing
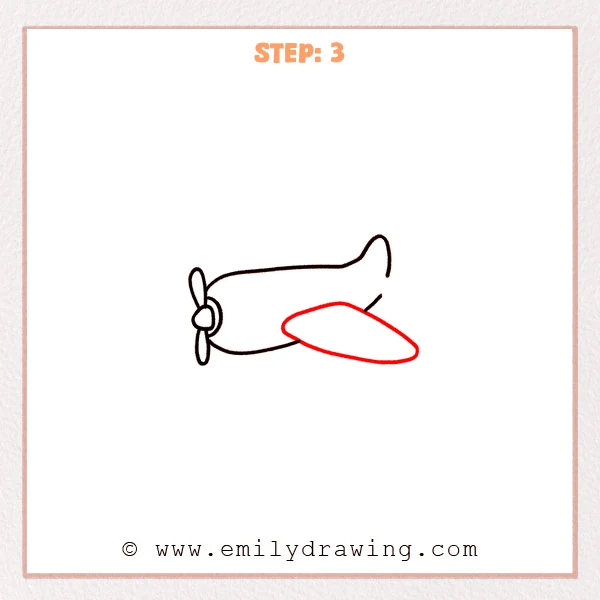
Draw a large teardrop-shaped wing attached to the lower right side of the fuselage. Let the wing stretch outward and slightly forward. Overlap the wing at the body connection so it feels sturdy.
Pro Tip: Make the wing’s front edge rounder than the back edge.
Step 4: Draw the Left Main Wing
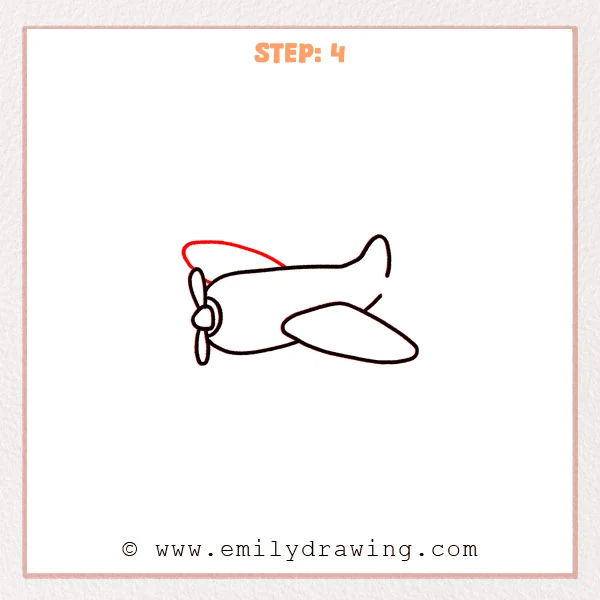
On the upper left side of the fuselage, sketch a long curved line starting near the nose and sweeping back. Add a shorter return curve to connect the wing back into the body. Keep this wing slimmer so it looks farther away.
Pro Tip: Place the left wing higher than the right wing to show depth.
Step 5: Add the Nose Cowl and Wing Tip Detail
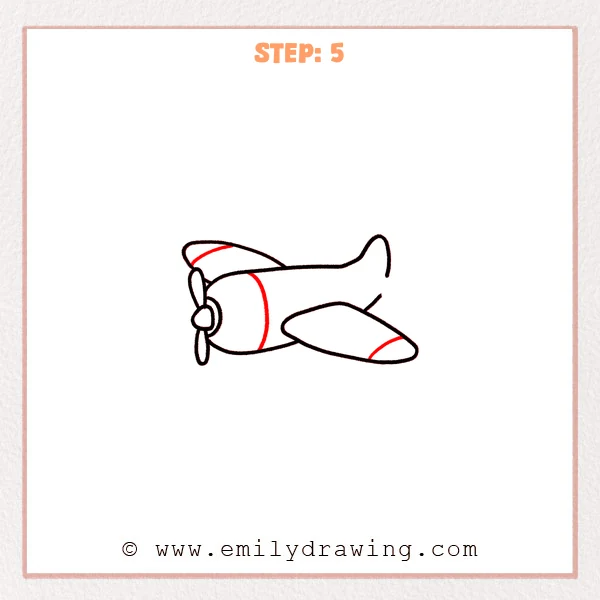
Draw a big curved border just behind the propeller to form the nose cowl. On the far right tip of the main wing, add a small curved dividing line for a wing-tip edge. These small lines help the airplane feel finished.
Pro Tip: Follow the body’s curve when you draw the cowl so it blends in.
Step 6: Shape the Tail Fin and Tail Wing
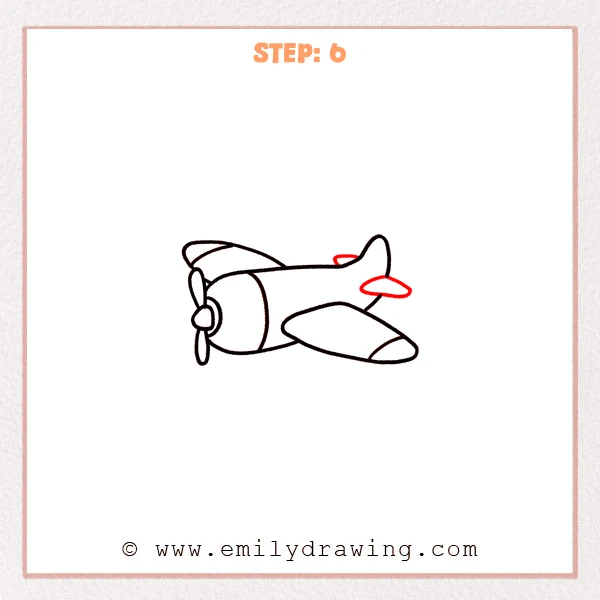
At the far right end of the fuselage, draw a rounded triangle standing upward for the tail fin. Add a small horizontal tail wing sticking out from the tail area. Keep the tail parts compact and neat.
Pro Tip: Keep the tail fin about twice the body thickness or less.
Step 7: Refine the Tail Details
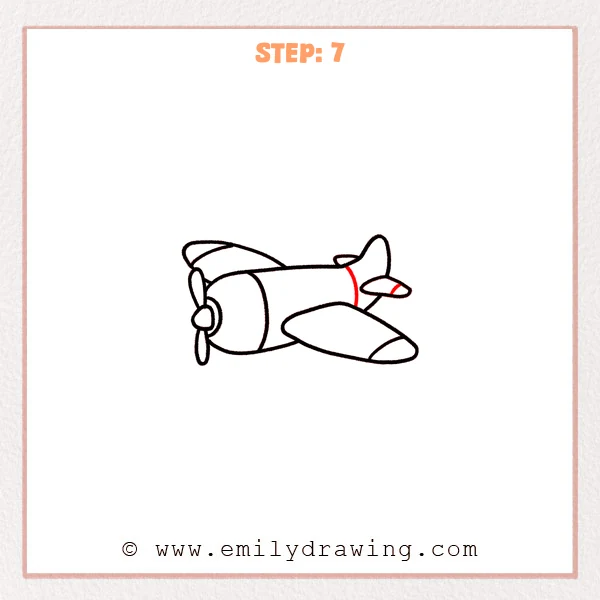
Add a gentle curved line on the tail wing to show a tip edge. Smooth the tail connections where lines meet the fuselage. Lightly erase any extra overlap lines you do not need.
Pro Tip: Draw detail lines lighter than the outer outline for clear reading.
Step 8: Draw the Windows
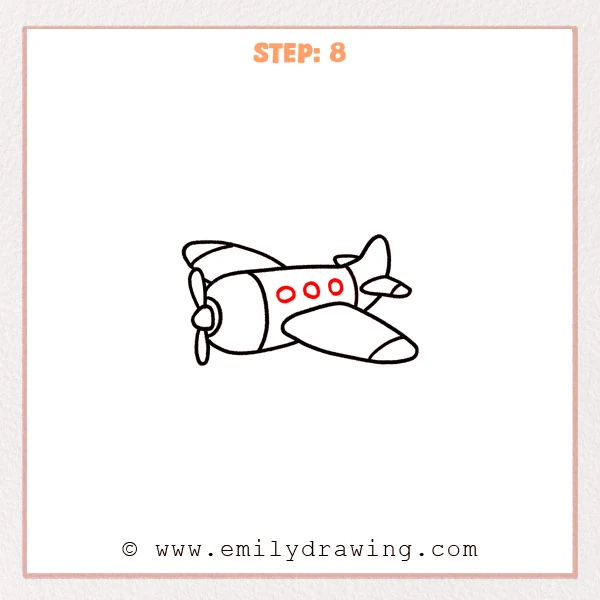
Place three small circles along the side of the fuselage for windows. Space them evenly across the middle of the body. Keep the window size consistent for a tidy look.
Pro Tip: Mark three light dots first, then draw circles on top of them.
Step 9: Add a Friendly Face
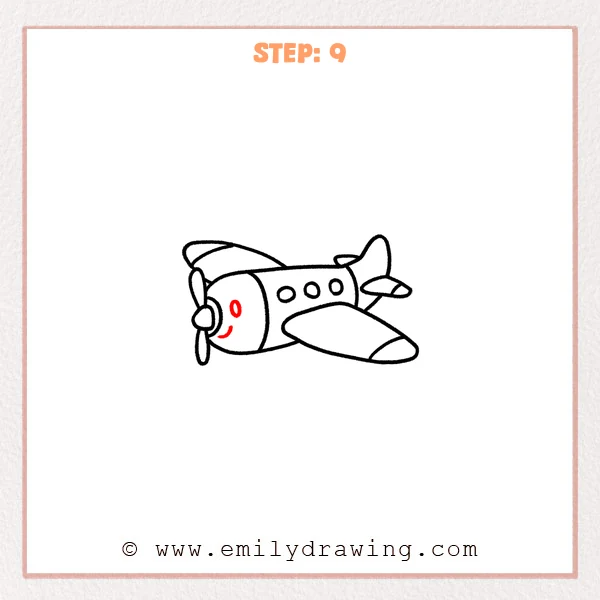
Draw a small oval eye on the nose cowl area. Add a curved smile below it to make the airplane feel friendly. Trace your final lines with a pen or marker when you like the shapes.
Pro Tip: Keep the face near the center of the nose so it feels balanced.
Step 10: Color in your drawing!
Fun Facts
- Many small planes use propellers because they are efficient at lower speeds.
- Airplane wings are shaped to help lift the plane as air moves over them.
- A fuselage is the main body of an airplane where the pilot and passengers sit.
Pin it now, Draw later!
You built your airplane by starting with the propeller, then shaping the body, wings, and tail. Add color by shading the underside of the fuselage and the bottom of the wings a little darker. Try a light gray shadow under the wing to make the airplane pop.
One common beginner mistake is making both wings the same thickness and height, which flattens the drawing. Practice again and change the wing angle slightly to explore new looks. If you want more drawing for beginners lessons, try another how to draw airplane variation with different windows or a longer tail.
Get the FREE Printable Drawing Guide
FREE Download Printable Airplane Drawing Tutorial
Frequently Asked Questions
How do I make my airplane look like it is flying?
Tilt the fuselage slightly upward and add a few curved motion lines behind the tail.
What if my wings look uneven?
Lightly erase and redraw the wing edges using the fuselage as your center guide.
Can I draw a jet instead of a propeller airplane?
Yes, replace the propeller with a rounded nose and add small engine shapes under the wings.