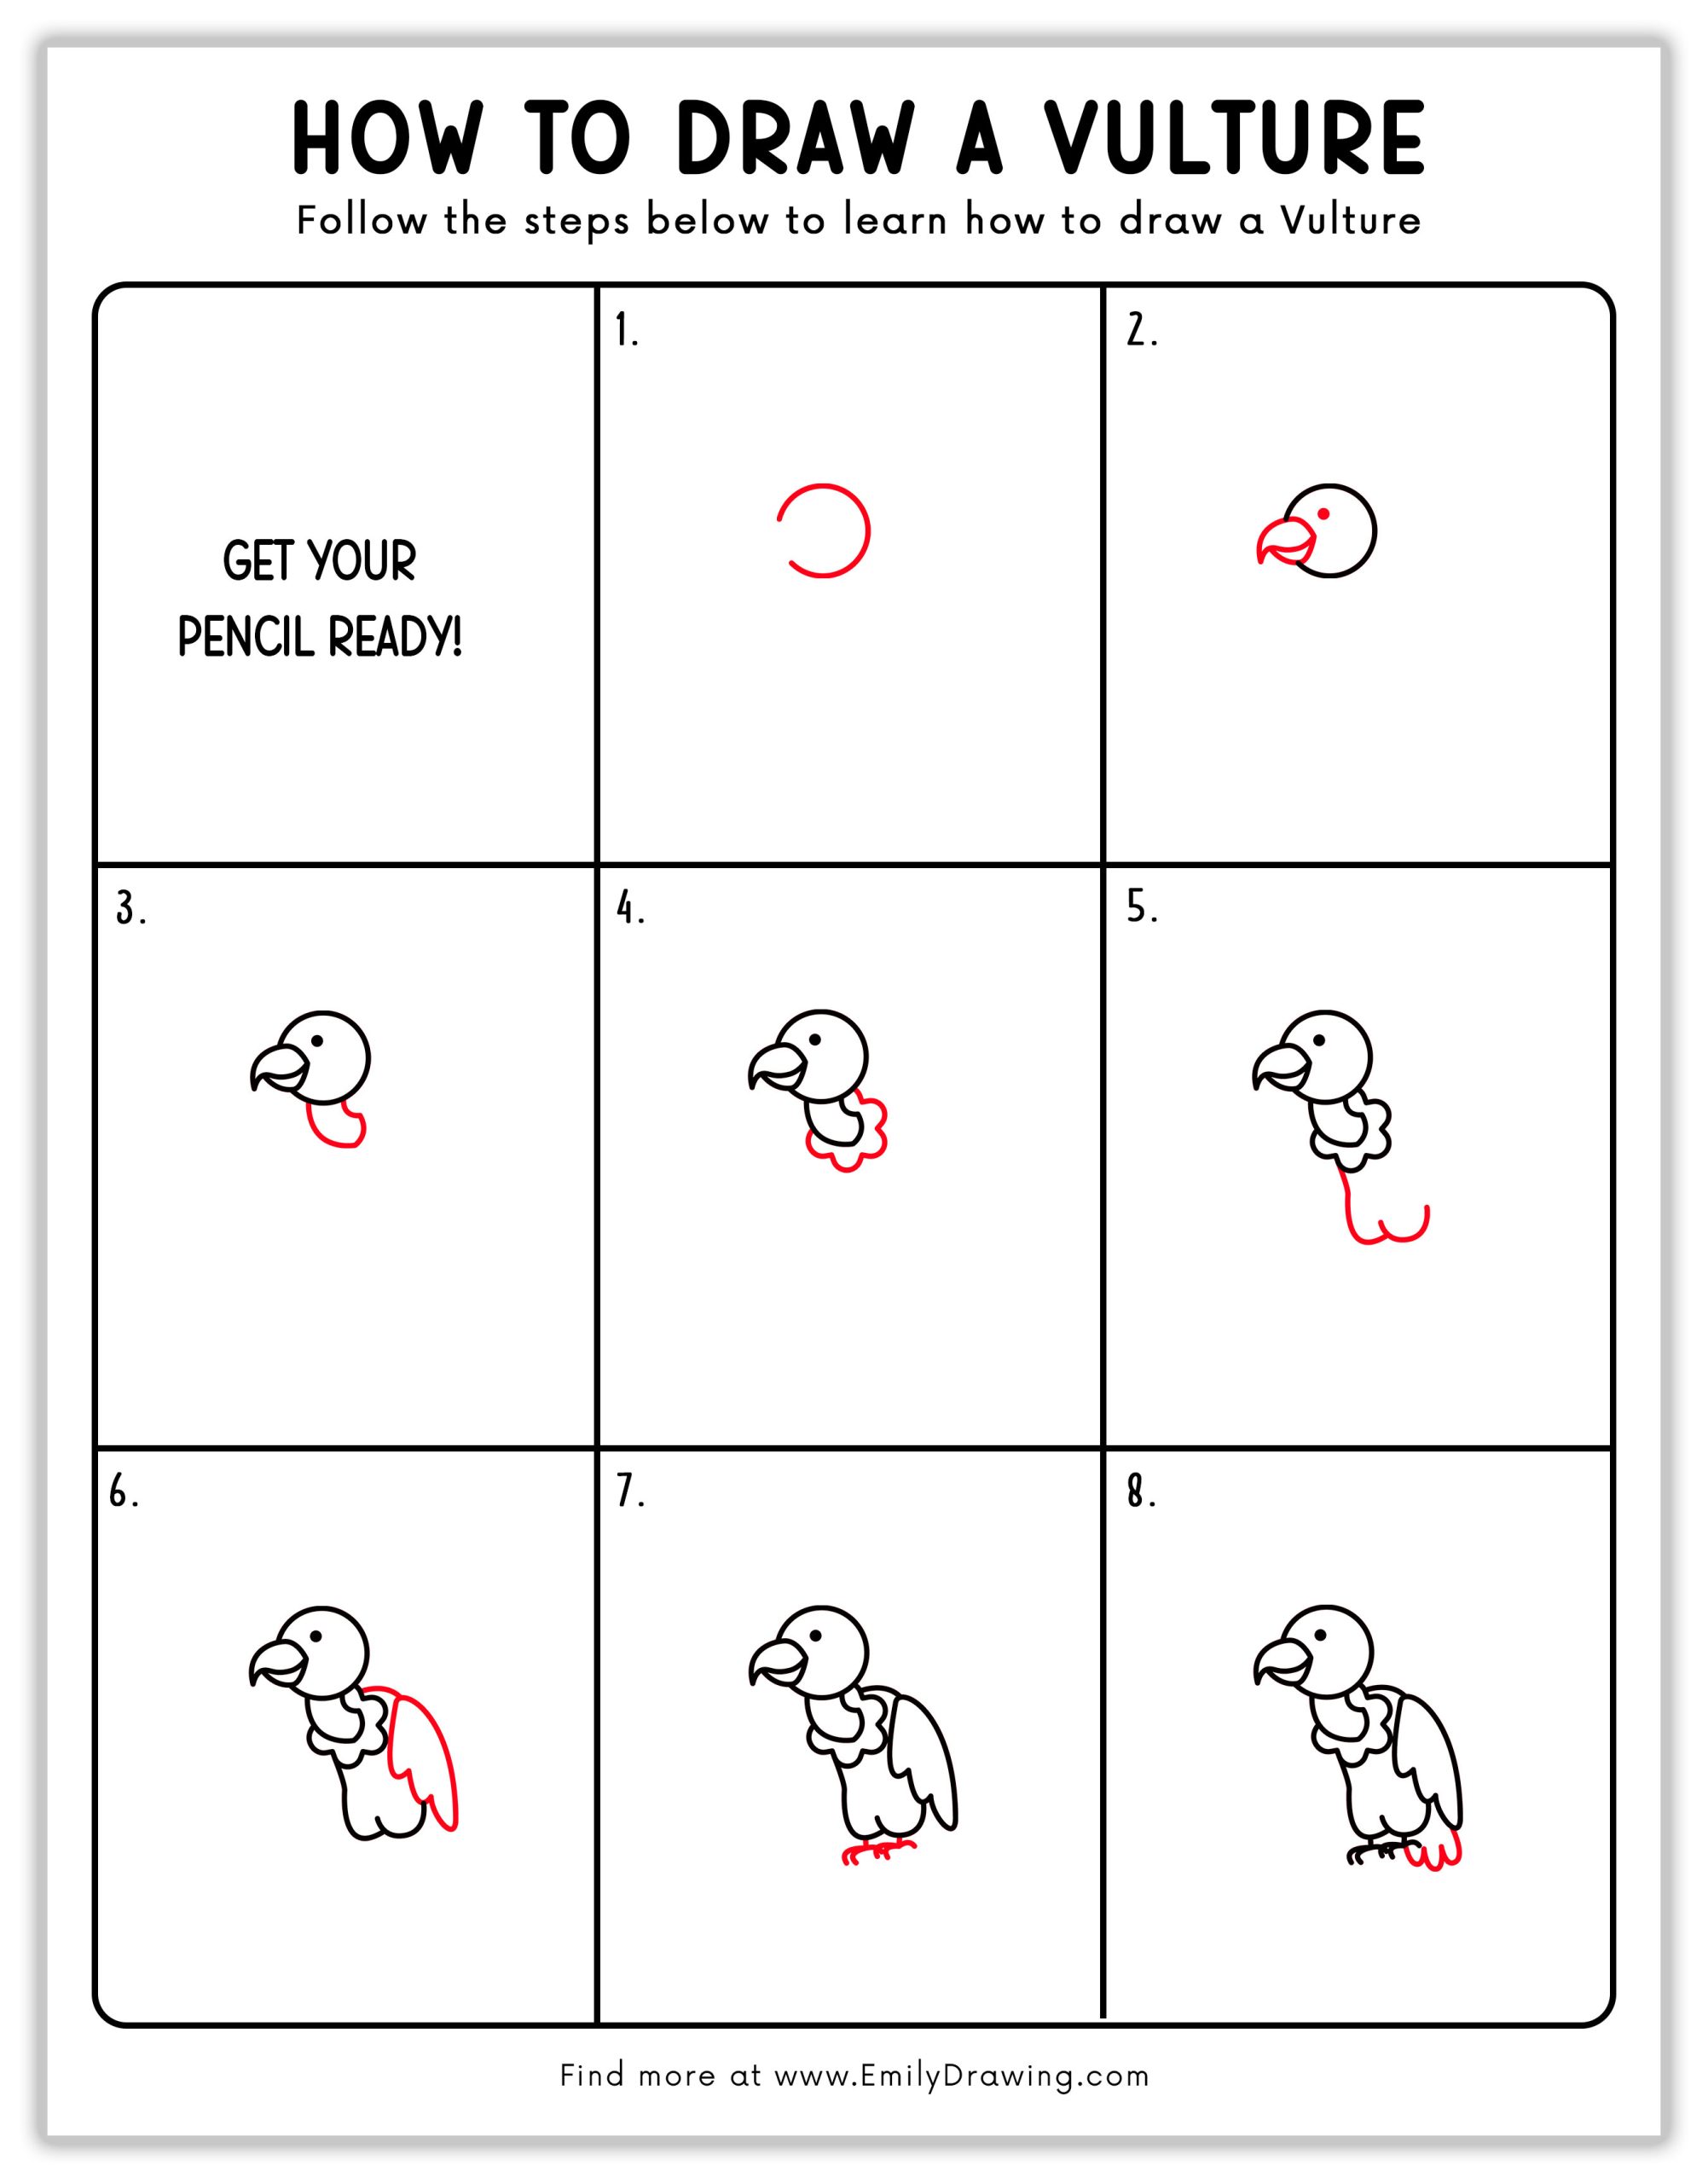
Hey there, young artists and creative parents! Are you ready to dive into the world of drawing and create something amazing? In this vulture sketch tutorial, we’ll learn how to draw a vulture in just a few simple steps!
These fascinating birds might look a little funny, but they are incredibly important in nature! They help keep the environment clean by eating dead animals, preventing the spread of disease. In this step-by-step guide, we’ll teach you how to draw a vulture from start to finish. Grab your pencil, some paper, and let’s get started!
Materials:
- a piece of paper
- a pencil for the guiding lines and sketching
- an eraser
- a black sharpie or a pen for the outlines
- markers or colored pencils for coloring
- our printable drawing guide (Join my Email List below to get this Tutorial)
Here are my RECOMMENDED Art Supplies!
- Crayola Coloring Set (140 Pieces – Mega Value!)
- 24 Colored Crayon Set
- A4 Printer Paper
- Crayola Coloring Pencils
- HP Home Printer with Instant Ink!
Time needed:
15 minutes.
How to Draw a Vulture — Let’s get started!
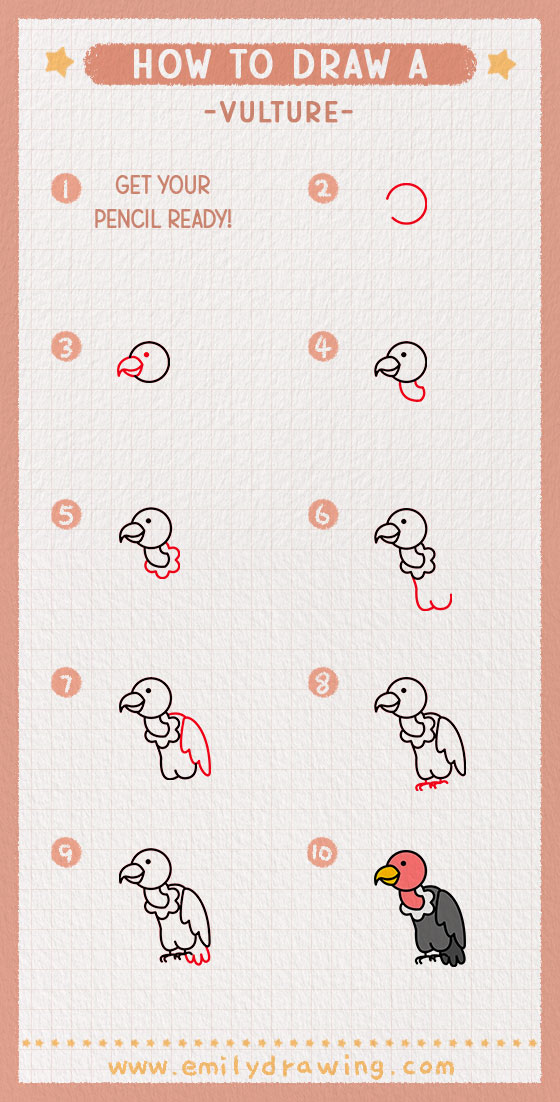
Step 1 – Start with the Head
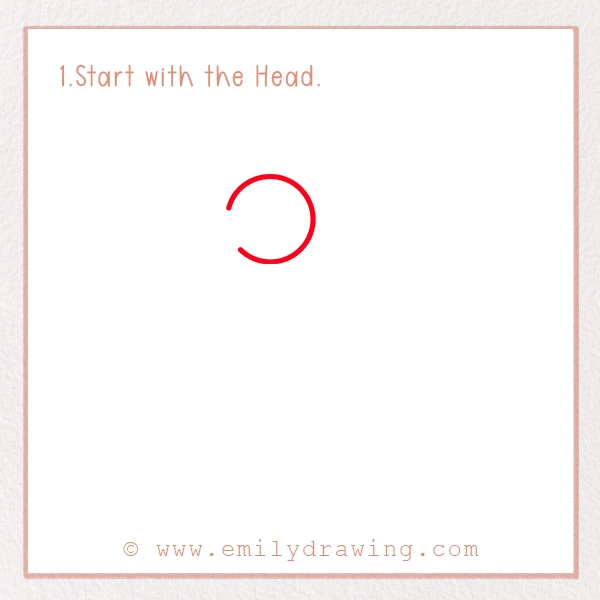
Begin by drawing a simple curved shape for the vulture’s head. Think of it as a small, round half-circle. Keep your pencil strokes light so you can adjust later if needed! For this bald vulture illustration, remember that vultures have bare heads to stay clean while feeding—so skip the fluffy feathers.
Step 2 – Add the Beak and Eye
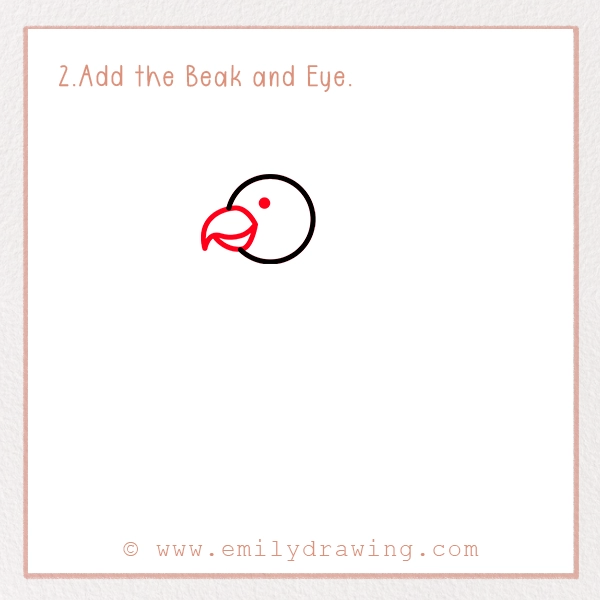
Next, draw a hooked beak at the front of the head. Vultures have strong, curved beaks to help them tear through tough food. Add a small dot for the eye so your vulture can see! You can also add a tiny curved line above the eye to give your vulture a more expressive look.
Step 3 – Draw the Neck
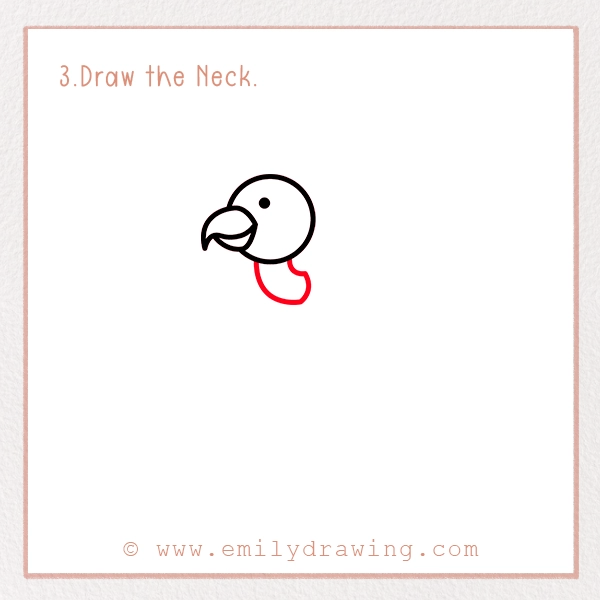
Vultures have long, thin necks. Draw a smooth curve extending from the head downward. Make sure to keep it a little wavy to show the loose skin they have. This loose skin helps them stretch their necks while feeding.
Step 4 – Add Feathers Around the Neck
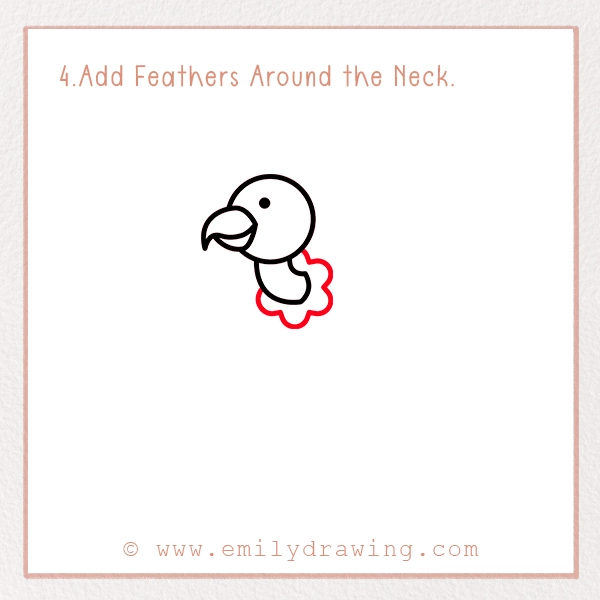
Now, add some fluffy feathers around the neck. This makes the vulture look more realistic. Draw small cloud-like bumps at the base of the neck. These feathers separate the vulture’s body from its bald head, making it easy to recognize.
Step 5 – Sketch the Body
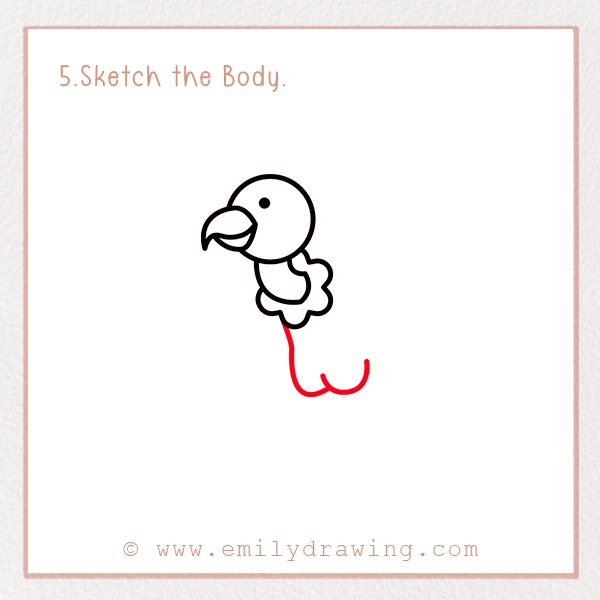
From the bottom of the neck, draw a slightly curved oval shape for the body. Make sure it’s a little bigger than the head so your vulture looks balanced. Vultures have broad bodies because they need strong muscles to fly long distances in search of food.
Step 6 – Draw the Wings
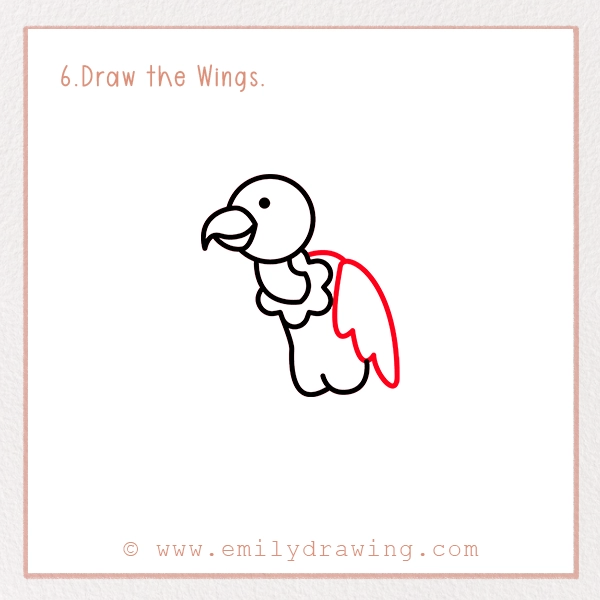
Time to add the wings! Vultures have large wings that help them glide. Draw one big wing on the side of the body, using curved lines to show the feathers. The wings should be slightly folded so the vulture looks like it’s resting. If you want to draw your vulture flying, extend the wings outward with long, pointed feathers.
Step 7 – Add the Legs and Feet
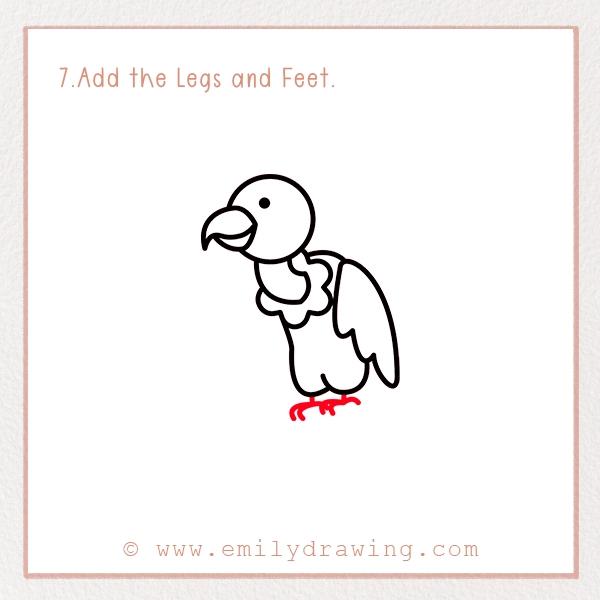
Draw two thin legs coming down from the body. Then, add small curved claws at the bottom. Vultures use their feet to grip onto branches when they rest. Unlike birds of prey, vultures do not have sharp talons since they don’t hunt live animals.
Step 8 – Final Details
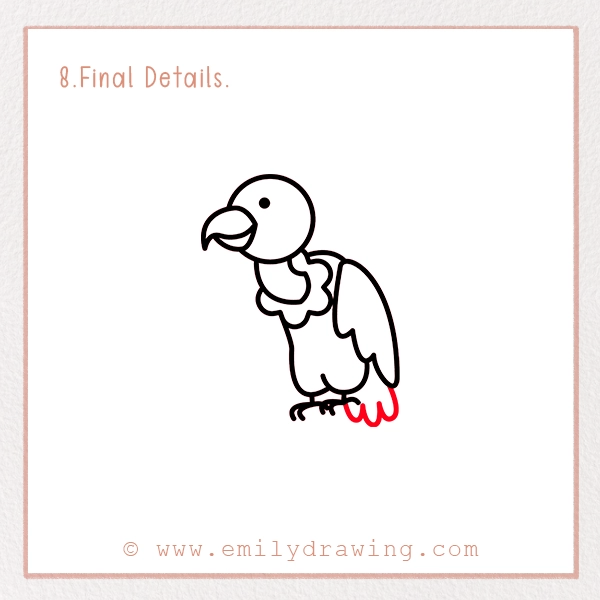
Now, add some extra details like more feather lines on the wings and shading on the body. You can also make the beak stand out by darkening the edges. If you want to create realistic vulture art, add some small wrinkles on the neck and a few curved lines on the beak.
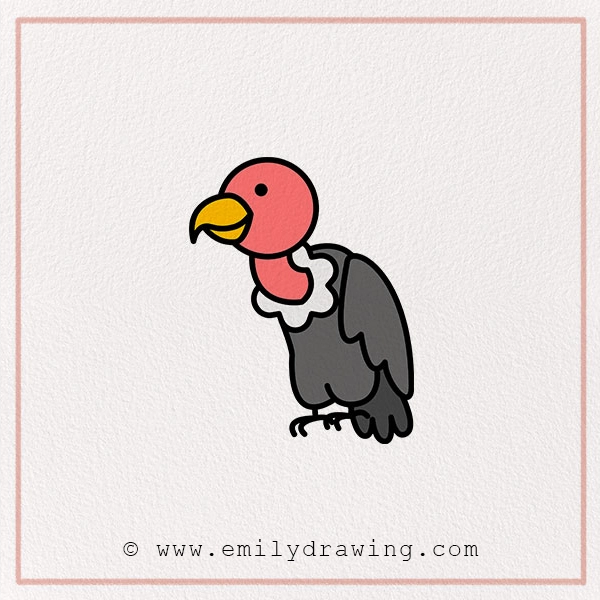
Step 9 – Color Your Drawing!
Now for the fun part: coloring! Vultures usually have dark grey or black feathers, a pinkish-red head, and a yellow beak. Use your colors to bring your vulture to life! If you want to get creative, you can give your vulture a different color scheme. Maybe a blue vulture with golden wings?
Fun Facts About Vultures
Pin it now, Draw later!
Did you know vultures are some of the most misunderstood birds? Here are some amazing facts about them:
- Nature’s Cleaners: Vultures help clean up the environment by eating dead animals, preventing the spread of disease.
- Superb Flyers: Some vultures can soar in the sky for hours without flapping their wings, using warm air currents to stay in the air.
- Amazing Stomachs: Vultures don’t get sick from eating old meat—their stomach acid is strong enough to kill harmful bacteria!
- They Cool Themselves in a Weird Way: Instead of sweating, vultures cool off by urinating on their legs. Strange but effective!
- Silent Birds: Vultures don’t have vocal cords, so instead of chirping or singing, they hiss and grunt.
Tips and Tricks for Better Drawing
Drawing a vulture might seem tricky at first, but here are some tips to help you:
- Start with Light Sketches: Draw lightly with your pencil so you can erase mistakes easily.
- Use Basic Shapes: Break the vulture down into circles, ovals, and curves before adding details.
- Look at Real Pictures: If you want to make your drawing more realistic, check out photos of real vultures to see their features up close.
- Experiment with Expressions: Want your vulture to look happy, sleepy, or mischievous? Change the eye shape or add eyebrows to create different emotions.
- Try Different Poses: Practice drawing a vulture sitting, flying, or even tilting its head to make your drawings more dynamic.
- Use Different Art Supplies: Try using watercolours, markers, or coloured pencils to experiment with different textures and effects.
Congratulations! You’ve just learned how to draw a vulture step by step. Drawing birds can be fun and rewarding, and vultures are a great place to start because of their unique features. Once you’re done, why not try our tutorial on how to draw an ostrich—another bird with fascinating characteristics?
Remember, the more you practice, the better you’ll get. Try drawing other birds, too maybe an eagle, a hawk, or even a peacock!
We’d love to see your artwork. If you enjoyed this tutorial, share your drawing with friends or post it online using #EmilyDrawing. Keep drawing, keep learning, and most importantly, have fun!
Get the FREE Printable Drawing Guide