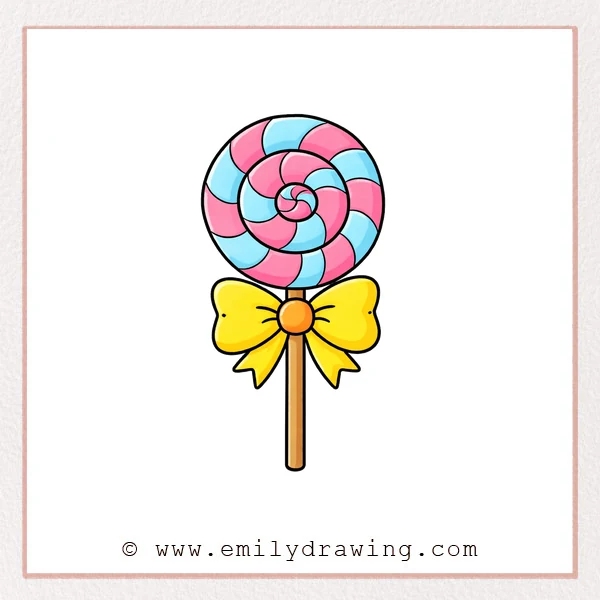
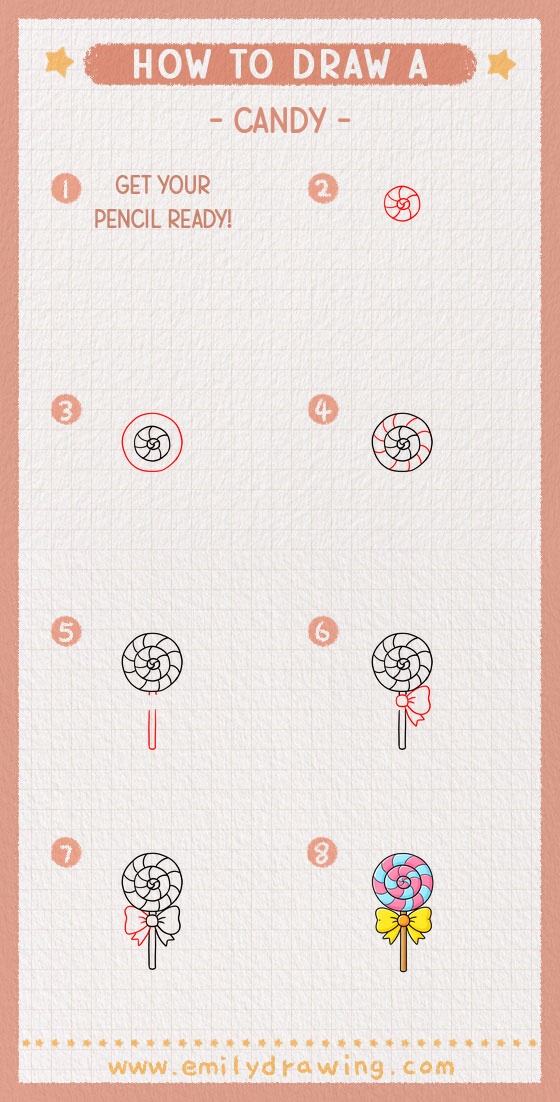
This easy drawing tutorial shows how to draw a candy lollipop step by step. You will build a simple swirl candy, then add a stick and a neat bow. Take your time, and enjoy this drawing for beginners.
What You Will Need
- Pencil
- Eraser
- Black marker or pen
- Paper
- Colored pencils or markers (optional)
Here are my RECOMMENDED Art Supplies!
- Crayola Coloring Set (140 Pieces – Mega Value!)
- 24 Colored Crayon Set
- A4 Printer Paper
- Crayola Coloring Pencils
- HP Home Printer with Instant Ink!
Time needed:
18 minutes.
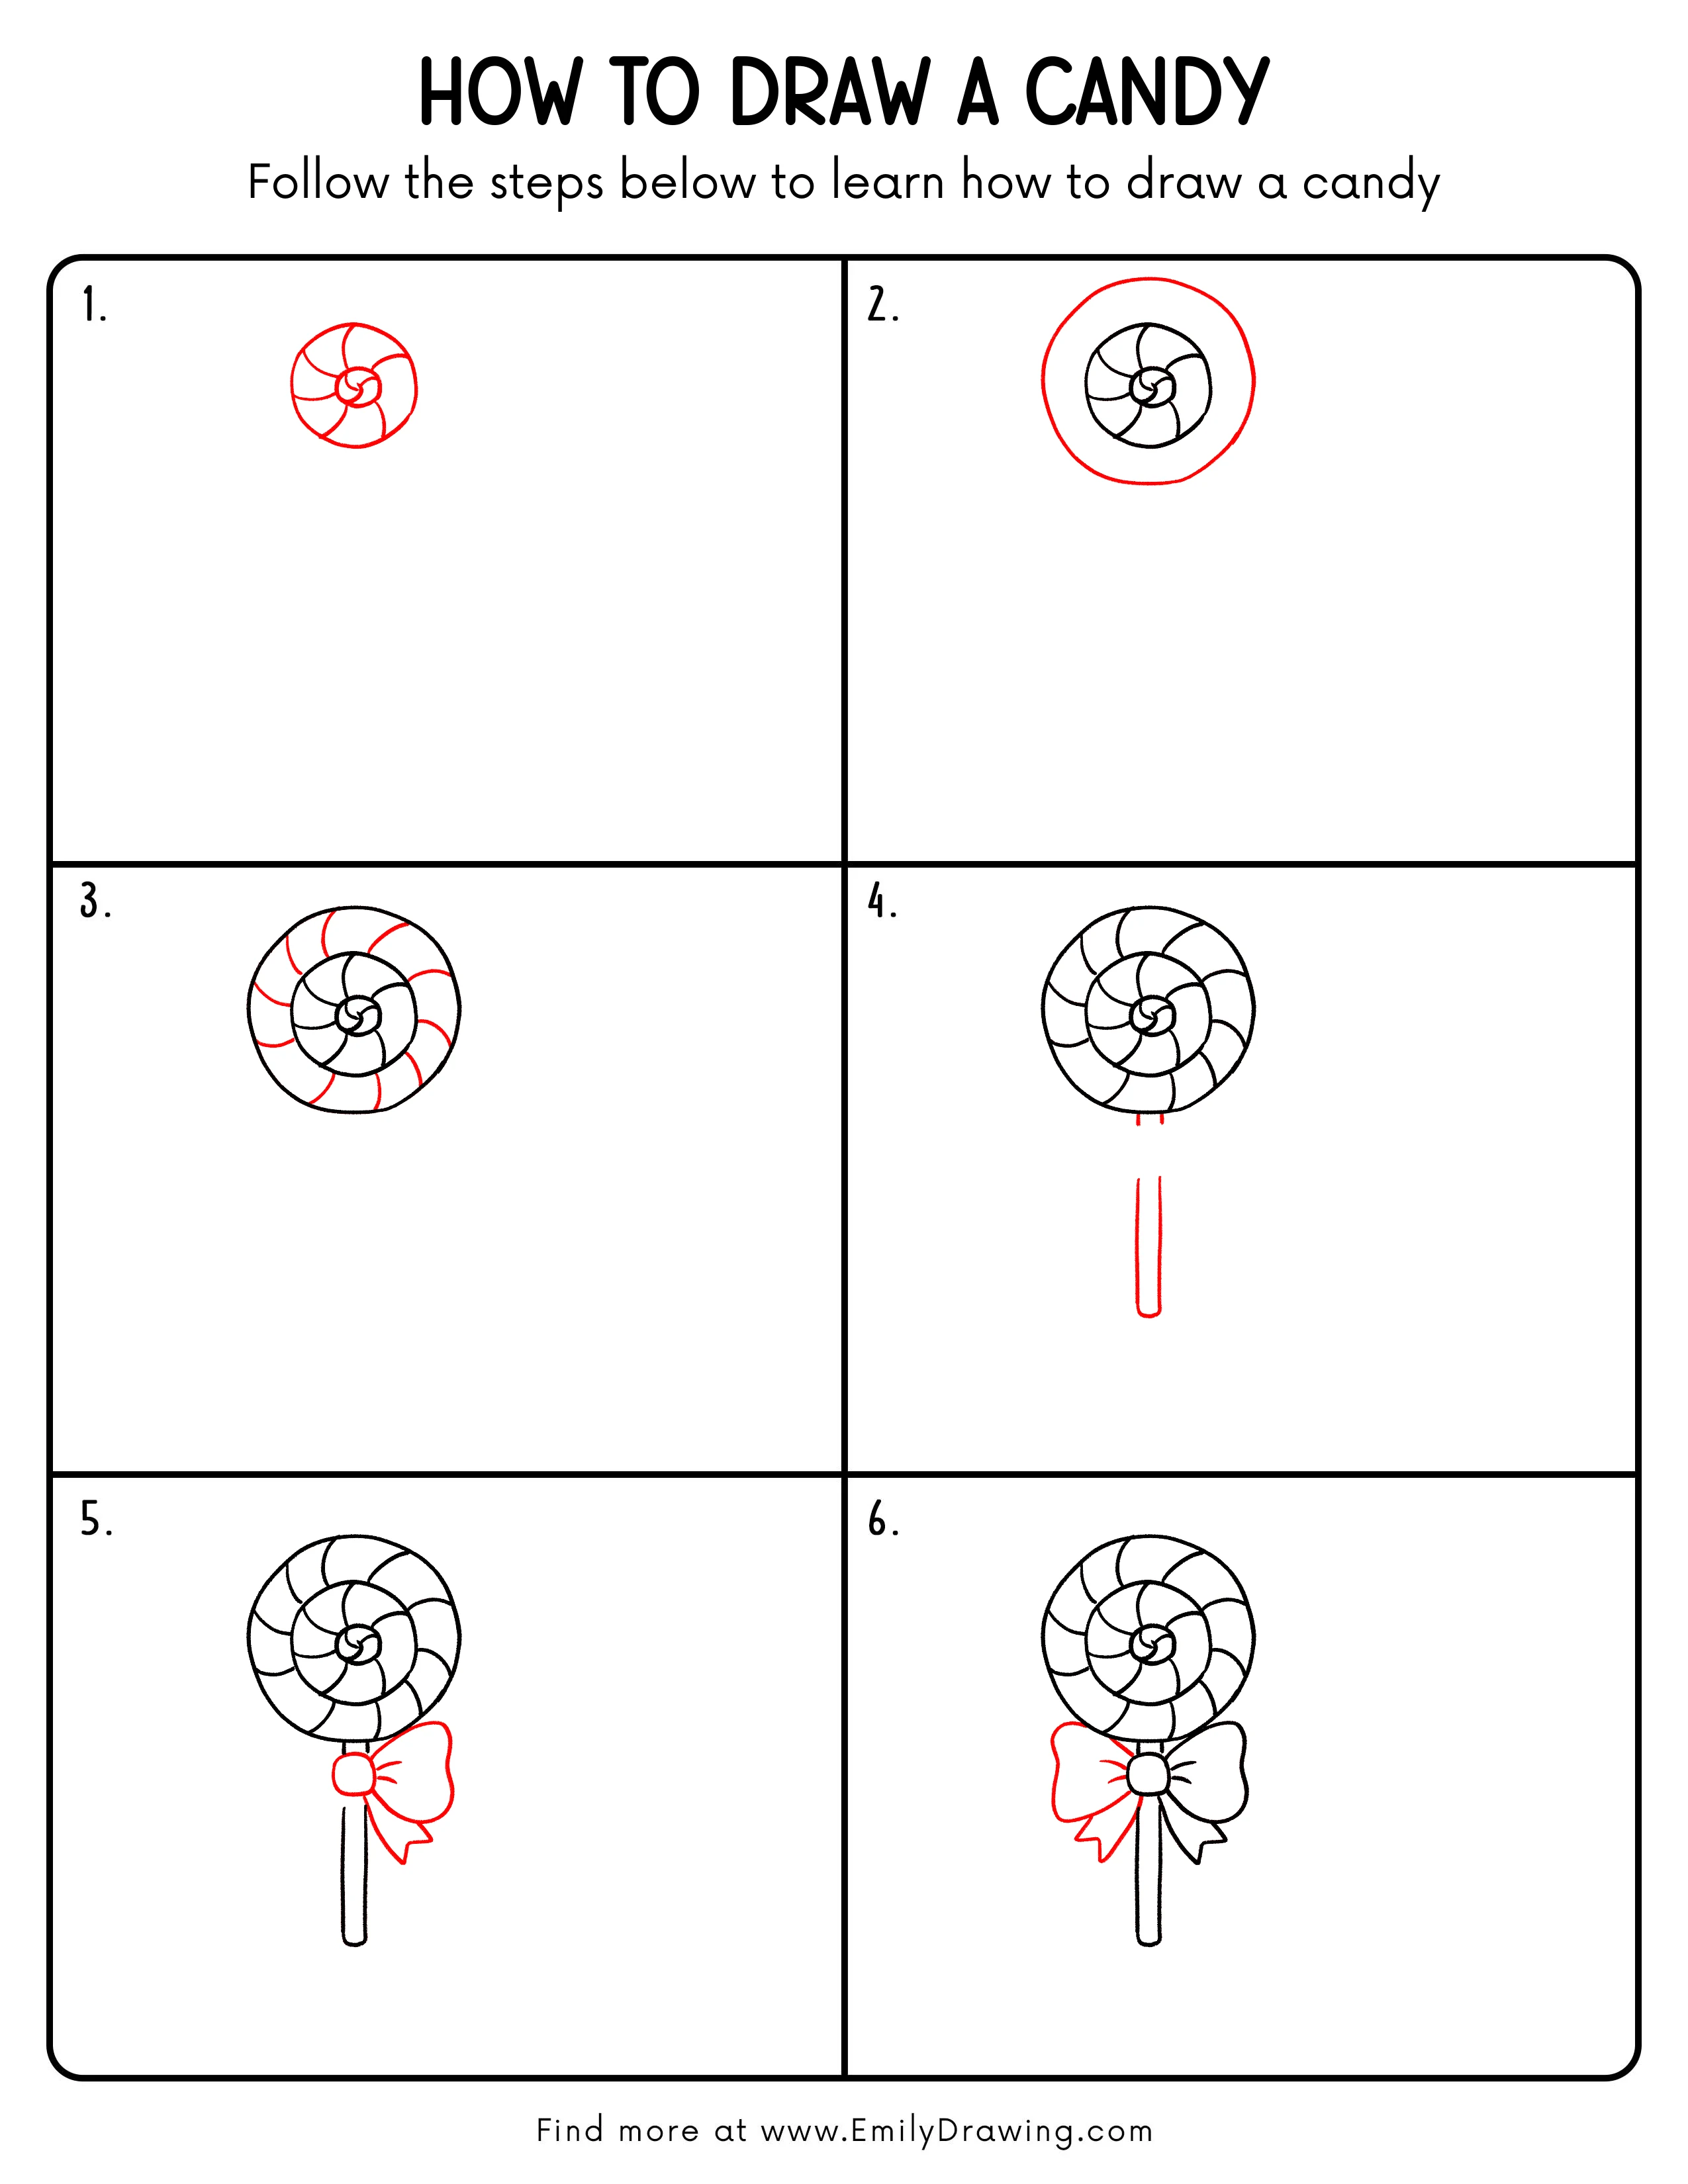
Step-by-Step Drawing Guide
Step 1: Build the Candy Swirl Base
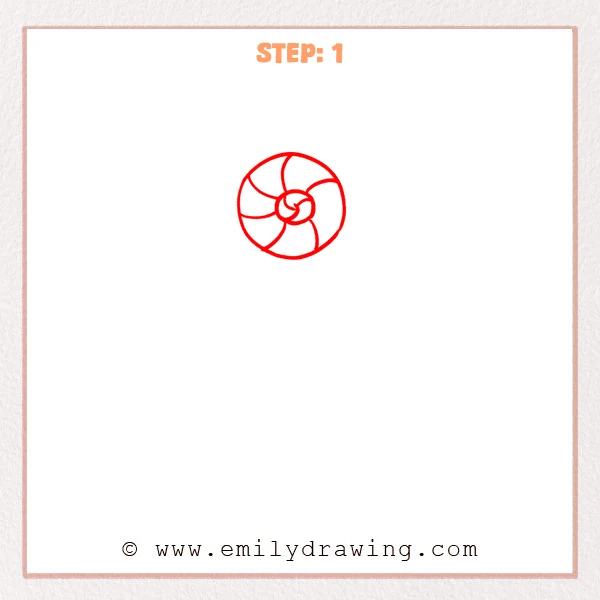
Start with a neat circle for the candy’s outer edge. Add a small swirl knot in the center, then draw several curved divider lines flowing outward like petals to form the spiral pattern. Keep all curves turning in the same direction.
Pro Tip: Don’t crowd the center—leave a little space so the swirl looks clean.
Step 2: Add a Thick Outer Candy Ring
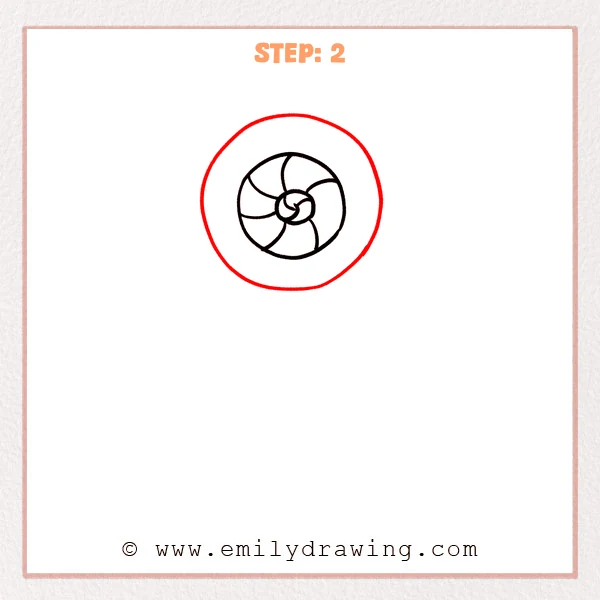
Draw a larger circle around your candy so it frames the swirl inside. Slightly thicken this outer line to create a bold candy rim.
Pro Tip: Keep the gap even all around so the candy looks balanced.
Step 3: Divide the Outer Ring into Swirl Candy Sections
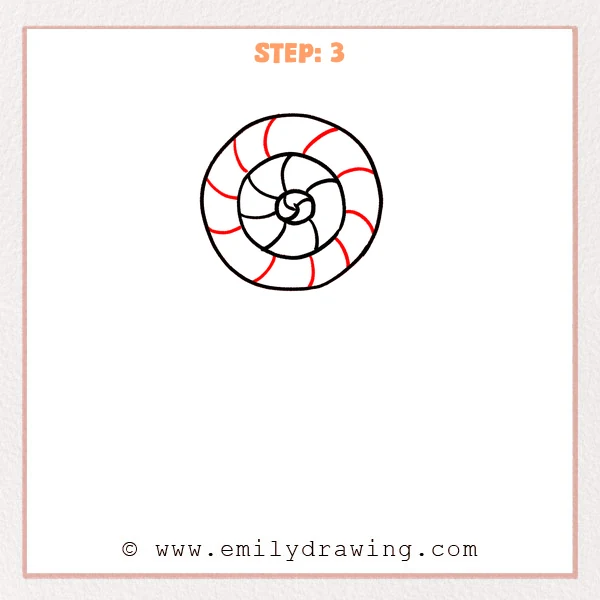
On the thick outer ring, add several curved lines that follow the same spinning direction. These arcs split the rim into candy-like segments that feel like they wrap around the center.
Pro Tip: Keep the curve strength similar on each arc for a tidy swirl.
Step 4: Add the Lollipop Stick
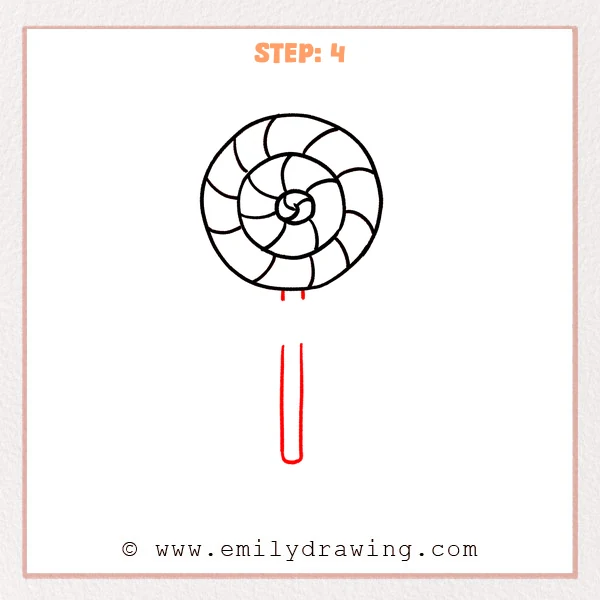
Under the candy, draw two straight, parallel lines and extend them downward to form the stick. Round the bottom with a soft U-shaped curve so it feels smooth.
Pro Tip: Line the stick up under the center so the lollipop feels balanced.
Step 5: Tie a Bow onto the Stick
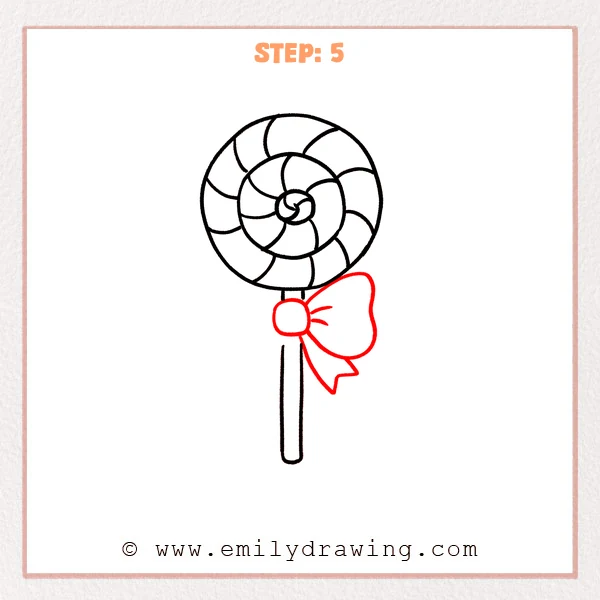
Draw a small rounded square on the upper stick as the knot center. From the right side, add a large, puffy bow loop with a smooth outer curve, then draw one ribbon tail below with a V-cut tip.
Pro Tip: Sketch the big bow shapes first, then add small folds last.
Step 6: Complete the Bow and Make It Symmetrical
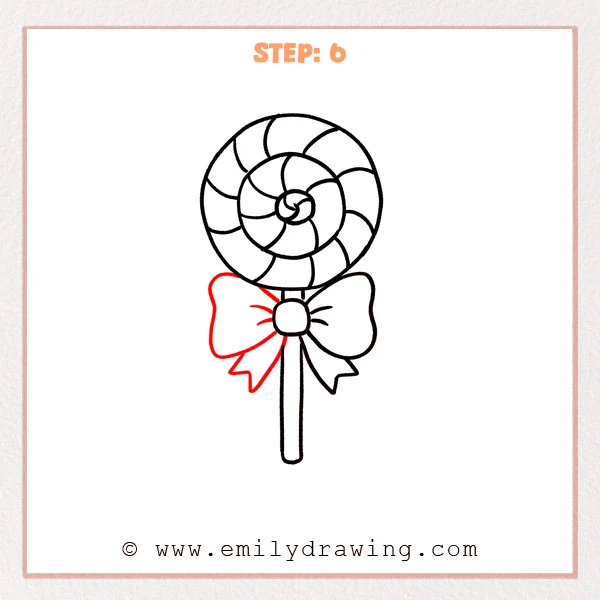
Add a matching bow loop on the left side of the knot so both sides feel balanced. Then draw a second ribbon tail below, and place a few short curved lines inside each loop to show gentle folds.
Pro Tip: Compare both loops for width first, then adjust curves to match.
Step 7: Color in your drawing!
Fun Facts
- Swirl candies are often designed with repeating curves, which makes them look like they are spinning.
- Lollipops can be made in many shapes, but circles are a classic because they are easy to hold and decorate.
Pin it now, Draw later!
Now you have a finished candy lollipop with a bold swirl and a pretty bow. Try coloring the candy in two or three bright stripes so the spiral stands out, and keep one stripe lighter to suggest shine. Add a soft shadow on one side of the stick and under the bow for a gentle 3D look. A common beginner mistake is making the swirl lines bend in different directions, so keep them flowing the same way. If you enjoyed this step by step drawing, practice drawing the candy again with new stripe patterns, and try another easy drawing tutorial next.
Get the FREE Printable Drawing Guide
FREE Download Printable Candy Drawing Tutorial
Frequently Asked Questions
How do I make the swirl look more even?
Lightly mark a few guide points around the circle, then keep the curved sections similar in width.
What if my outer ring looks wobbly?
Go slowly and draw the circle in short, smooth strokes, then darken it once it looks right.
How can I color this candy without streaks?
Use small circles with your pencil, layer lightly, and build color gradually for smoother stripes.