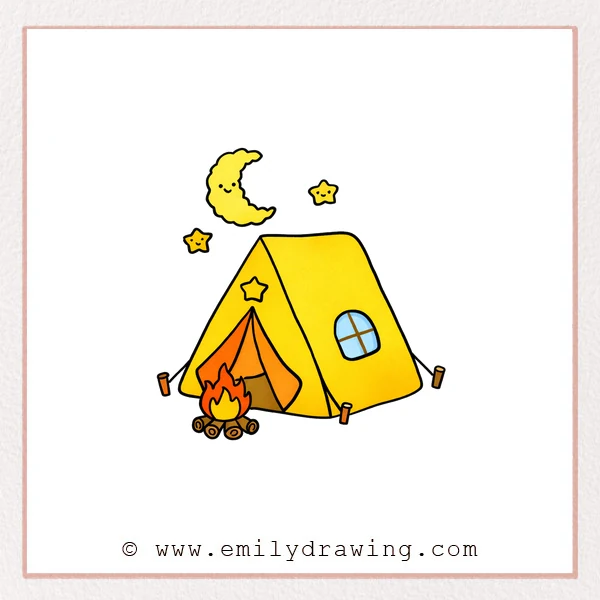
This easy drawing tutorial shows how to draw a camping scene step by step. You will sketch a friendly night sky, a simple tent, and a cozy campfire. Take your time, and enjoy this drawing for beginners.
What You Will Need
- Pencil
- Eraser
- Black marker or pen (optional for outlining)
- Paper
- Colored pencils or crayons (optional)
Here are my RECOMMENDED Art Supplies!
- Crayola Coloring Set (140 Pieces – Mega Value!)
- 24 Colored Crayon Set
- A4 Printer Paper
- Crayola Coloring Pencils
- HP Home Printer with Instant Ink!
Time needed:
14 minutes.
Step-by-Step Drawing Guide
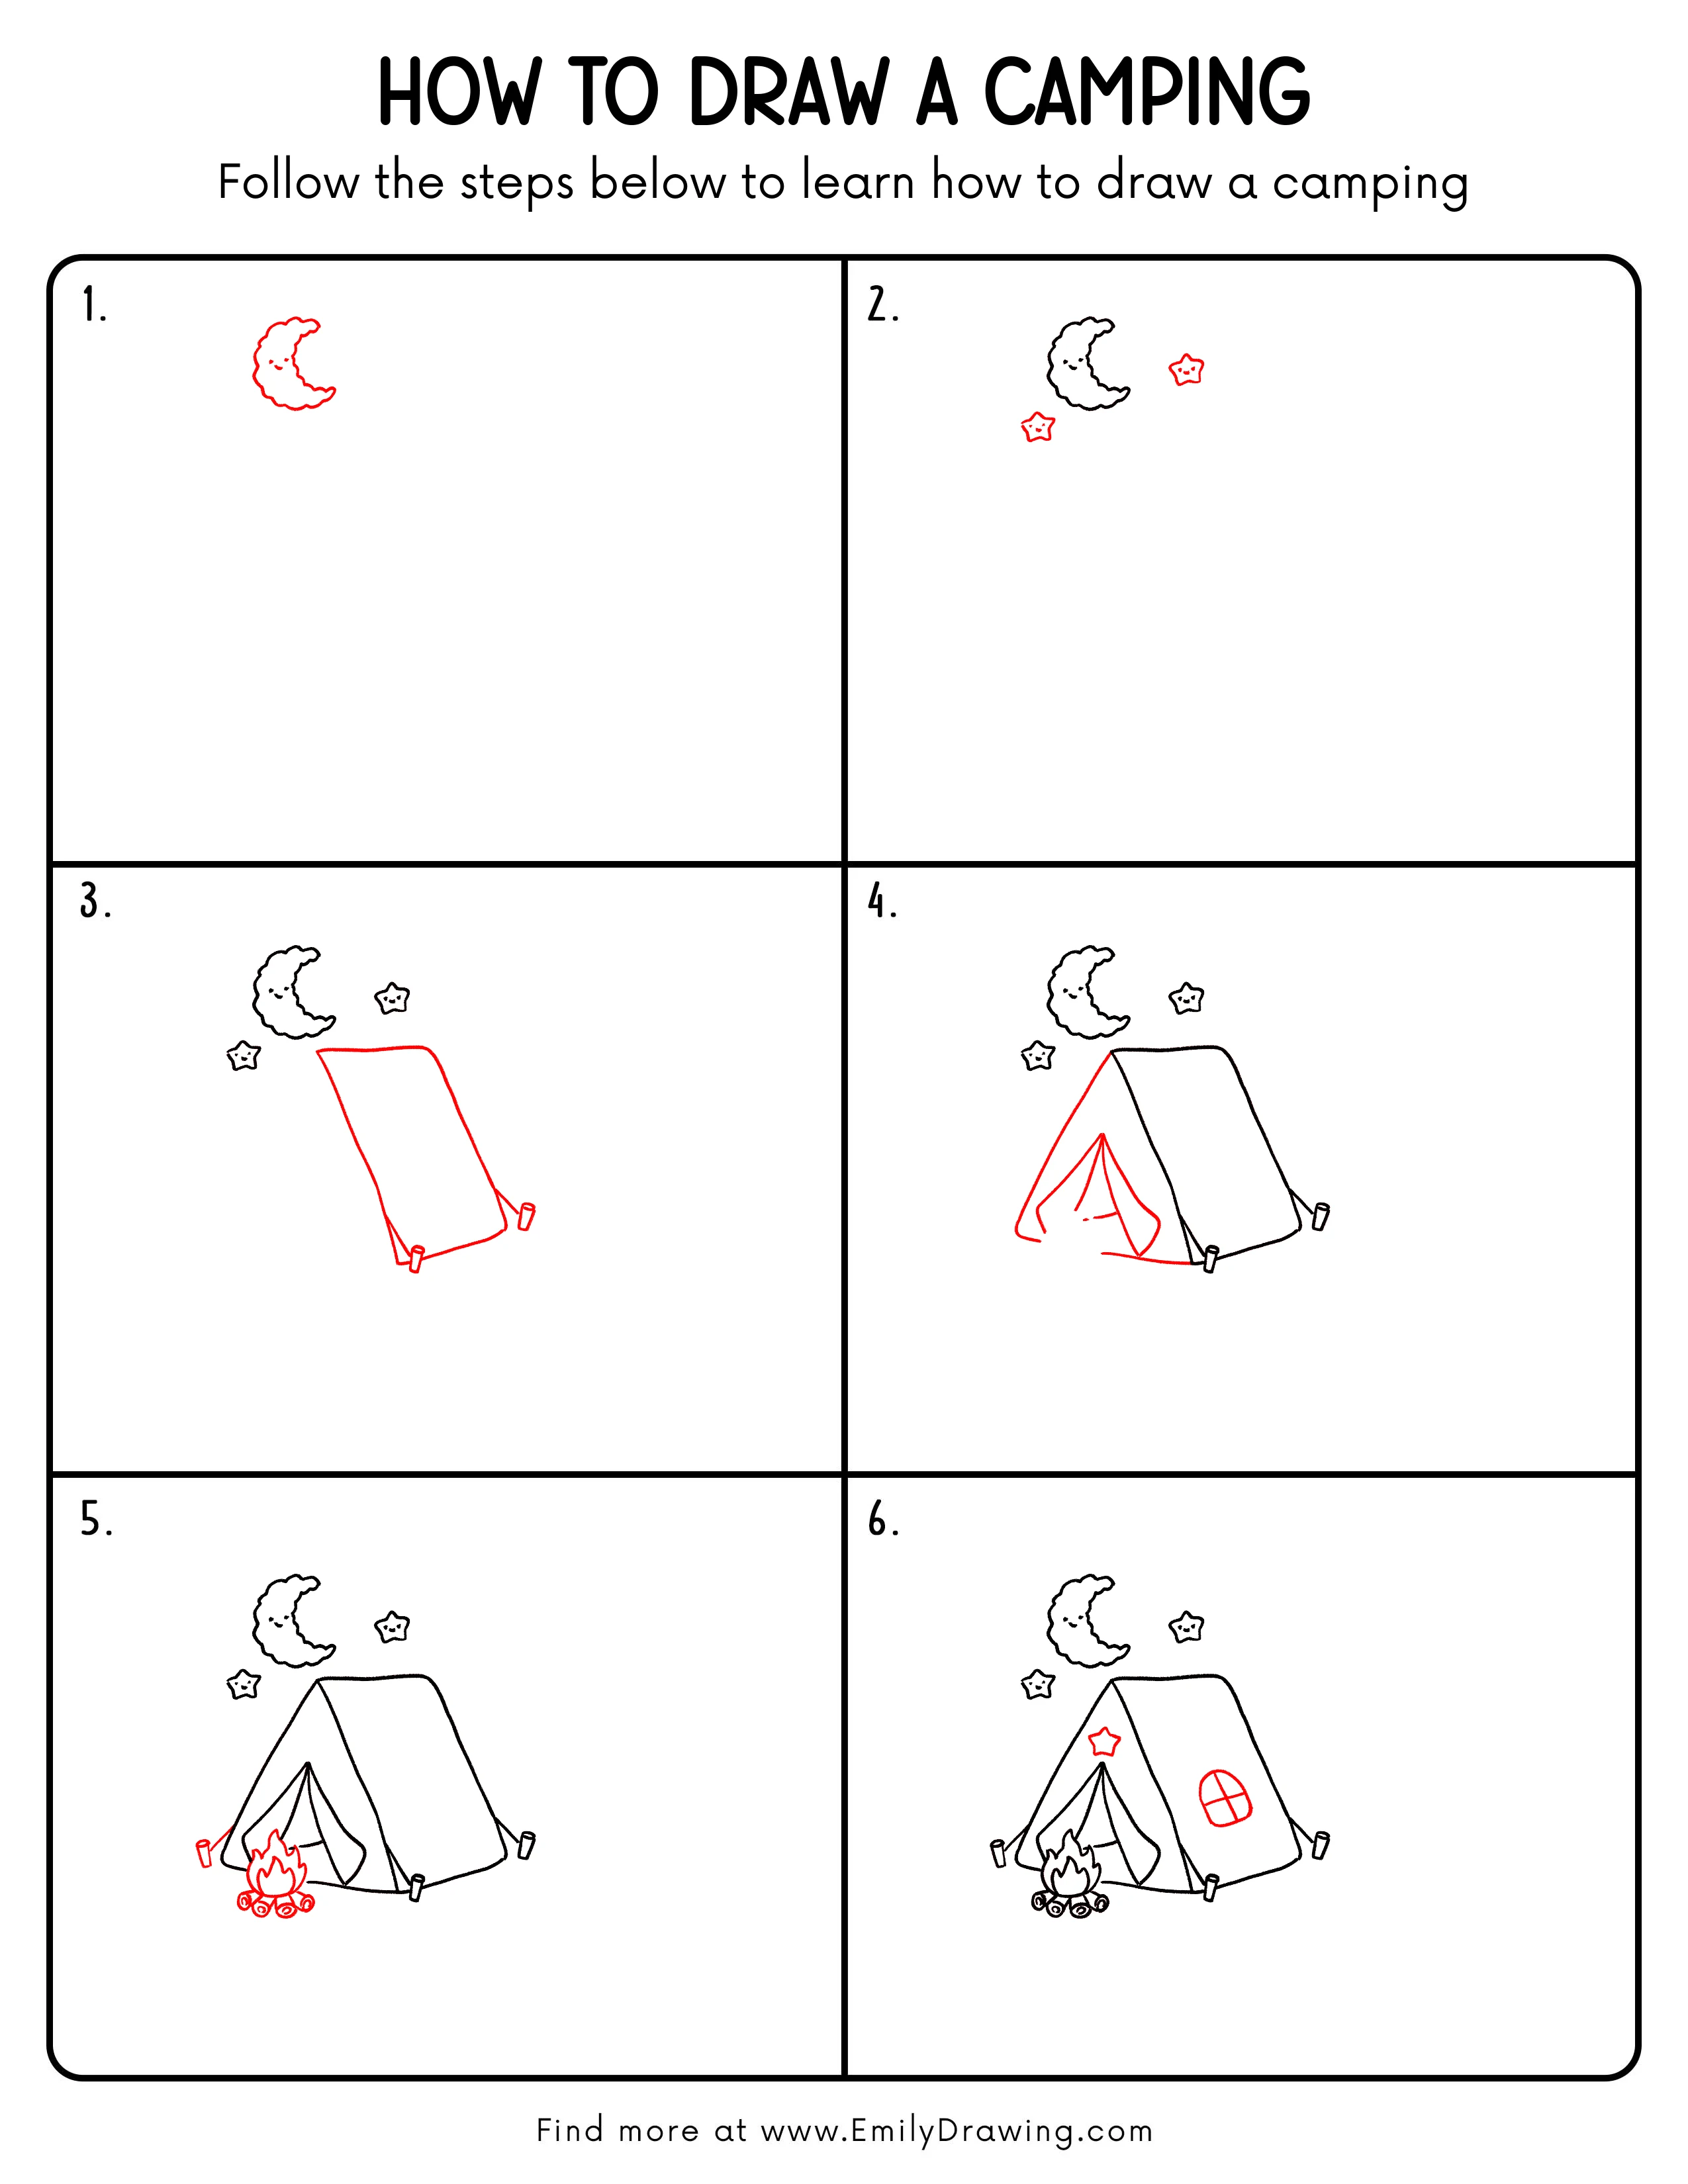
Step 1: Sketch a Cute Camping Moon Shape
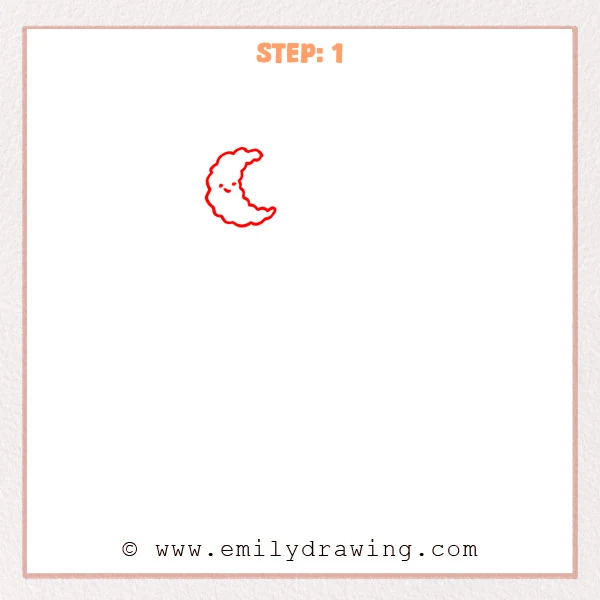
Start near the upper-left area and draw a curved “C” shape for the moon. Use small wavy bumps along the outer edge so it feels soft, like a fluffy cloud moon. Leave the center open for a simple face.
Pro Tip: Keep the bumps spaced out for a cuter, calmer look.
Step 2: Add Two Little Star Friends
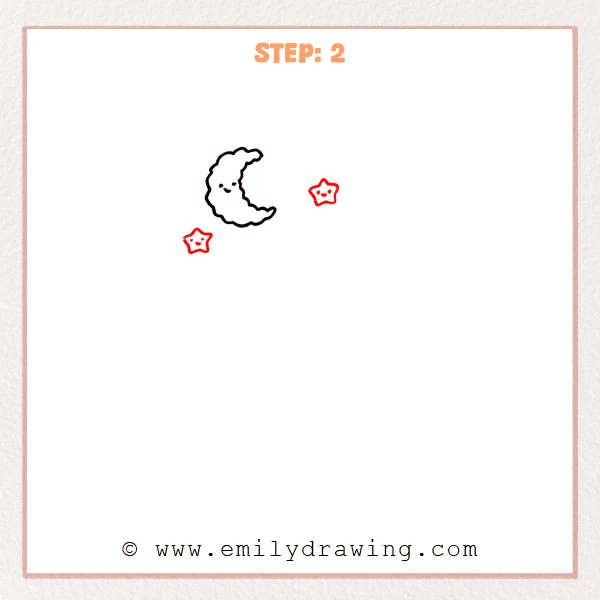
Draw a small five-point star to the right of the moon, keeping the points soft and rounded. Add a second, slightly smaller star below-left of the moon. Give both stars tiny eyes and a gentle smile to brighten the camping night sky.
Pro Tip: Vary the star sizes a little to make the sky feel deeper.
Step 3: Add the Tent Canvas and Two Small Stakes
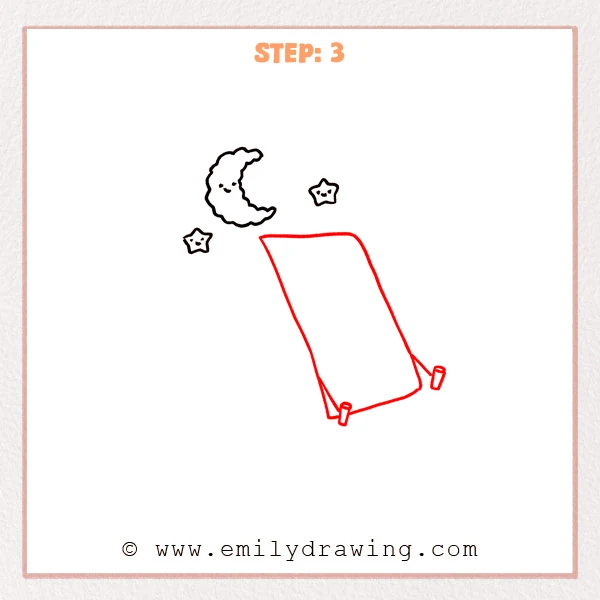
On the lower-right area, add a large tilted rectangle for the tent fabric, with gently rounded corners. Draw two small cylinder-shaped stakes near the bottom. Connect each stake to the fabric with a short line so it looks anchored for camping.
Pro Tip: Tilt the tent fabric a little so the scene feels more three-dimensional.
Step 4: Add the Tent Front and Open Door Flaps
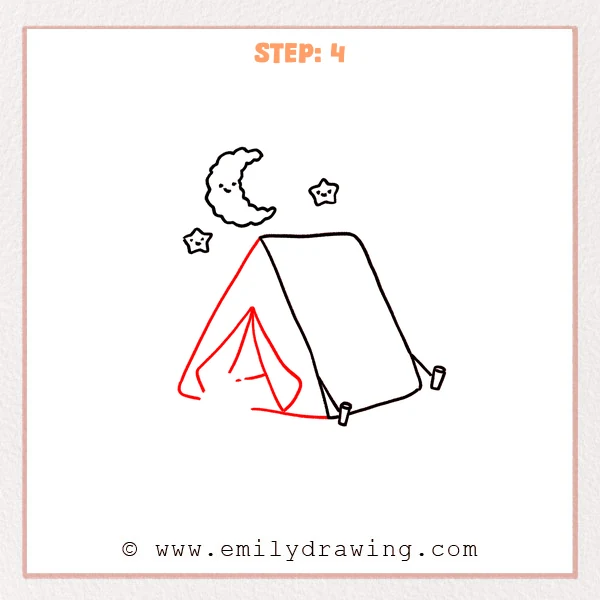
Add a large triangle on the left to form the tent’s front frame and connect it to the side panel. Inside, sketch two curved door flaps that meet near the top and open downward, leaving a clear entrance gap. Add a few short crease lines and a simple ground line under the tent to settle it into the camping scene.
Pro Tip: Keep the two door flaps slightly uneven for a natural look.
Step 5: Add a Campfire and Logs in Front
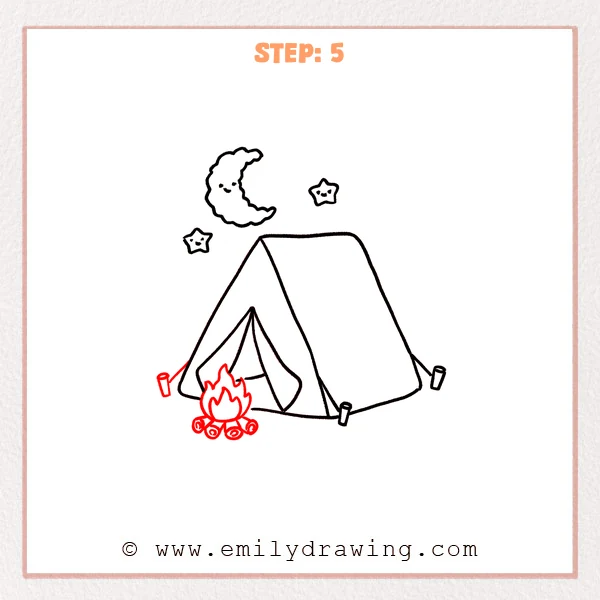
On the ground line in front of the tent entrance, add a flame made from a few stacked teardrop shapes. Under it, draw several short logs and curl small spiral rings on the ends to show the cut wood.
Pro Tip: Keep the tallest flame in the center so the fire feels balanced.
Step 6: Add a Tent Window and a Star Decoration
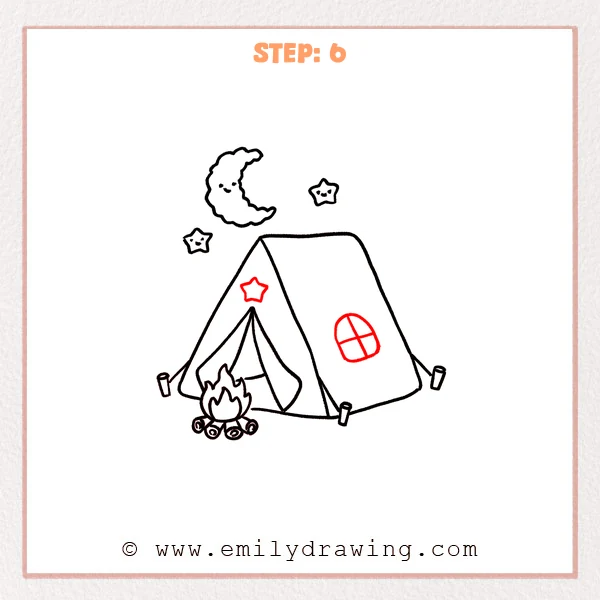
On the middle of the right tent panel, draw a small rounded oval for a window. Add one vertical line and one horizontal line to split it into four panes. Then place a small star emblem near the top of the tent front to make the camping scene feel extra cozy.
Pro Tip: Keep the window small so the tent panel still feels open.
Step 7: Color in your drawing!
Fun Facts
- Camping tents are designed to shed rain, so many have slanted sides.
- Campfires are often built with logs arranged to leave space for air.
- On clear nights away from city lights, you can see many more stars.
Pin it now, Draw later!
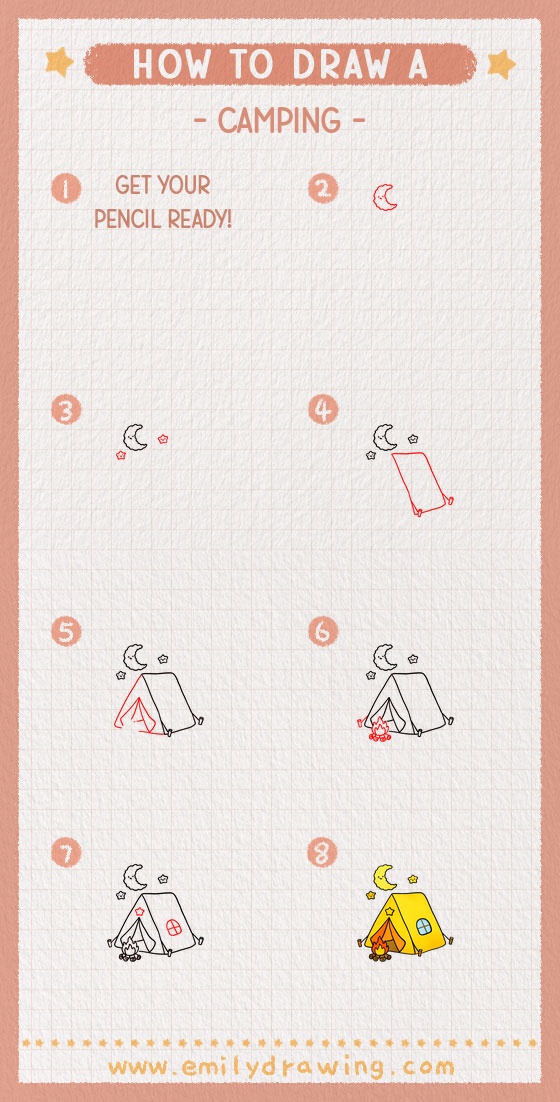
You now have a sweet camping night scene with a smiling moon, stars, a tent, and a campfire. Try coloring the sky a deep blue or purple, then shade the tent lightly along one side for depth. Add warm orange and yellow layers to the fire, and darken the log bottoms for contrast. A common beginner mistake is making the tent window too large, so keep it small and centered. Practice this step by step drawing again, and try adding trees or more stars in your next easy drawing tutorial.
Get the FREE Printable Drawing Guide
FREE Download Printable Camping Drawing Tutorial
Frequently Asked Questions
How do I make the night sky look darker without messy marks?
Color in light layers and build up slowly, pressing gently each time.
What if my tent looks crooked?
That is okay—camping tents can look slightly tilted, and it still feels natural.
How can I make the campfire look like it is glowing?
Leave a small white space inside the flame shapes and add light yellow around them.