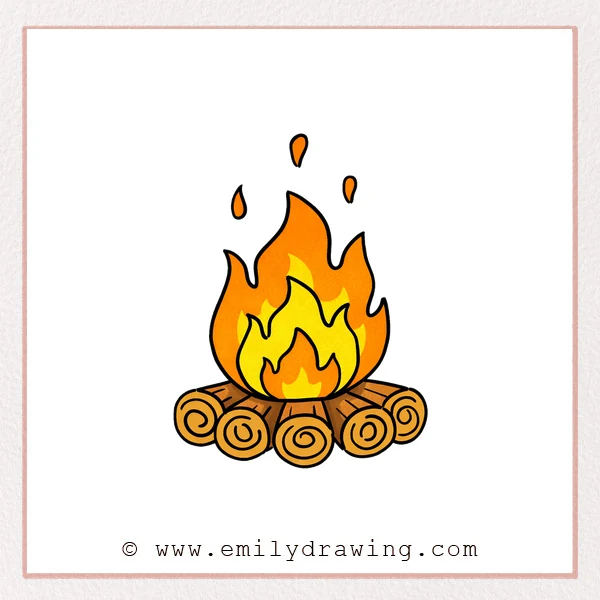
This easy drawing tutorial shows how to draw a campfire step by step. You will build a simple flame, then add logs and small sparks. Take your time and enjoy each small change as your campfire comes to life.
What You Will Need
- Pencil
- Eraser
- Black marker or pen
- Paper
- Colored pencils or crayons (optional)
Here are my RECOMMENDED Art Supplies!
- Crayola Coloring Set (140 Pieces – Mega Value!)
- 24 Colored Crayon Set
- A4 Printer Paper
- Crayola Coloring Pencils
- HP Home Printer with Instant Ink!
Time needed:
21 minutes.
Step-by-Step Drawing Guide
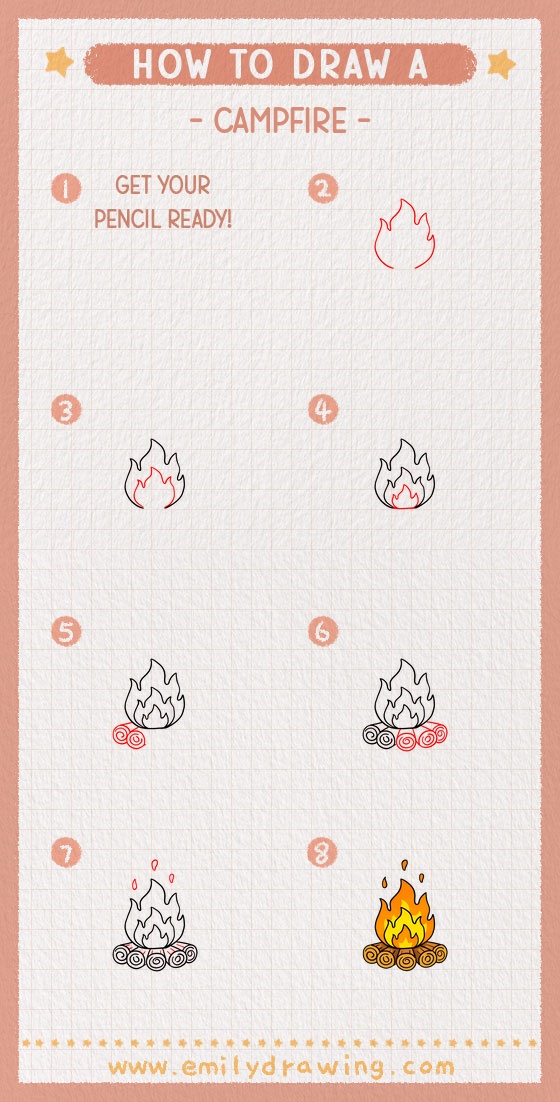
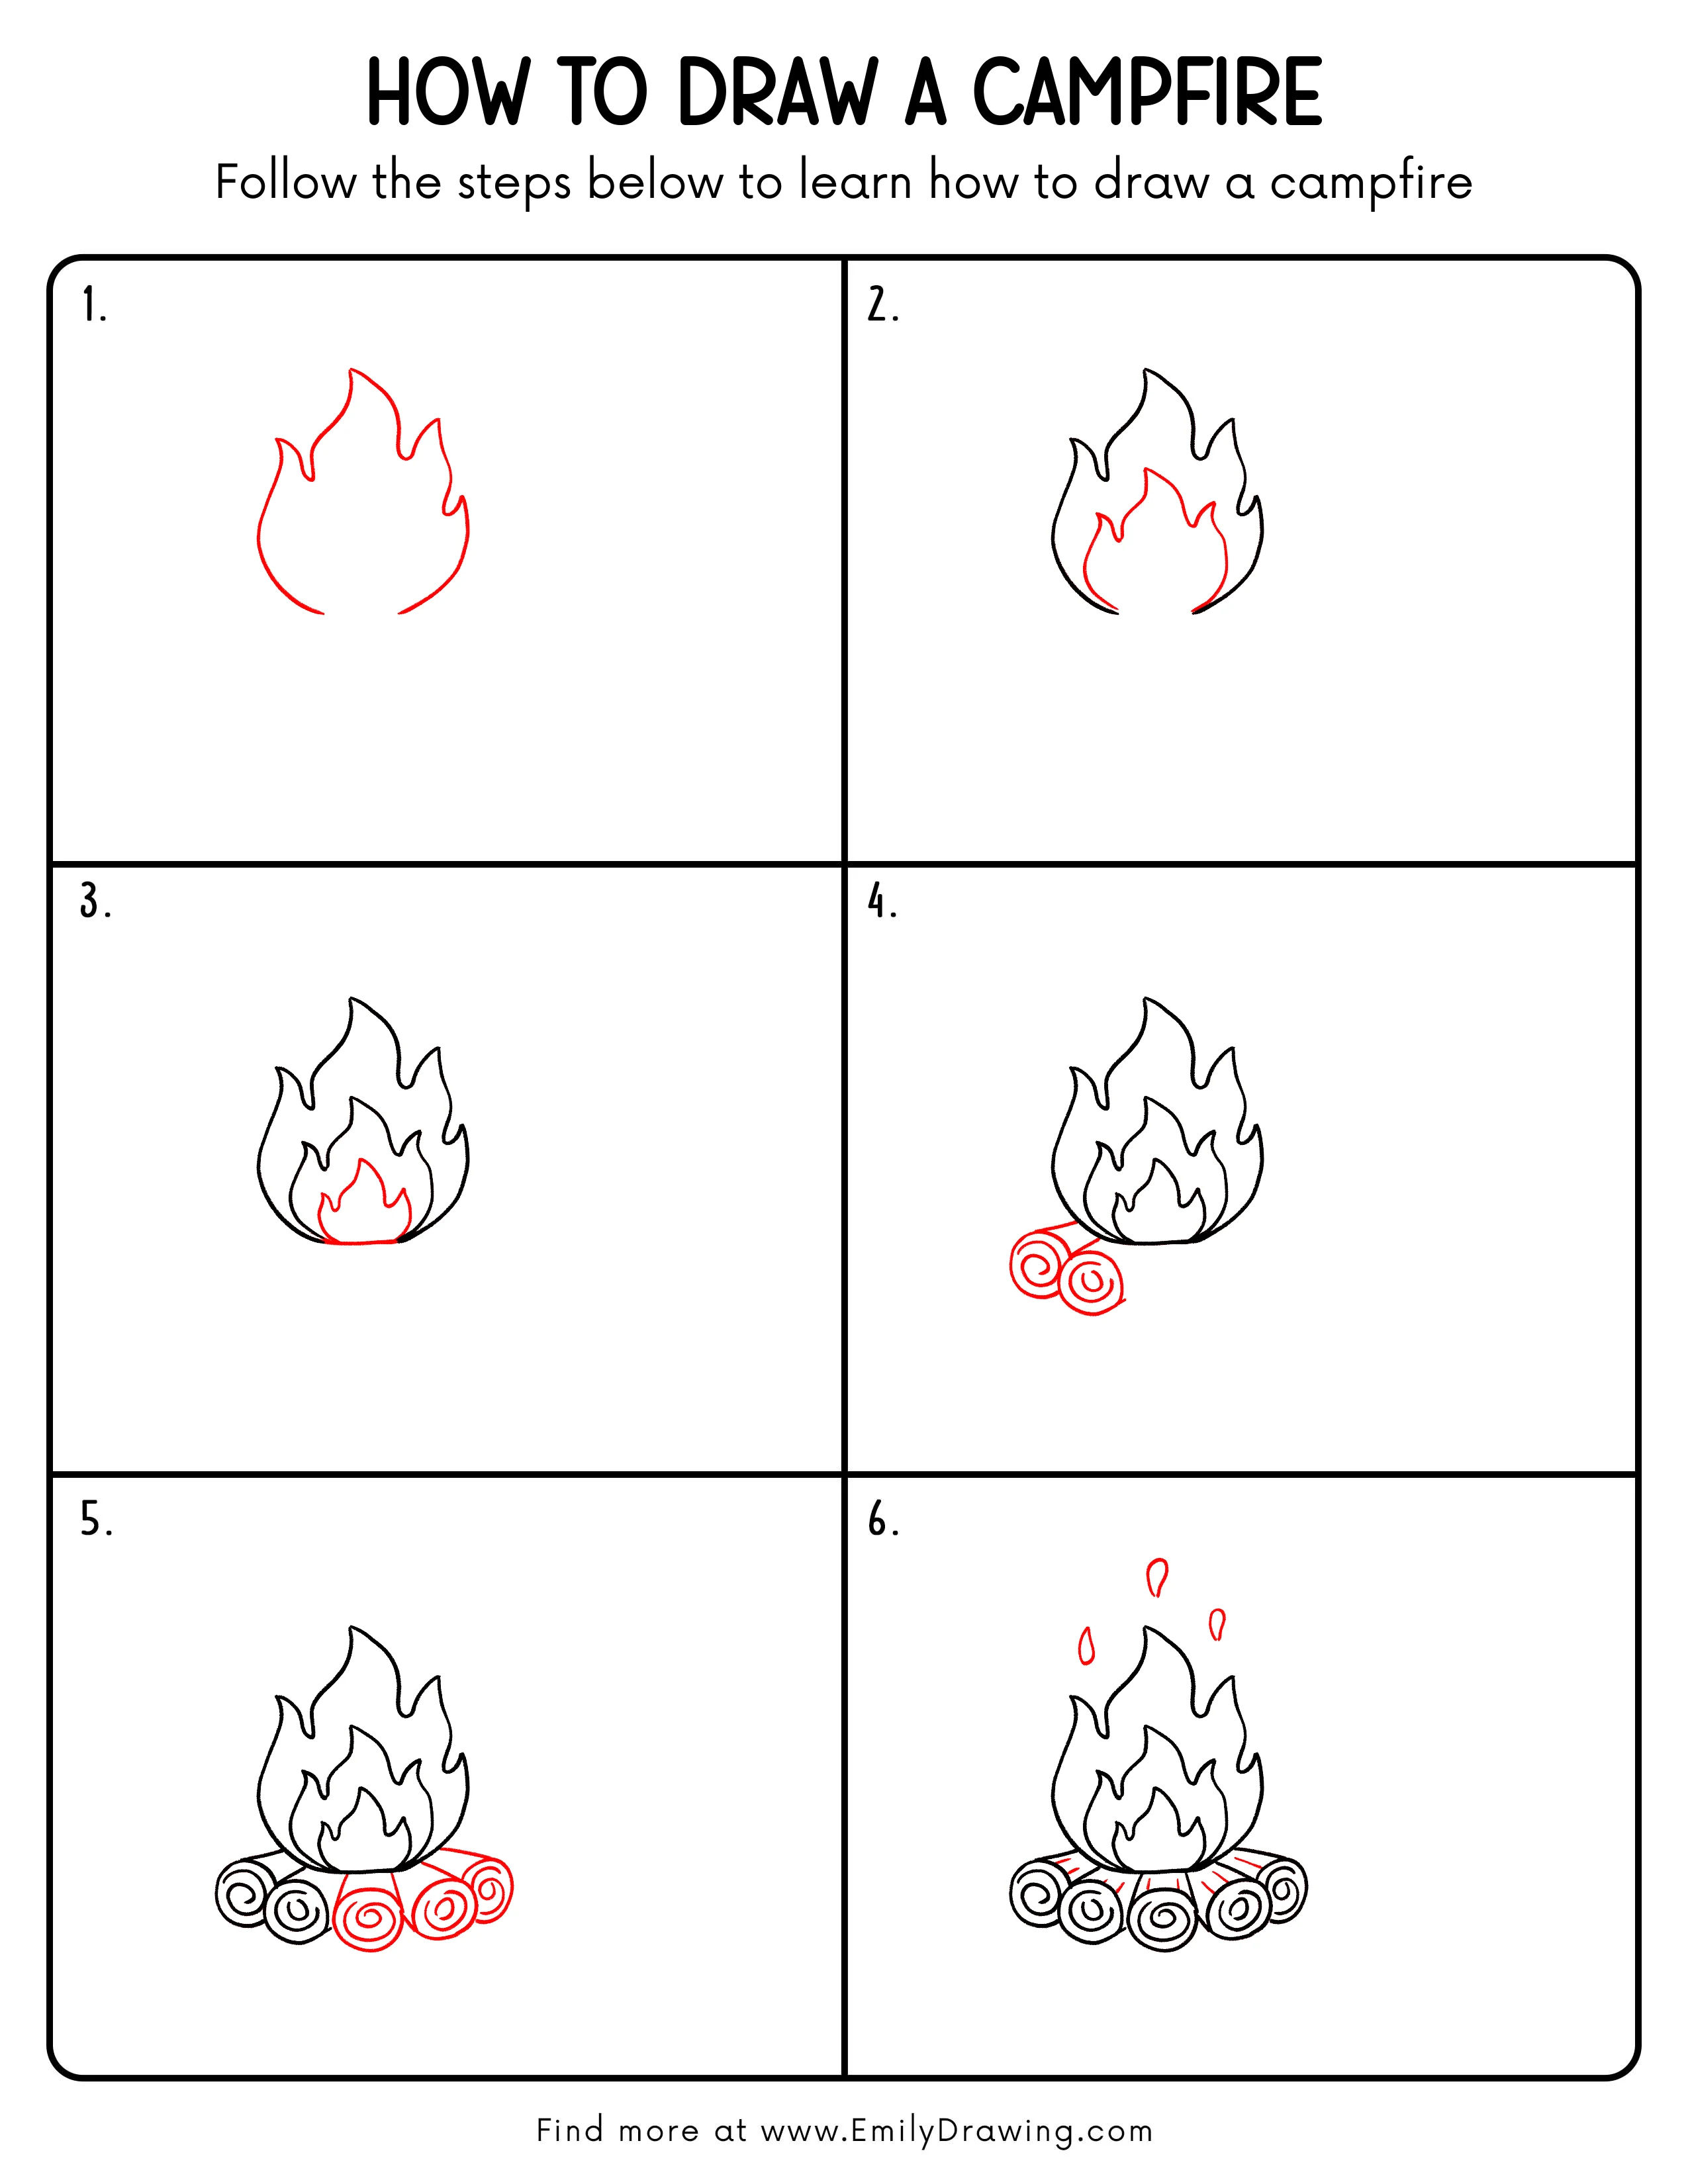
Step 1: Draw the Flame Outline
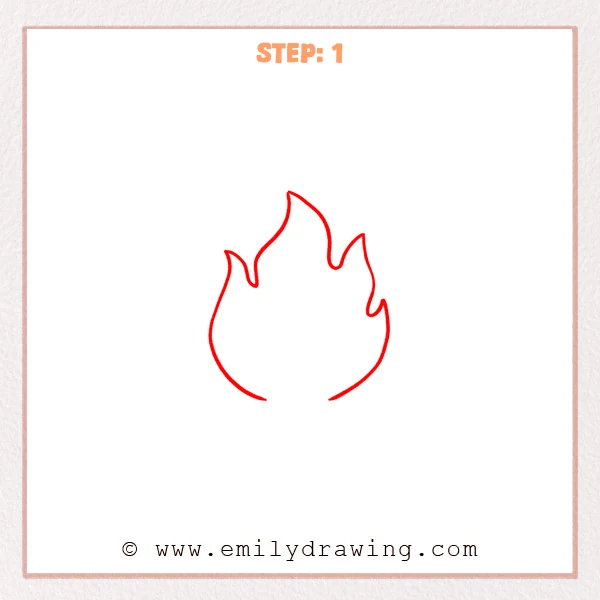
Start with a large teardrop-like flame shape in the center of the page. Add three wavy points at the top, keeping the middle point the tallest. Leave a small gap at the bottom instead of closing the shape.
Pro Tip: Keep the tips slightly rounded so the flame feels natural.
Step 2: Add the Inner Flame
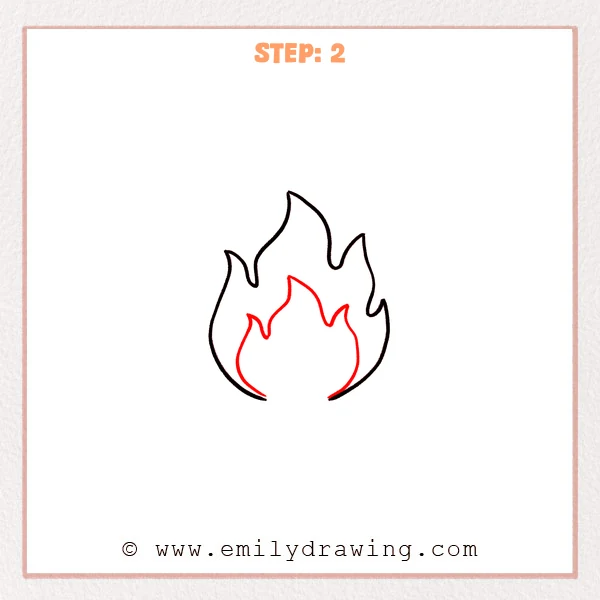
Inside the main flame, sketch a smaller flame rising from the bottom opening. Keep its tips away from the outer edge, leaving a thin border of space around it. Leave a small gap at the bottom so it feels airy and bright.
Pro Tip: Center the inner flame slightly to create a glowing look.
Step 3: Add the Smallest Flame and the Bottom Curve
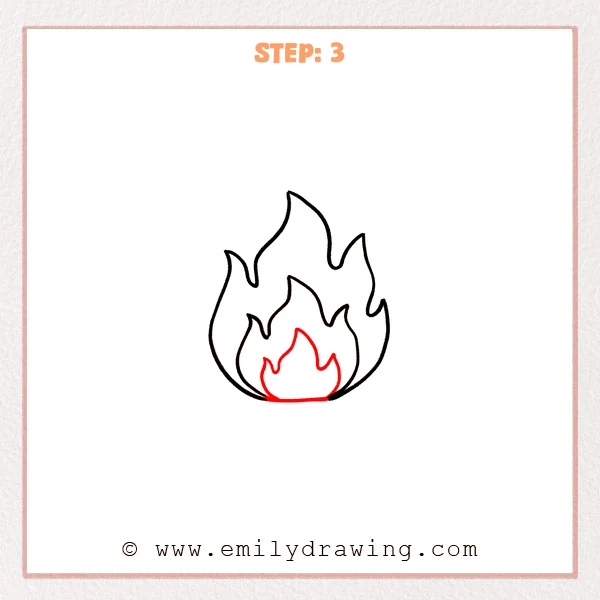
Draw a third, smaller flame inside the lower area, rising up from the center. Then add a gentle curved line to connect the bottom opening, so the campfire flame feels grounded.
Pro Tip: Keep the smallest flame shorter and rounder to show clear layers.
Step 4: Add Two Logs Under the Flame
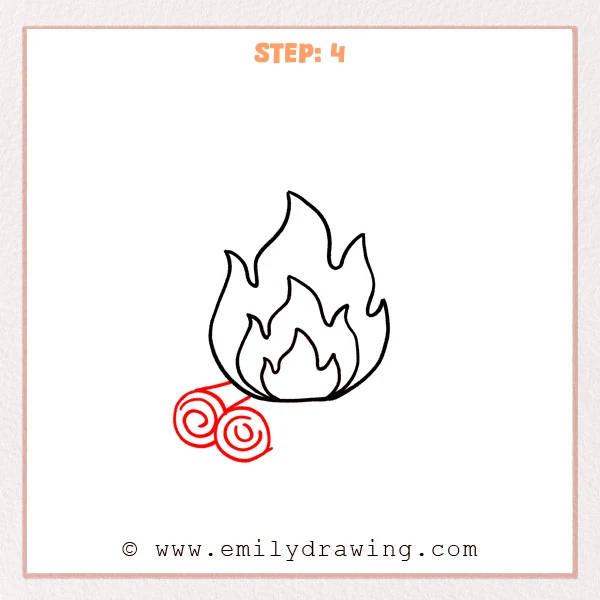
Under the base of the flame, sketch two short log shapes angled slightly to the left. On each log end, add a circle and a simple spiral line to show the wood grain, like a cut tree trunk.
Pro Tip: Vary the log angles a little so the campfire looks more natural.
Step 5: Fill Out the Log Base and Add Wood Grain
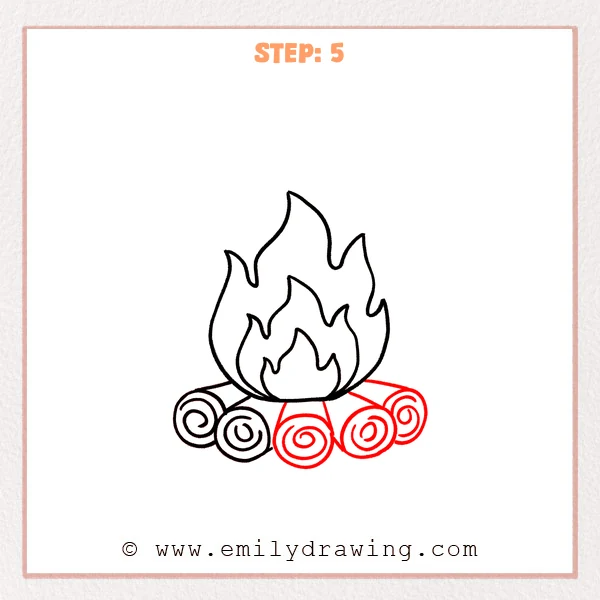
Continue adding more short log cylinders under the flame, spreading them from left to right to form a full log pile. Give each log end a circle with a spiral grain line, and add a few short connecting lines where the logs overlap under the flame.
Pro Tip: Vary the log-end sizes slightly to show depth and overlap.
Step 6: Add Sparks and Log Texture Lines
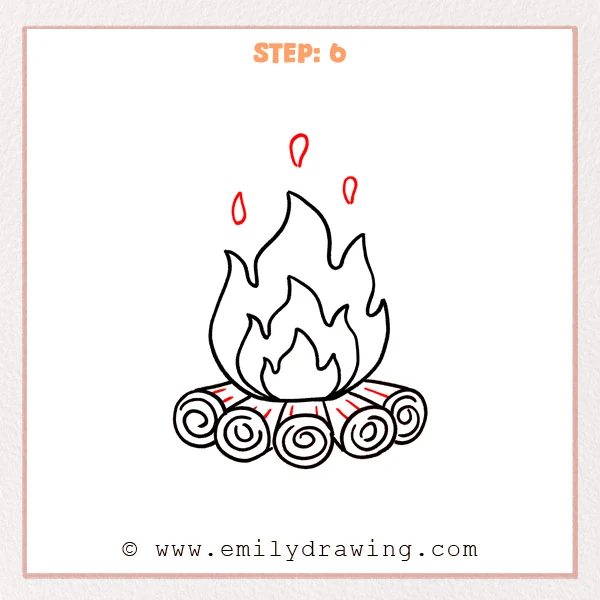
Add three or four small teardrop-shaped sparks above the flame, spacing them out and varying their sizes. Then draw a few short straight lines on the top faces of the logs, radiating outward from under the flame to suggest texture and depth.
Pro Tip: Keep the sparks unevenly spaced so they feel like they are floating.
Step 7: Color in your drawing!
Fun Facts
- A campfire needs heat, fuel, and oxygen to keep burning.
- Flames often look layered because hotter parts glow brighter.
- Wood grain lines curl in rings because trees grow in layers each year.
Pin it now, Draw later!
You now have a clear campfire drawing with a layered flame, stacked logs, and drifting sparks. For coloring, try yellow in the center flame, then orange, then a little red on the outer edges. Add light gray shading under the logs to suggest a shadow on the ground.
A common beginner mistake is making every flame tip the same size and spacing. If your flame looks stiff, soften one or two curves and vary the points a little.
Keep practicing this step by step drawing, and try changing the spark shapes or log stack. When you are ready, draw a few stones around the campfire or add a simple night sky.
Get the FREE Printable Drawing Guide
FREE Download Printable Campfire Drawing Tutorial
Frequently Asked Questions
How do I make the campfire flame look more realistic?
Keep the tips slightly rounded and vary the height of the points. Adding a smaller inner flame helps the glow feel stronger.
What if my logs look uneven or messy?
That is normal for a drawing for beginners. Use your eraser to clean the outer edges, and make the log ends slightly different sizes.
Can I draw smoke above the campfire too?
Yes. Add a few light, wavy lines above the sparks, and keep them very thin so they do not overpower the flame.