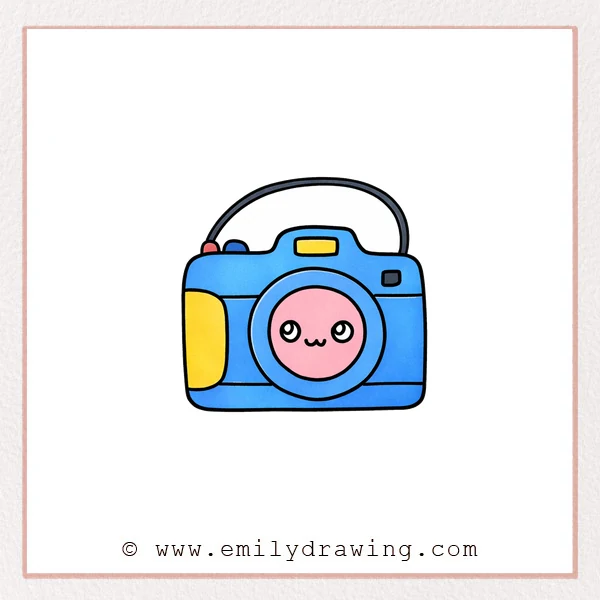
This easy drawing tutorial shows how to draw a cute camera step by step. We will build simple shapes first, then add details that make it feel friendly and fun. Take your time with each line, and enjoy the calm rhythm of drawing.
What You Will Need
- Pencil
- Eraser
- Black marker or pen
- Paper
- Optional: Colored pencils or markers
Here are my RECOMMENDED Art Supplies!
- Crayola Coloring Set (140 Pieces – Mega Value!)
- 24 Colored Crayon Set
- A4 Printer Paper
- Crayola Coloring Pencils
- HP Home Printer with Instant Ink!
Time needed:
19 minutes.
Step-by-Step Drawing Guide
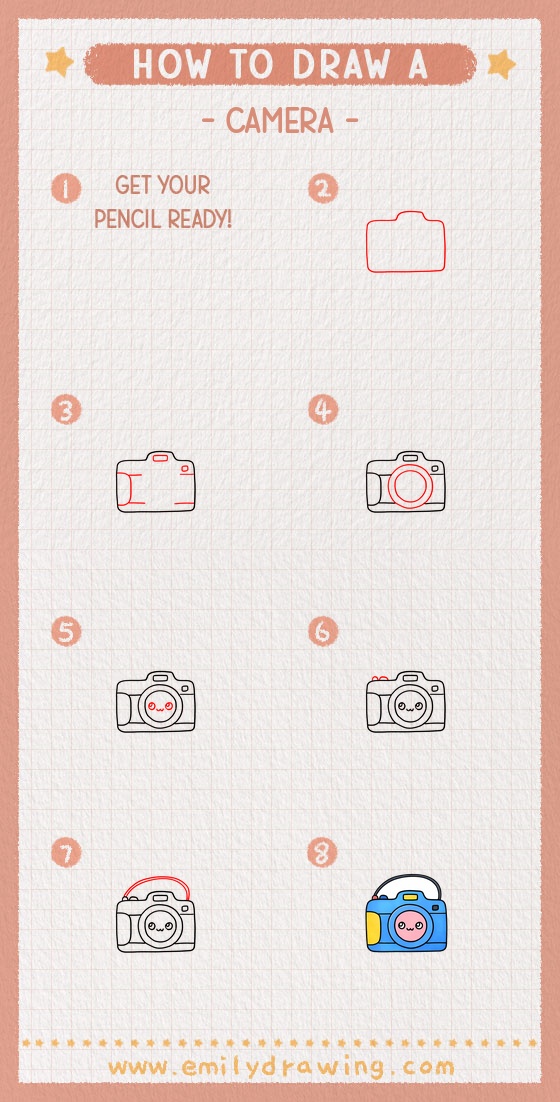
Step 1: Sketch the Camera Body Outline
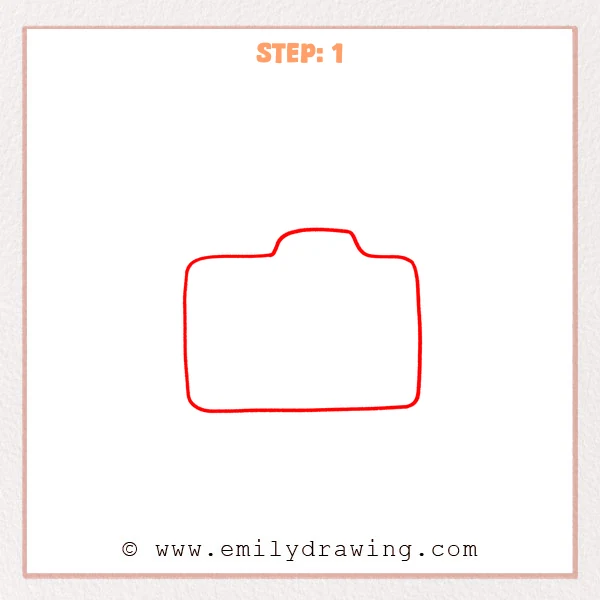
Start with a wide rounded rectangle for the camera body. Add a small raised bump in the top center to suggest the viewfinder area. Keep your corners gently curved and your outline smooth.
Pro Tip: Keep both sides balanced so the camera looks steady.
Step 2: Add the Grip and Simple Buttons
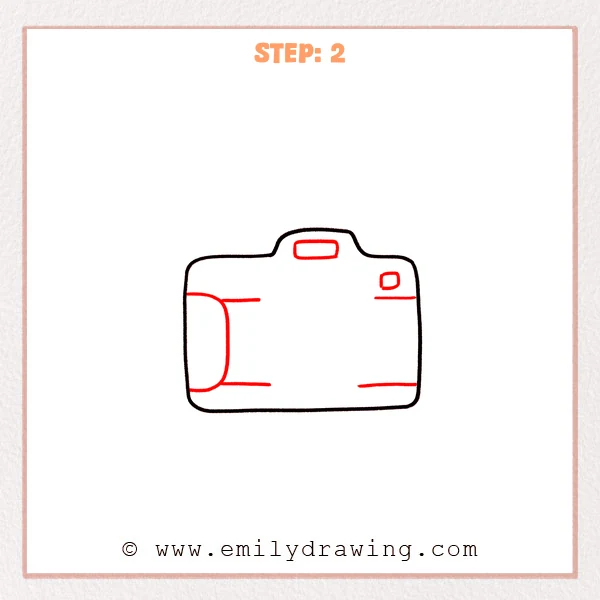
Add a tall rounded grip on the left side, hugging the camera edge from top to bottom. Draw a small rounded rectangle in the top center for the viewfinder window, then add a tiny rounded square on the upper right as a button. Finish with a few short horizontal lines to suggest body panels.
Pro Tip: Keep the grip close to the outline, with even spacing for a neat look.
Step 3: Add the Big Lens Ring
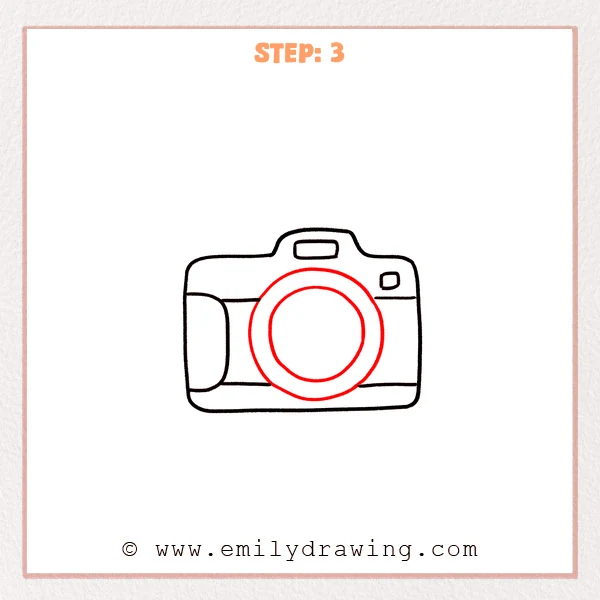
Draw a large ring in the center of the camera body, letting the bottom edge sit close to the lower panel line. Inside it, add a smaller circle for the inner lens glass. Try to keep the space between the circles even.
Pro Tip: Sketch the circles lightly first, then darken them for a rounder shape.
Step 4: Turn the Lens into a Cute Face
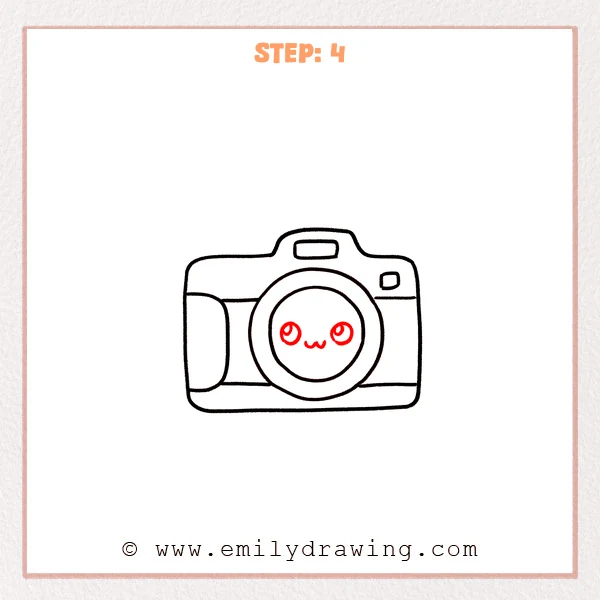
Inside the inner lens circle, add two round eyes placed slightly above center, one on each side. Draw a small highlight and a curved inner line in each eye to make them sparkle. Finish with a tiny “w”-shaped smile between the eyes.
Pro Tip: Keep both eyes at the same height for a sweeter expression.
Step 5: Add the Small Top Buttons
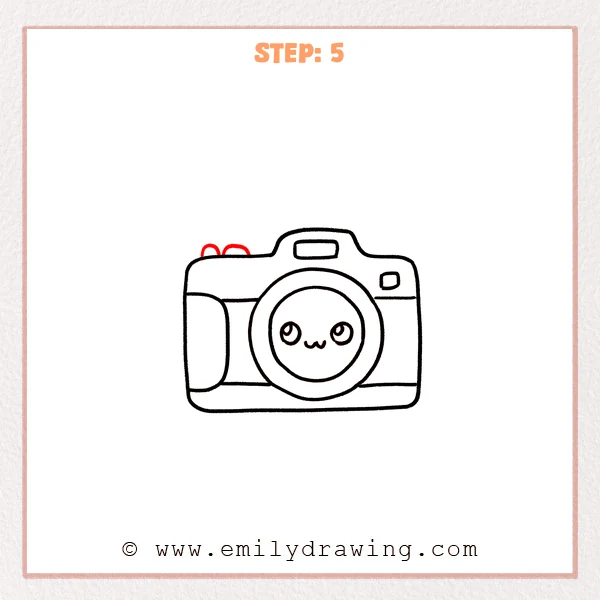
On the upper left edge of the camera, add two tiny rounded bumps sitting on the outline. Keep them similar in size and close together so they feel like a matched set of controls.
Pro Tip: Don’t make the buttons too tall—small bumps look best.
Step 6: Draw the Curved Camera Strap
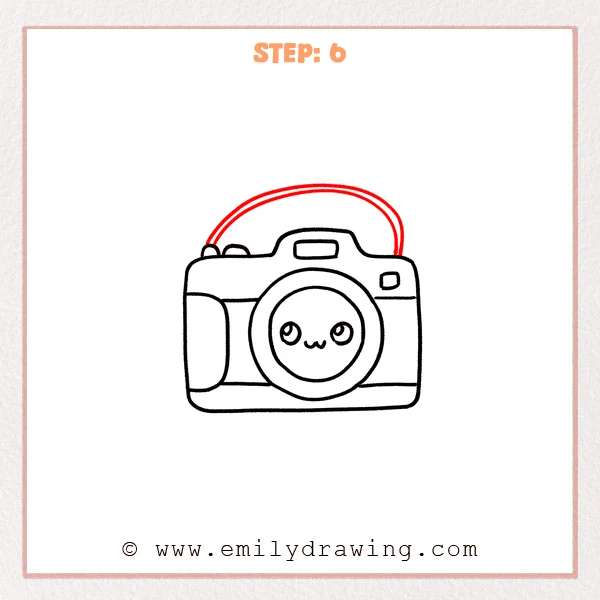
Starting near the top-left buttons, draw a long arching curve that rises over the camera like a rainbow. Add a second, parallel curve just inside the first to give the strap thickness. Let both ends gently meet the camera body.
Pro Tip: Keep the gap between the two curves even for a clean strap.
Step 7: Color in your drawing!
Fun Facts
- The word “camera” comes from “camera obscura,” meaning “dark room,” an early image-making tool.
- Many cameras use a lens to focus light, just like your eye does.
- Some cameras have straps to help people carry them safely.
Pin it now, Draw later!
You have drawn a cute camera by building the body, lens, and small controls step by step. For coloring, try a light gray or pastel body, then shade along the bottom edge and under the strap to make it look 3D. Add a darker ring around the lens and leave the eye highlights white for sparkle.
A common beginner mistake is making the lens circles uneven, so slow down and check the spacing as you ink. Keep practicing this drawing for beginners, and try changing the face or adding stickers for a new look. If you enjoyed this step by step drawing, draw it again smaller, then bigger, to build confidence.
Get the FREE Printable Drawing Guide

FREE Download Printable Camera Drawing Tutorial
Frequently Asked Questions
How do I draw a round lens more easily?
Lightly sketch a circle first, then trace it again with a smoother line.
What if my camera looks lopsided?
Compare the left and right sides, then adjust the outline with your eraser.
How can I make the cute face look nicer?
Place both eyes at the same height and keep the highlights in the same corner.