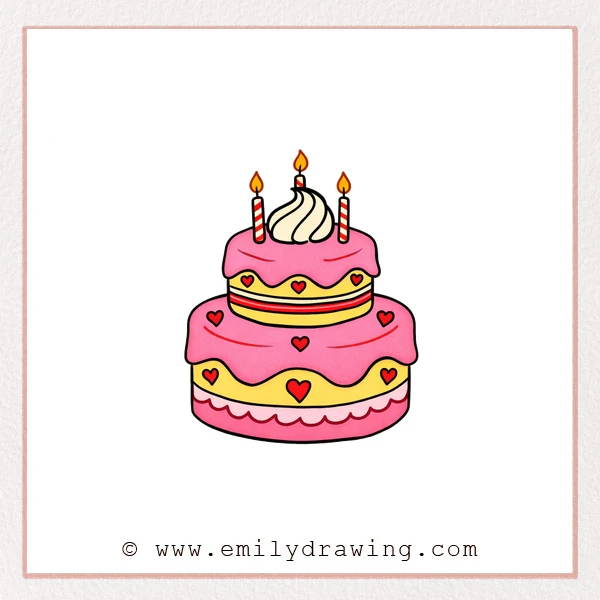
This easy drawing tutorial shows how to draw a cute cake step by step. You will build the cake one simple shape at a time, so it feels calm and manageable. It is a friendly drawing for beginners and a sweet little practice page.
What You Will Need
- Pencil
- Eraser
- Black marker or pen (optional for outlining)
- Coloring tools (crayons, colored pencils, or markers)
Here are my RECOMMENDED Art Supplies!
- Crayola Coloring Set (140 Pieces – Mega Value!)
- 24 Colored Crayon Set
- A4 Printer Paper
- Crayola Coloring Pencils
- HP Home Printer with Instant Ink!
Time needed:
10 minutes.
Step-by-Step Drawing Guide
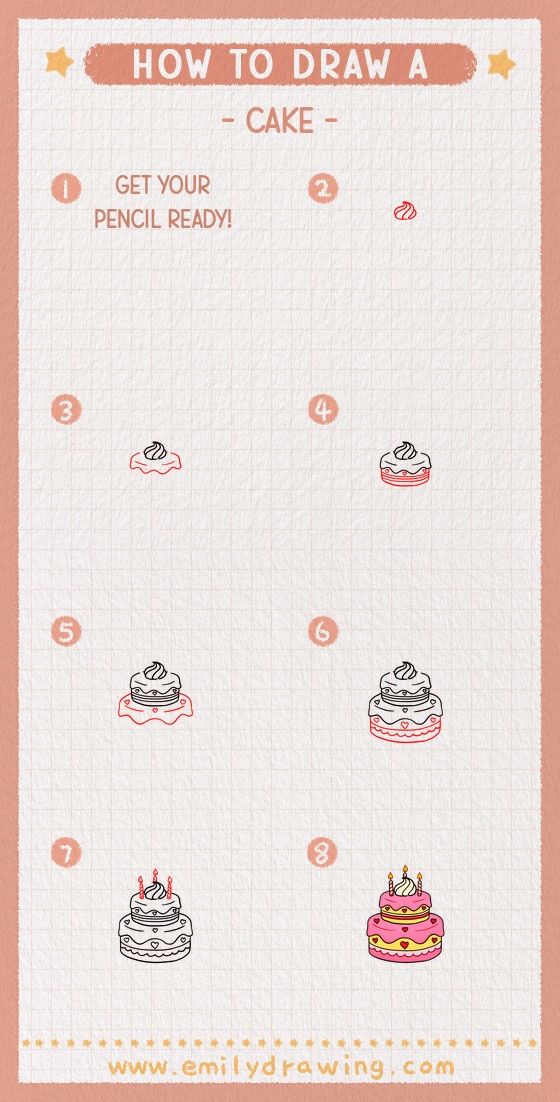
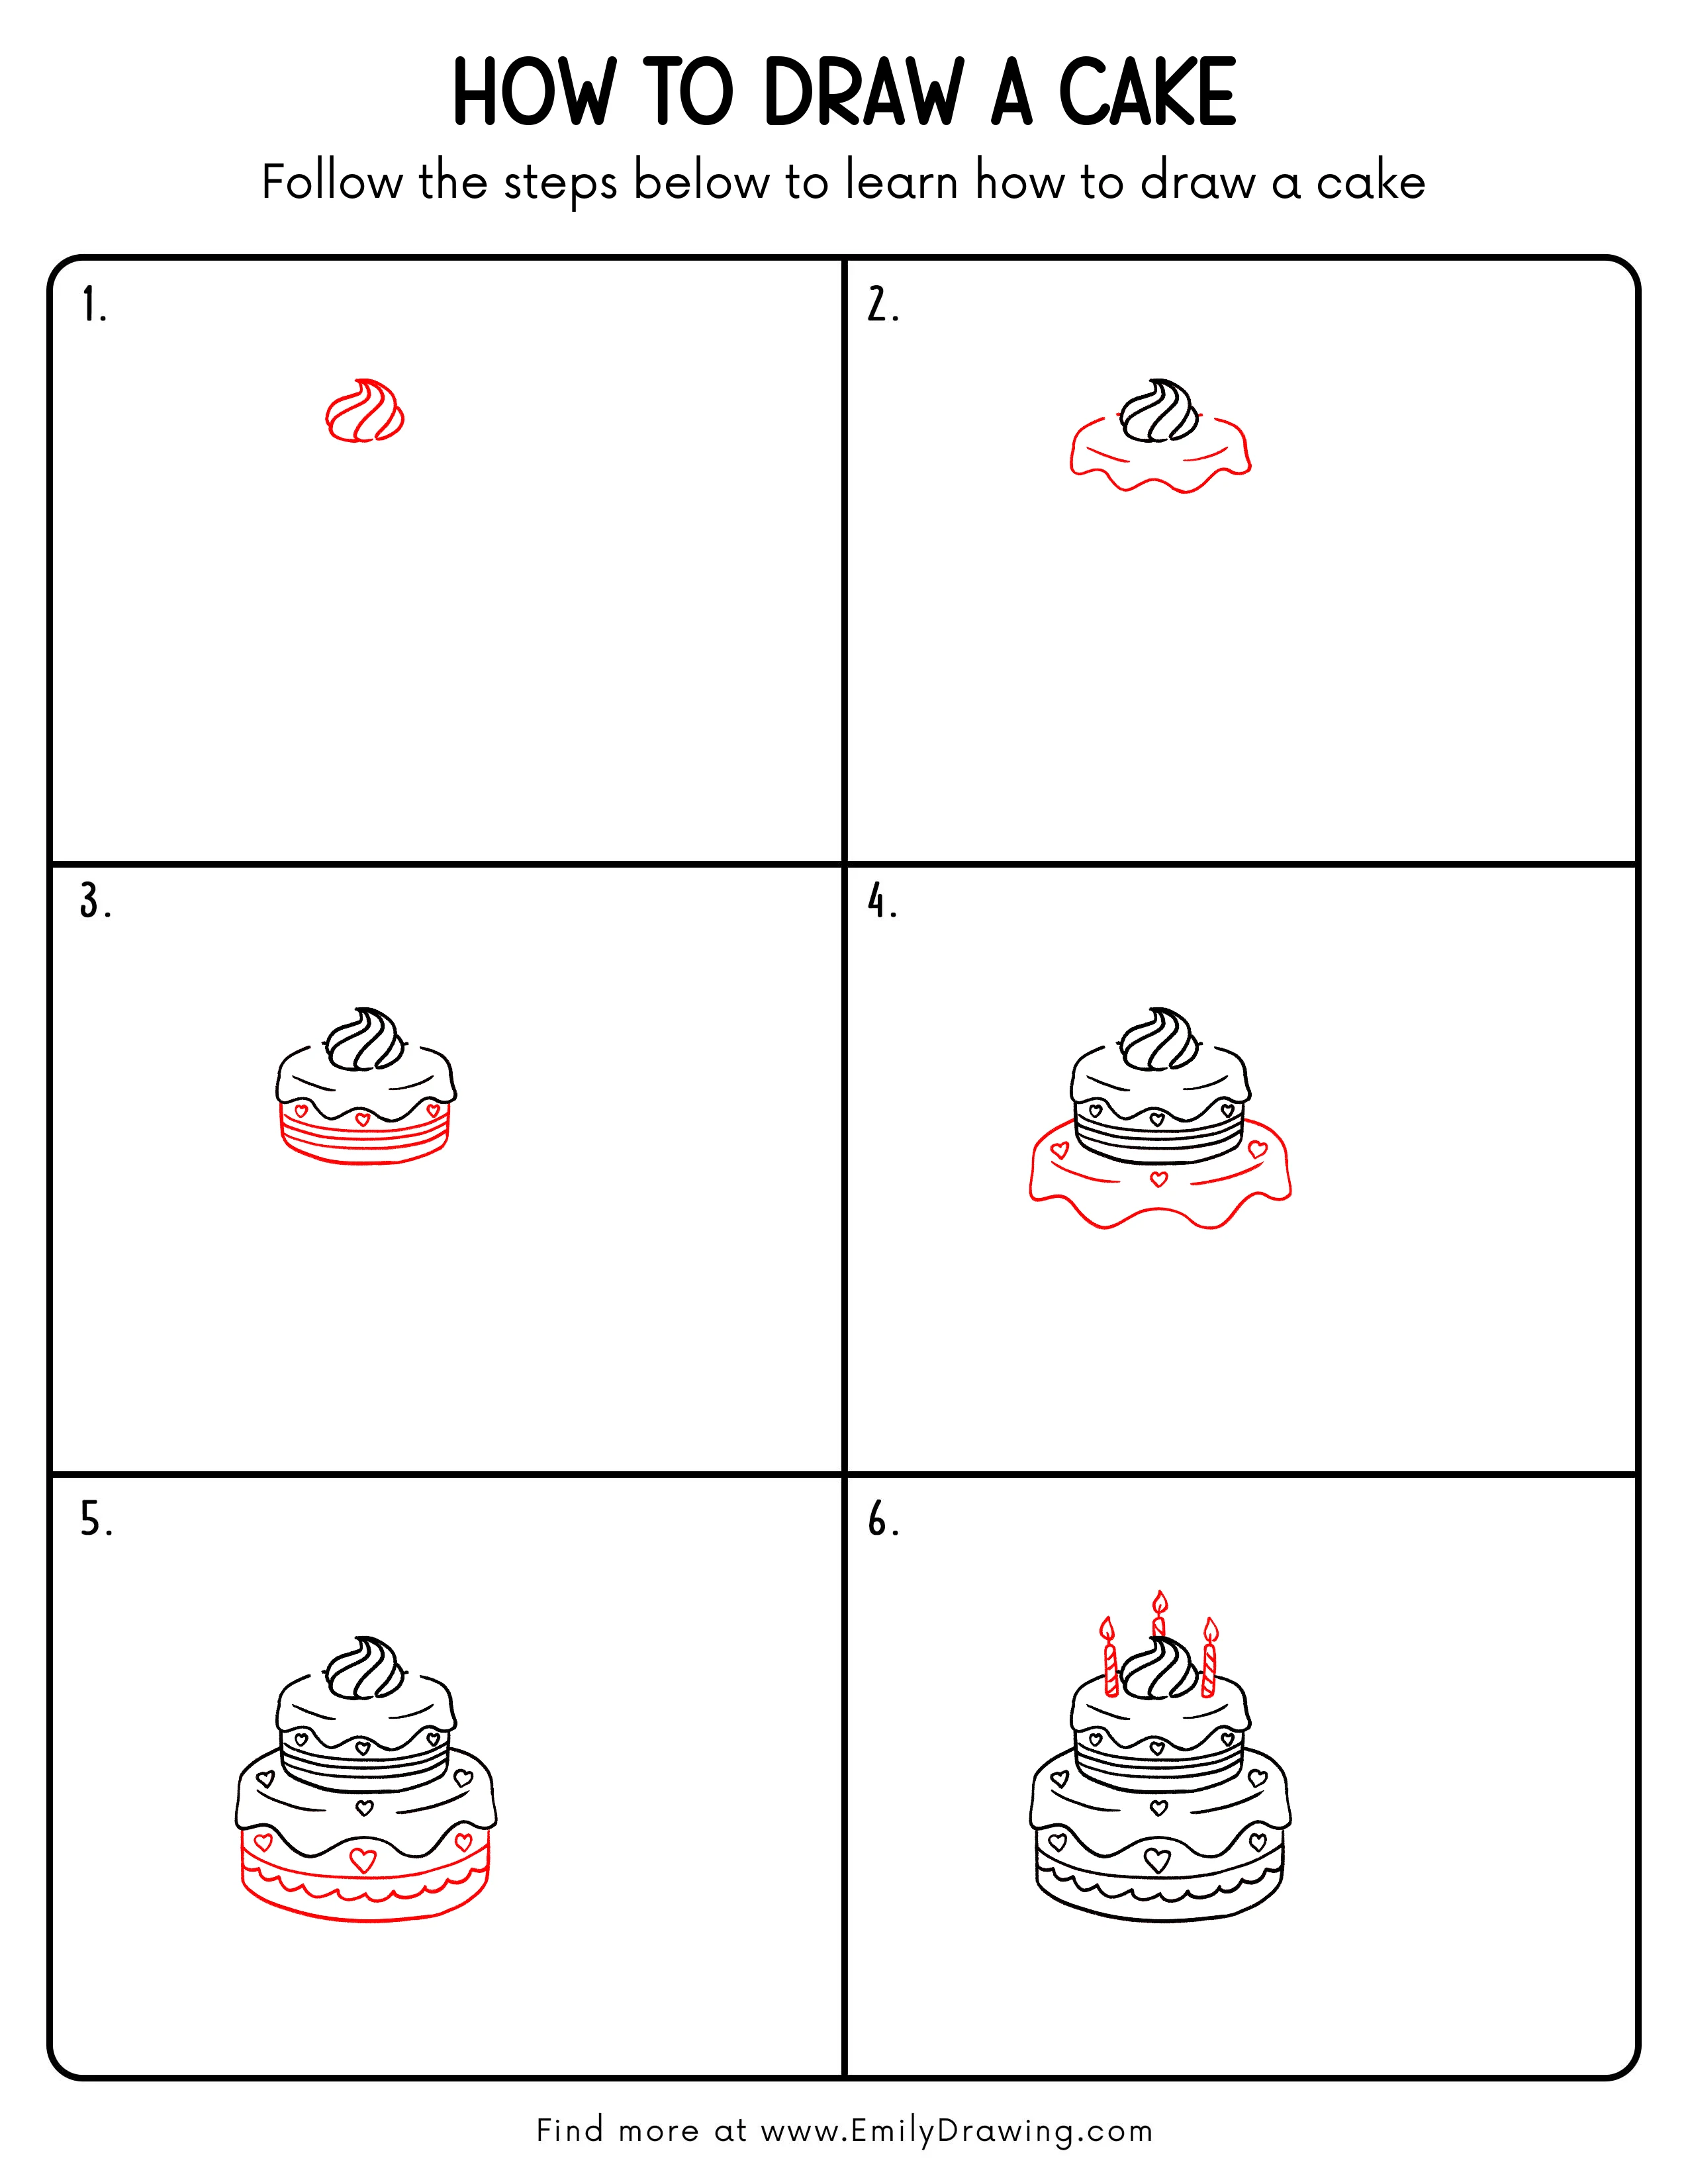
Step 1: Draw the Frosting Swirl
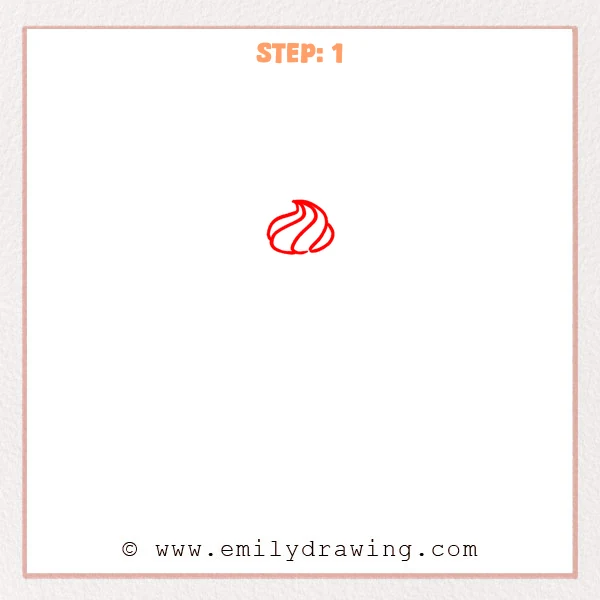
Start near the upper center of your page with a shallow curved base, like a small oval pad. Add three smooth, wavy stripes that rise and meet at the top to form a gentle point.
Pro Tip: Keep all curves flowing the same direction for a neat swirl.
Step 2: Add the Dripping Frosting Top
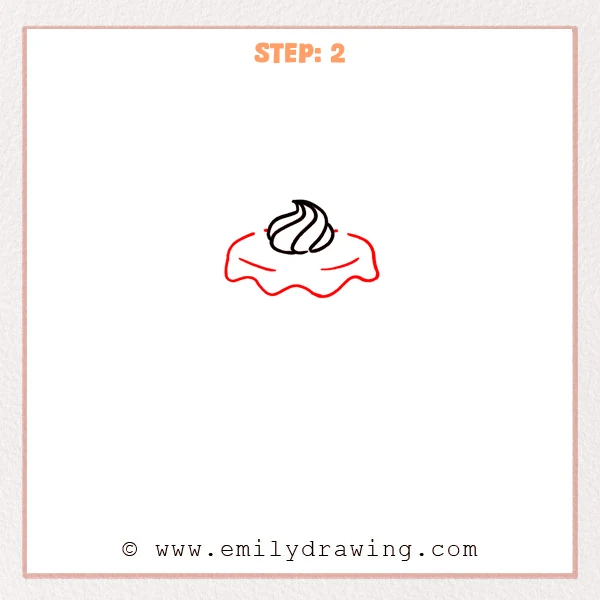
Under the swirl, sketch a wider curved outline that dips slightly on both sides. Shape the bottom edge with soft wavy bumps, like frosting dripping gently. Add two short curved lines on the top surface to show roundness.
Pro Tip: Vary the wave sizes slightly to make the drip edge feel natural.
Step 3: Add the Top Cake Layers and Hearts
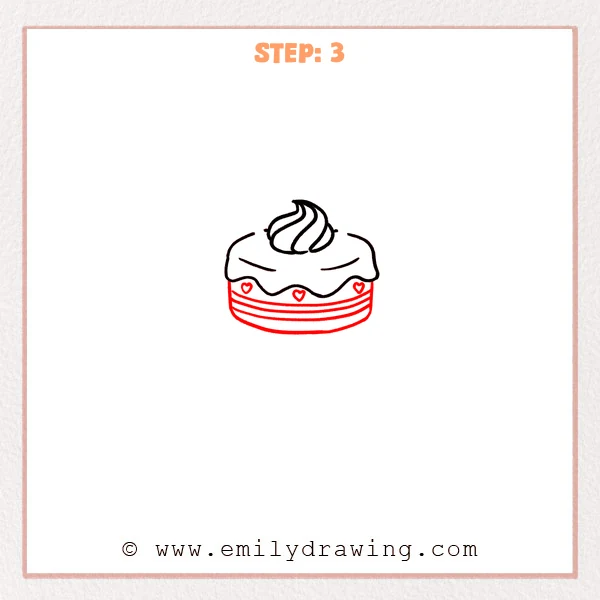
Pull two short vertical lines down from the frosting edge to show the cake’s side height. Add a few parallel curved stripes across the side, following the round shape like layered filling. Place three small hearts on the front to decorate the cake.
Pro Tip: Keep the stripe curves consistent so the cake looks round and steady.
Step 4: Add a Larger Frosting Base
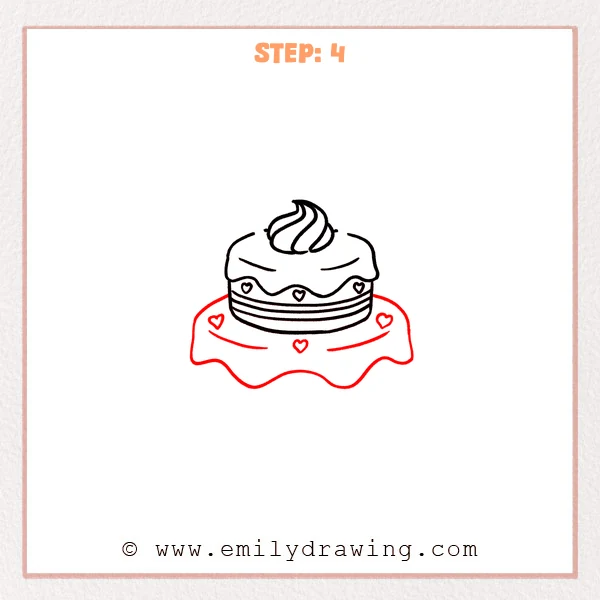
Draw a bigger wavy outline beneath the cake, like a thick frosting cushion. Add two long curved lines across the base to show its round surface, then place a few small hearts as decorations.
Pro Tip: Make the base waves wider and softer so it looks supportive.
Step 5: Draw the Big Bottom Tier and Scallop Trim

Extend the cake downward by drawing a wider rounded tier under the frosting base, with a curved bottom edge like an oval. Add a scalloped band near the lower front, using small repeating bumps to look like piped frosting. Place a larger heart in the center and a few smaller hearts around it for extra charm.
Pro Tip: Make the scallops similar in size so the trim looks tidy and even.
Step 6: Add Three Birthday Candles
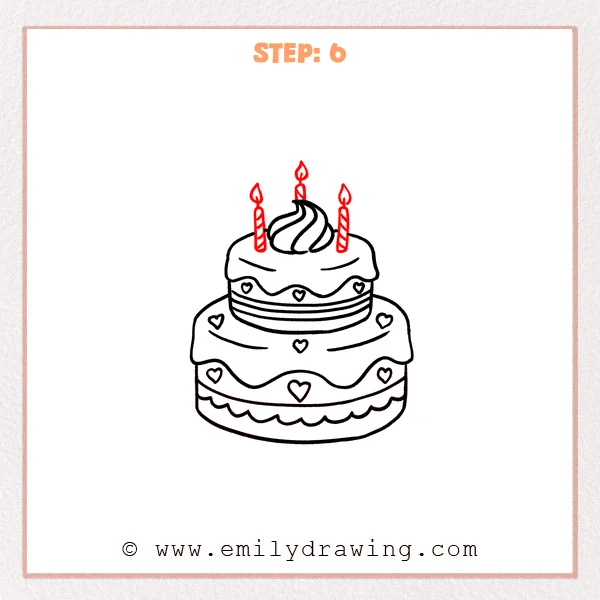
Draw three slim candles above the top frosting, with the middle one slightly taller. Add a small teardrop flame on each candle, then draw diagonal stripes down the candle bodies for a twist pattern.
Pro Tip: Keep even spacing between candles for a balanced look.
Step 7: Color in your drawing!
Fun Facts
- Cakes can be decorated with piping tips that make stars, shells, and scallops.
- Many birthday candles use spiral stripes because they are easy to see from far away.
- Layer cakes often have filling stripes that show where the layers meet.
Pin it now, Draw later!
You now have a sweet two-tier cake with dripping frosting, hearts, and candles. For coloring, try a light base color for the cake and a brighter color for the frosting, then add a soft shadow under each drip and along the bottom tier. A common beginner mistake is making the curved stripes too flat, so keep them gently rounded to match the cake’s shape. Keep practicing this step by step drawing, and try drawing another cake with different decorations next time.
Get the FREE Printable Drawing Guide
FREE Download Printable Cake Drawing Tutorial
Frequently Asked Questions
How do I make the cake look more round?
Curve the layer stripes and the bottom edge the same way, like an oval.
What if my frosting drips look uneven?
That is okay. Redraw a few drips with smoother waves and try again slowly.
How can I color the flames nicely?
Use yellow in the center, orange around it, and a tiny darker tip at the top.