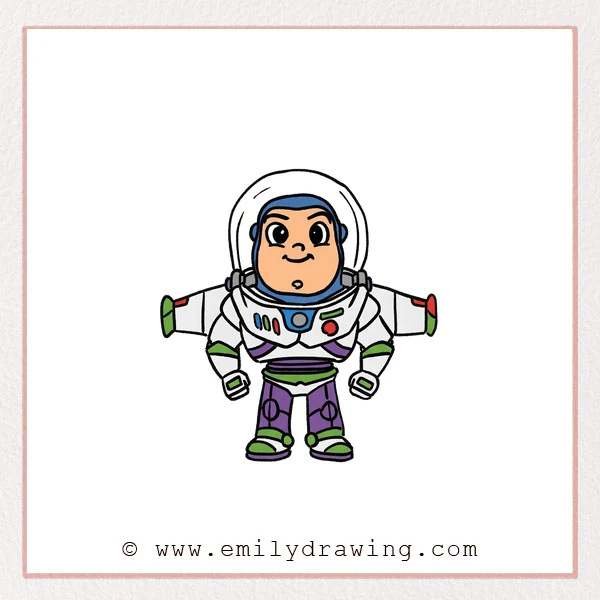
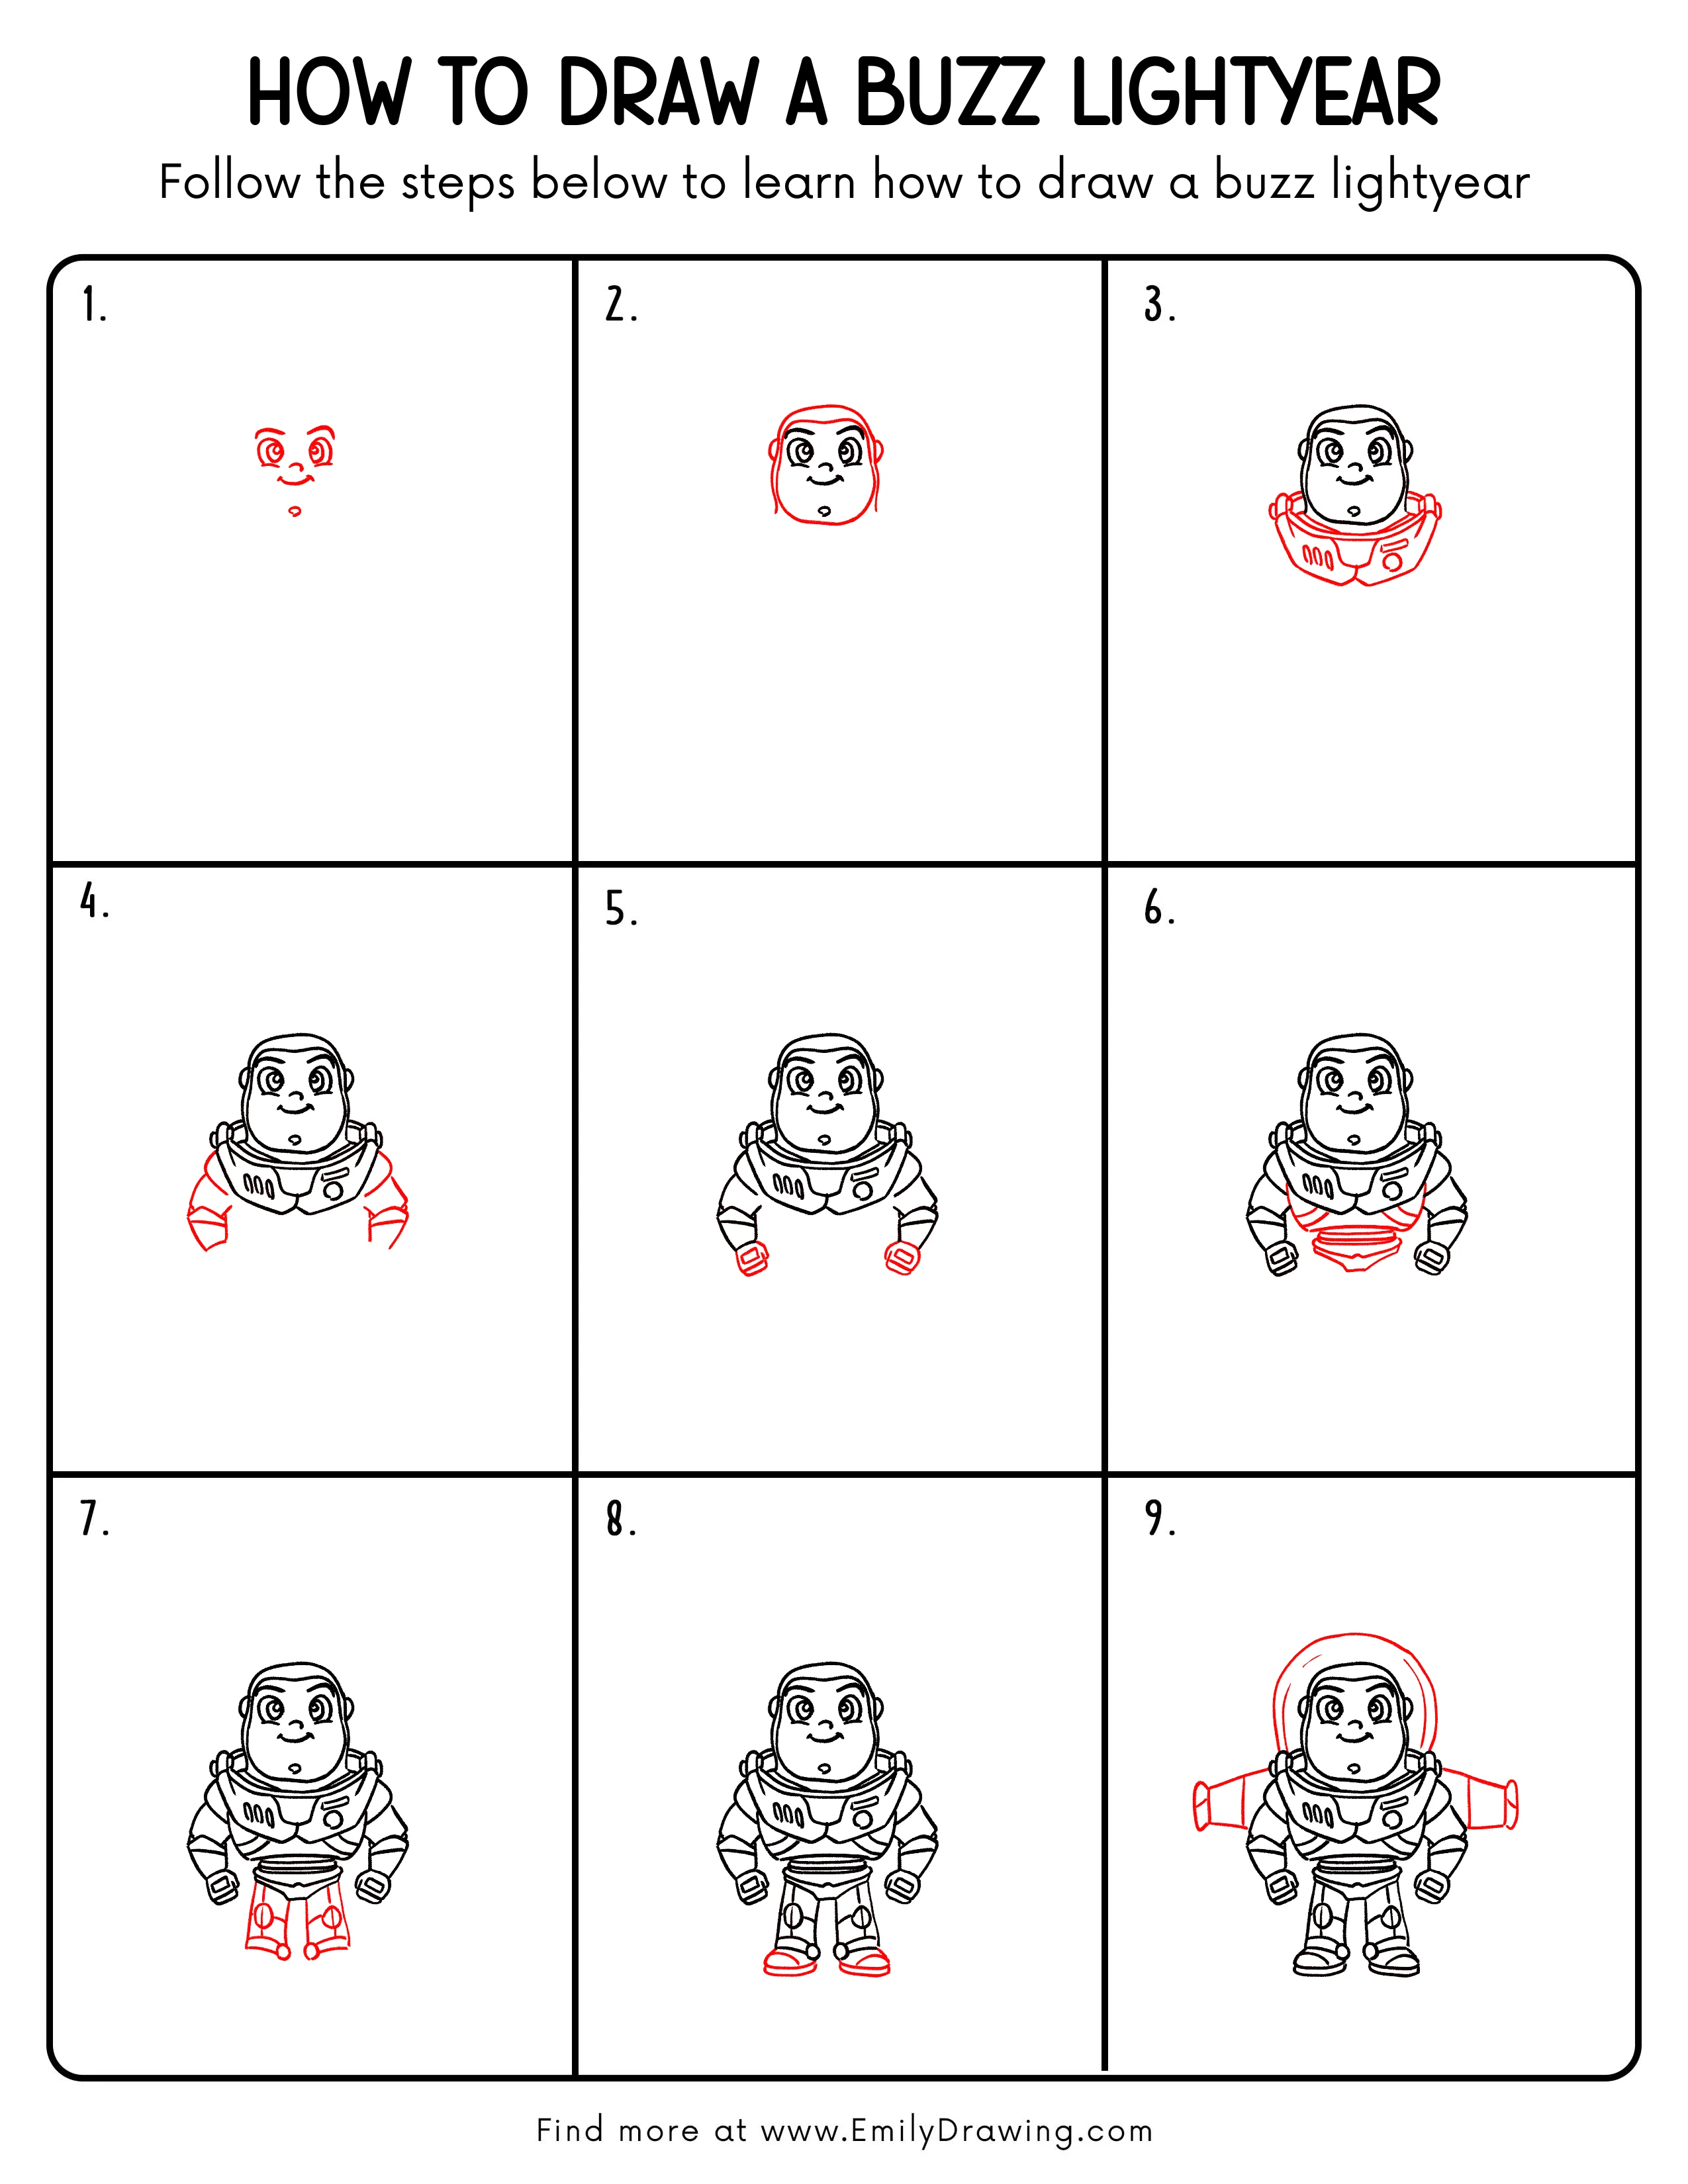
This easy drawing tutorial shows how to draw Buzz Lightyear step by step. We will build his face, suit, and helmet in small, calm stages. Take your time, and let each line help the next one.
What You Will Need
- Pencil
- Eraser
- Black pen or marker
- Paper
- Colored pencils or markers (optional)
Here are my RECOMMENDED Art Supplies!
- Crayola Coloring Set (140 Pieces – Mega Value!)
- 24 Colored Crayon Set
- A4 Printer Paper
- Crayola Coloring Pencils
- HP Home Printer with Instant Ink!
Time needed:
10 minutes.
Step-by-Step Drawing Guide
Step 1: Sketch Buzz Lightyear’s expressive face features
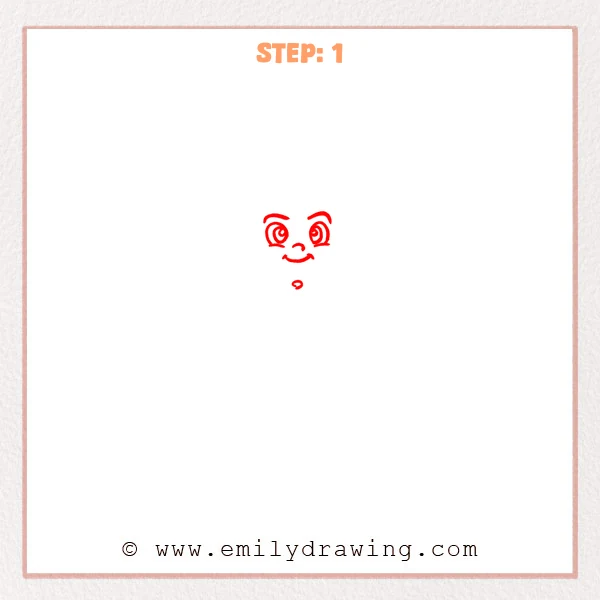
Start near the upper center and draw two large eyes, using circles and inner swirls for a bright look. Add two thick eyebrows above them, lifting the outer ends for a confident expression. Then place a small nose and a gentle smiling mouth, and finish with a tiny chin mark below to guide the face shape later.
Pro Tip: Keep both eyes level, with about one eye-width of space between them.
Alt Text: Early sketch of Buzz Lightyear showing bold eyebrows, large cartoon eyes, a small nose, a smiling mouth, and a tiny chin guide mark.
Step 2: Add the helmet shape and face outline
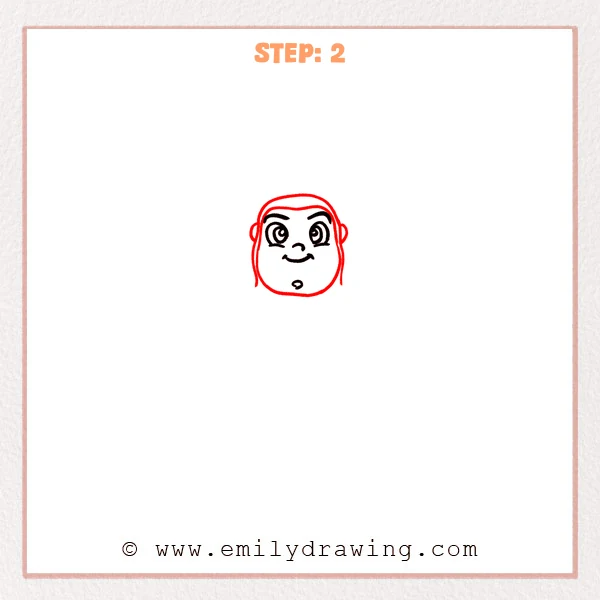
Draw a smooth, rounded head outline around the face, making the cheeks wider and the chin fuller. Add a curved helmet band across the top of the forehead, like a snug rim. Place a small half-circle ear on each side, then drop two slim lines down from the helmet sides to suggest the side panels.
Pro Tip: Make the head outline slightly larger than the features, and keep both sides even.
Alt Text: Buzz Lightyear drawing now includes a rounded head shape, a curved helmet rim across the forehead, small ears on both sides, and slim side lines suggesting the helmet panels.
Step 3: Add the space suit chest armor and shoulders
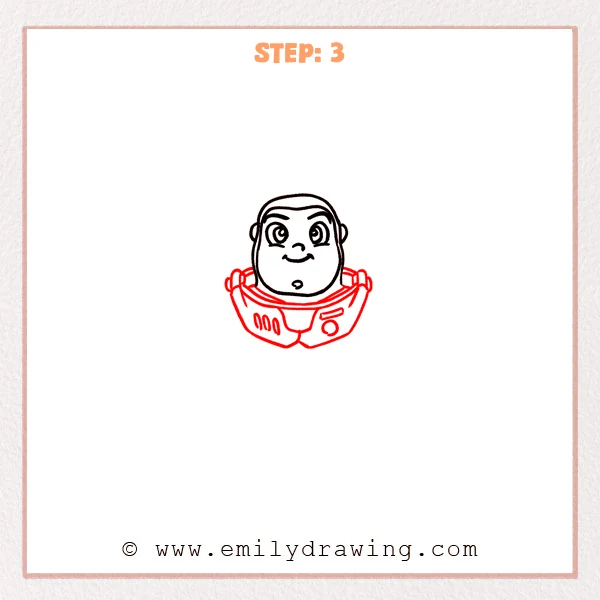
Draw a thick curved collar under the head, like a protective neck ring. Add rounded shoulder joints on both sides, then build the chest armor with two large curved plates. Finish by placing simple control buttons: three vertical ovals on the left, and a small rectangle plus a circle on the right.
Pro Tip: Keep both chest plates the same width, and level their top edges.
Alt Text: Buzz Lightyear drawing now includes a thick collar ring, rounded shoulder joints, curved chest armor plates, and simple suit buttons on both sides.
Step 4: Add the upper body and arm shapes
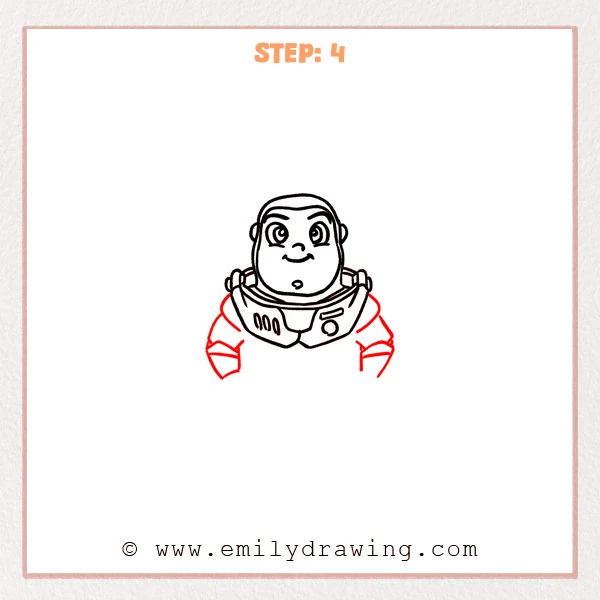
Pull two gentle lines down from under the chest armor to form a wide, tapered torso. Extend short upper arms from each shoulder, keeping the sleeves rounded like a puffy space suit. Finish by adding angled forearm guards on both sides, using a small break in the line to hint at the glove edge.
Pro Tip: Keep both arms the same length, and match the shoulder-to-forearm spacing.
Alt Text: Buzz Lightyear drawing now includes a wider upper torso beneath the chest armor, plus rounded sleeves and angled forearm glove shapes on both sides.
Step 5: Add the gloves and wrist control details
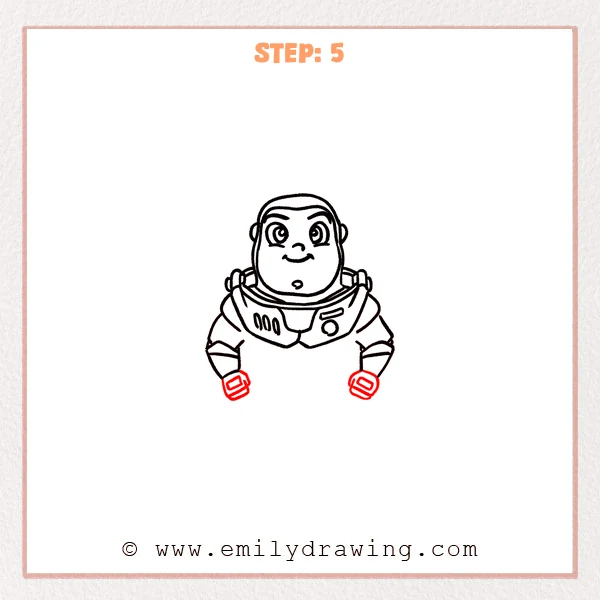
At the end of each forearm, build a chunky glove shape using a rounded rectangle so the fists feel solid. Add a small rectangular “screen” on each glove, then outline it with a second border like a wrist control panel. Finish by slightly thickening the outer glove lines to give both hands more weight.
Pro Tip: Keep both wrist screens similar in size, centered on the front of each glove.
Alt Text: Buzz Lightyear drawing now includes clenched gloves with rectangular wrist control panels and thicker outlines for the hands.
Step 6: Add the belly armor and waist layers
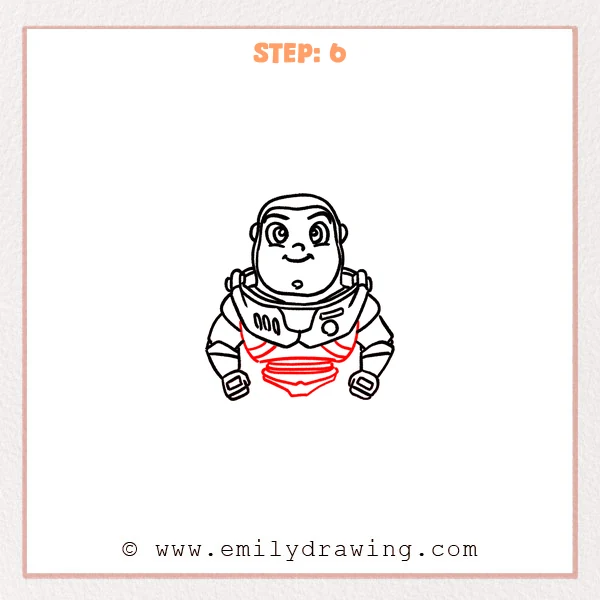
Under the chest plate, add two crossing curved lines that meet toward the center like suit straps. Draw a flattened oval ring on the stomach, then add a smaller oval inside it to create layered armor. Finish with a pointed lower guard shape beneath, using soft angles to connect both sides.
Pro Tip: Keep the belly oval lower, so the chest plate has breathing room.
Alt Text: Buzz Lightyear drawing now includes crossing suit straps, a layered oval belly armor piece, and a pointed lower waist guard under the torso.
Step 7: Add the leg armor under the waist
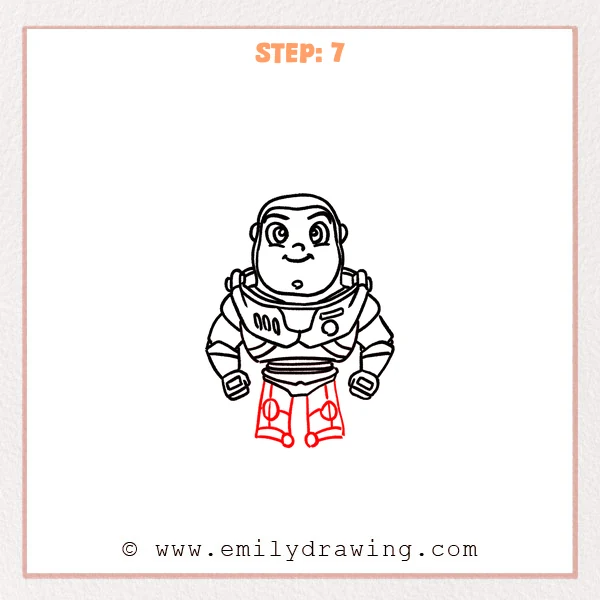
Draw two short pant-leg shapes under the belt, like a slightly flared rectangle. Add a round joint on each leg, and place a short vertical line inside to divide the armor section. Finish with a curved cuff line at the bottom and two small circular connectors beneath for a sturdy suit look.
Pro Tip: Keep both leg bottoms level so Buzz looks balanced.
Alt Text: Buzz Lightyear drawing now includes short leg armor panels with round joints, divided sections, curved cuffs, and small connector circles below the legs.
Step 8: Add the boots and thick soles

Draw rounded boot shapes under both legs, with a half-oval toe that sticks out slightly on each side. Add a wider curved line beneath each boot to create a thick sole layer. Finish with a curved seam line across the boot top to suggest armored panels.
Pro Tip: Keep both toes the same width, and make the sole curves feel parallel.
Alt Text: Buzz Lightyear drawing now includes rounded boots with thick soles and a curved seam line on each boot, completing the full-body suit.
Step 9: Add the clear helmet dome and the jet pack behind
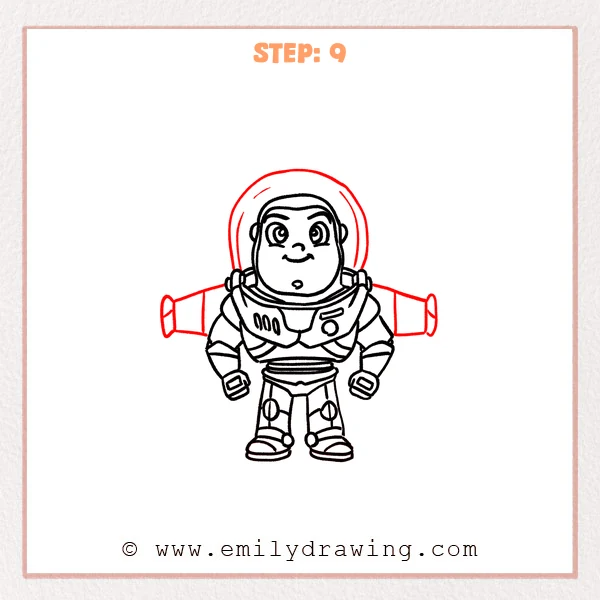
Draw a larger rounded dome around the head, leaving a wide curve at the top like a clear bubble helmet. Extend two long rectangular pack arms from behind the shoulders, and round off their ends to feel mechanical. Finish with a few short curved highlight lines on the dome to suggest shiny glass.
Pro Tip: Make the dome noticeably wider than the face, and match both sides.
Alt Text: Buzz Lightyear drawing now includes a large clear bubble helmet with highlight lines and a horizontal jet pack structure extending behind both shoulders.
Step 10: Color in your drawing!
Fun Facts
- Buzz Lightyear’s suit is designed with bold armor shapes to feel strong and heroic.
- The clear helmet dome is a great place to add light reflections and shine.
- Simple buttons and panels help a character look “space-ready” without extra complexity.
Pin it now, Draw later!

You now have a complete step by step drawing of Buzz Lightyear, from his confident face to his boots and helmet dome. If you want to color him, try white for the suit, green for accents, and a touch of purple for details, then add light gray shadows under the chest armor and around the boots. A common beginner mistake is making the helmet dome too tight, so let it sit wider than the face for a clear “bubble” look. Keep practicing this easy drawing tutorial, and try drawing Buzz in a new pose next time.
Get the FREE Printable Drawing Guide
FREE Download Printable Buzz Lightyear Drawing Tutorial
Frequently Asked Questions
How can I keep Buzz Lightyear’s face symmetrical?
Lightly mark a center line first, then check that the eyes and ears match across it.
What if my armor shapes look uneven?
Slow down and compare left and right widths, then adjust with small erases.
How do I make the helmet dome look transparent?
Leave some white space and add a few gentle curved highlight lines on one side.