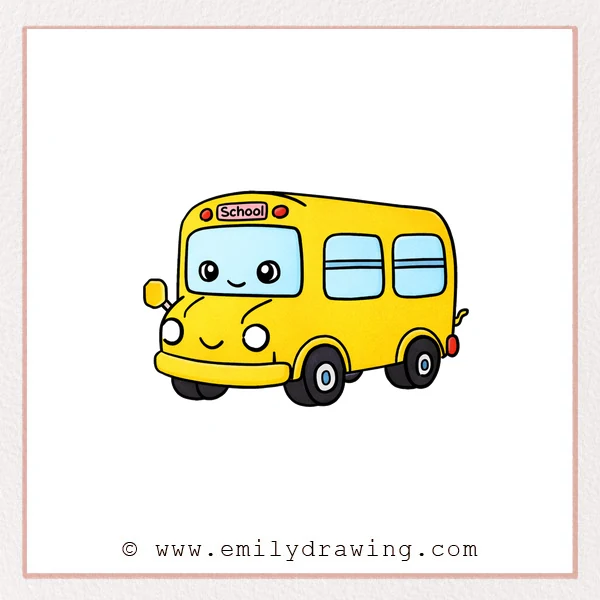
If you are looking for how to draw a bus, this step by step drawing tutorial is a calm place to start. You will use simple rounded shapes to build a friendly, cute bus with a smiling face. This is an easy drawing tutorial made for drawing for beginners.
What You Will Need
- Pencil
- Eraser
- Black marker or pen
- Paper
- Colored pencils or crayons (optional)
Here are my RECOMMENDED Art Supplies!
- Crayola Coloring Set (140 Pieces – Mega Value!)
- 24 Colored Crayon Set
- A4 Printer Paper
- Crayola Coloring Pencils
- HP Home Printer with Instant Ink!
Time needed:
25 minutes.
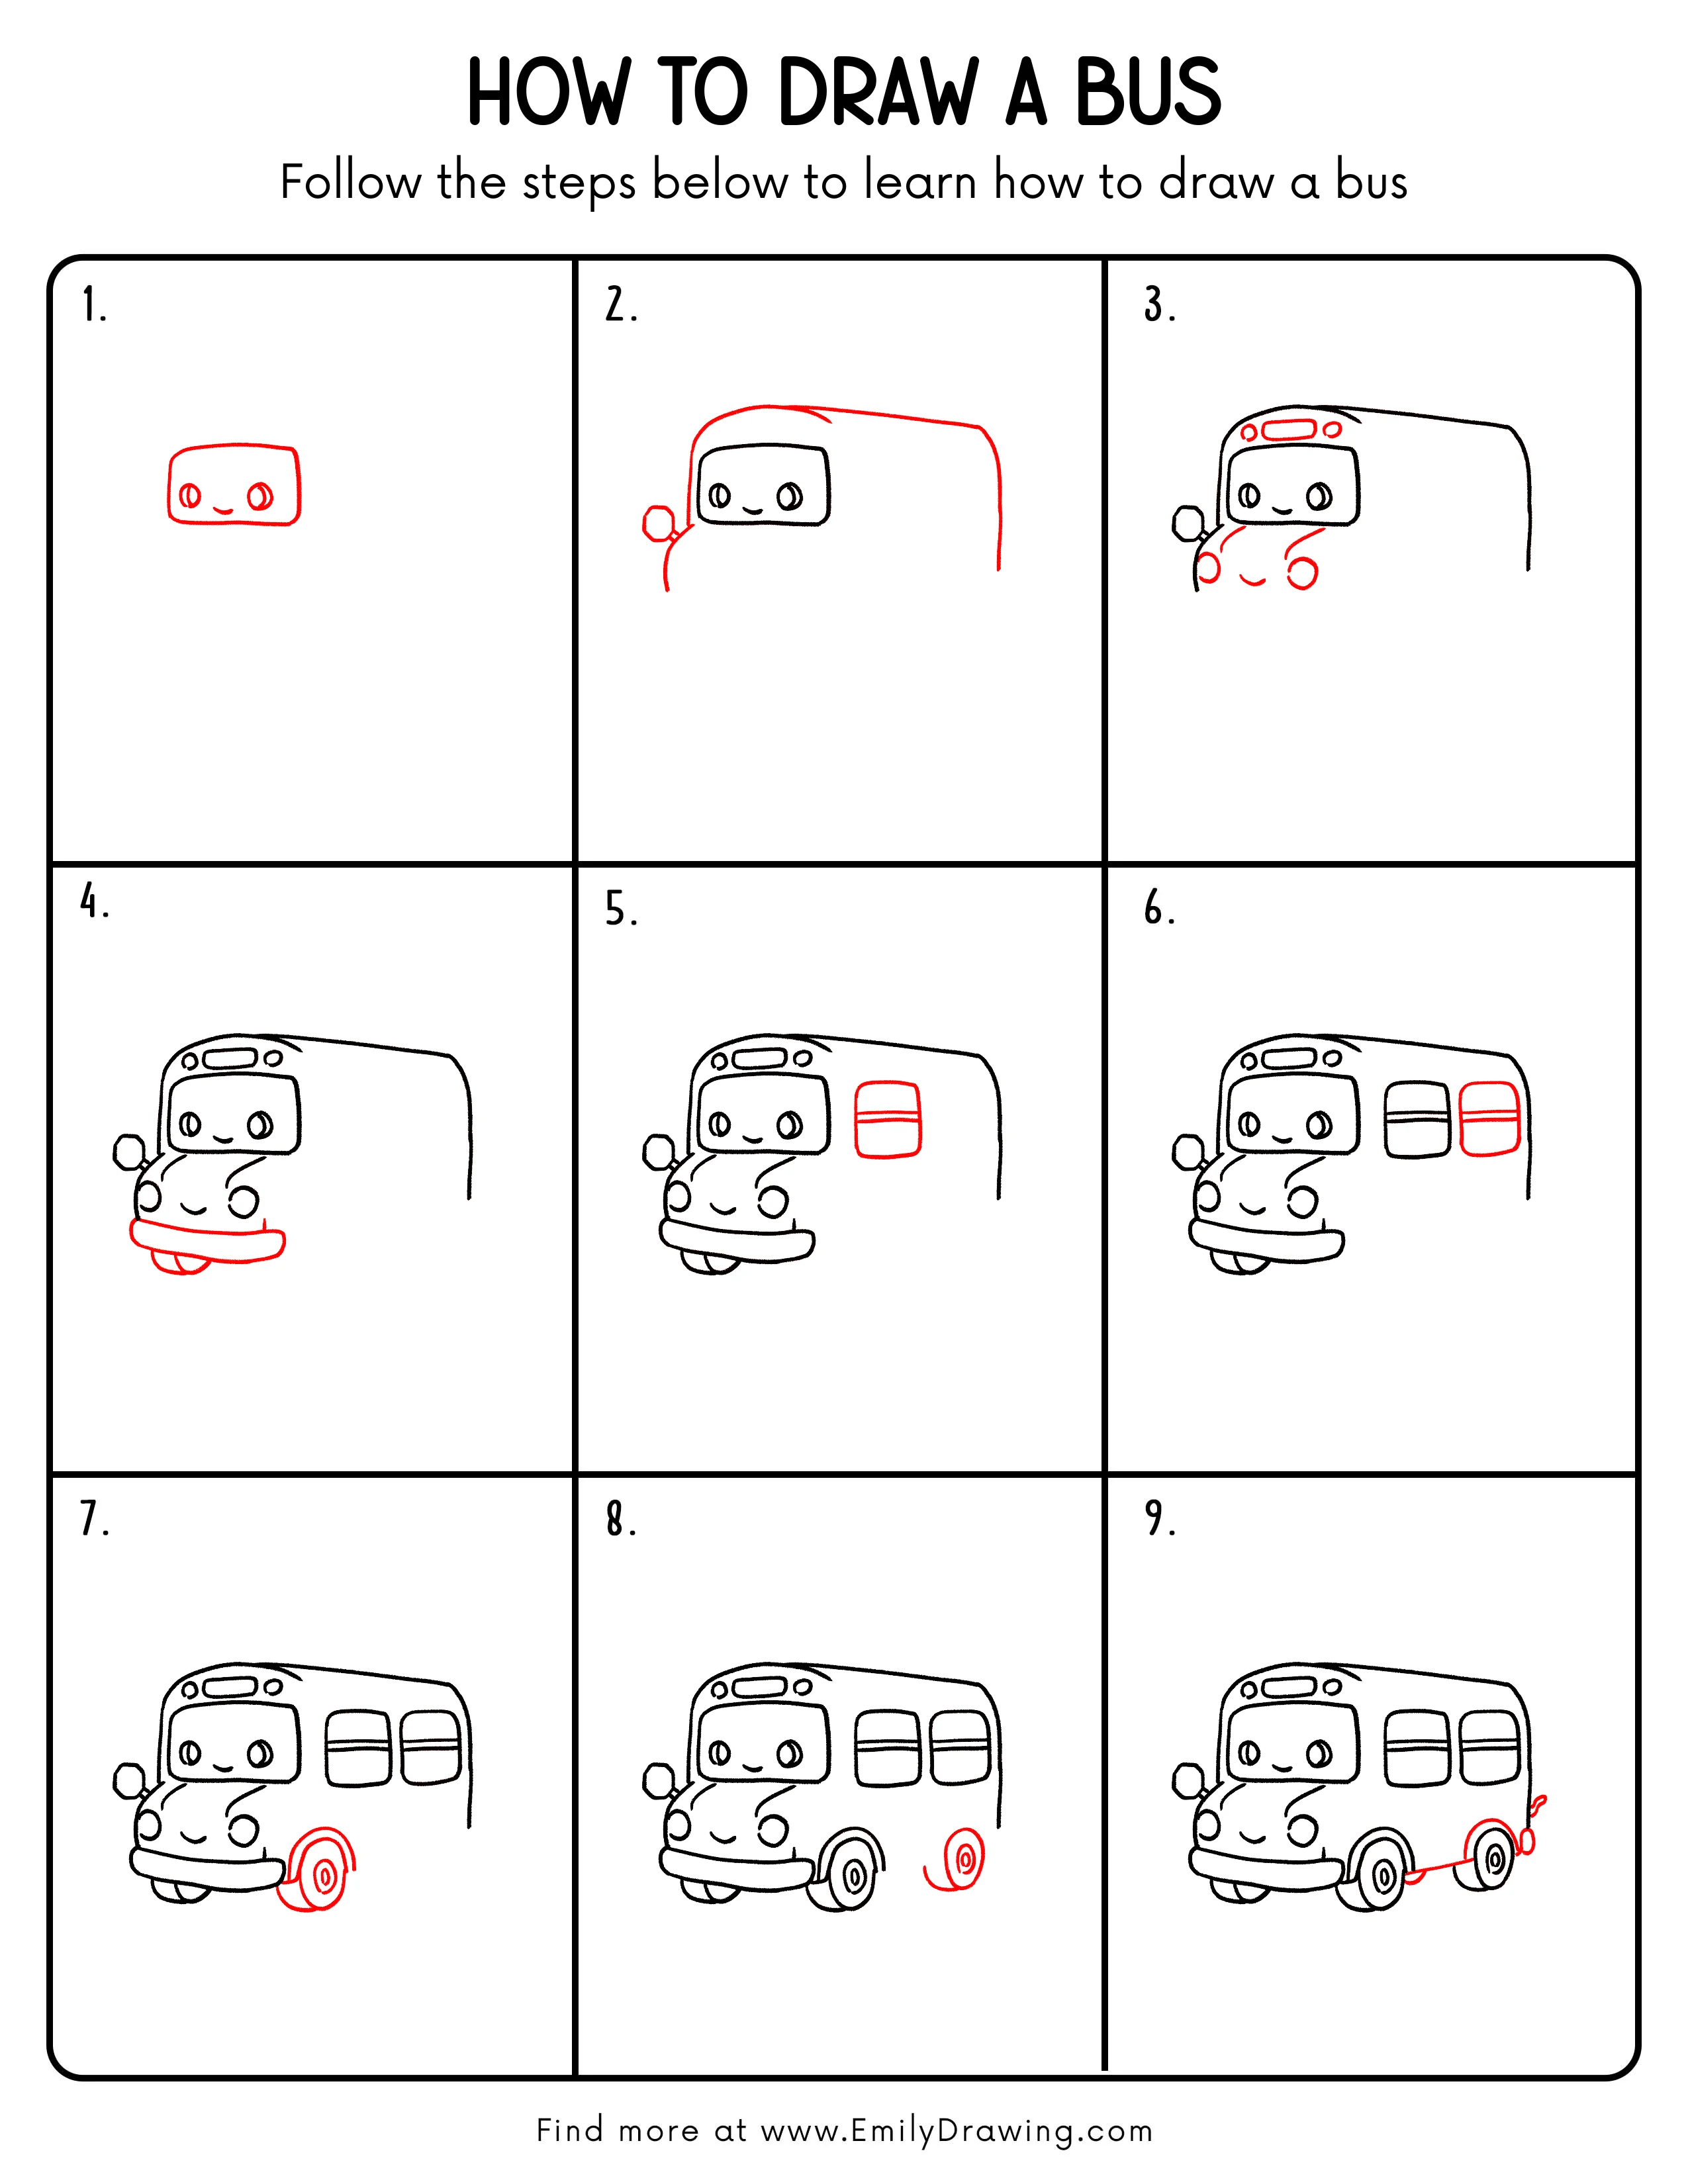
Step-by-Step Drawing Guide
Step 1: Draw a Cute Bus Face
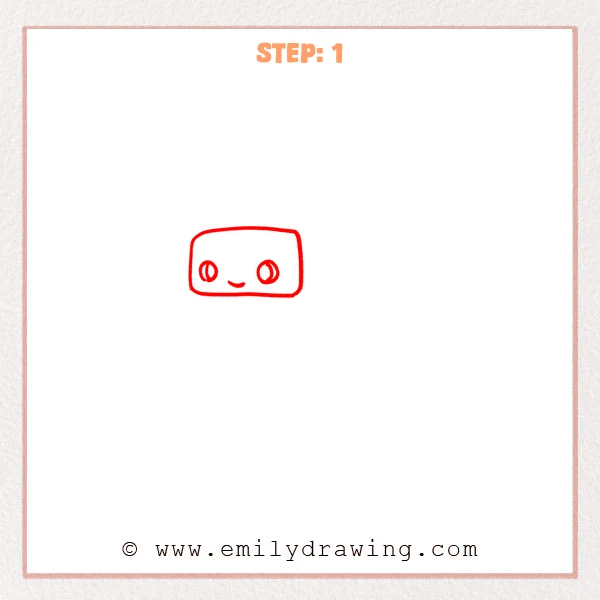
Start with a rounded rectangle to form the front of the bus. Add two round eyes inside, leaving a small highlight in each one. Finish with a small curved smile in the middle.
Pro Tip: Keep the corner curves even so the bus front looks neat and cute.
Step 2: Add the Bus Body Outline
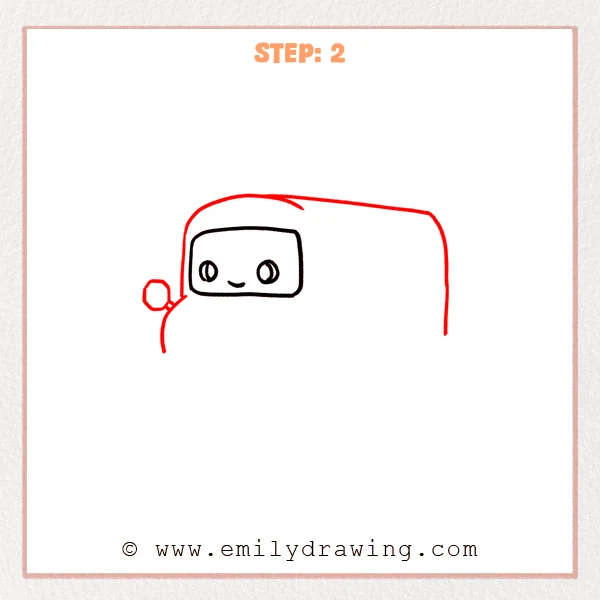
Draw a larger rounded rectangle around the face to create the front shell of the bus. Then pull a long curved line from the top to the right for the roof, and end the back with a gentle vertical line. Finish by adding a small circle and short stem on the left as the side mirror.
Pro Tip: Keep the roof curve smooth and continuous so the bus feels solid.
Step 3: Add Headlights and the Top Sign
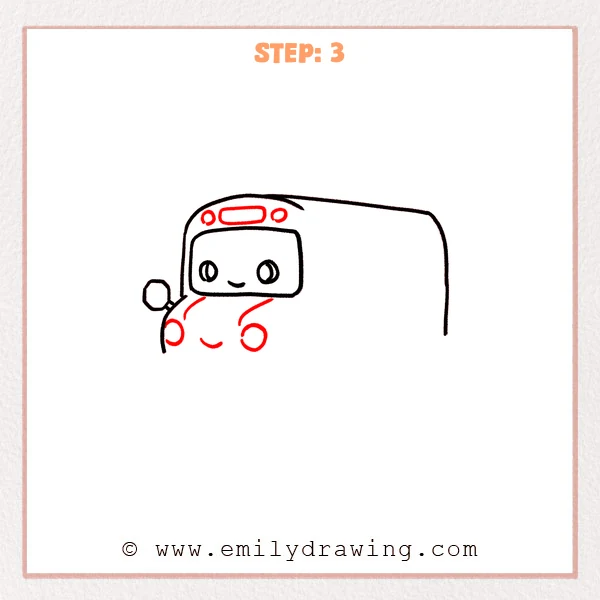
Add a round headlight on each lower corner of the front, with a small inner circle for shine. Draw two gentle curved lines dropping from under the window to shape the rounded front. Finish with a small rounded sign on top, plus two tiny circles beside it as indicator lights.
Pro Tip: Place both headlights at the same height for a balanced front.
Step 4: Draw the Bumper and Front Wheel
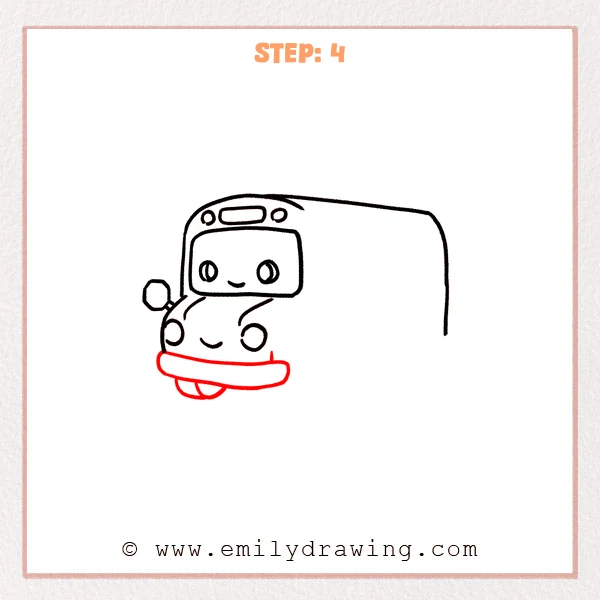
Add a long rounded bar at the very bottom of the bus to form a soft bumper. Behind it, draw a half-circle wheel peeking out from the underside on the left. Add a short vertical line near the right end to show where the front body turns into the bumper.
Pro Tip: Make the bumper slightly wider than the front so it feels protective.
Step 5: Add a Side Window and Divider Lines
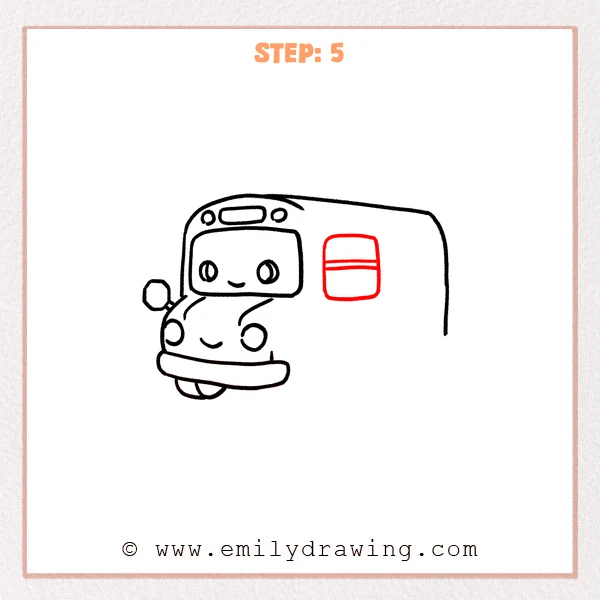
Draw a small rounded rectangle on the right side of the bus body for a window. Add two thin horizontal lines across the middle to suggest glass sections or a frame detail. Keep these lines fairly straight so the window looks tidy.
Pro Tip: Leave an even border around the window so it feels like real glass.
Step 6: Add a Second Side Window
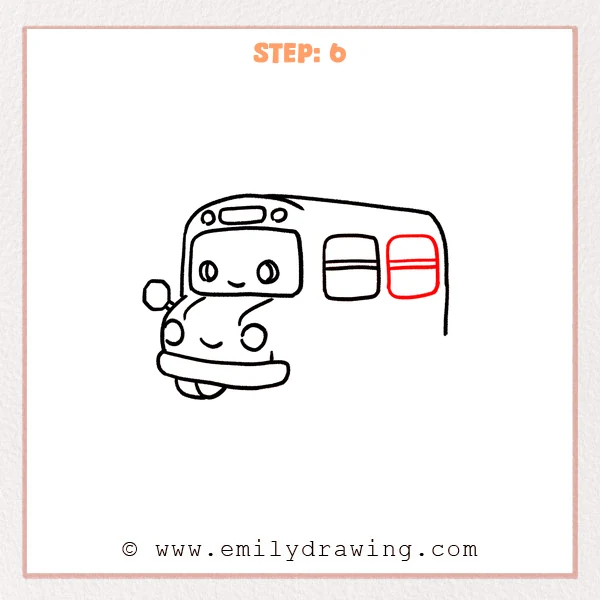
Draw another rounded rectangle window to the right of the first one, matching its size and height. Add the same two thin horizontal divider lines across the middle to keep the window style consistent. Leave a small gap between the windows so the side looks balanced.
Pro Tip: Align the top edges of both windows to keep the bus looking tidy.
Step 7: Add the Big Middle Wheel and Wheel Cover
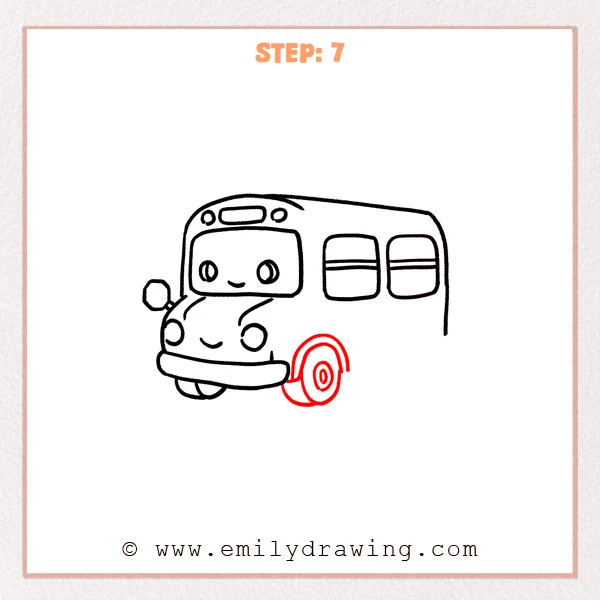
Draw a large circle under the middle of the bus for the wheel, then add an inner ring for the hub. Sketch a half-arch above the wheel to show the wheel cover attached to the body. Add a small curved pad under the wheel so the bus feels steady on the ground.
Pro Tip: Match the wheel cover curve to the wheel curve so it fits naturally.
Step 8: Add the Last Small Wheel
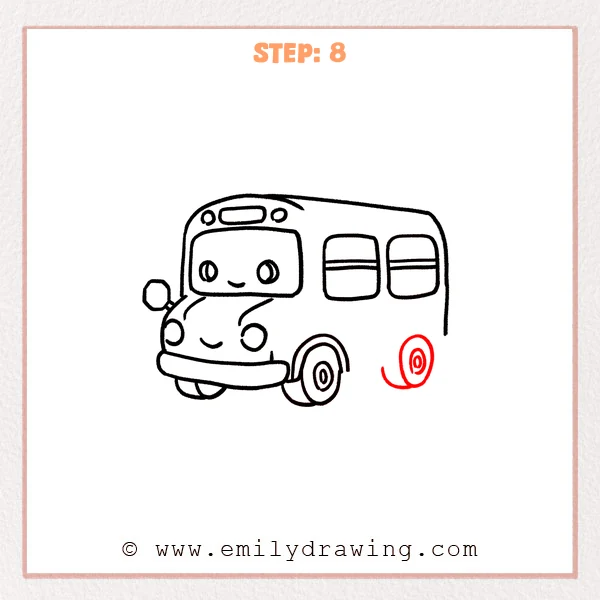
Draw a smaller wheel near the lower right of the bus to show it is farther back. Add an inner ring and a small oval hub to match the style of the other wheels. Place a short curved line beside it to hint at the rounded underside of the bus.
Pro Tip: Make the far wheel slightly smaller to create depth.
Step 9: Add the Bottom Edge and Rear Details
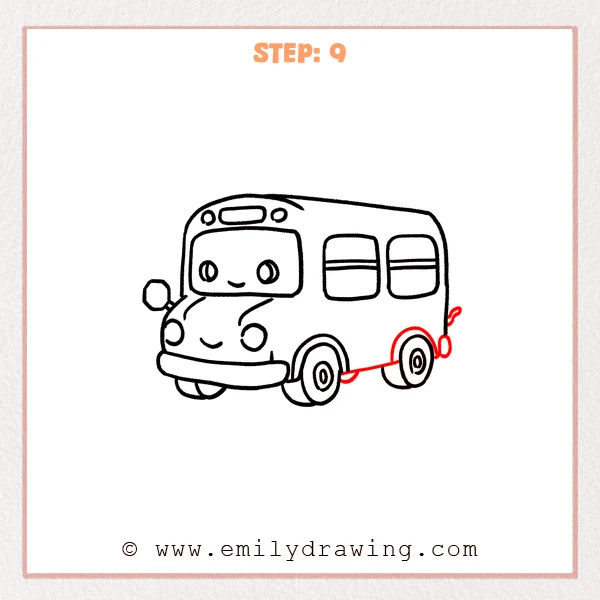
Draw a gently rising bottom line from the middle wheel toward the back wheel to connect the underside. Add a tiny curved mark on the rear edge for a simple tail detail. Finish with a small dot near the back wheel to suggest a little rear accessory.
Pro Tip: Keep the underside line slightly curved so the bus feels rounded.
Step 10: Color in your drawing!
Fun Facts
- Many city buses have a route sign on top to show where they go.
- Bus wheels are often larger than car wheels to help carry heavy loads.
- A rounded front shape can help a vehicle move through air more smoothly.
Pin it now, Draw later!
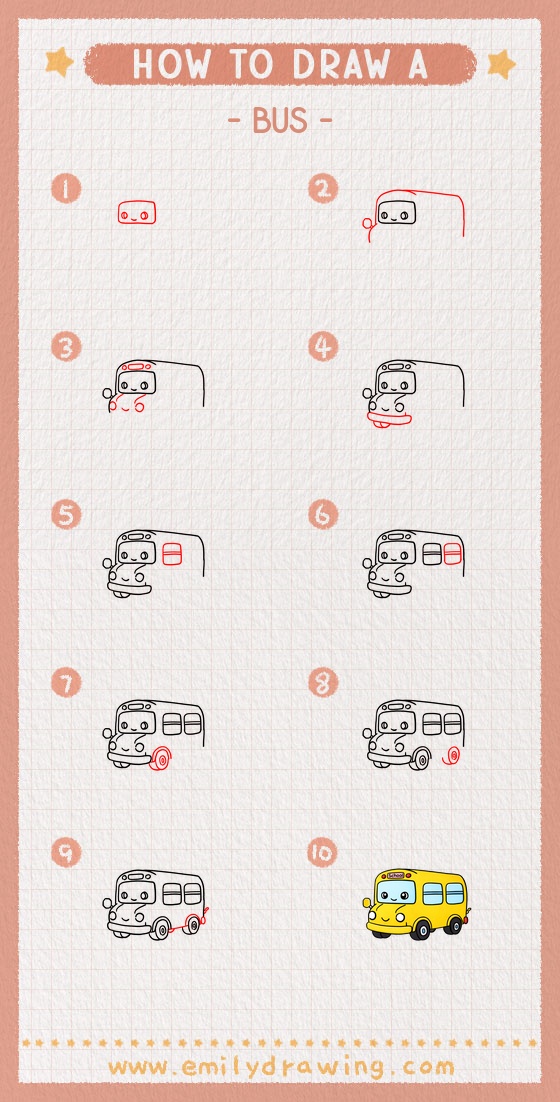
You now have a complete cute bus made from rounded rectangles and circles. Try coloring the bus in bright yellow, red, or blue, and shade under the bumper and wheels for depth. A common beginner mistake is drawing windows at different heights, so take a moment to align them before you ink. Keep practicing this step by step drawing, and then try drawing the same bus from a new angle for your next easy drawing tutorial.
Get the FREE Printable Drawing Guide
FREE Download Printable Bus Drawing Tutorial
Frequently Asked Questions
How do I make the bus look more 3D?
Make the back wheel slightly smaller and add a soft shadow under the bus.
What if my circles look uneven?
Sketch lightly first, then go over the best line with your pen.
How can I add more details without making it messy?
Add just one or two extras, like a door line or small stripes, and keep them simple.