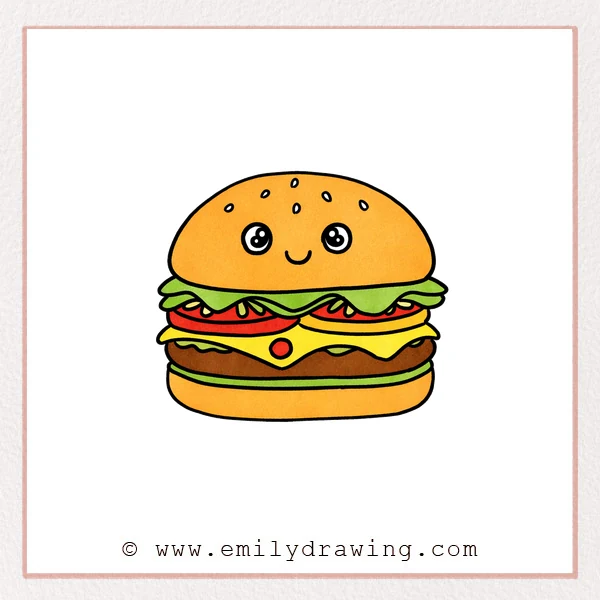
This easy drawing tutorial shows how to draw a cute burger step by step. It is a calm, simple drawing for beginners, with friendly shapes and clear lines. Take your time, and enjoy watching your burger come to life.
What You Will Need
- Pencil
- Eraser
- Black marker or pen
- Paper
- Coloring tools (crayons, markers, or colored pencils)
Here are my RECOMMENDED Art Supplies!
- Crayola Coloring Set (140 Pieces – Mega Value!)
- 24 Colored Crayon Set
- A4 Printer Paper
- Crayola Coloring Pencils
- HP Home Printer with Instant Ink!
Time needed:
30 minutes.
Step-by-Step Drawing Guide
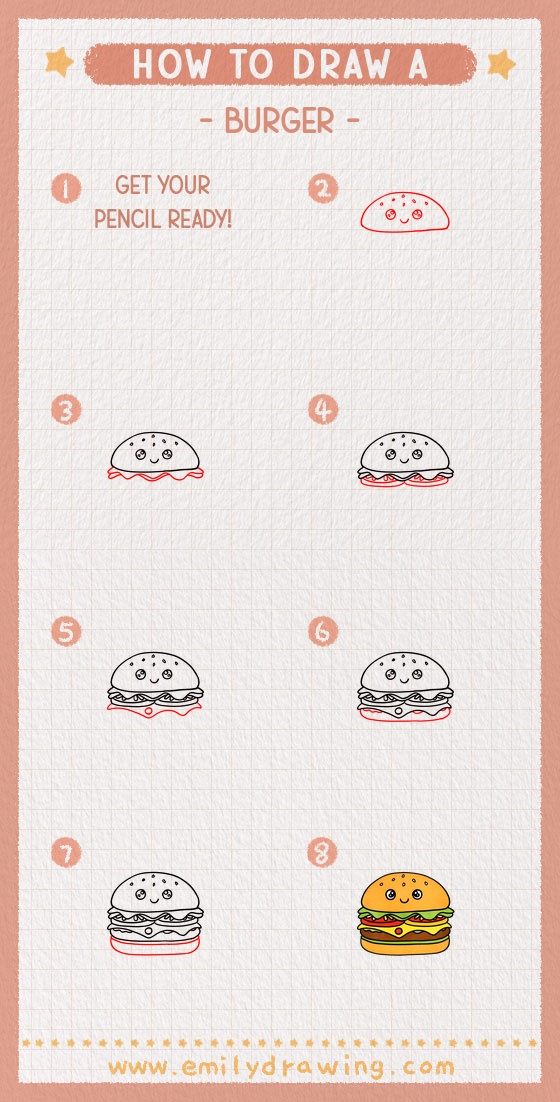
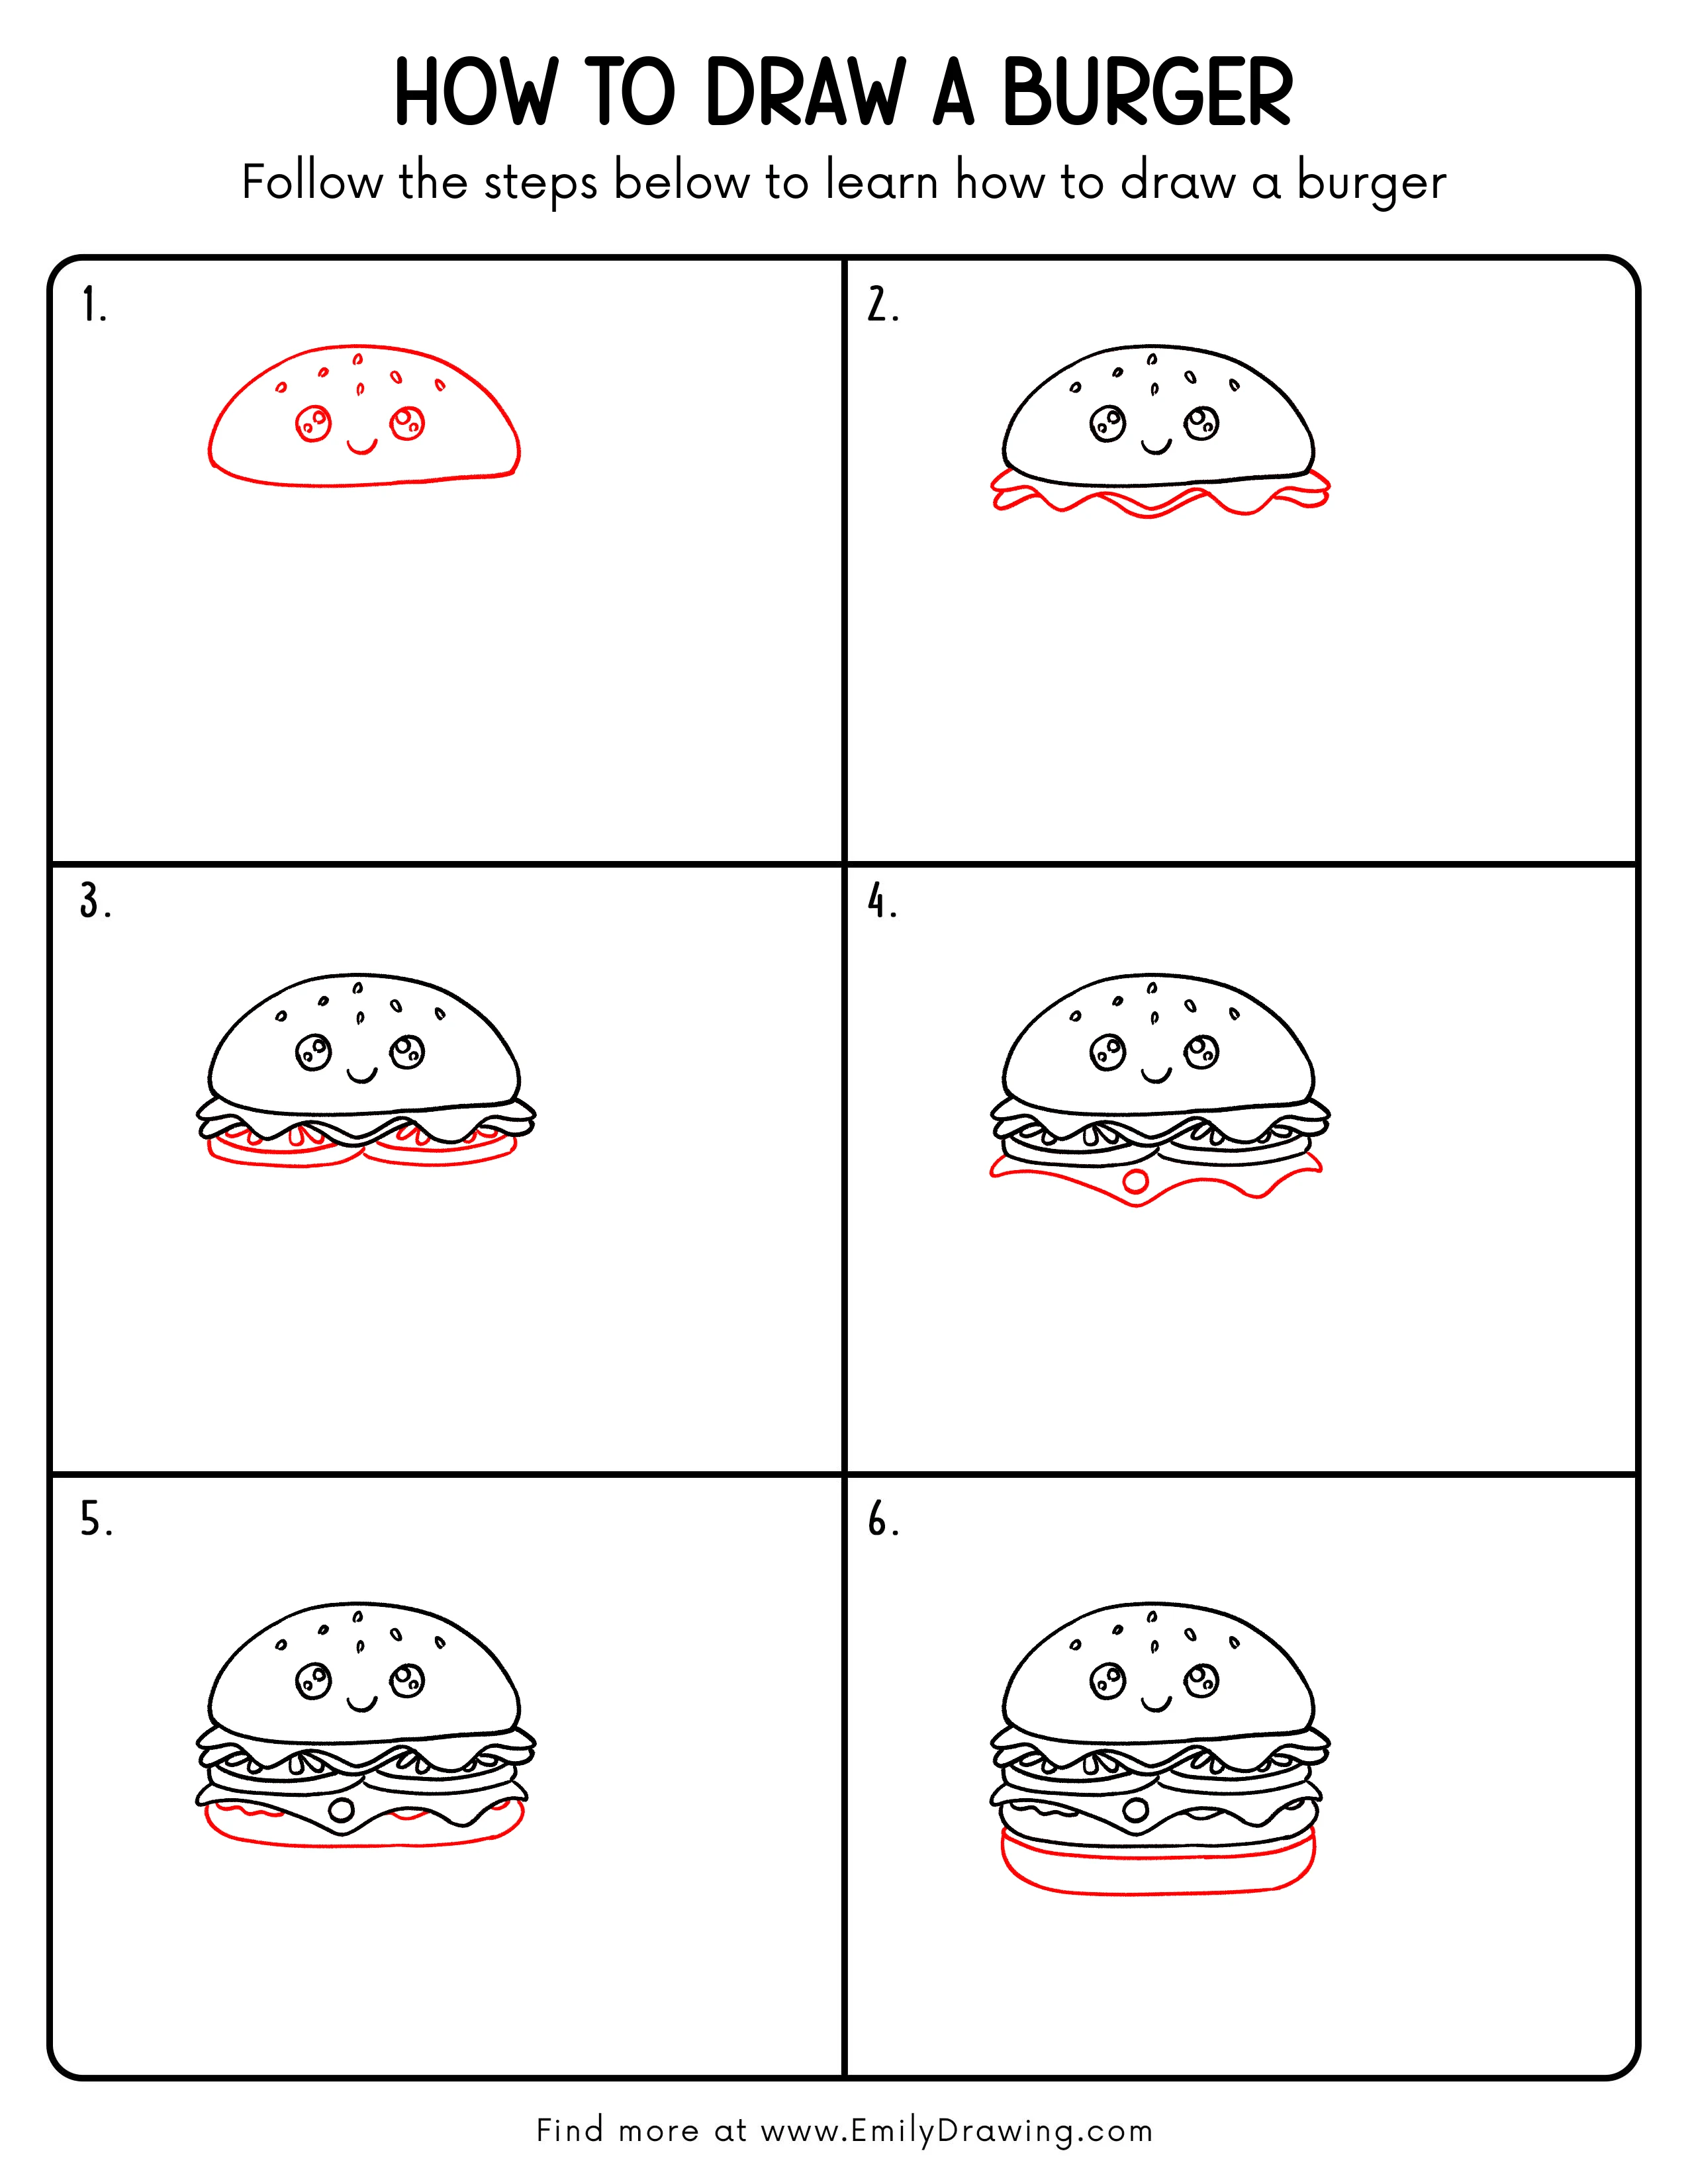
Step 1: Draw the Top Bun and a Cute Face
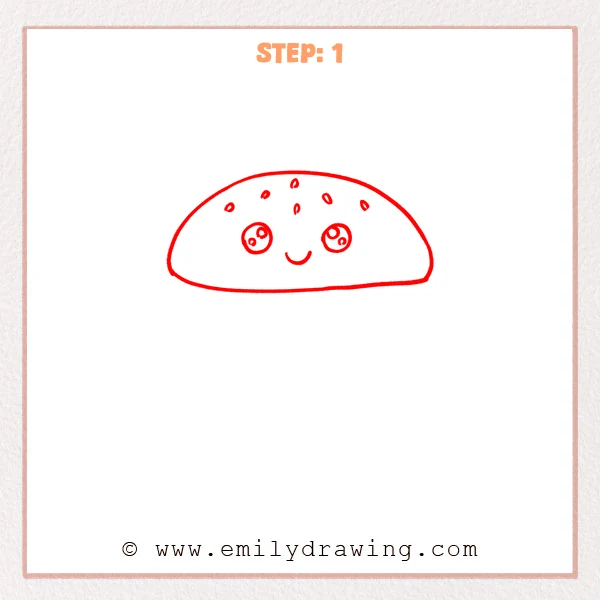
Start with a wide, low half-oval for the top bun, keeping the bottom edge slightly flatter. Add two big round eyes and a small curved smile, then sprinkle a few tiny oval sesame seeds near the top.
Pro Tip: Keep both eyes level so the face looks extra cute.
Alt Text: A simple cute burger top bun with sesame seeds, big shiny eyes, and a small smiling mouth.
Step 2: Add a Wavy Lettuce Layer
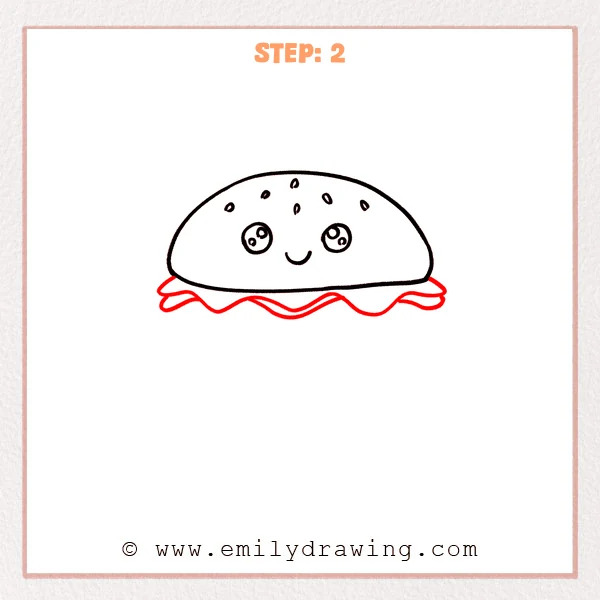
Draw a bouncy wavy line hanging under the bun, letting it flow from left to right. Add a second, thinner curve inside it to show folds and give the lettuce depth.
Pro Tip: Vary the wave sizes a little so the lettuce feels more natural.
Alt Text: A cute burger drawing with a smiling sesame bun, now with a wavy lettuce layer and an inner fold line beneath the bun.
Step 3: Add the Bottom Bun and Extra Filling Details
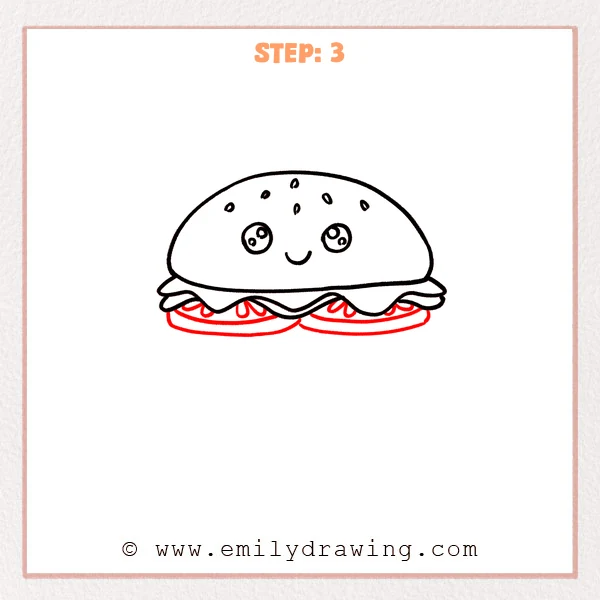
Under the lettuce, sketch the bottom bun as two low, long ovals that overlap a little in the middle. Then add a few small curved “teardrop” shapes under the lettuce to make the filling look fuller.
Pro Tip: Keep the bottom bun flatter than the top so the burger feels stable.
Alt Text: A cute burger drawing with a sesame top bun and smiling face, wavy lettuce, added small filling curves, and a layered bottom bun.
Step 4: Add a Melty Cheese Slice
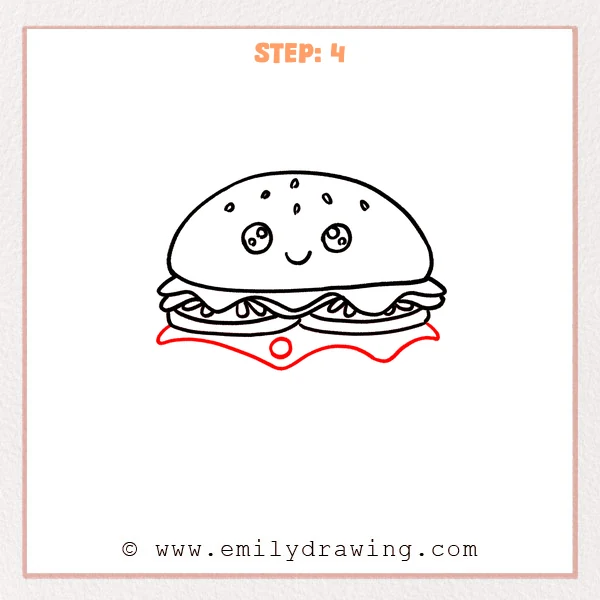
Draw a larger wavy layer underneath everything, letting it droop like soft, melted cheese. Add a small circle detail near the center to suggest a cheese hole or a shiny spot.
Pro Tip: Make the waves round and smooth so the cheese feels nicely melted.
Alt Text: A cute burger drawing with a smiling sesame bun, lettuce and filling layers, and a new melted cheese slice drooping at the bottom with a small circular detail.
Step 5: Finish the Bottom Bun and Hint the Lower Filling
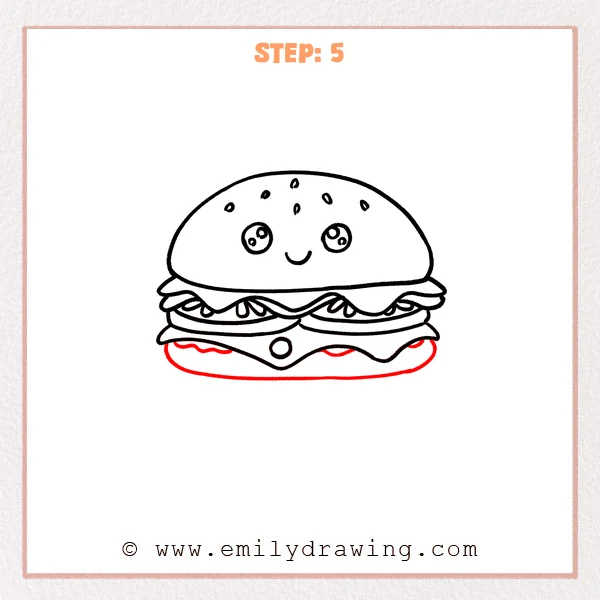
Add a long, smooth curve under the cheese to complete the bottom bun so the burger feels grounded. Then draw a small wavy line between the cheese and the bun to peek out a bit of the lower filling.
Pro Tip: Keep the bottom curve smooth so both sides feel evenly thick.
Alt Text: A cute burger drawing with a smiling sesame bun, lettuce and layers, melted cheese, and a finished bottom bun with a small wavy filling line above it.
Step 6: Make the Bottom Bun Thicker

Add a larger curved outline under the existing base to form a rounded bottom bun. Then draw a thin curved line across it to show thickness and a neat bun edge.
Pro Tip: Keep the gap between the two bottom lines even for a clean look.
Alt Text: A cute burger drawing with a smiling sesame bun and layered fillings, now with a thicker, rounded bottom bun showing an extra edge line.
Step 7: Color in your drawing!
Fun Facts
- Sesame seeds are often added to burger buns for extra texture and a gentle nutty flavor.
- Lettuce is usually placed near the top so it stays crisp and bright.
- Melted cheese is drawn with wavy edges because it softens and drips when warm.
Pin it now, Draw later!
You now have a cute burger drawing with a happy face and tasty layers. For coloring, try a warm golden tan for the buns, bright green for lettuce, and a sunny yellow for the cheese. Add light shading under each layer to make the burger look stacked and three-dimensional.
One common beginner mistake is making the bottom bun too thin, which can make the burger look wobbly. If that happens, gently widen the base line and keep the curves smooth.
Keep practicing this step by step drawing, and try changing the toppings next time. If you enjoyed this easy drawing tutorial, draw another food character and build your own cute menu.
Get the FREE Printable Drawing Guide
FREE Download Printable Burger Drawing Tutorial
Frequently Asked Questions
How do I make the burger look more “3D”?
Add small shadows under the lettuce, cheese, and bun edges. Keep the shadows light and follow the curve of each layer.
What if my wavy lettuce or cheese looks messy?
That is okay. Try making the waves slower and rounder, and erase any sharp corners.
Can I change the face or toppings?
Yes. You can add rosy cheeks, different eyes, or extra layers like tomato or a patty. Keep each new layer simple and slightly curved.