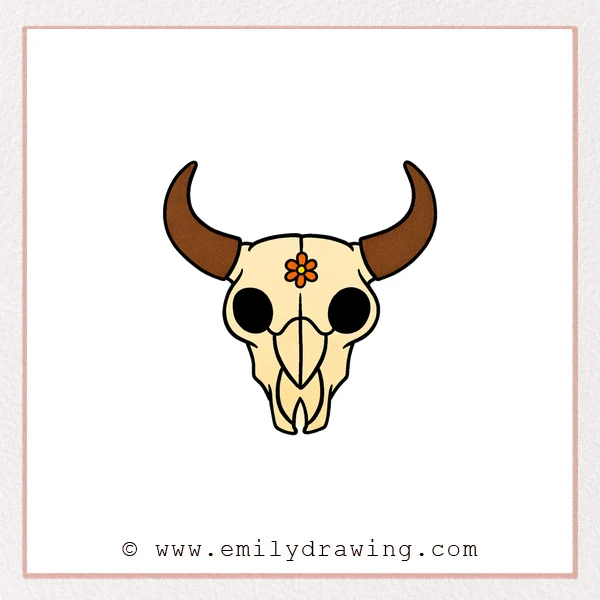
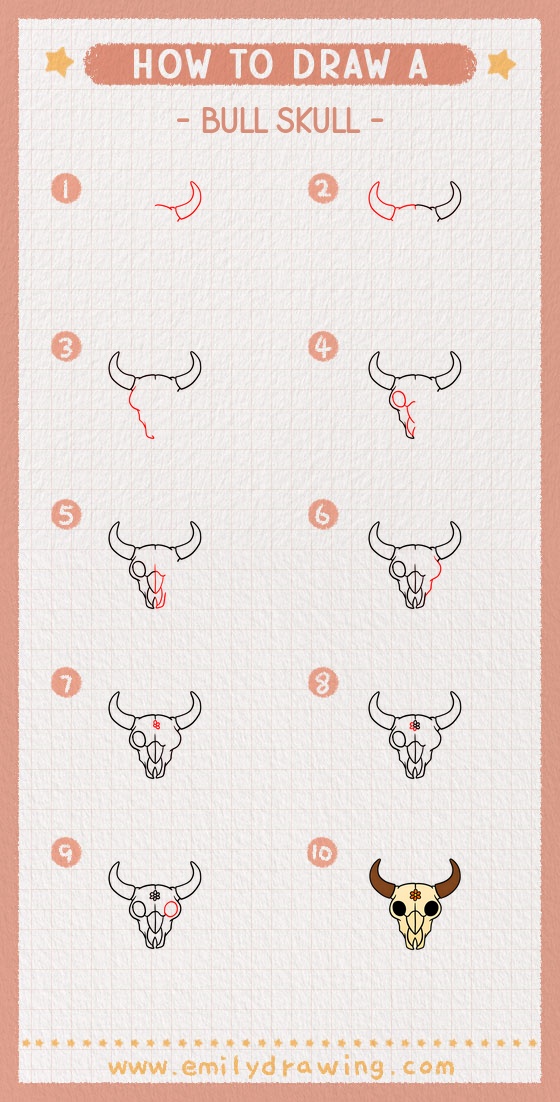
If you want to learn how to draw a bull skull, this calm, step by step drawing guide will help you build it slowly. We will start with the horns, then shape the skull, and finish with simple details. This is an easy drawing tutorial made for drawing for beginners.
What You Will Need
- Pencil
- Eraser
- Black marker or pen (optional)
- Plain paper
- Colored pencils or markers (optional)
Here are my RECOMMENDED Art Supplies!
- Crayola Coloring Set (140 Pieces – Mega Value!)
- 24 Colored Crayon Set
- A4 Printer Paper
- Crayola Coloring Pencils
- HP Home Printer with Instant Ink!
Time needed:
21 minutes.
Step-by-Step Drawing Guide
Step 1: Start One Curved Horn Shape
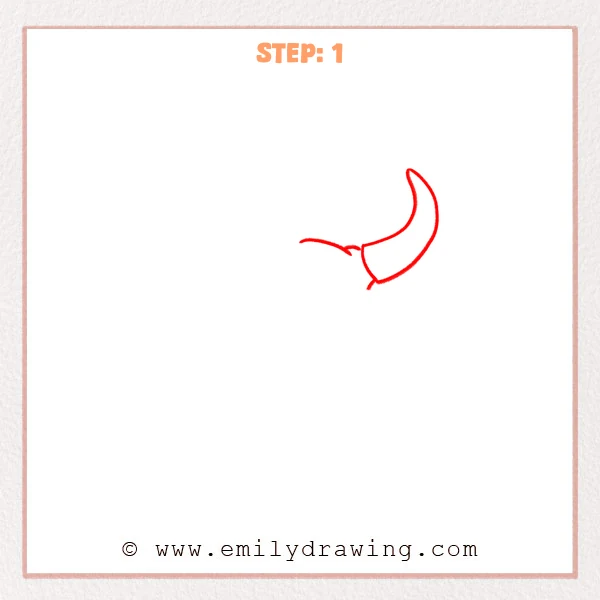
Near the upper-right area, sketch a long curved line like a crescent to form the outside edge of one bull skull horn. Add a short curved band at the base so the horn looks attached, and keep the inner area open for now.
Pro Tip: Keep the tip thin and the base thicker to make the horn feel strong.
Step 2: Add the Second Horn and the Forehead Bridge
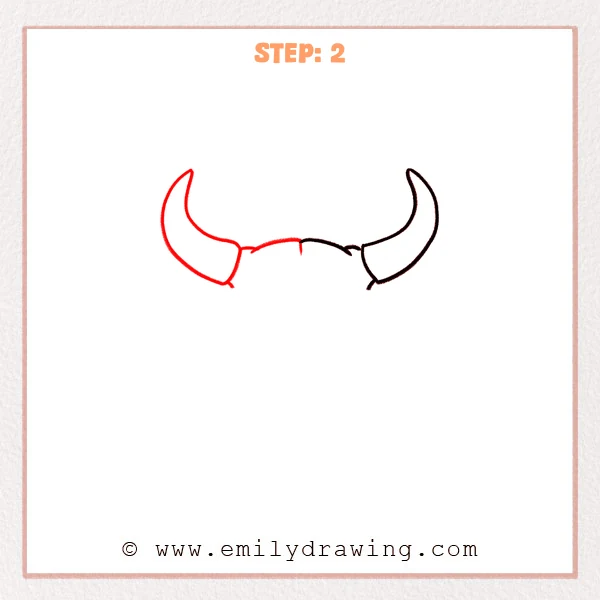
On the left side, sketch a matching horn with a similar curve, and add a small band at its base. Connect the two bases with a gentle curved line, leaving a small notch in the center to suggest the skull’s forehead split.
Pro Tip: Match the horn lengths first, then adjust the curves for balance.
Step 3: Outline the Skull’s Side Shape
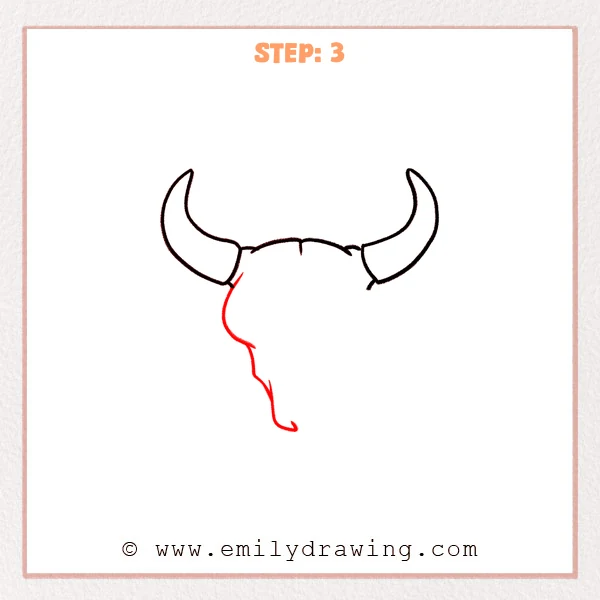
Starting under the left horn base, pull a long curved line downward to form the side of the bull skull. Let it tuck in slightly around the middle, then narrow as it goes down, finishing with a small hook-like curve for the jaw tip.
Pro Tip: Keep the midsection tuck gentle so the skull does not look too thin.
Step 4: Add the Eye Socket and Inner Nose Lines
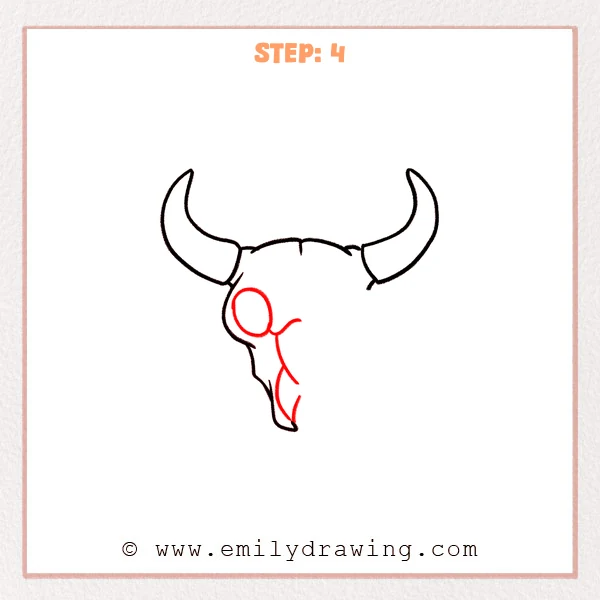
Draw a round eye socket on the upper-left area of the skull, keeping it full and slightly inside the outer edge. Then add a gently curving inner line that drops from the forehead toward the lower area, leaning a bit to the right like the start of the nasal bridge, and finish with a short inner jaw line for depth.
Pro Tip: Do not place the eye socket too close to the edge; leave bone thickness.
Step 5: Add the Center Line, Nasal Shape, and Split Jaw
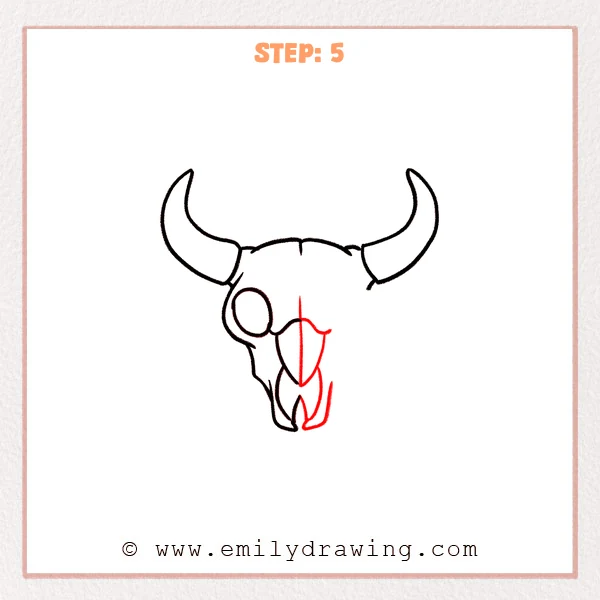
Lightly draw a straight vertical center line to keep the bull skull symmetrical. On both sides of it, sketch a long shield-like nasal area with a gently wavy top and a pointed lower end, then add a split lower jaw shape at the bottom like two bones opening outward.
Pro Tip: Keep the center line very light so it is easy to erase later.
Step 6: Complete the Right Cheek and Skull Outline
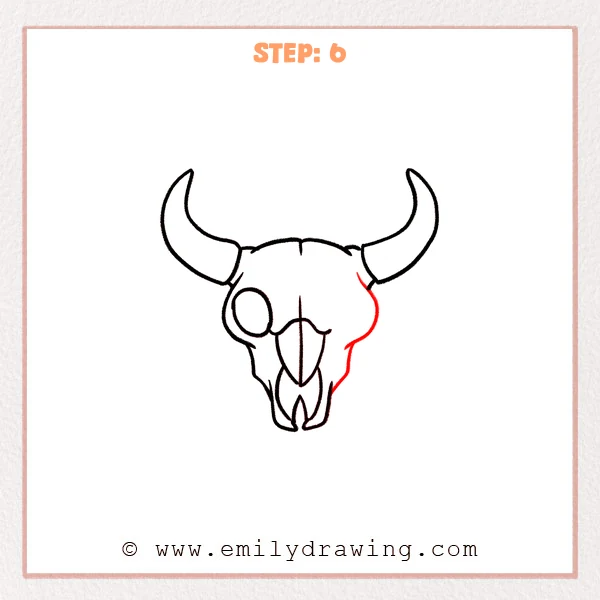
Starting under the right horn base, add the outer edge of the right cheekbone so it gently bulges outward before narrowing as it goes down. Guide this line to meet the lower jaw area smoothly, helping the bull skull feel balanced and complete.
Pro Tip: Sketch the right outline lightly first, then darken it after comparing to the left.
Step 7: Add a Small Forehead Flower Detail
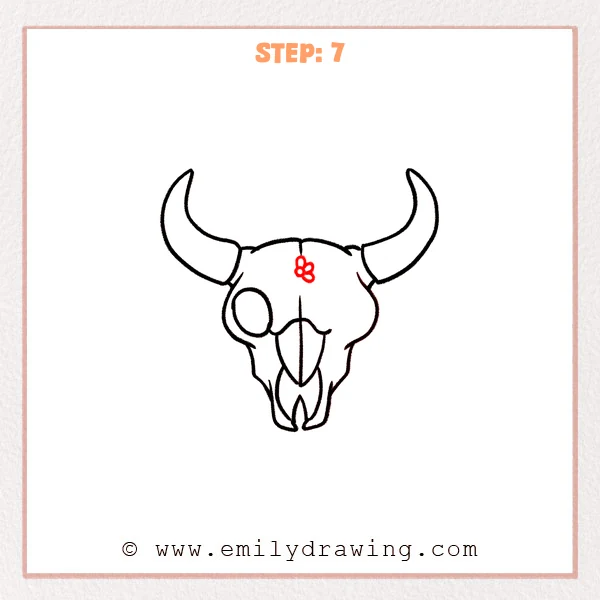
Near the top of the center forehead line, add a tiny flower-like detail using a few small circles as petals. Keep it sitting on the skull surface and make it small so the horns remain the main focus.
Pro Tip: Smaller decorations look cleaner, and placing them near the center line feels balanced.
Step 8: Refine the Flower into Clear Petals
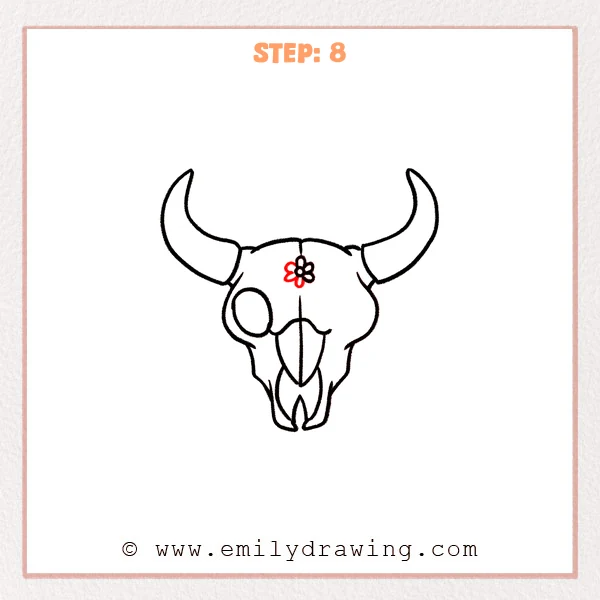
On the forehead decoration, shape the outer circles into clearer petal forms so each petal feels similar in size. Add a small center dot to finish the flower and make it read like a neat badge on the bull skull.
Pro Tip: Space the petals evenly in a ring to keep the drawing clean.
Step 9: Add the Right Eye Socket
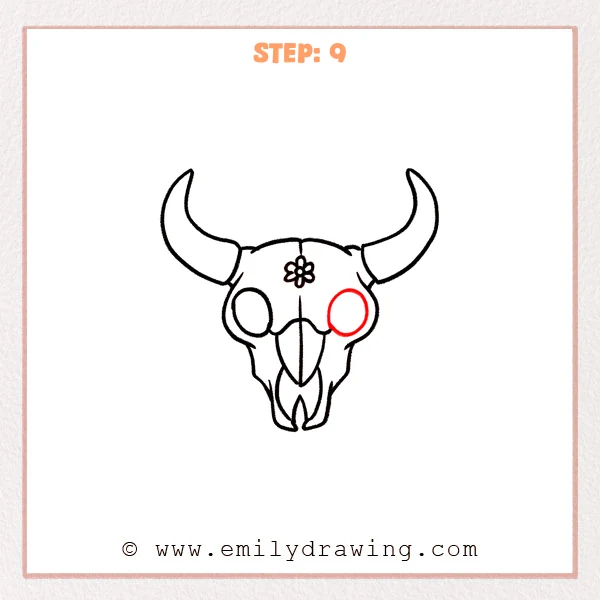
On the upper-right cheek area, draw a second round eye socket at a similar height to the left one. Leave a small border between the circle and the outer edge so both sockets feel evenly placed.
Pro Tip: Compare the two socket sizes first, then adjust the circle width gently.
Step 10: Color in your drawing!
Fun Facts
- Bull horns grow from a bony core and are covered by a tough outer layer.
- Real skull shapes are not perfectly even, so tiny differences can look natural.
- Many artists use a center guide line to keep a skull drawing symmetrical.
Pin it now, Draw later!
You now have the main shapes for an easy bull skull drawing, built step by step from horns to face details. If you want more depth, lightly shade inside the eye sockets and along the nasal shape, keeping the edges softer than the outline. A common beginner mistake is making both eye sockets touch the outer edge, which removes the feeling of bone thickness. Keep practicing this drawing for beginners, and try drawing the bull skull again with slightly different horn curves to build confidence.
Get the FREE Printable Drawing Guide
FREE Download Printable Bull Skull Drawing Tutorial
Frequently Asked Questions
How do I make the bull skull look more symmetrical?
Use the center line as a guide, and compare left and right shapes after each new line. Small adjustments are easier before you press hard or ink the drawing.
What if my horns look uneven?
First match the horn lengths, then check the curve and tip position. If one horn feels taller, shorten it slightly by adjusting the inner edge.
How can I add more realism without making it complicated?
Add gentle shading in the eye sockets and under the cheek edges. Keep the shading light and build it slowly, like a soft shadow.