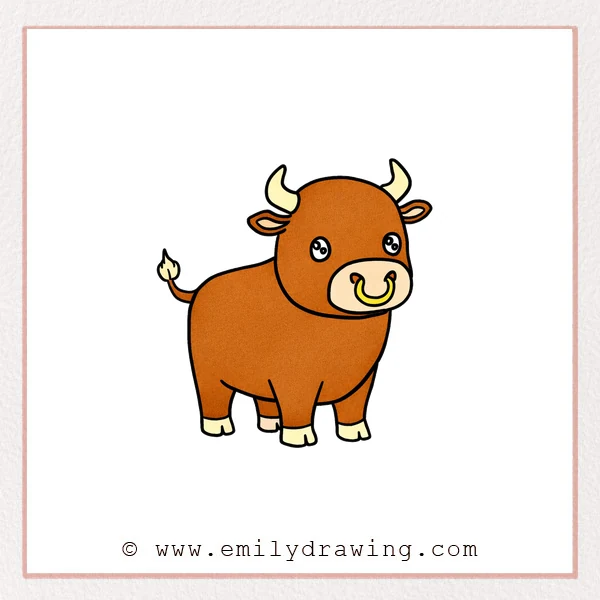
This easy drawing tutorial shows how to draw a bull step by step using simple shapes. Take your time, draw lightly at first, and enjoy watching your bull come together line by line. It is a calm, friendly drawing for beginners that works well with markers or crayons.
What You Will Need
- Pencil and eraser
- Black fineliner or marker (optional for outlining)
- Coloring tools: crayons, colored pencils, or markers
- Paper
Here are my RECOMMENDED Art Supplies!
- Crayola Coloring Set (140 Pieces – Mega Value!)
- 24 Colored Crayon Set
- A4 Printer Paper
- Crayola Coloring Pencils
- HP Home Printer with Instant Ink!
Time needed:
19 minutes.
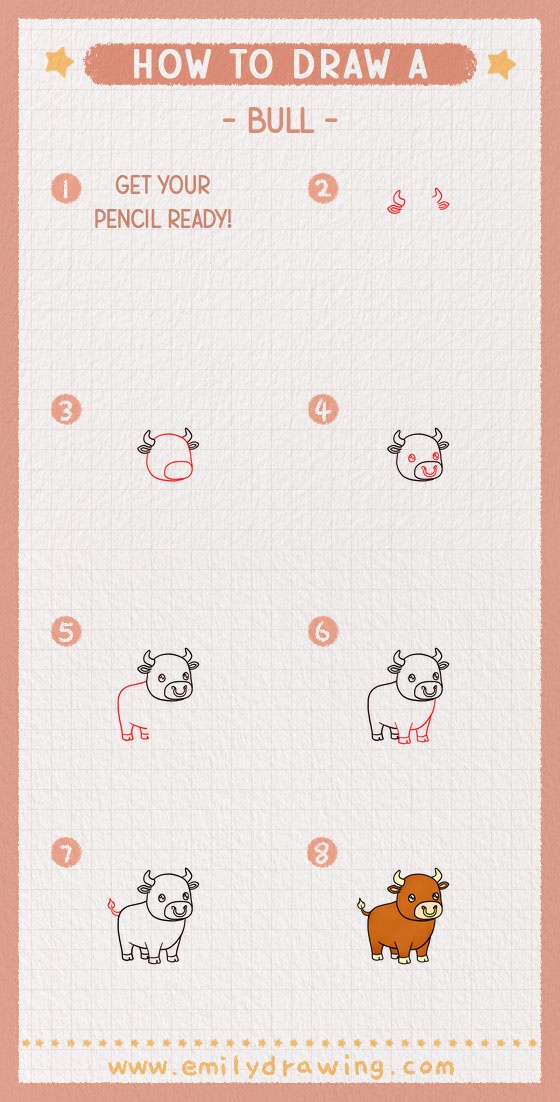
Step-by-Step Drawing Guide
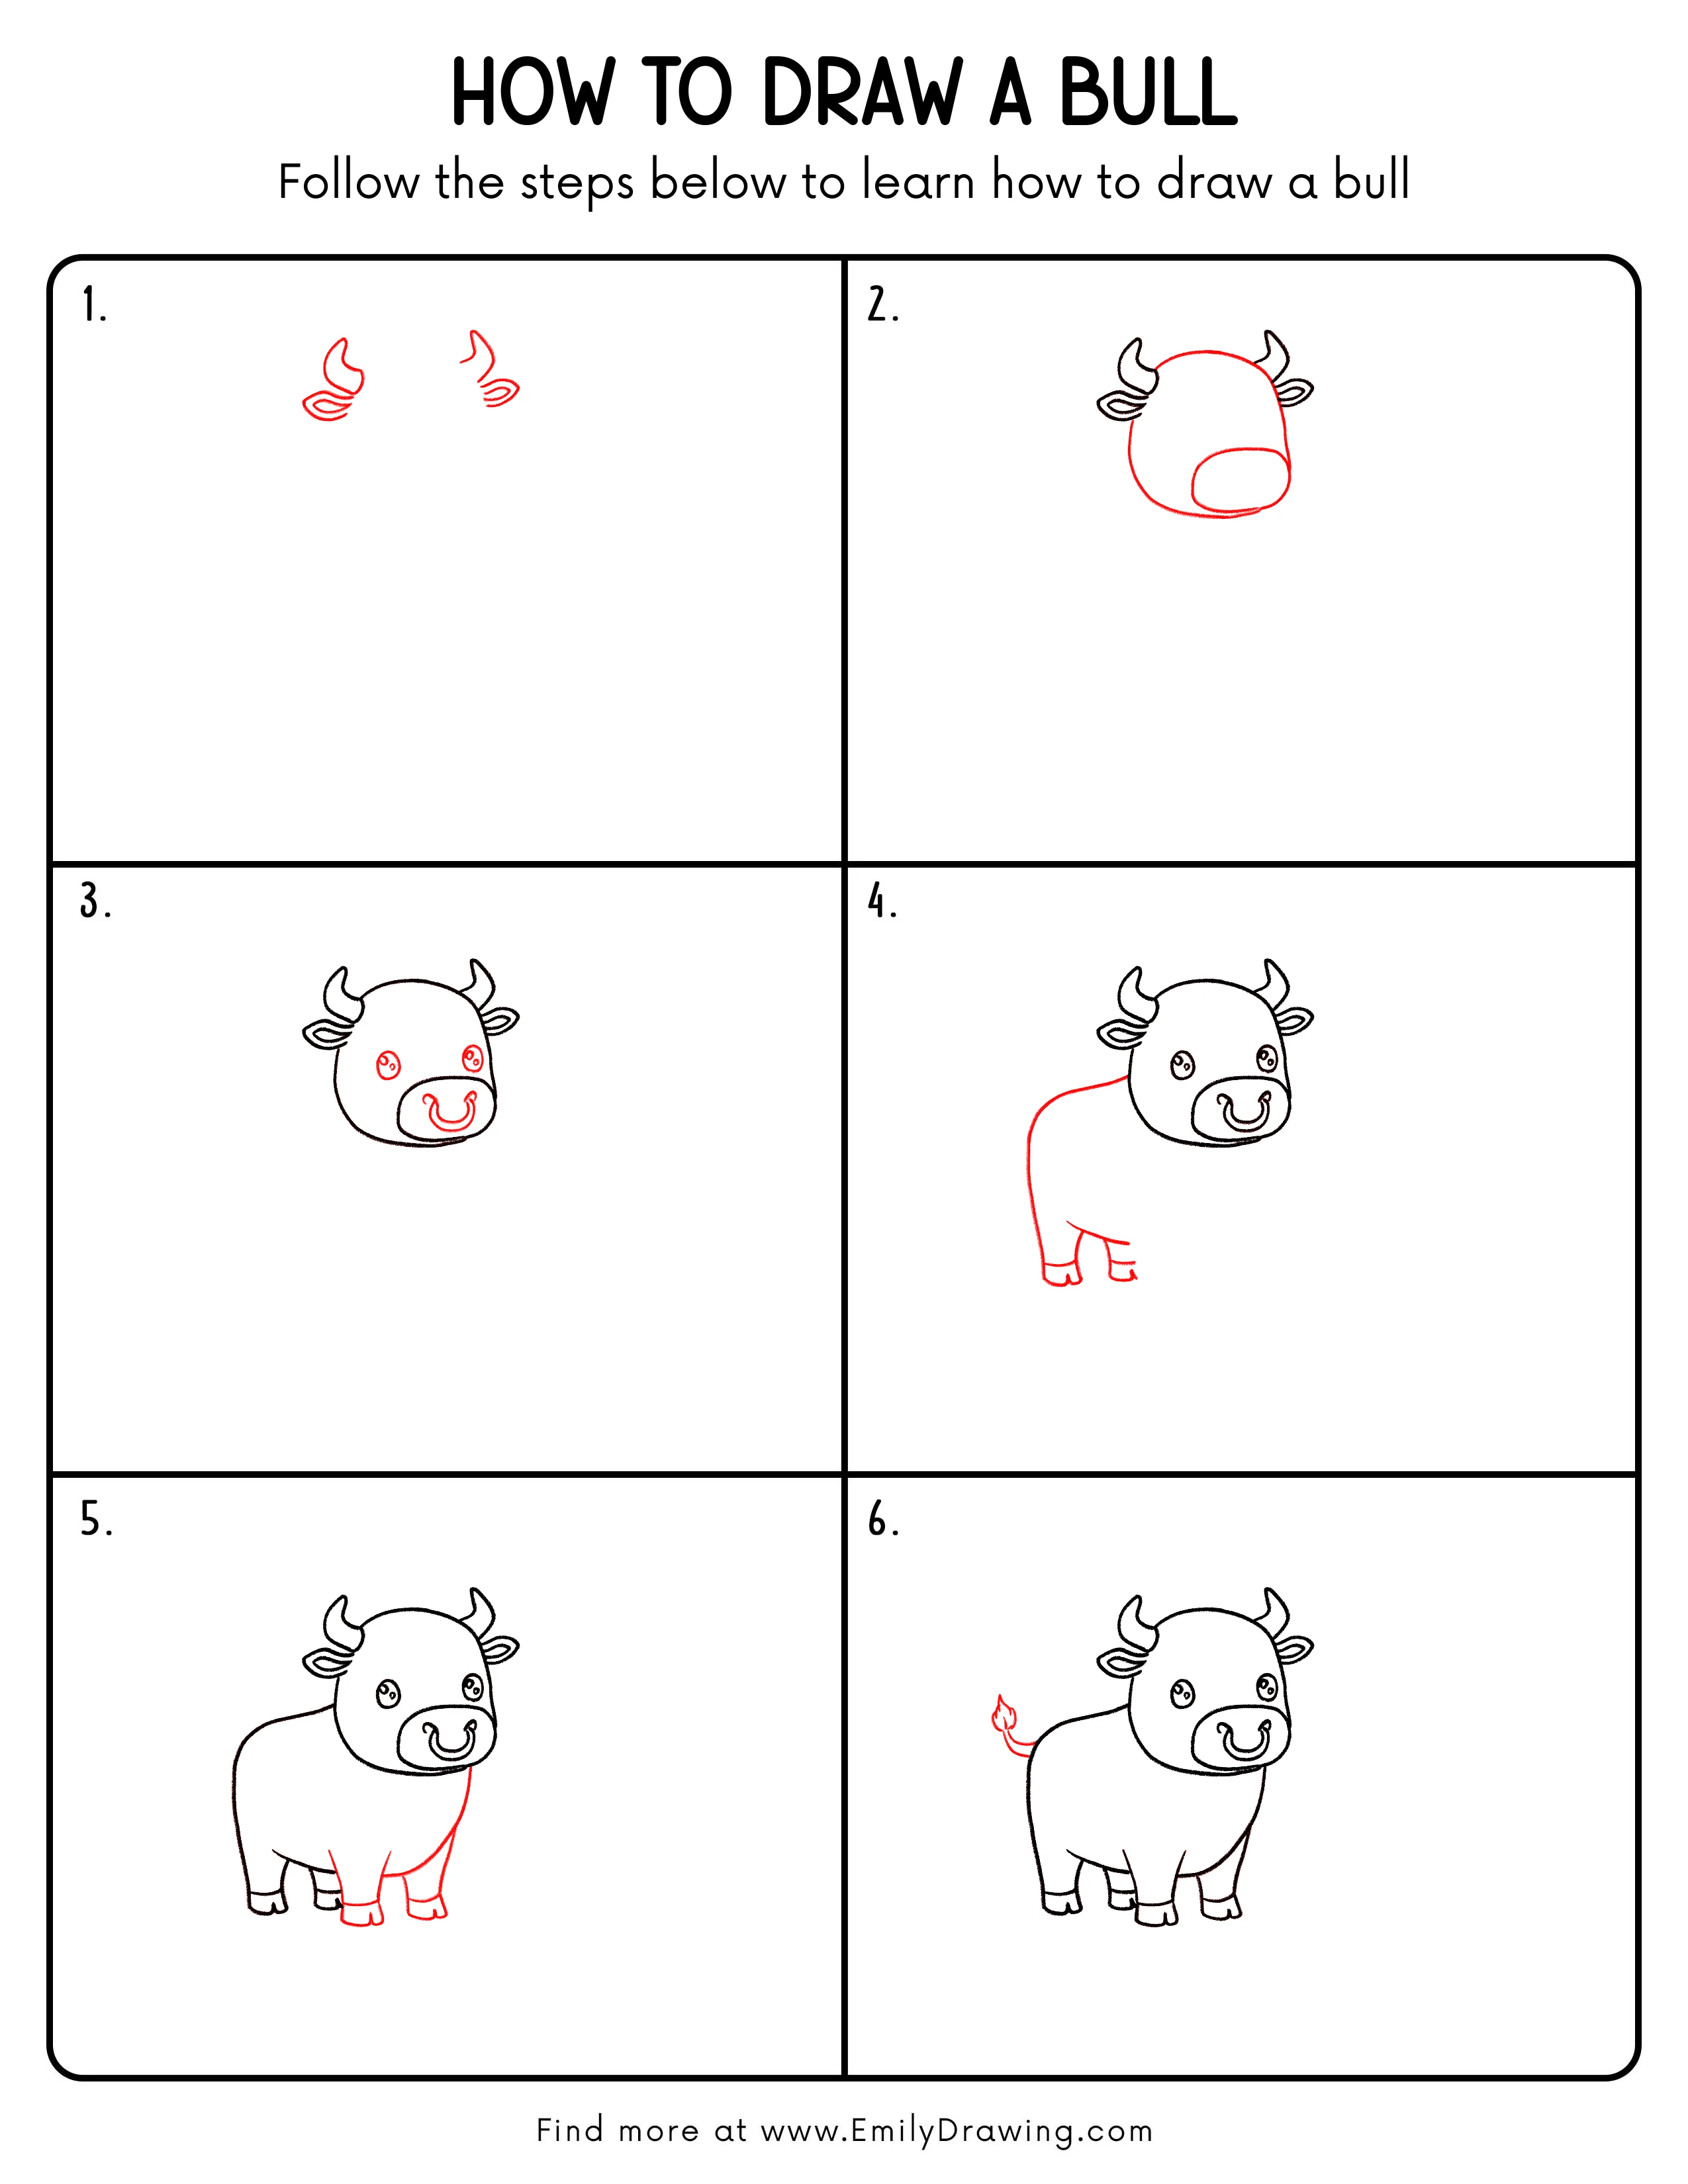
Step 1: Sketch the Basic Horn Shapes
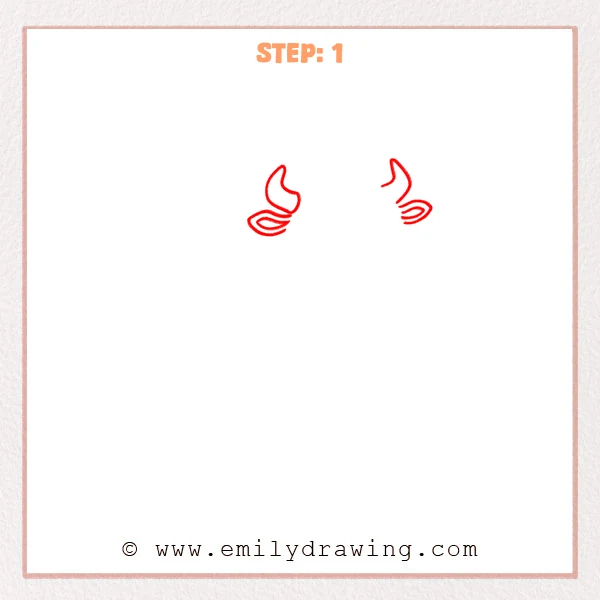
Leave space at the top of the page, then draw two curved, crescent-like horns—one on the left and one on the right. Under each horn, add two short curved lines to suggest where the horn meets the head.
Pro Tip: Keep both horns at a similar height and curve for balance.
Step 2: Add the Head Outline and Muzzle Area
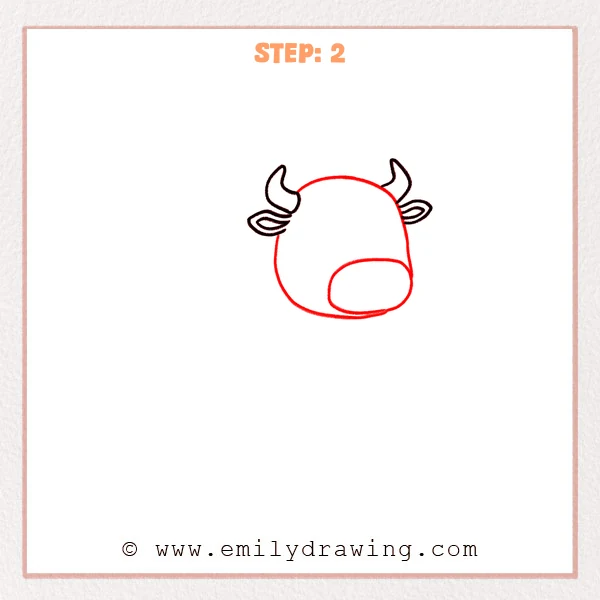
Connect the two horns with a smooth curved line to form the rounded top of the head. Bring the sides down into a soft, wide face shape that curves back in at the bottom. Then add a large horizontal oval on the lower right area for the muzzle.
Pro Tip: Keep a small gap between the muzzle oval and the head outline.
Step 3: Add the Eyes and Nose Details
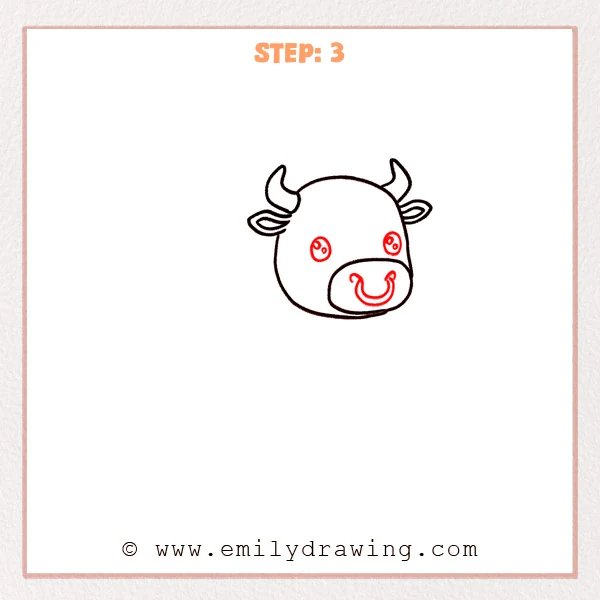
Place one small round eye on each side of the face, then add tiny highlight circles inside to make them shine. Inside the muzzle oval, draw two small nostrils and a curved U-shaped line to give the bull a gentle smile.
Pro Tip: Keep both eyes the same size and level for a cute look.
Step 4: Add the Back Half of the Body and the First Pair of Legs
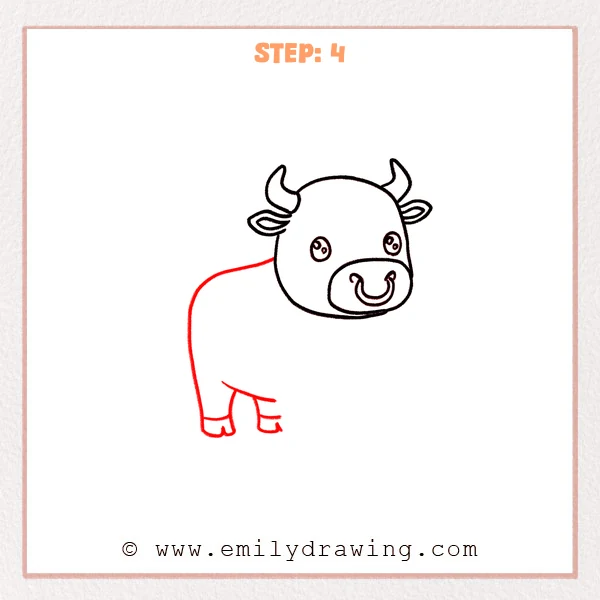
From the left side of the head, pull a long curve back to form the bull’s rounded back and rear body, then let it drop down into a soft corner. Under the body, add the first pair of short legs: draw the back leg first, then a slightly overlapping leg in front, finishing each with a simple hoof split.
Pro Tip: Keep the bottoms of the hooves level so the stance feels steady.
Step 5: Complete the Front Body and Add the Other Pair of Legs
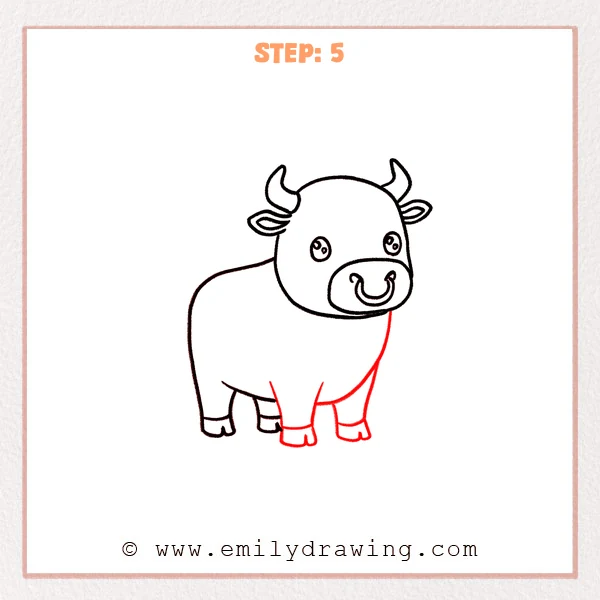
Draw a smooth curve down from under the head to connect the chest and front belly, so the body feels finished. Then add the other pair of short legs underneath: draw the front leg first, place the second one slightly behind to show overlap, and finish each with a small hoof split.
Pro Tip: Leave a small gap between legs so the shapes stay clear.
Step 6: Add the Small Tail
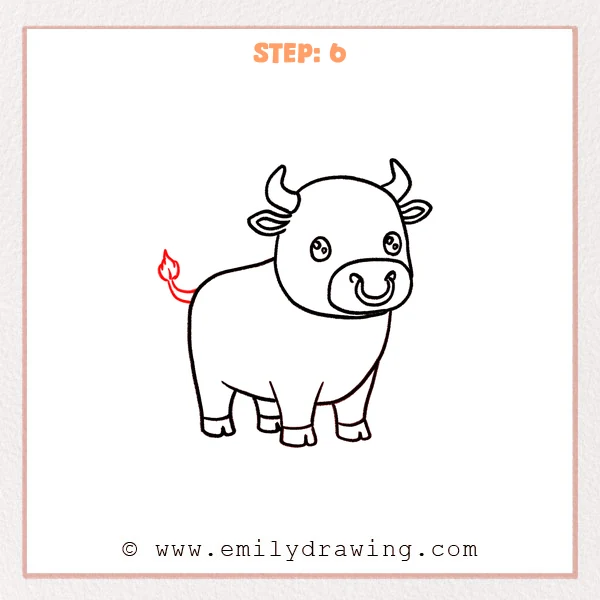
Extend a thin, gently curved line from the back of the body, like a soft swinging rope. Finish it with a small leaf-shaped tuft, then add one or two short lines to split the tuft into simple sections.
Pro Tip: Keep the tail thin so it feels light and lively.
Step 7: Color in your drawing!
Fun Facts
- Bulls and cows are the same species, but a bull is a male.
- Bulls use their strong neck and shoulders to push and spar with other bulls.
- A bull’s horns are made of bone inside, with a hard outer layer.
Pin it now, Draw later!
Now you have a complete bull made from calm, simple shapes. If you want more depth, add light shading under the belly and behind the legs, then darken the hooves slightly for contrast. For coloring, try warm browns, charcoal gray, or a classic black-and-white pattern, and keep the muzzle a little lighter.
A common beginner mistake is making the legs too long, which can make the bull look wobbly. Keep the legs short and the hooves lined up, and your bull will feel sturdy and balanced.
Practice this step by step drawing a few times, then try changing the horn shape or adding spots to make your own bull character.
Get the FREE Printable Drawing Guide
FREE Download Printable Bull Drawing Tutorial
Frequently Asked Questions
How do I make my bull look cuter?
Make the eyes slightly larger, keep the legs short, and add bigger highlight dots.
What if my horns do not match?
That is normal at first. Adjust one horn by rounding the curve until both feel similar.
Can I draw a bull facing the other direction?
Yes. Mirror the head and muzzle placement, and flip the tail to the opposite side.