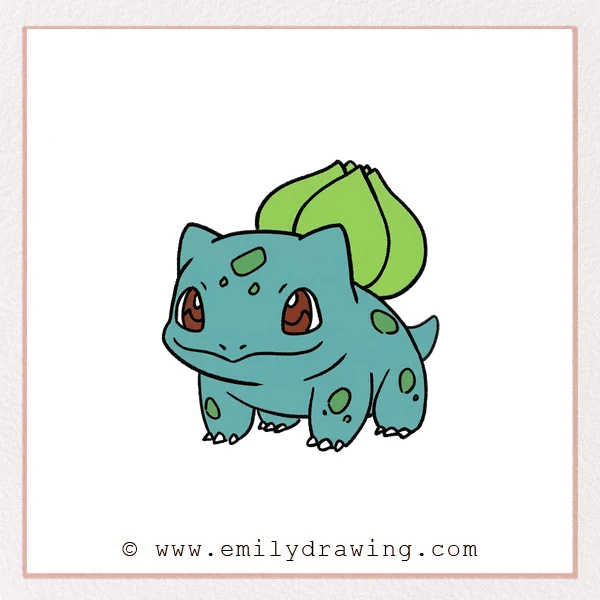
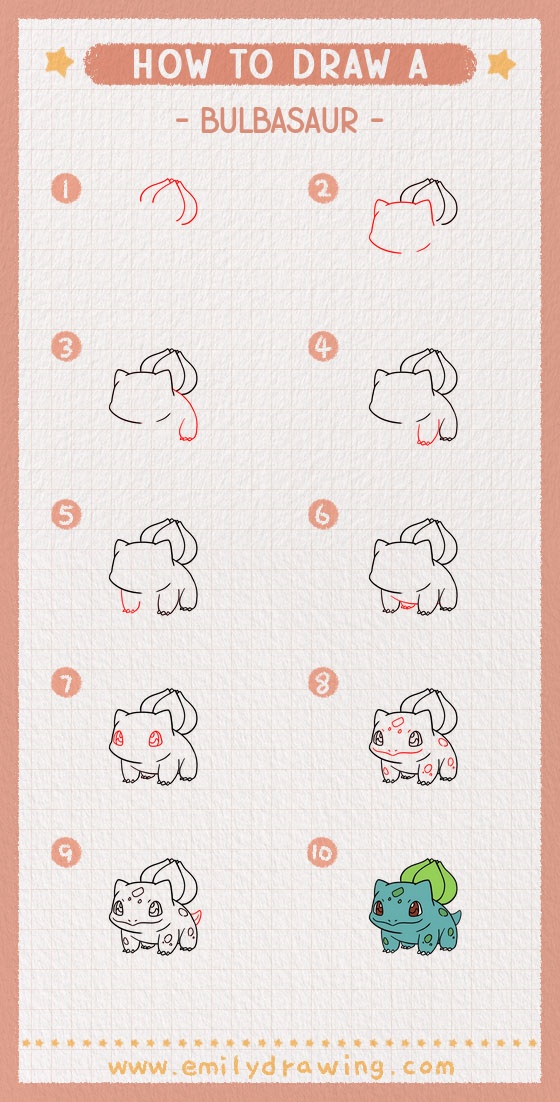
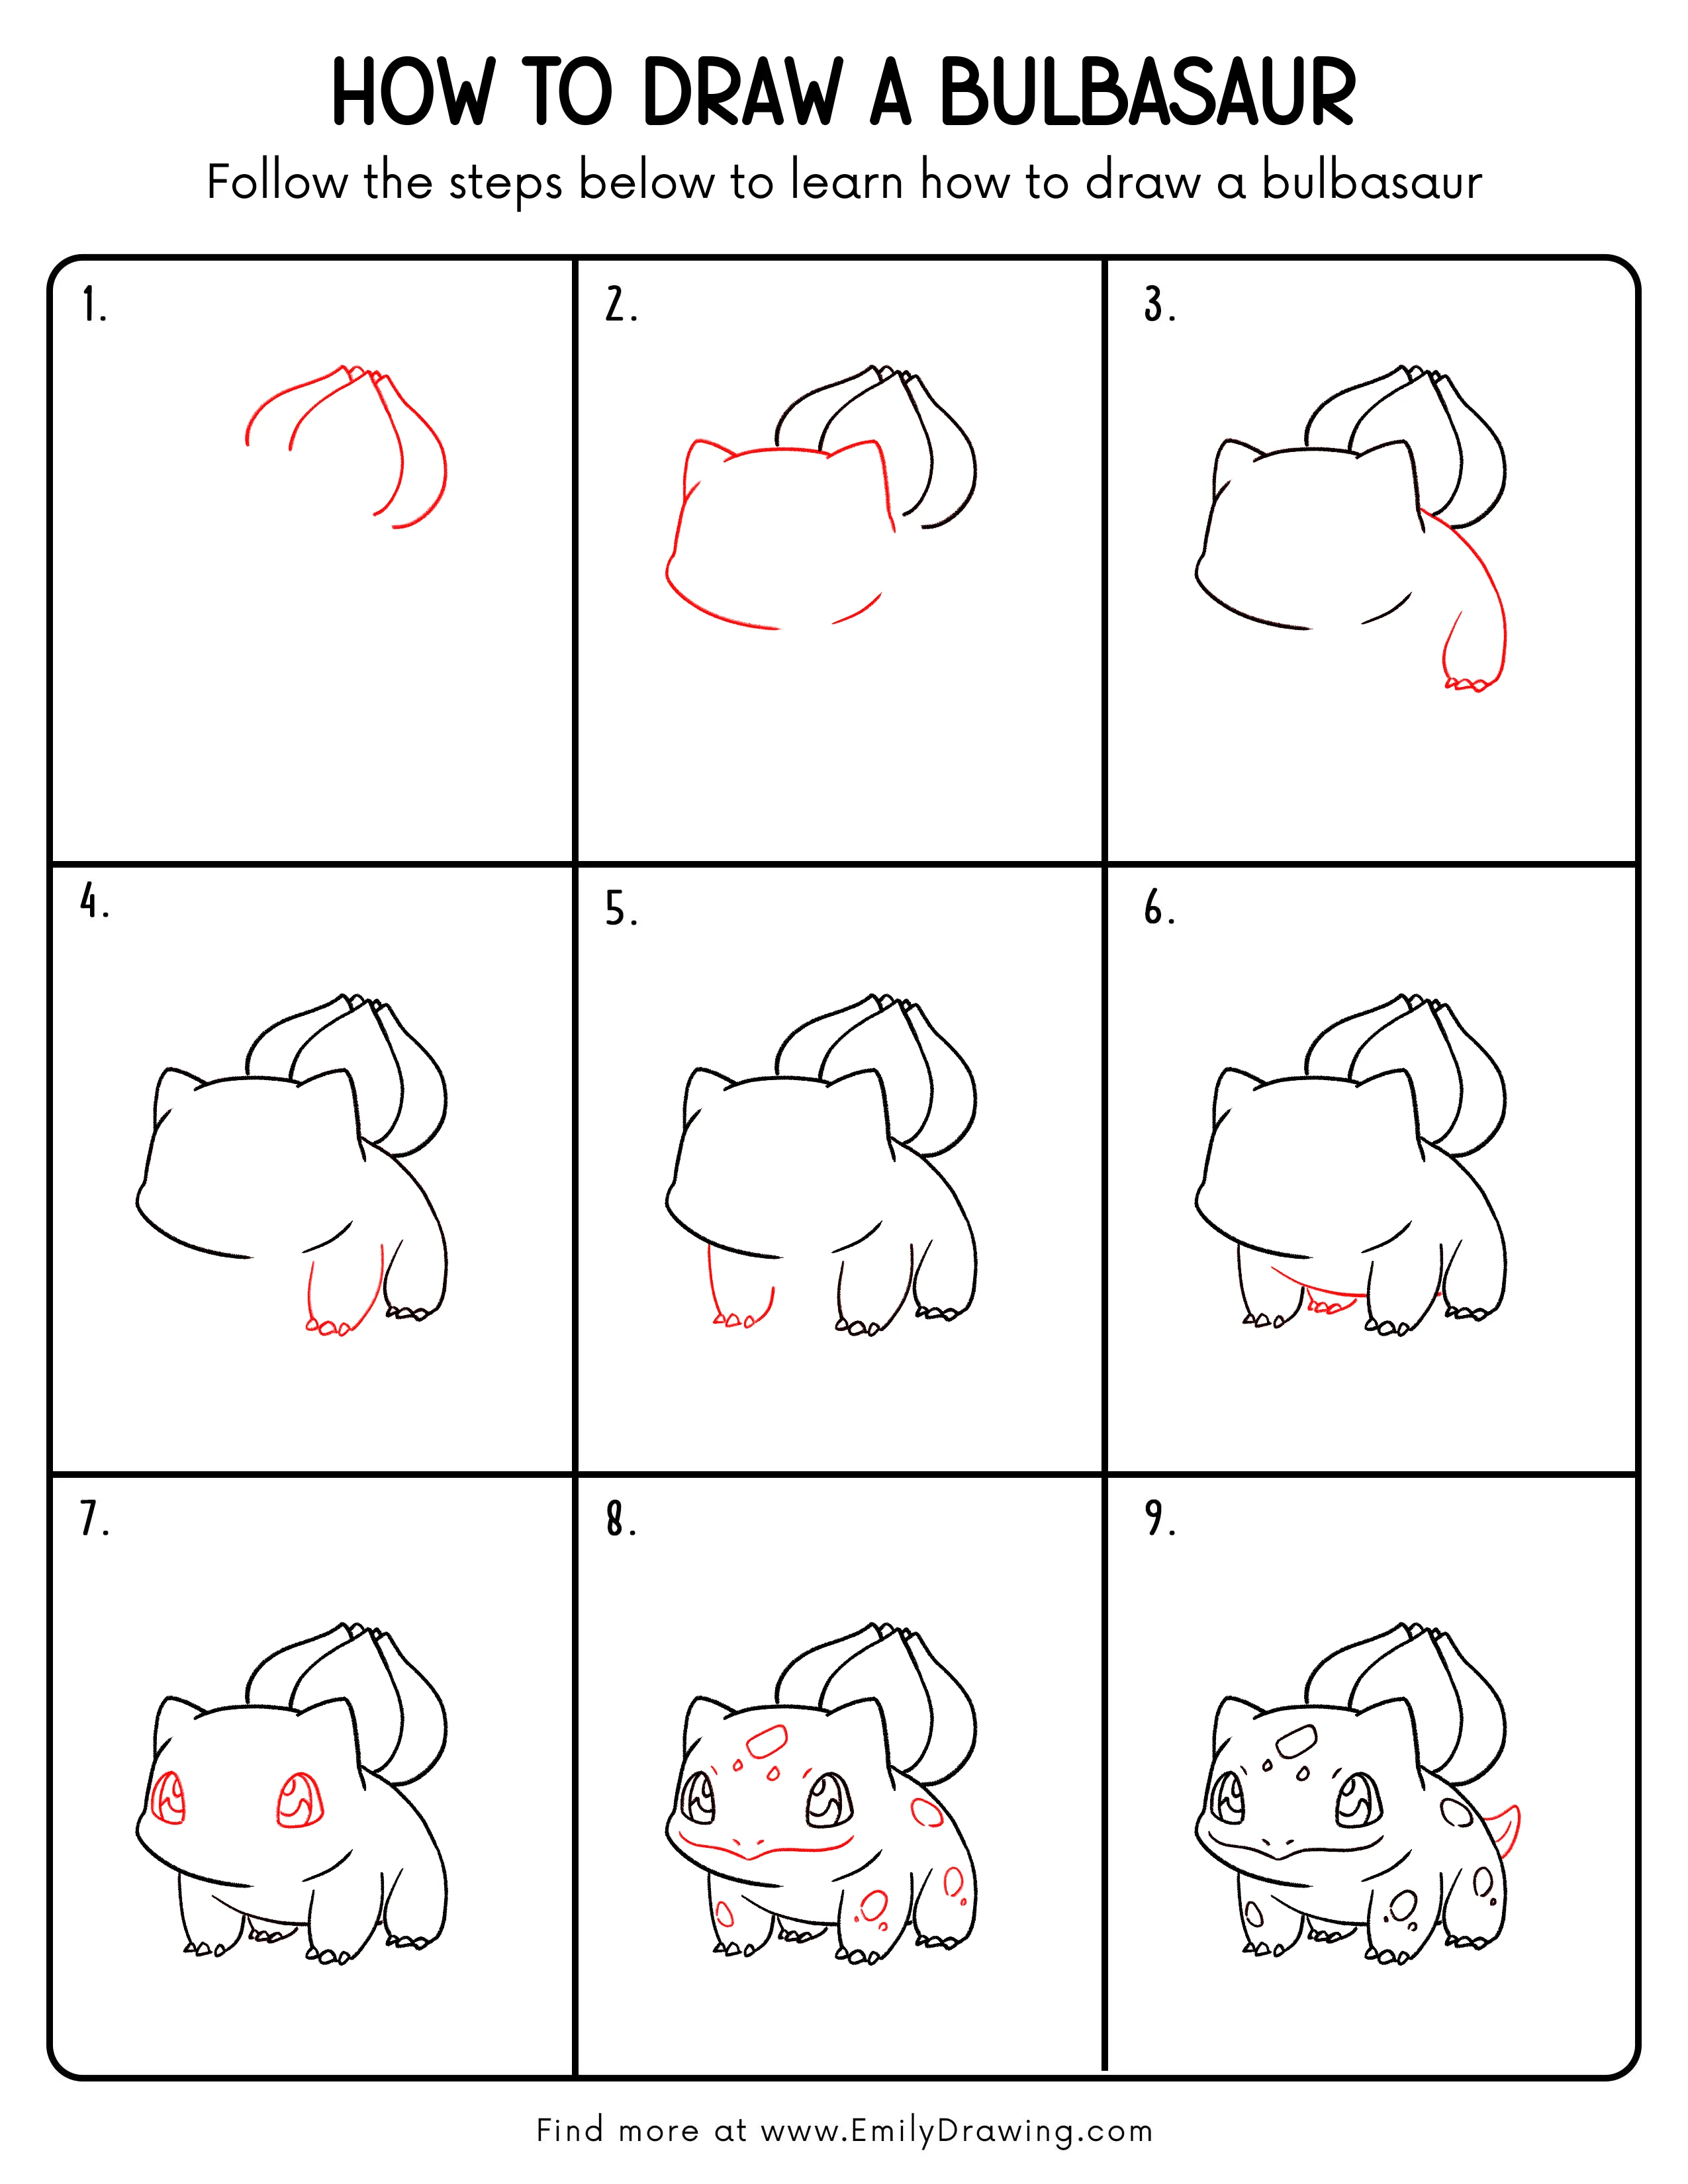
This easy drawing tutorial shows how to draw Bulbasaur step by step using simple shapes. Take your time with each line, and let the sketch stay light until the end. By the last step, you will have a clear Bulbasaur pose with its bulb, face, and spots.
What You Will Need
- Pencil
- Eraser
- Black pen or fine liner (optional)
- Colored pencils or markers (optional)
- Plain drawing paper
Here are my RECOMMENDED Art Supplies!
- Crayola Coloring Set (140 Pieces – Mega Value!)
- 24 Colored Crayon Set
- A4 Printer Paper
- Crayola Coloring Pencils
- HP Home Printer with Instant Ink!
Time needed:
23 minutes.
Step-by-Step Drawing Guide
Step 1: Sketch the Bulb Outline on Bulbasaur’s Back
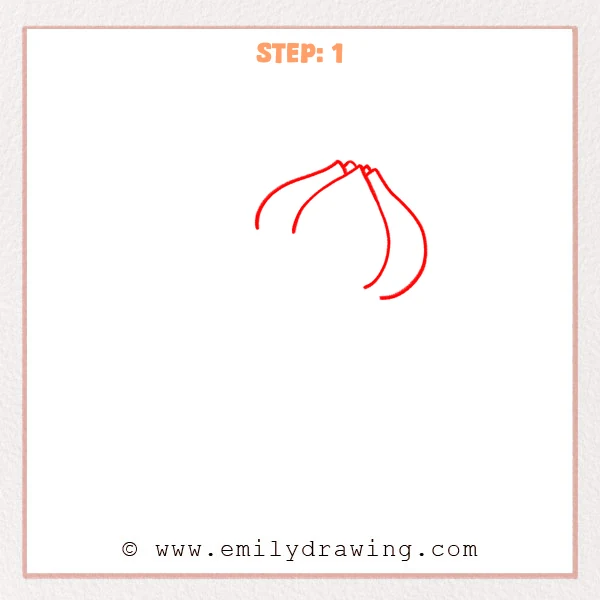
Near the upper-right area of your page, sketch three long curved lines like drooping leaf panels. Let their top ends meet in a small area to suggest where the bulb connects. Keep the shapes open for now, with smooth, gentle curves.
Pro Tip: Vary each curve slightly so the bulb feels more natural.
Alt Text: Early sketch of Bulbasaur showing three curved lines forming the top of the back bulb.
Step 2: Add the Head and Body Outline
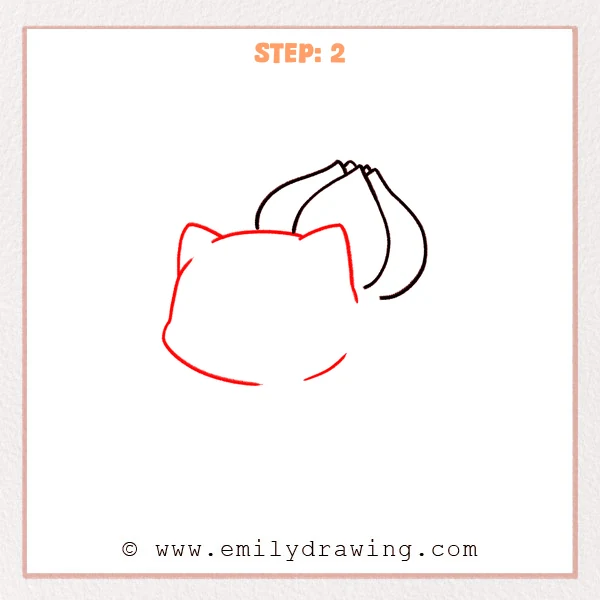
Below the bulb, draw a wide curved line for the top of Bulbasaur’s head, then add one pointed ear on each side. Pull two long curves downward to shape the sides of the body, keeping the bottom open for now. Let the body feel like a rounded bean shape.
Pro Tip: Keep the ears medium height and slightly angled outward for a cute look.
Alt Text: Bulbasaur sketch now includes a rounded head and body outline with two pointed ears beneath the back bulb.
Step 3: Add the Right Back Leg and Toes
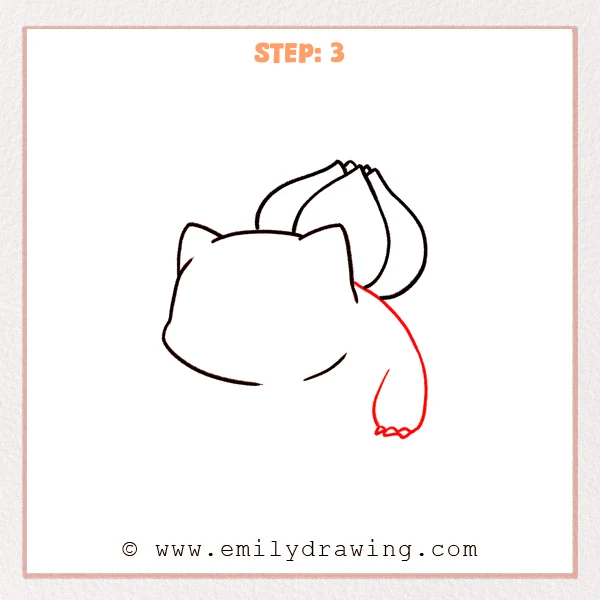
On the far right side of the body, add a chunky back leg dropping down from the side. Keep the leg short and sturdy, with a smooth outer curve. Finish the foot with three small rounded toe points.
Pro Tip: Place this leg on the outer edge so it reads as a back leg.
Alt Text: Bulbasaur sketch now includes a chunky right back leg with three small toes beneath the body.
Step 4: Draw the Right Front Leg and Toes

On the front-right area under the face, add a chunky front leg curving down from the body edge. Let the leg feel slightly forward compared to the back leg. Finish the foot with three small rounded toe points so it feels firmly planted.
Pro Tip: Place this leg slightly forward so it reads as a front leg.
Alt Text: Bulbasaur drawing adds the right front leg under the face, with three small toes at the bottom.
Step 5: Draw the Left Front Leg and Toes
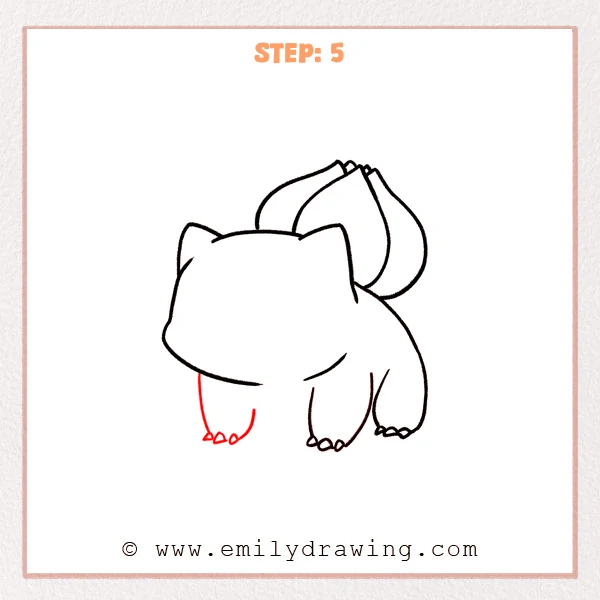
Near the lower middle under the head, add the left front leg dropping down from the body. Keep the shape rounded and close in height to the right front leg. Add three small rounded toe points at the bottom.
Pro Tip: Tuck this leg slightly inward to show depth.
Alt Text: Bulbasaur drawing adds the left front leg under the face area, with three small toes matching the right front leg.
Step 6: Add the Belly Curve and a Hidden Back Foot
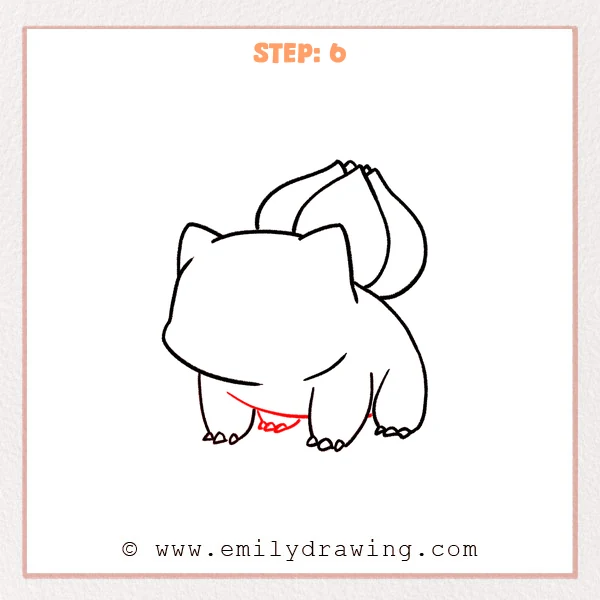
Sketch a gentle upward curve along the lower body to show Bulbasaur’s rounded belly passing behind the front legs. Then, between the two front legs and slightly farther back, add a small back foot with three tiny toe points, as if it is partly hidden. Keep this back foot smaller than the front feet.
Pro Tip: Make this back foot smaller and tucked in to show it’s behind.
Alt Text: Bulbasaur sketch adds a curved belly line and a small hidden back foot with three tiny toes between the front legs.
Step 7: Draw the Big Eyes and Highlights
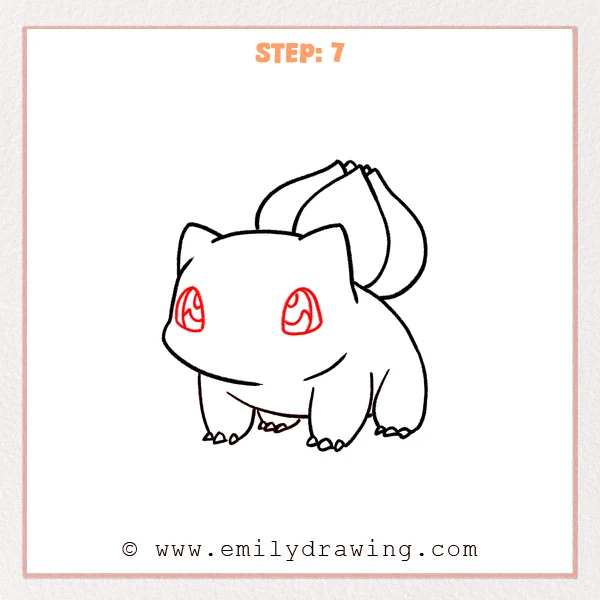
Add one tall oval eye on each side of the face, keeping them level with each other. Inside each eye, place a small circle for the highlight. Add curved inner shapes to divide the pupil and shadow for a shiny look.
Pro Tip: Keep both eyes the same height so the expression feels balanced.
Alt Text: Bulbasaur drawing now includes two large oval eyes with highlights and inner pupil details on the face.
Step 8: Add the Mouth, Nostrils, and Body Spots
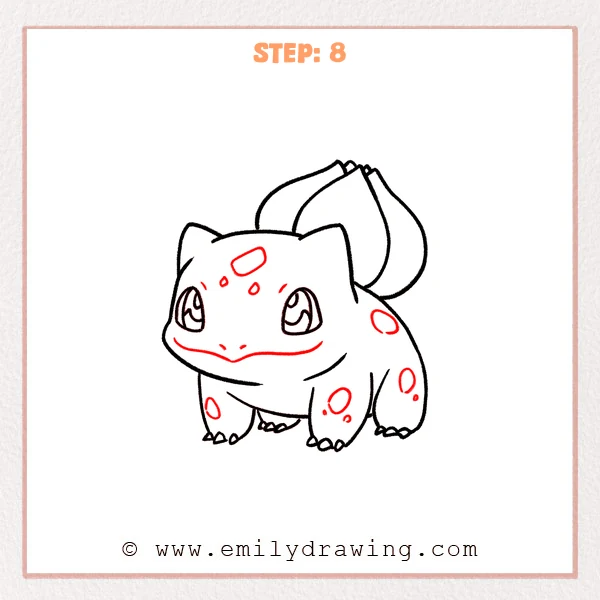
Draw a soft smiling curve under the face, dipping slightly in the middle before lifting at the corners. Place two tiny nostrils above the smile. Add several oval spots on the forehead and along the body sides, varying their sizes and spacing.
Pro Tip: Mix small and medium spots so the skin pattern feels natural.
Alt Text: Bulbasaur drawing now has a gentle smiling mouth, two small nostrils, and several oval spots on the face and body.
Step 9: Add the Small Tail
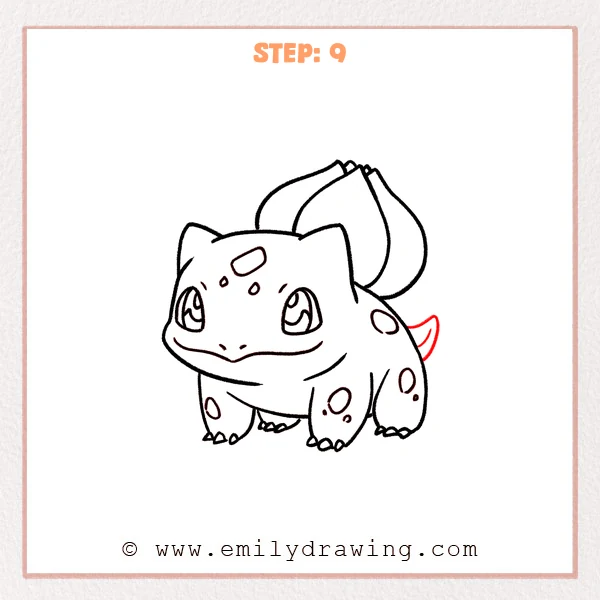
On the back-right edge of the body, sketch a small pointed leaf-like tail peeking out. Keep the base close to the body, with the tip lifting slightly toward the back. Use simple, clean curves so it stays easy to read.
Pro Tip: Keep the tail short and placed farther back for a true Bulbasaur look.
Alt Text: Bulbasaur drawing now includes a small pointed tail peeking from the back-right side behind the spotted body and bulb.
Step 10: Color in your drawing!
Fun Facts
- Bulbasaur is both a Grass-type and a Poison-type Pokémon.
- Its back bulb is often shown growing larger as it evolves.
- Bulbasaur is one of the classic starter Pokémon from the original games.
Pin it now, Draw later!
You now have a full Bulbasaur sketch with a bulb, sturdy legs, big eyes, and spots. If you want to ink it, trace the final outlines slowly, then erase the pencil lines underneath. For coloring, try light green for the body, a deeper green for the spots, and a brighter green for the bulb, then add gentle shading under the belly and behind the legs.
A common beginner mistake is placing the back leg too far forward, which can flatten the pose. Keep the front legs closer to the face, and let the hidden back foot stay small.
Practice this step by step drawing a few times, and try changing the tail angle or spot shapes. When you feel ready, draw Bulbasaur again in a new pose to build confidence.
Get the FREE Printable Drawing Guide
FREE Download Printable Bulbasaur Drawing Tutorial
Frequently Asked Questions
How do I keep Bulbasaur’s face from looking uneven?
Lightly sketch a center guide line, and keep the eyes at the same height.
What if my legs look different sizes?
Compare the front legs side by side, then adjust the shorter one with small edits.
How can I make the bulb look more 3D?
Add slightly darker shading where the bulb meets the back and under each leaf curve.