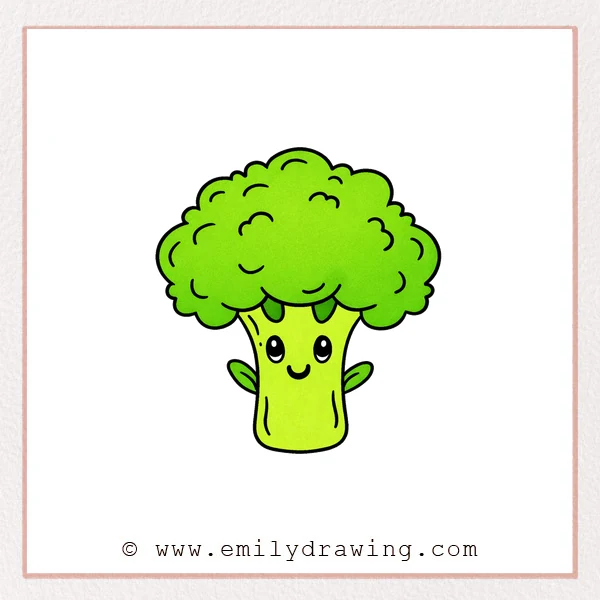
This easy drawing tutorial shows how to draw broccoli with a cute face. Follow the simple shapes to build a friendly character, one calm step at a time. It is a helpful step by step drawing activity for beginners.
What You Will Need
- Pencil
- Eraser
- Black marker or pen
- Coloring tools (green markers, crayons, or colored pencils)
Here are my RECOMMENDED Art Supplies!
- Crayola Coloring Set (140 Pieces – Mega Value!)
- 24 Colored Crayon Set
- A4 Printer Paper
- Crayola Coloring Pencils
- HP Home Printer with Instant Ink!
Time needed:
16 minutes.
Step-by-Step Drawing Guide
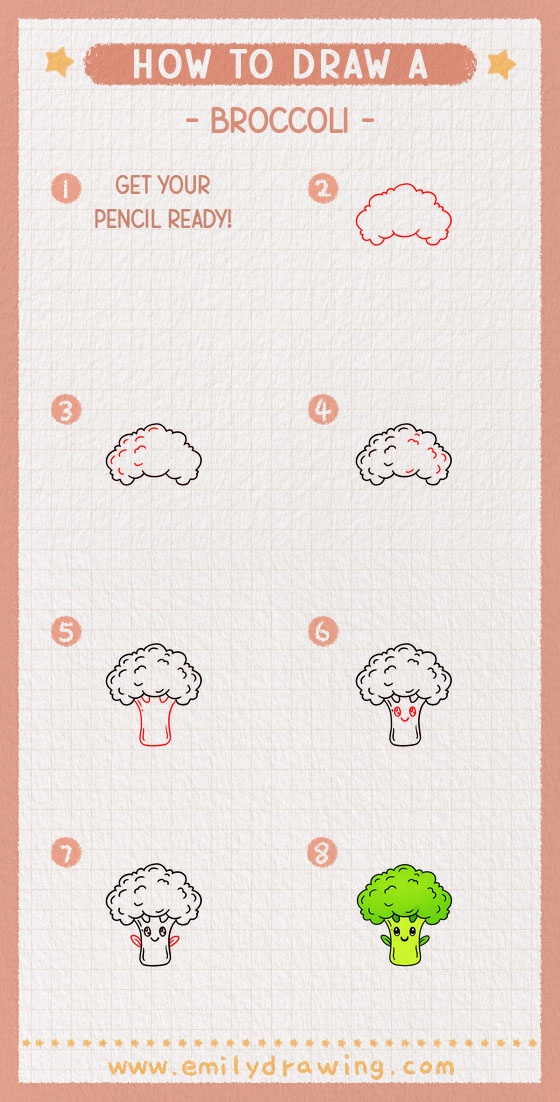
Step 1: Draw the Broccoli Crown Outline
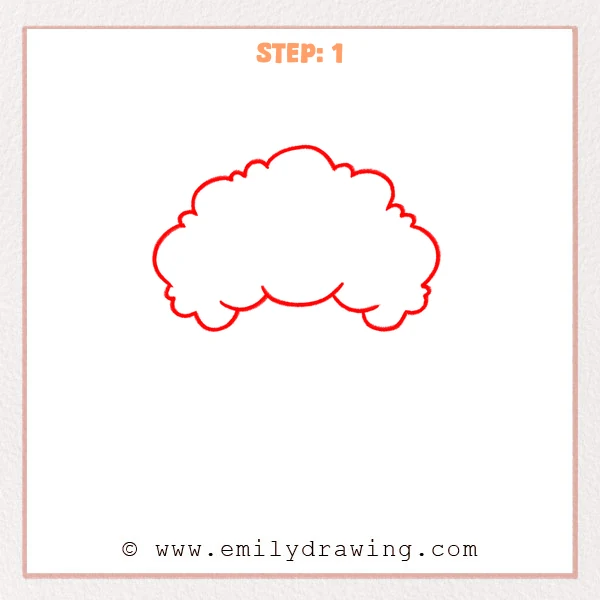
Start with a big, fluffy cloud shape near the top of the page. Leave a gentle curved opening along the bottom, then add two small rounded bumps on each side to make the crown feel full.
Pro Tip: Use smooth curved arcs to keep the crown soft and rounded.
Step 2: Add Small Floret Texture

In the upper-left area of the crown, add a few short curved marks like tiny half-moons. Keep them grouped on one side instead of filling the whole crown, so the texture feels natural.
Pro Tip: Leave small gaps between curves to suggest separate little florets.
Step 3: Even Out the Crown Texture

Add more short curved marks across the top and right side of the crown, so the texture spreads beyond the left area. Place a few curves close to the outer edge on the right to show a fluffy, bumpy surface.
Pro Tip: Vary the curve sizes—slightly larger near edges, smaller inside.
Step 4: Draw the Thick Broccoli Stem
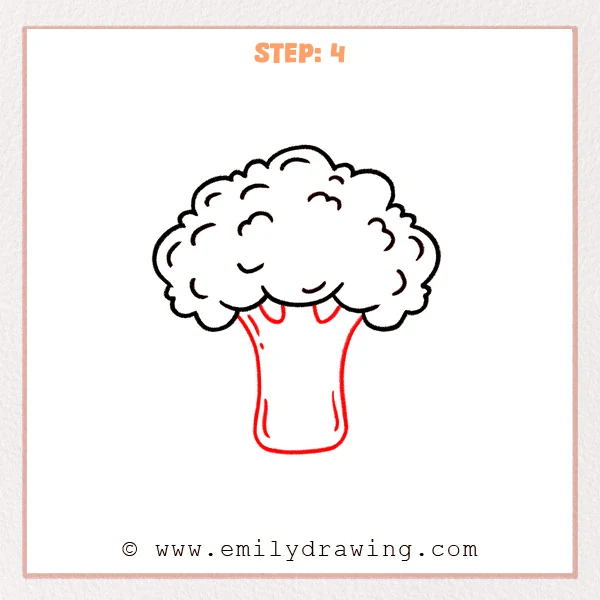
Under the crown, sketch a wide stem that drops down from the center, with both sides gently curving outward. Round off the bottom edge, then add a few short curved lines on the stem to suggest simple skin texture.
Pro Tip: Make the top of the stem slightly narrower than the bottom.
Step 5: Add a Cute Face on the Stem
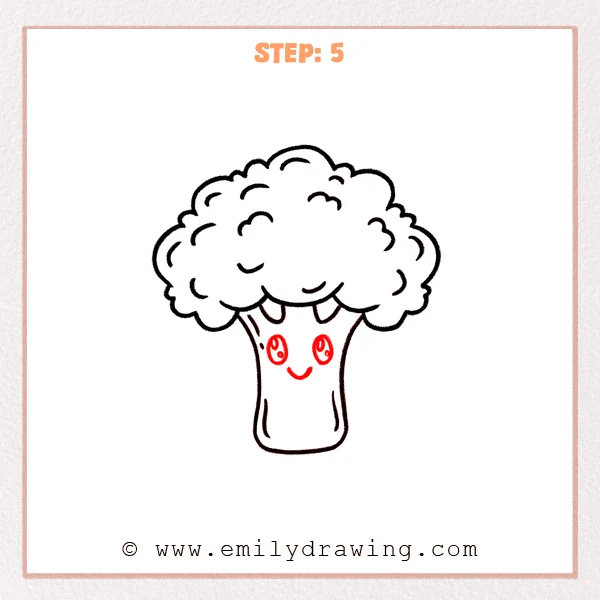
Draw two oval eyes on the upper-middle part of the stem, spaced evenly left and right. Add tiny highlight dots inside each eye, then place a small upward curved smile underneath.
Pro Tip: Keep both eyes at the same height for a balanced, cute expression.
Step 6: Add Two Little Leaves as Arms
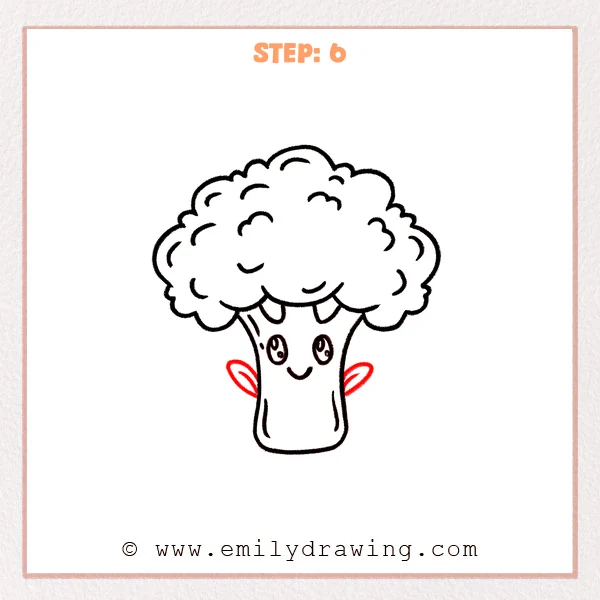
On each side of the stem, add a small leaf shaped like a pointed oval. Draw one short inner line on each leaf to suggest a simple fold and direction.
Pro Tip: Keep both leaves at a similar height and size for balance.
Step 7: Color in your drawing!
Fun Facts
- Broccoli is a flower bud, and the crown is made of many tiny florets.
- Broccoli and cauliflower are close relatives in the same plant family.
- The stalk is also edible, and it can be sweet and crunchy.
Pin it now, Draw later!
To finish your broccoli drawing, trace the final lines with a pen and erase leftover pencil marks. Color the crown in a darker green, then shade the lower areas with a second layer for depth. Add a lighter green on top edges to make the florets look bouncy. A common beginner mistake is making the stem too skinny, so keep it wide and sturdy. Practice this easy step by step drawing again, and try making a whole set of happy vegetables next.
Get the FREE Printable Drawing Guide

FREE Download Printable Broccoli Drawing Tutorial
Frequently Asked Questions
How do I make the broccoli crown look more realistic?
Add more small curved texture marks, and keep them uneven in size.
What if my crown looks lopsided?
Gently adjust the outer cloud bumps so the left and right sides feel balanced.
Can I draw a different expression?
Yes, try a small open mouth, sleepy eyes, or tiny blush marks on the cheeks.