If you are learning how to draw branches, this step by step drawing guide will help you build them with calm, simple shapes. We will begin with small buds, then connect them with smooth branch lines for an easy drawing tutorial.

What You Will Need
- Pencil
- Eraser
- Black marker or pen
- Paper
- Colored pencils or crayons (optional)
Here are my RECOMMENDED Art Supplies!
- Crayola Coloring Set (140 Pieces – Mega Value!)
- 24 Colored Crayon Set
- A4 Printer Paper
- Crayola Coloring Pencils
- HP Home Printer with Instant Ink!
Time needed:
28 minutes.
Step-by-Step Drawing Guide
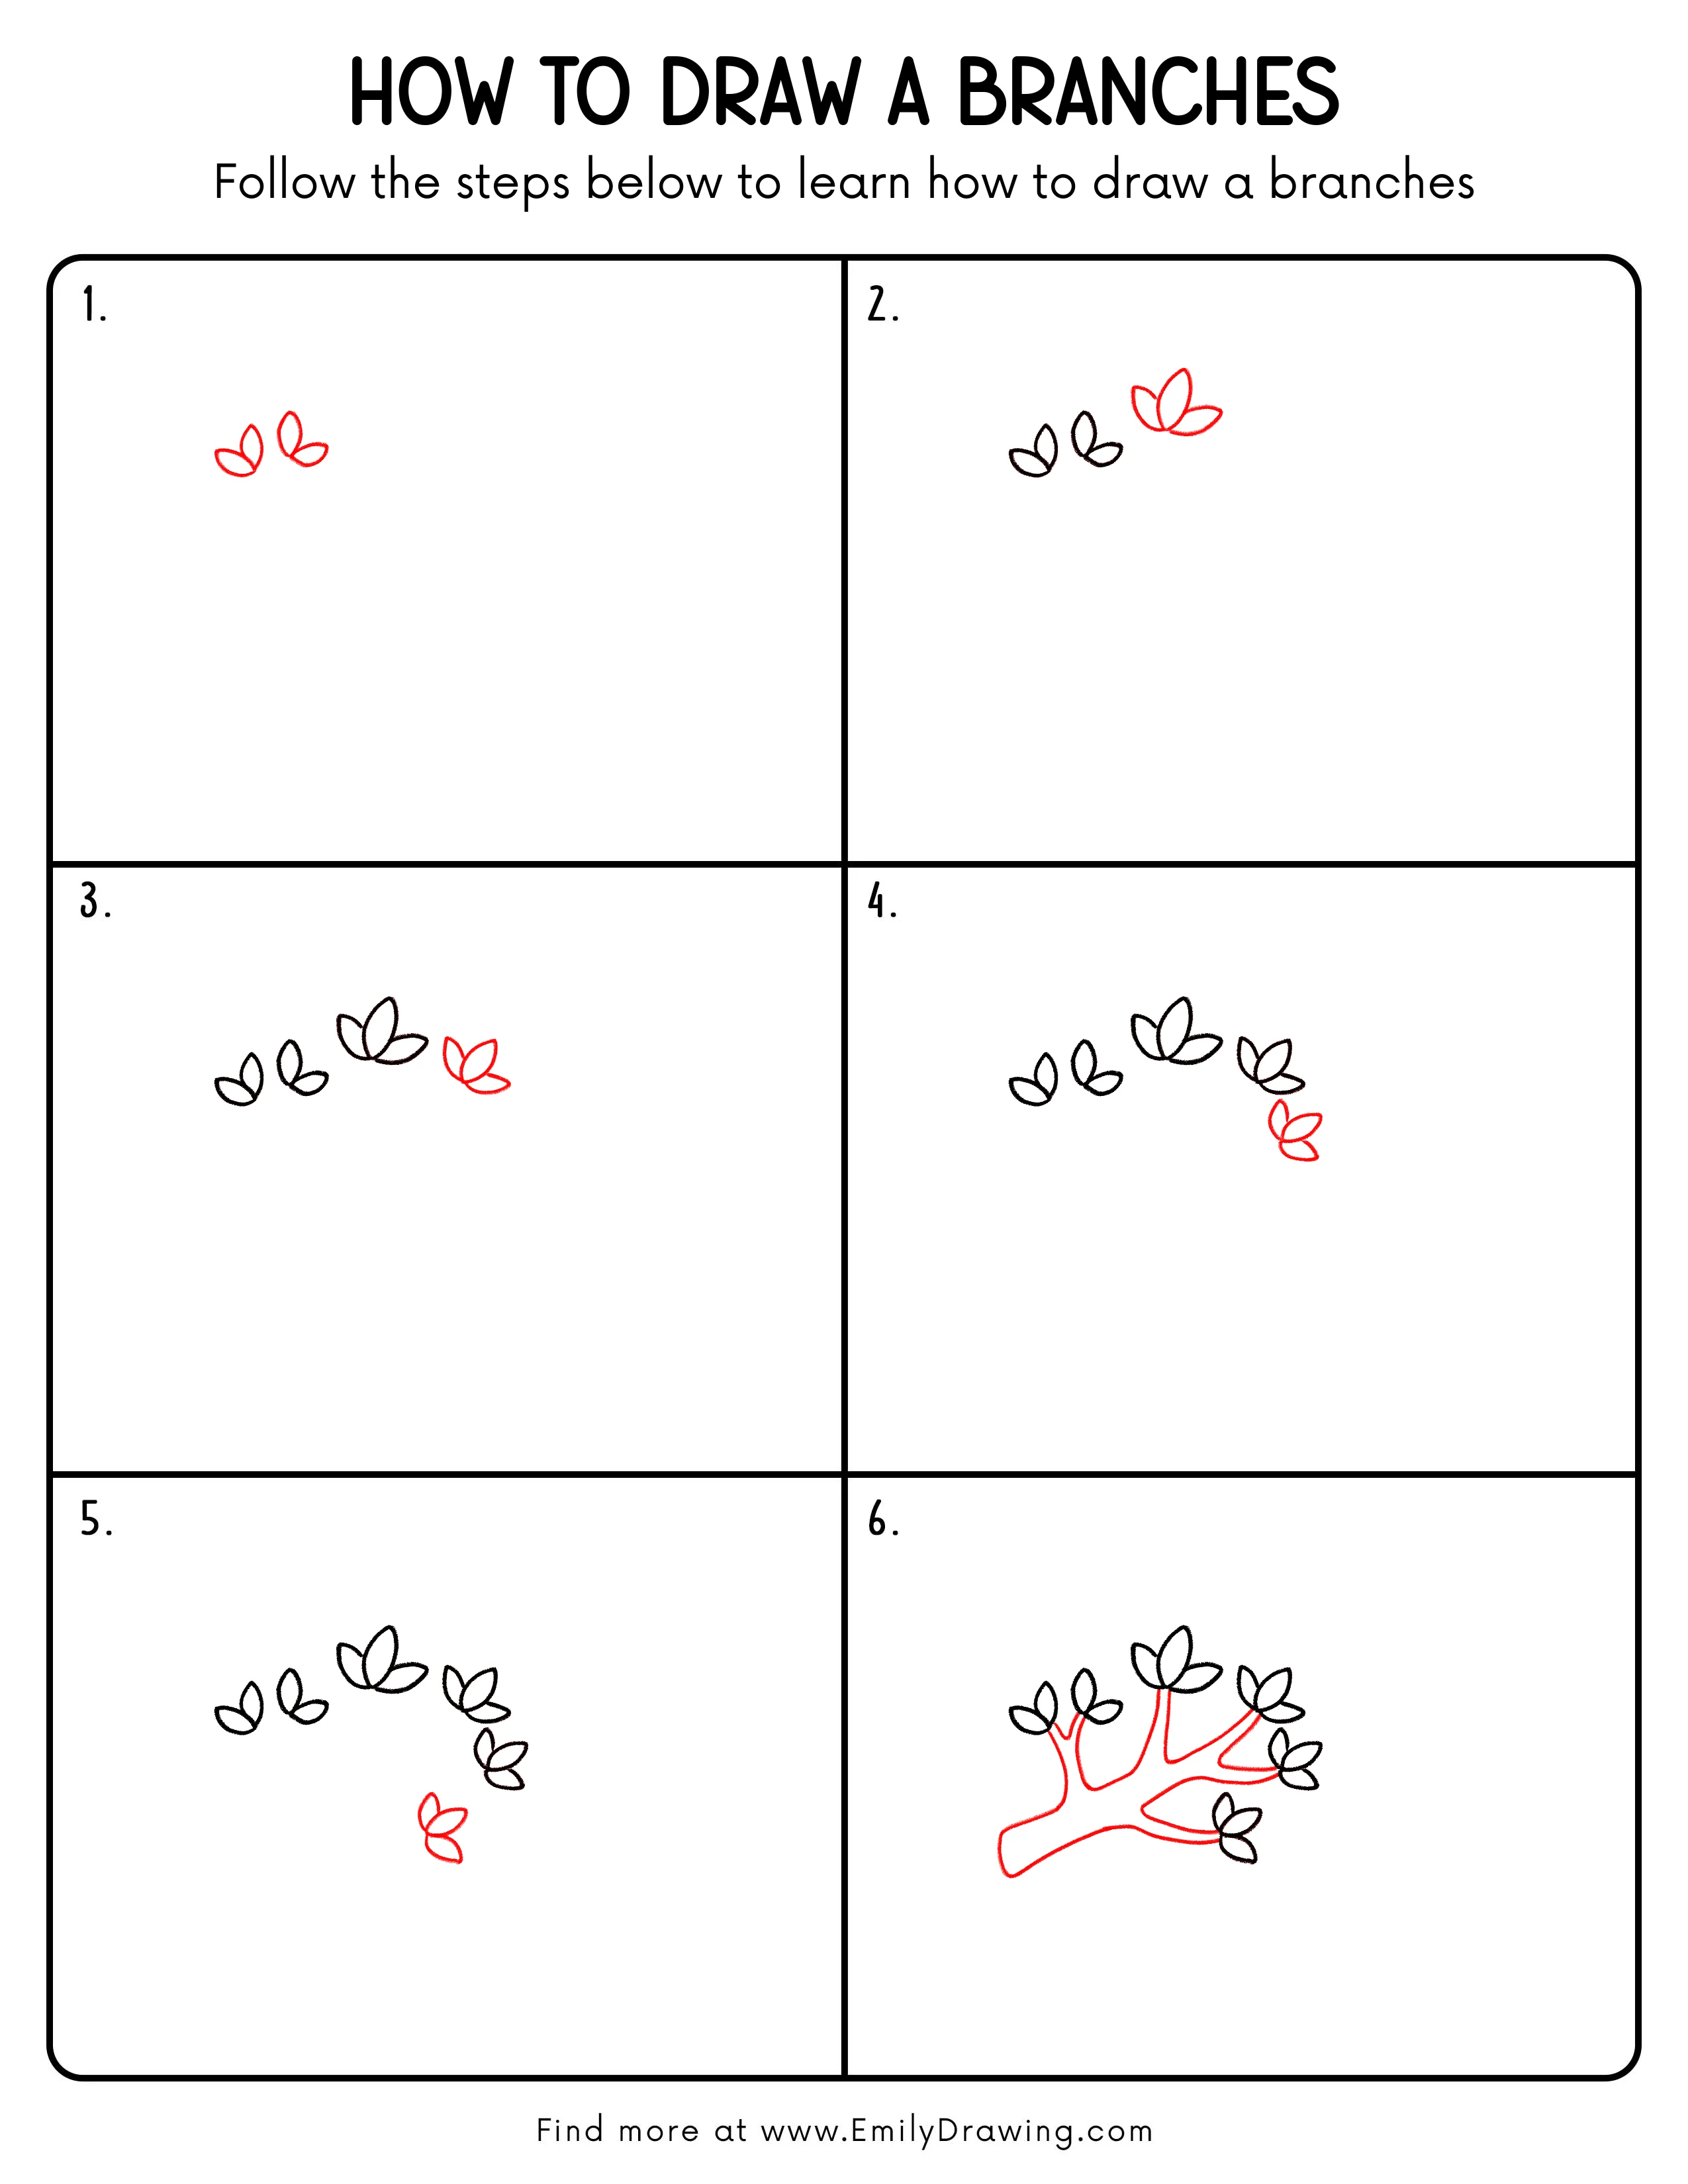
Step 1: Sketch Two Small Bud Clusters

Near the upper middle of your page, sketch two small bud clusters. Build each cluster from two to three oval leaf shapes, like fresh growth at the tips of branches.
Pro Tip: Keep both buds similar in size, but vary the tilt slightly.
Step 2: Add a Larger Bud on the Right
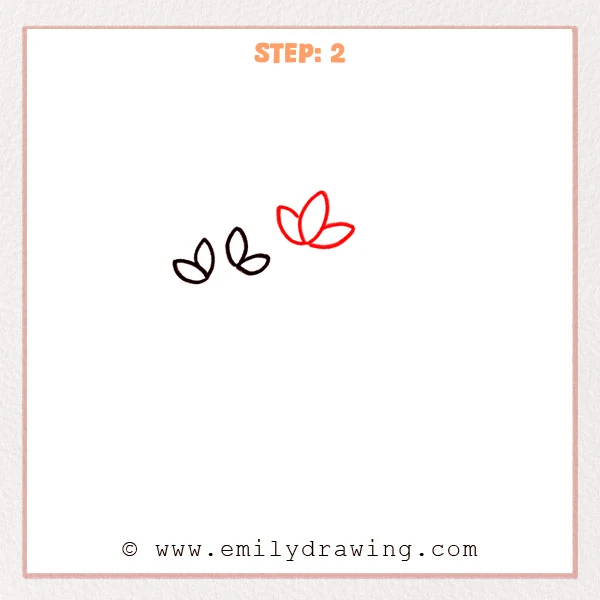
Above and to the right of the first buds, add one larger bud cluster. Use three oval leaf shapes, with the middle leaf a bit taller, so it feels like the branches are growing outward.
Pro Tip: Making this bud slightly larger helps create depth and variety.
Step 3: Add a Small Bud on the Far Right
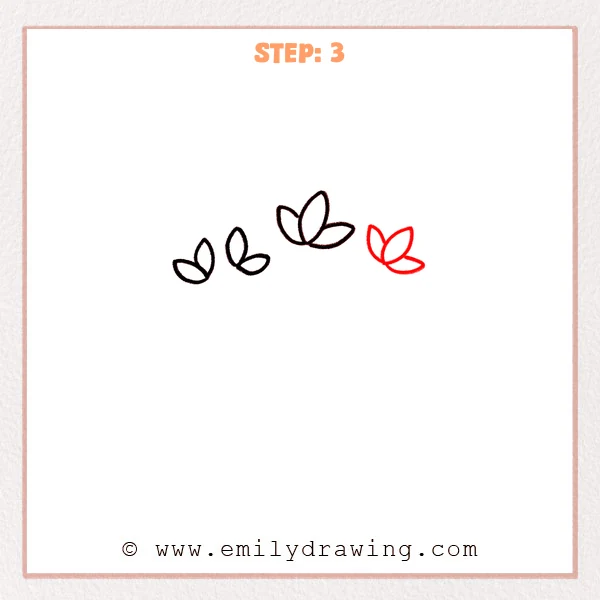
Leave a small gap to the right of the larger bud, then add one smaller bud cluster. Build it with two to three oval leaves, and angle it slightly outward to the right.
Pro Tip: Don’t place this bud too close; a little space keeps the drawing airy.
Step 4: Add a Small Bud Below to Create a Gentle Curve
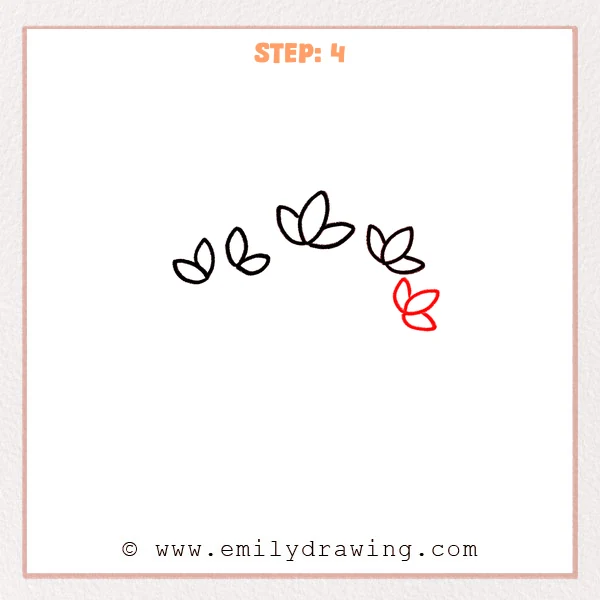
Below the right-side bud, add one more smaller bud cluster. Tilt it slightly downward so the branches begin to curve and continue.
Pro Tip: Keep this one smaller so the curve feels light and uncrowded.
Step 5: Add One More Bud Lower Down to Extend the Branches
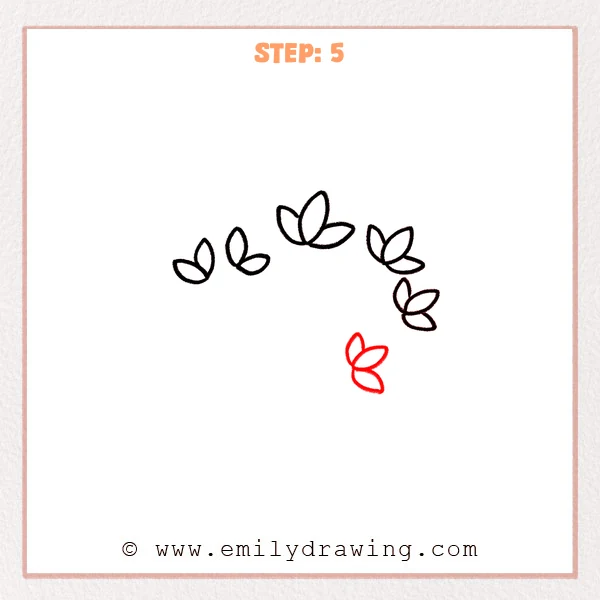
Below and slightly left of the lower-right bud, add another small bud cluster. Place it a bit lower and angle it slightly left, so the curved flow continues.
Pro Tip: Draw this bud a little lighter to leave room for the branch lines later.
Step 6: Draw the Main Branch and Connect Each Bud
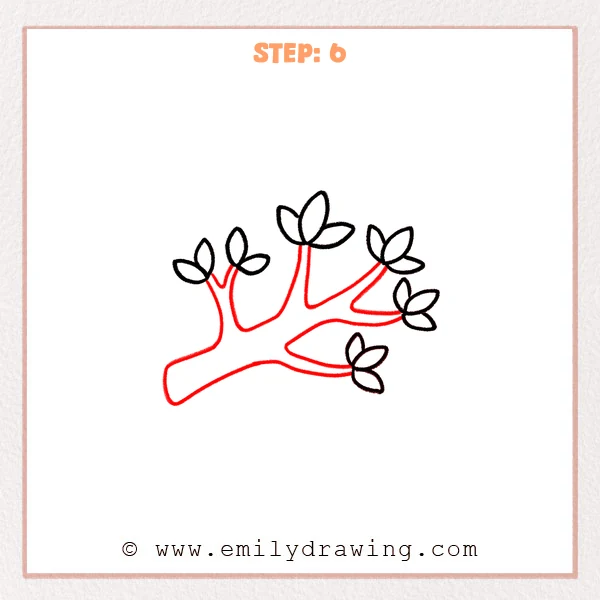
Start a thick main branch from the lower left and let it curve upward to the right. Add short offshoots from the main branch, using two lines to connect into the base of each bud, tapering thinner as they reach the buds.
Pro Tip: Round the corners where the branch turns so it feels more natural.
Step 7: Color in your drawing!
Fun Facts
- Leaf buds often grow at branch tips and at small side joints.
- Branches curve as trees reach toward sunlight.
- A branch looks more realistic when it thickens near the base and narrows outward.
Pin it now, Draw later!
You now have a clean branches drawing with buds placed in a smooth, flowing curve. For coloring, start with a light brown base, then add a darker brown along the underside for gentle shading. You can color the buds soft green and add a tiny shadow where each bud meets the branch.
A common beginner mistake is making every branch the same thickness. Let your branch taper as it moves toward the buds, and it will look more natural.
Keep practicing how to draw branches by changing the curve, adding extra buds, or sketching a second branch behind the first. Try another step by step drawing for beginners and build a whole tree scene.
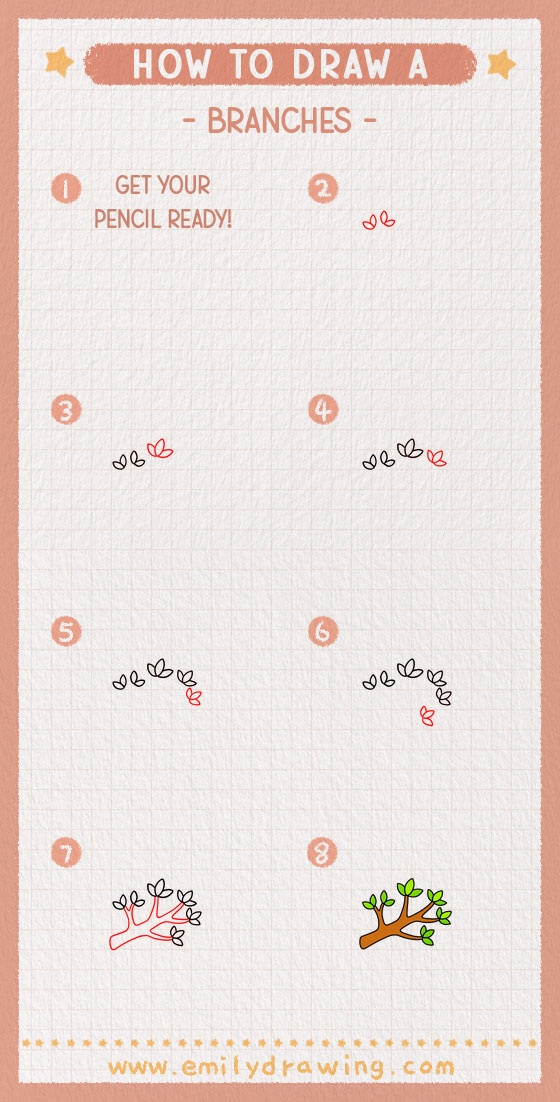
Get the FREE Printable Drawing Guide
FREE Download Printable Branches Drawing Tutorial
Frequently Asked Questions
How do I make my branches look less stiff?
Use gentle curves and avoid sharp corners. Rounded turns help the branch feel alive.
What if my buds look uneven?
That is okay. Keep the ovals simple, and make only small size changes between buds.
How can I add more detail without making it messy?
Add just one or two light bark lines and keep them spaced out.